Shore power is the method of charging your leisure batteries and can also be known as a campervan ‘hook up’. It is a way of directly powering your electrical system from a standard 240V power supply (or whatever your countries electrical supply is). A shore power hook-up is essential if you plan on traveling in winter as well as if you intend on using campsites often. Having a shore power hook up socket in your campervan gives you the versatility to charge up anywhere you have access to a power unit!
There are of course other methods of charging including solar charging and battery to battery charging. You can read our guides on these electrical circuits in the posts below.
If the sun isn’t beaming down on your panels and you don’t intend on driving long distances, shore power is exactly what you need. This post covers how to install the hook up socket to your campervan. If you want to know how to wire it up correctly check out the post below.
Instructions
For charging / powering your electrical system with shore power you will use a standard shore power extension cable as shown in the diagram below.
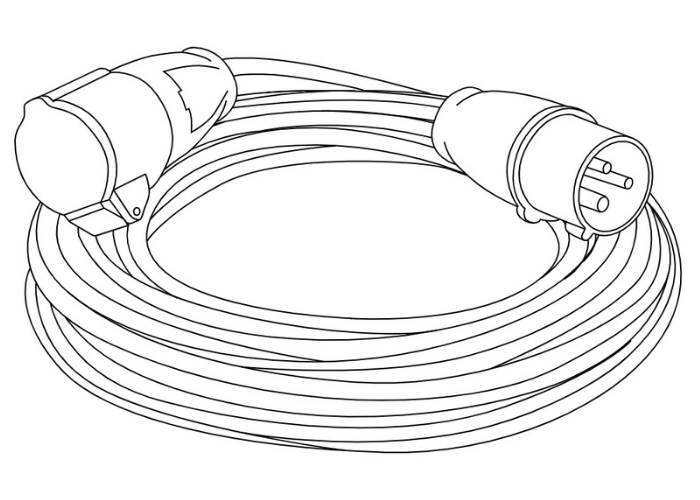
These are durable cables with the correct attachments on each end for hooking up your campervan to a shore power unit. They are incredibly durable because they are designed to be used outdoors in all weather conditions. This guide will take you through how to install the hook up socket which this cable will be connected to for supplying shore power to the van.
Step 1 – Choose Style of Hook Up Connection
Typically, on factory made motorhomes there will be a small flip up casing on the side of the van in which lies the hook up point. These are fairly easy to install into the side of any panel van and look like the diagram below.

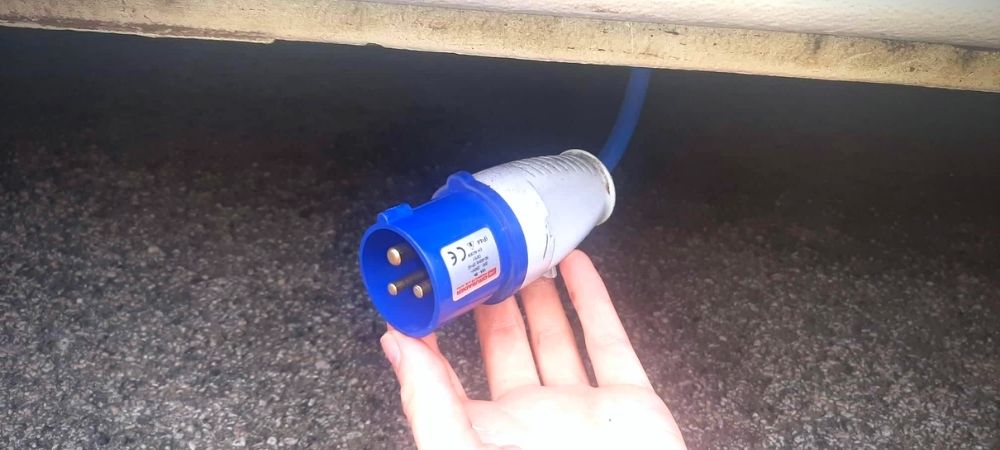
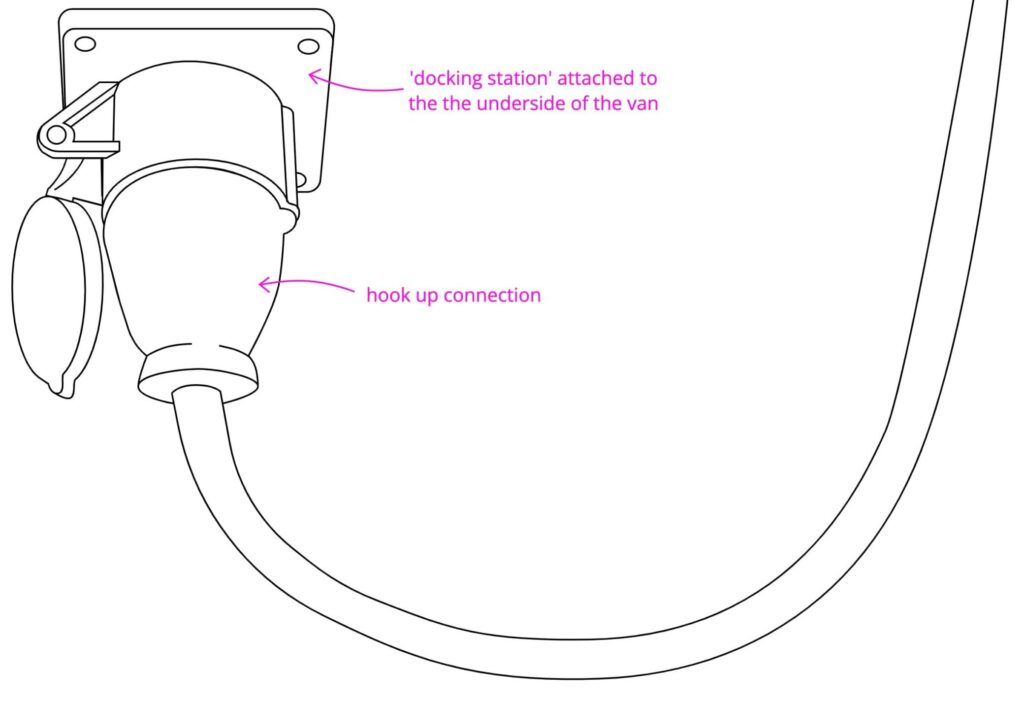
We, however, have opted for something a little different. We didn’t want to drill large holes into the side of our van. Our idea was to keep our van as stealthy as possible. Our shore power hook up is a simple connector like the diagram below located underneath the van.
Step 2 – Choose Location For Hook Up
The style of connector / socket you have selected will help determine the best position for it on your van. Wherever you choose to position your power inlet, make sure that it is easy to access so that hooking it up to a power unit is a simple process.
As well as a convenient location, make sure that the position you have chosen is viable. If mounting of the side of your van, be sure not to choose an area with a thick metal support through it. In our case, the undermounted shore power hook up has its challenges too. Be sure to look out for all hazards underneath your van. These include thick supporting beams, fuel tanks, water tanks etc
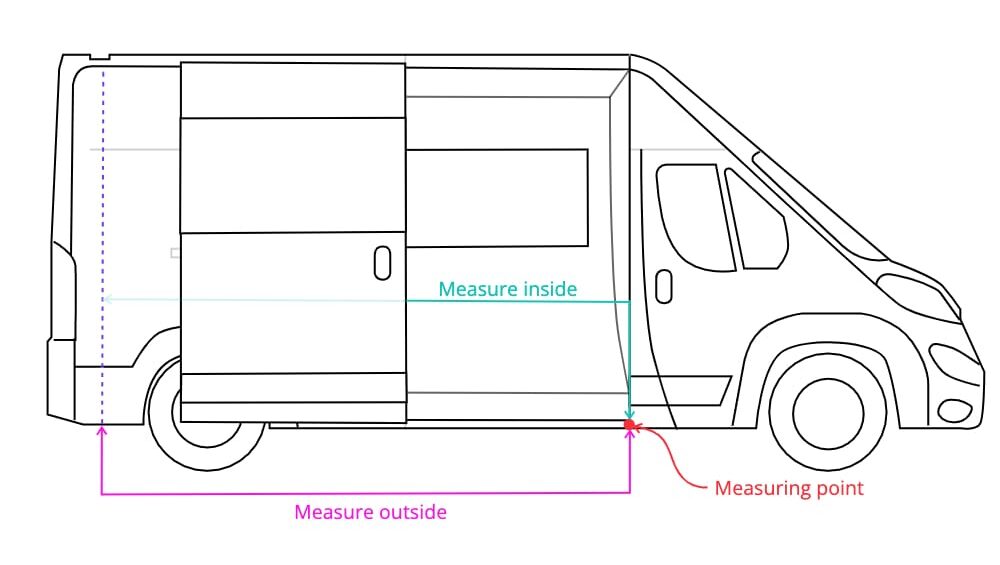
Be sure to measure from the inside and outside of your van to calculate its best position. Choose a starting position that can be seen from the inside and the outside and measure carefully from that point, e.g. where the sliding door opens. The diagram above shows how to measure from a selected measuring point.
Step 3 – Create Hole In Van
Once you have decided where you want to place your hook up socket, it is time to make a hole in the campervan. Begin by drilling a pilot hole from the inside of the van, through the metalwork to the outside. Check again once the hole is drilled that you are happy with its position. When you are happy with it, it is time to make the hole larger.
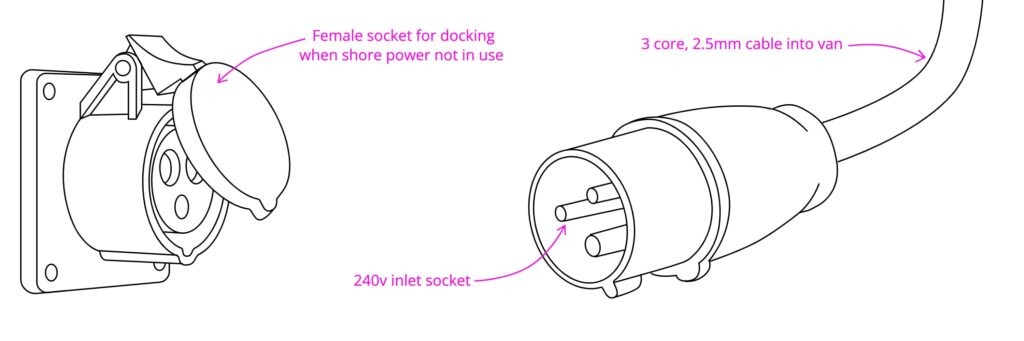
For the underslung hook up point, the hole through the floor of the van will need to be a little larger than the cable width. For reference we used a 3 core, 2.5mm ‘Arctic Blue’ cable, which is standard for this application. A 10mm hole is large enough for the cable to pass through easily.
Step 4 – Protect metalwork from rust
With the hole for the hook up point created, it is vital that you treat the metalwork before moving along any further. Apply Hammerite to the exposed metal edges. This will help prevent the metal from rusting. Be sure to check from the inside and outside that the hammerite paint has covered all of the raw edges.
Step 5 – Attach Docking Station To Van
When we say ‘docking station’ we are talking about the female socket in which the hook up connector sits when it is not in use. This is a very cheap component which is easy to source. Look underneath your van to find an appropriate location for this connector to sit. There are a lot of different things going on underneath a van. Look for a flat piece of metal near the edge of the van. Be sure to double check the location you have picked, make sure that it is not a tank as well as ensuring there are no cables or tubes in the way.
Once satisfied with your location, it is time to fix the docking station in place. To do this, simply screw self tapping metal screws through the 4 corner holes in the connector directly into the metalwork. Make sure that the connector is secured tightly and does not move at all.
Step 6 – Attach Wire To Hook Up Connection
The appropriate wire for shore power hook up is3 core and 2.5mm. We used ‘Arctic Blue’ cable which has worked very well. Cut your cable so that it is longer than you need to reach from outside your van to your indoor electrical system.
Strip one end of the cable to expose the live, neutral and earth wires. Then wire these up to the hook up connector / socket. It is very simple, the plastic connector is labeled to show where each wire should be fixed.
At one end of your cable you will have the hook up connector however the other end will be free. Pass the free end of the cable through the hole drilled in step 3 passing from outside to inside.
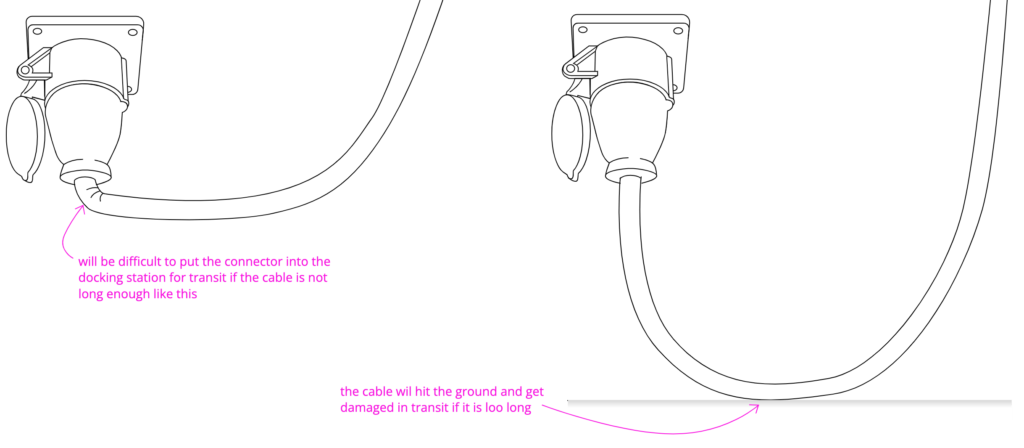
Experiment with the length you wish the cable to be outside the van. The cable should be long enough so that you can pull it out from under the van easily and connect it to an extension cable. You must also make sure the cable is not too long. When the socket is plugged into the docking station avoid excess cable sagging too low. The diagram above shows what to avoid.
When you have selected the perfect length, it is time to seal it in place. Apply silicone sealant around the cable where it meets the hole in the van. Be sure that the sealant is all the way around the cable, additionally check there are no air gaps. Silicone will prevent the cable being cut by the sharp metal hole. It will secure the cable in place leaving it air tight– so no nasty drafts.
Conclusion
It’s always daunting drilling holes into the bodywork of your van. However, if you follow this guide it really doesn’t need to be. Surprisingly, installing a shore power hook up socket is one of the “easier” jobs when converting a campervan.
To find out how to wire the shore power connector up to your electrical system check out the post below