


The wires coming out of ports 1 and 7 should be the exact same cable supplied with your solar panels.
Note: make sure to keep track of which cable is positive and which is negative by labeling them clearly!
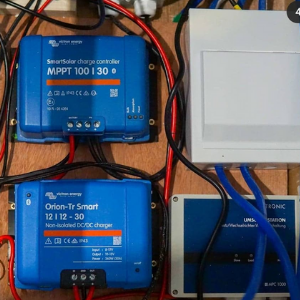
Step 2 – Solar Charge Controller
What is a solar charge controller and why do I need one?
A solar charge controller regulates the current / voltage coming in from the solar panels to avoid the batteries overcharging. Batteries can be ridiculously expensive so this nifty little box will stop the solar energy from damaging them in any way.
We opted for the Victron Smartsolar MPPT Solar Charge Controller (100V / 30A). We Love this controller because of its Bluetooth connectivity. It easily connects to your phone so you can see how many watts of solar you are taking in at any given time. If you’re not sure what size of solar charge controller you need, Victron has a calculator here.
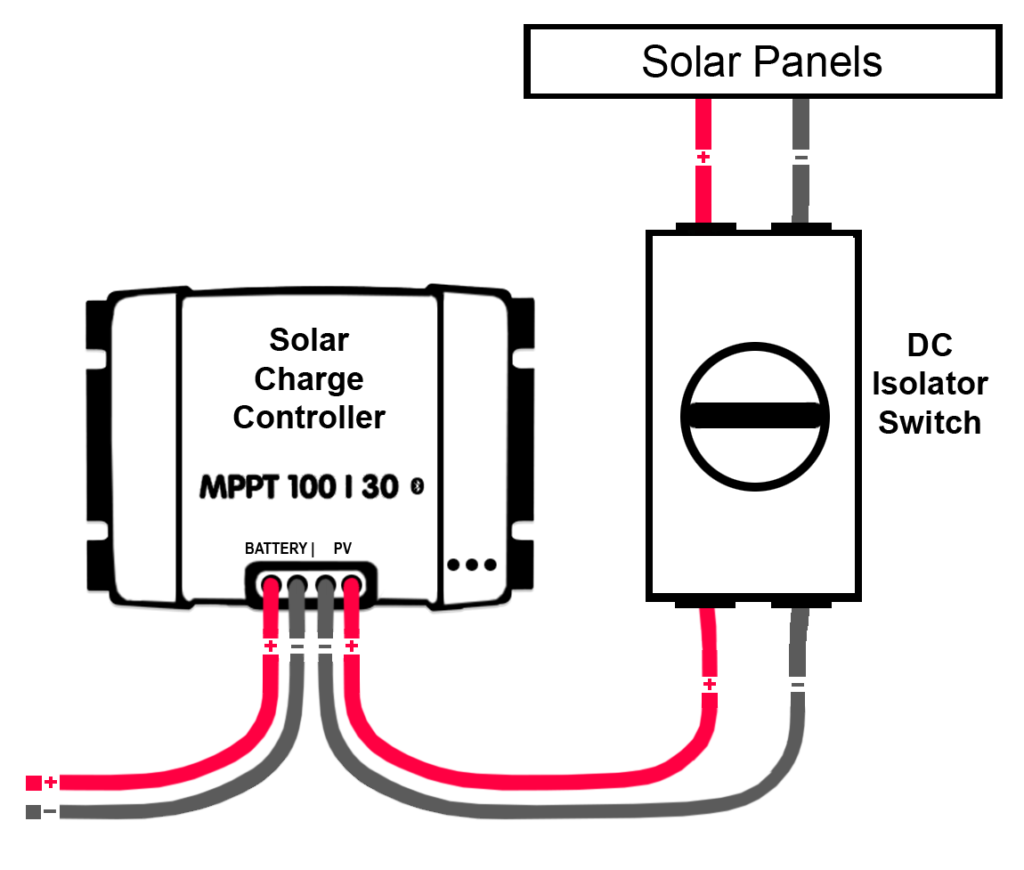
The whole circuit uses the same thickness of cables. We used a 10mm single core cable (red and black) – which is thicker than you need. You could use a thinner 6mm cable, however, thicker cables ensure that the voltage won’t drop as it travels the length of the cable.
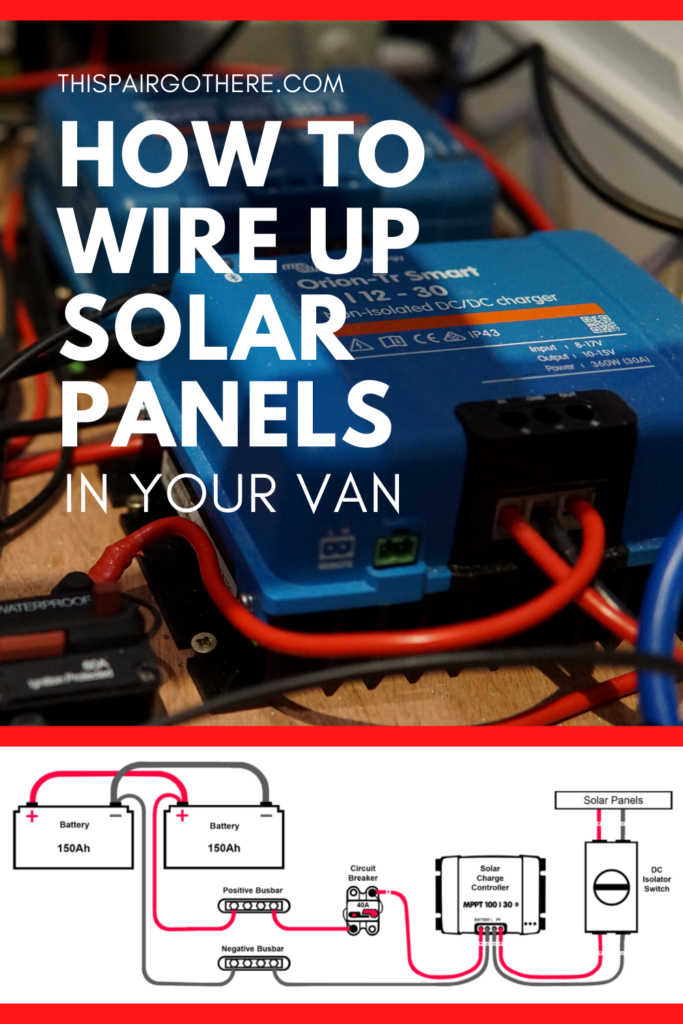
Connect the positive and negative cables from the DC isolator switch as shown in the diagram above.
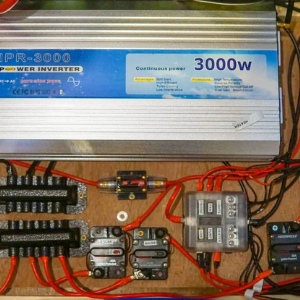
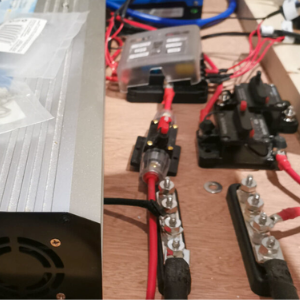
Step 3 – Circuit Breaker for solar energy
Time: 10 minutes
What is a circuit breaker and why do I need one?
A circuit breaker is an automatic switch that protects the circuit from an overload of current. As soon as the current exceeds the limit the switch trips the circuit interrupting the flow of current. Unlike a fuse, the benefit of using a circuit breaker is that it can be easily reset.
Connect the positive cable leading out of the solar charge controller to the circuit breaker. For reference, we used a 40A circuit breaker. The diagram below shows how it should be connected.
When choosing a circuit breaker make sure that its capacity is slightly larger than the current of the circuit. For example, a maximum of 30A will flow through this circuit. The 40A Circuit breaker gives a bit of wiggle room so that it won’t trip when the circuit is flowing as it should.
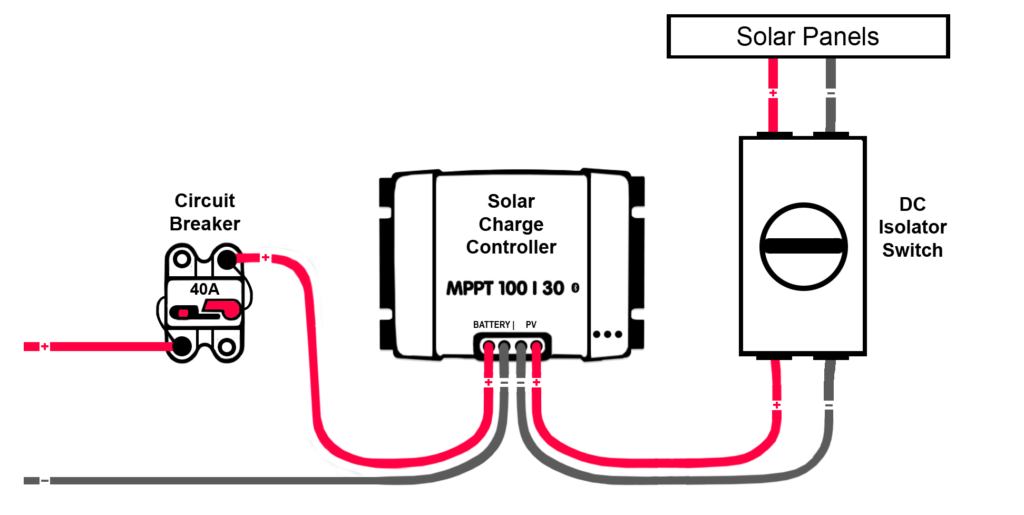
Again make sure to use the 10mm single core cable throughout this whole circuit. When attaching the cables to the circuit breaker use cable lugs. Simply strip the end of the wire, place it into the lug, and crimp it. We used a spring-loaded crimping tool which you hammer. There are other crimping tools out there that tend to be a bit more expensive. After crimping the lug use heat shrink tubing around the connection to make sure the connection is strong.
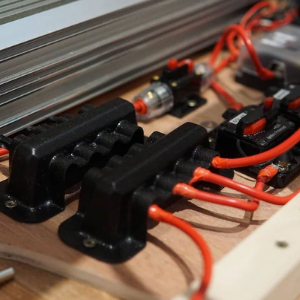
Step 4 – Busbar / Battery
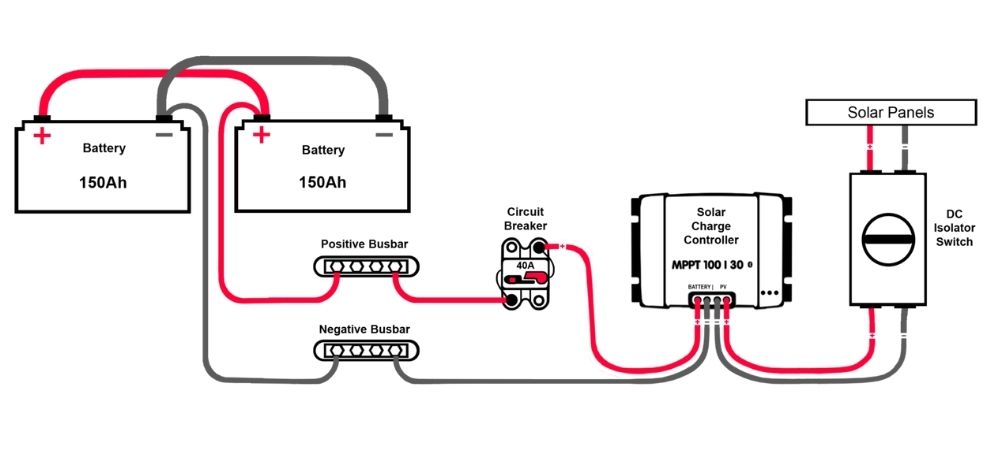
The final step is to connect the circuit up to the battery. We opted to use busbars in order to keep all the wiring neat and tidy. By using busbars it means you don’t have to cram a bunch of different connectors onto the battery terminals and makes the job a lot less fiddly.
Make sure that the busbar you buy can handle the current flowing through it. The busbars we use are 100A (This is more than enough to cover all of our electrics) When shopping for busbars its important they can handle the max current but also it’s good to get busbars that are easy to connect to.
Again, connect the 10mm wire to the busbars using cable lugs. Make sure that the hole in the lug matches the terminal post size on the busbar – ours was 8mm (M8)
The busbars are then connected to the batteries with the 10mm single core wire. As always, make sure you are connecting them the correct way round. Do not mix up your positives and negatives.
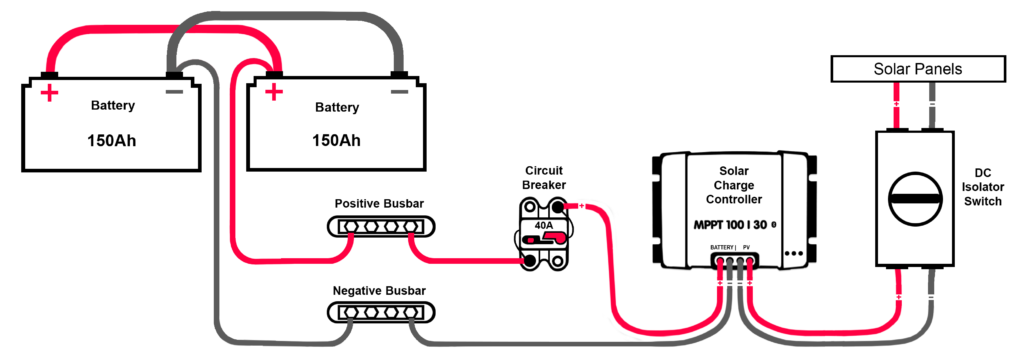
The diagram above shows our complete solar circuit.
Conclusion
Wrapping your head around the electrics of a van build is one hell of a task. We found that working through the electrics in manageable chunks really helped us as we never felt overwhelmed. Managing the solar energy is not too difficult once you understand what each part of the circuit does.
If you have any questions on wiring up your solar panels and controller don’t hesitate to ask. We’ll try to give you the best possible advice we can.
One Response