Step 1 – Decide On Layout For Slide Out Benches
This may sound like an obvious step, however, it is important to consider where benches will be. Things you will need to factor in when configuring the layout is:
- How much room do you have – this will influence what size of drawer runner you will buy.
- How much legroom you feel is comfortable
- Where the doors are, this will perhaps affect how much legroom you have, and it may cast a shadow over your picnic area.
Step 2 – Pick the appropriate drawer slides
Once you have picked a layout for your picnic benches it is time to order the drawer slides. However, it is important to consider the factors below prior to rushing into buying.
Firstly, think about how much weight the slides will need to support. We recommend adding 10kg onto how much you weigh. This will account for the weight of the materials and any heavy clothes you may be wearing… or even just a safety precaution in case you indulge yourself a little too much… we know we will!
You also have to consider how far you want the benches to pull out. There will need to be enough extension in the slide for you to be able to sit on it comfortably. You may not want to make the slide too long as it may encourage more than one person to sit on the bench and overweigh the capacity.
Finally, you need to consider if you want them to lock when in a pushed in position.
All of these factors massively affect the price you can expect to pay for slides. For premium locking slides you will easily pay over £100 per pair! Is that worth it to you?
For reference, we bought 2 pairs of 80kg drawer slides that slide out 1.1m. We purchased them on ebay. Link to the exact slides we bought here.
These are longer than we probably would have needed but are nice for lounging on.
Step 3 – Choose Construction Battens
The materials you will need to create the slide out picnic benches depend heavily on the slides you have chosen.
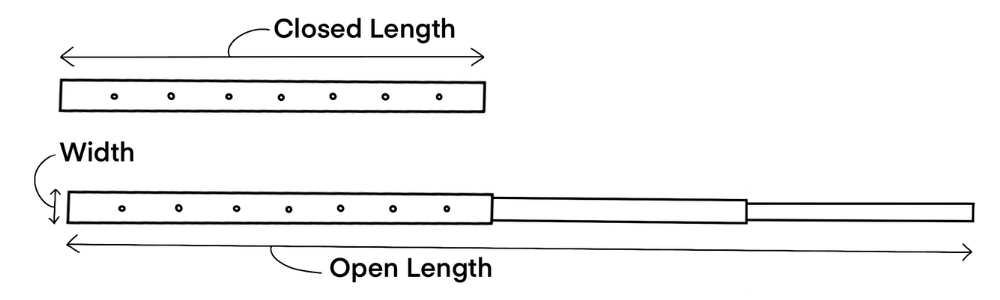
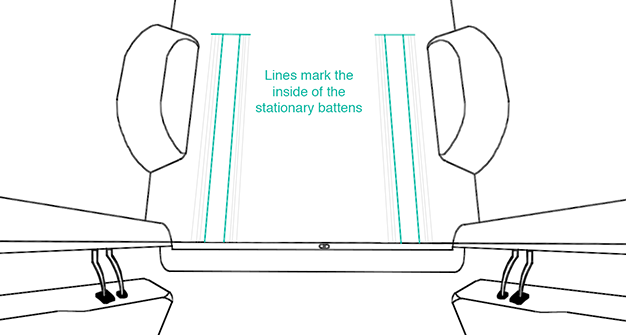
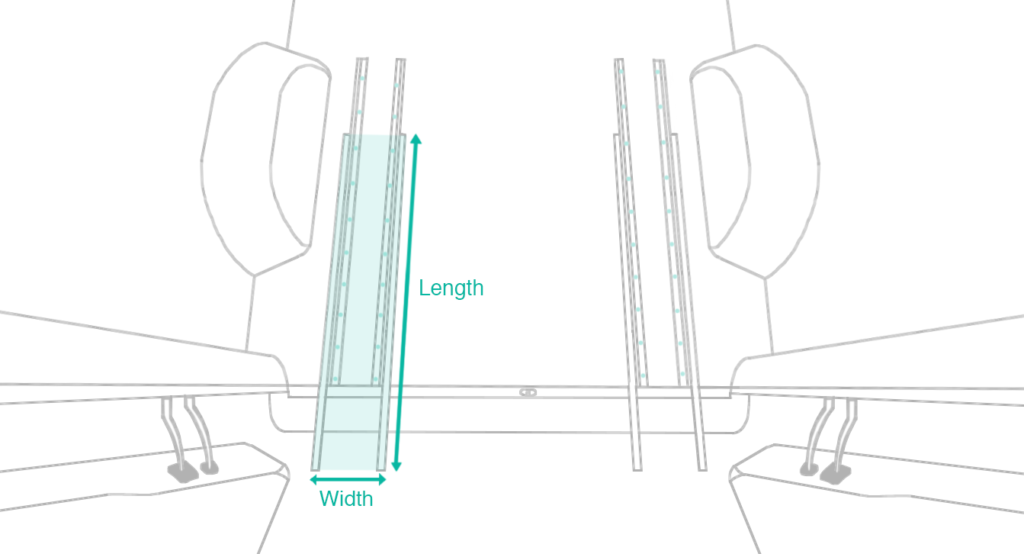
Once you have selected your slides you will need to measure the closed length, open length and width as shown in the image below. For reference our slides had these measurements:
- Open Length : 2200mm
- Closed Length : 1100mm
- Width : 53mm
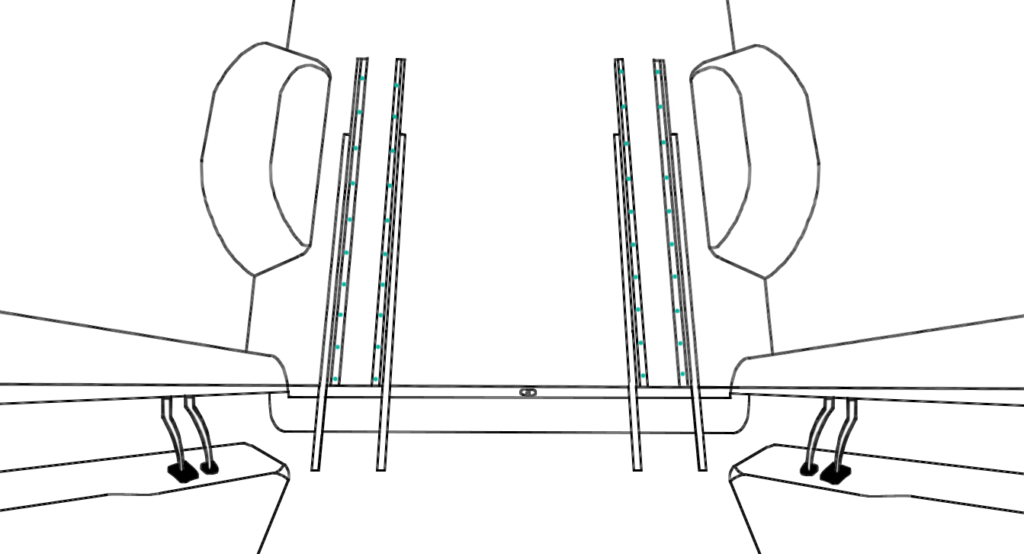
Below is a general diagram of how we constructed our benches. The slides run on the inside of the bench so it is hidden when the bench is pulled out. We think this makes the bench look more professional and also avoids your skin coming into contact with the metal slides.
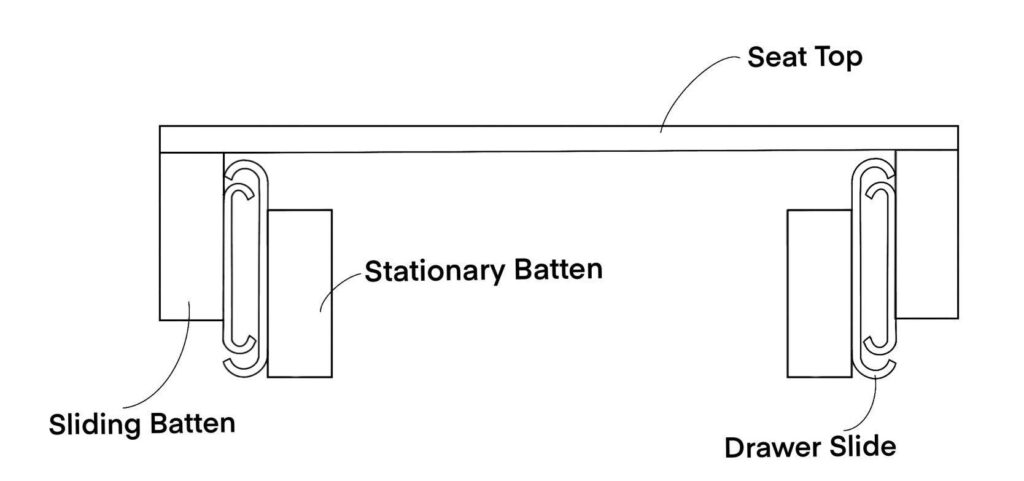
The width of the wooden battens you use will need to be larger than half the width of your slide. This is so that the wood can be secured to both the floor of your van and the centre of the slides securely. For reference the width of our slides were 53mm and the battens we used were 44mm wide. The depth of the battens need to be wide enough to be screwed through when standing on that edge. Ours were 18mm wide.
Cut your wooden battens to the length of the slide in its closed position; you will need four of these per bench.
Step 4 – Secure slides to Battens
You will need to attach the slides to the wooden battens before fixing to the van. Begin by lining up the stationary part of the drawer slide with one of your battens. It’s important to line them up on a flat surface so the batten will fit neatly along the floor of your van. Below is a diagram of how to line them up.
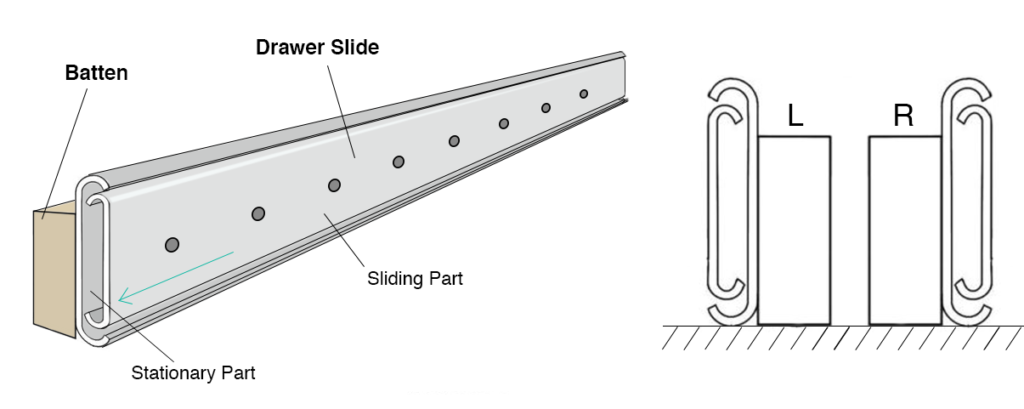
Your drawer slides should have a series of holes running along them on each side. Simply use self tapping counter sink screws in every hole of the stationary part of the slide to fix it to the batten. The hole size / batten size will help you determine which screws you should use. We used 4 x 16mm counter sink screws. You may need to pull the sliding part out ro access all of the holes.
Once the stationary part has been secured it is time to secure the next batten to the part of the slide that actually slides. To do this, flip the slide upside down like the diagram below. The top of the batten has to clear the top of the slide so that we can fix the top of the seat later down the line. This batten is fixed in the exact same way by screwing through the holes in the slides into the batten.
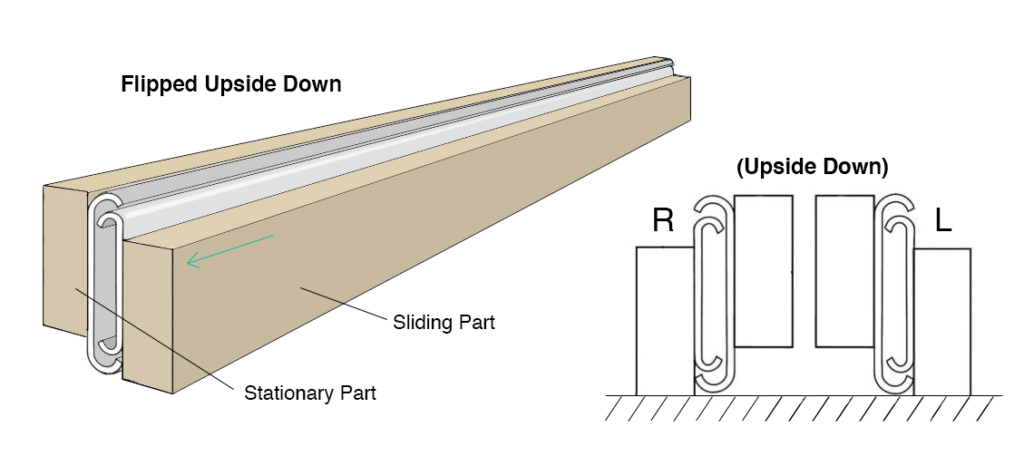
Repeat this process on all of your slides making sure your pairs of slides / battens mirror each other!
Step 5 – Mark layout onto van floor
In step one you chose your layout, now it’s time to mark it onto your van so it’s ready for installation. You want your slides to line up perpendicular to the back opening of your van.
When marking out the position of our slide placement we drew lines in pencil directly onto our plywood floor. If you don’t want to draw directly onto your floor you can mark the inside placement with tape which can be removed after.
The most important part of marking down your layout is making sure your slides are 100% parallel. If they are not parallel this will affect how easily they will glide in and out of your van.
Step 6 – Fixing slides to the van floor
Now its time to actually fix the slides to the van; to do this line up the stationary battens with the marks you have drawn onto the floor of your van. Make sure that you are putting the right slide in the right position; it can be quite confusing as they all look the same with the battens attached to each side. It helps to pull the slide out a little to avoid this confusion.
When putting the screws through the batten make sure that they do not clash with the small screws fixing the batten to the slide.
Once you are happy with its position drill small pilot holes for the screws. Make sure that they do not clash with the small screws fixing the batten to the slide. Then use long screws to go through the batten and into the floor of the van. We used 4 x 60mm decking screws which worked very well.
Once the battens are fixed in position make sure to double check that they are perfectly parallel. You can do this my measuring the distance between them when the slides are pushed in and pulled out. They should be the exact same measurement for both.
Step 7 – Add the top of the seat
Now that your slides are fixed into position re-measure the dimensions for the top of the bench as shown below.
Mark these sizes onto a sheet of plywood and cut to size. We used 6mm ply which holds our weight well. We’d recommend using something a little thicker if you want it to feel extra sturdy. For example 9mm ply.
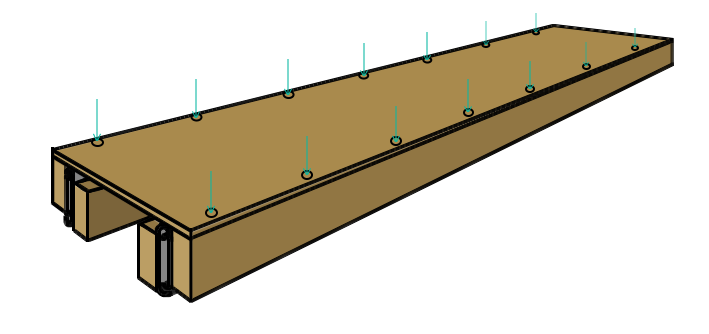
Attach the top of the bench by using a series of small countersink screws along the two outside battens (drill some pilot holes first to avoid the wood from splitting). We used the same screws we used for attaching the slides to the battens – 4 x 16mm. Make sure that everything is flush by giving the top and sides a quick sanding. Below is a diagram of how it should all come together.
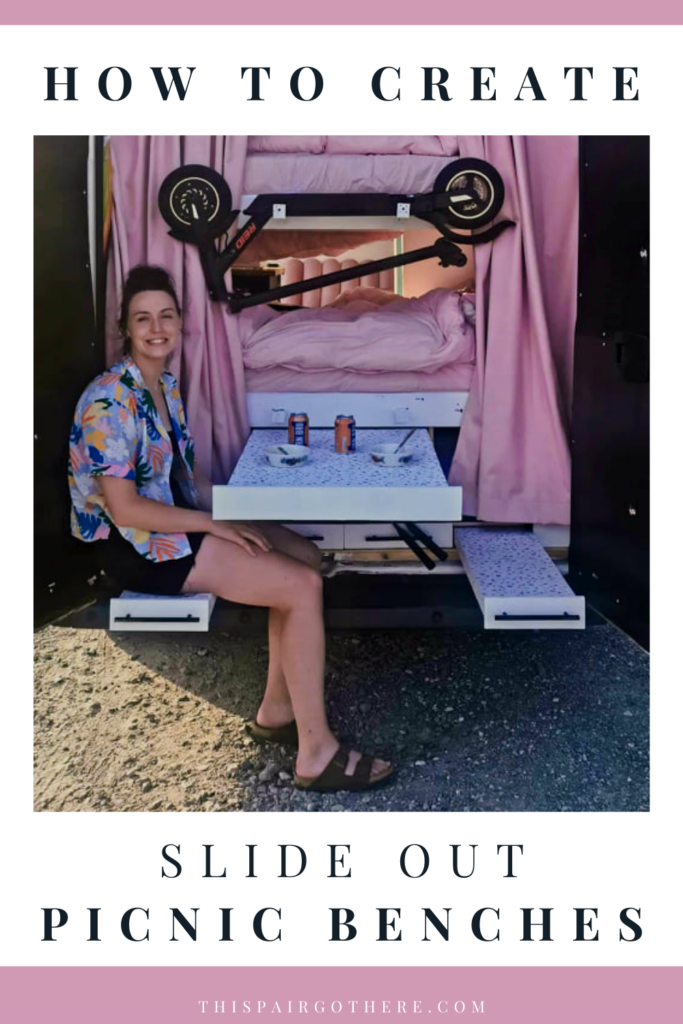
Step 8 – Finish The Slide Out Benches How You Wish
Now that the structure of the slide out bench is complete you can decorate it however you like. We chose to apply a fun patterned wallpaper over the top and sides. We then added drawer fronts to completely disguise the bench when it’s in the closed position.
If you’re looking to maximise the space in the back of your van we would recommend adding a false floor to cover the slide out picnic benches so that the whole area remains useable. This is what we did. We then added drawer fronts and handles to the benches to make the whole area look cohesive. Below are some images of the construction of these benches.
CONCLUSION
If you want your van to have the wow factor as well as be extremely functional – this is the way to do it. Creating the slide out benches is not as difficult as you would expect. We are thrilled with how ours turned out and would recommend everyone to stick these bad boys in your van!
If you have any additional questions, please leave a comment below and we will get back to you very soon.
Next Step : Create a false floor