
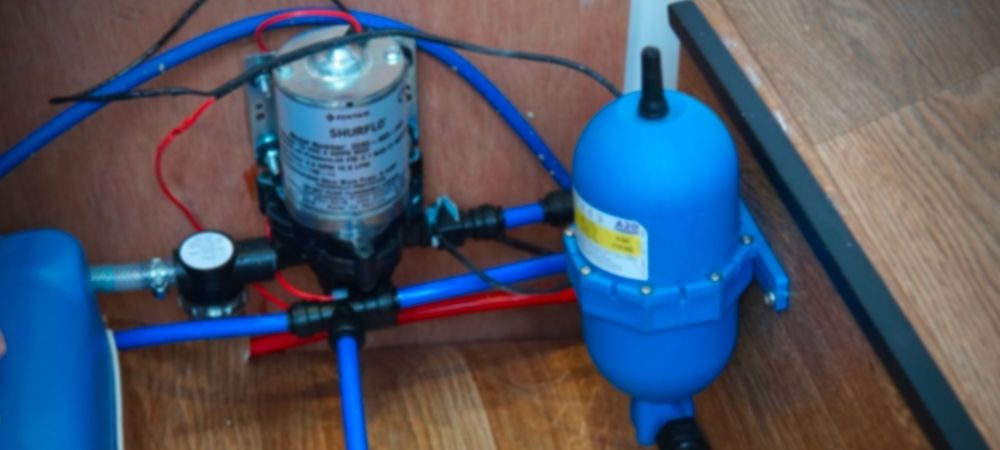
So, what does each component do?
Water filter
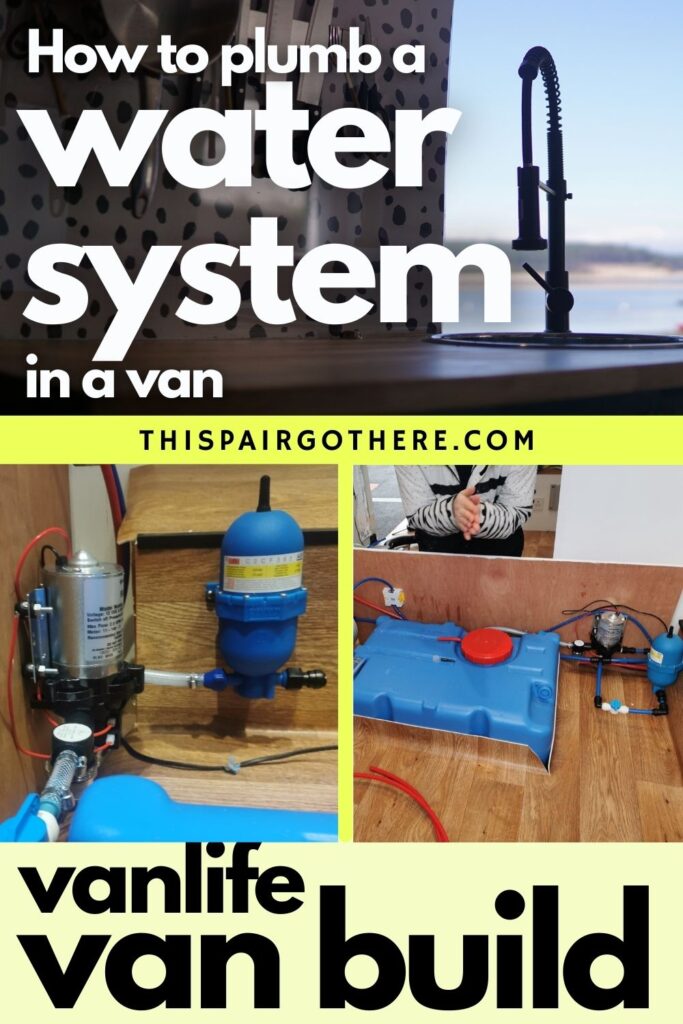
A water filter stops dirt and debris entering into the water pump.
Note: this type of filter is design to protect the pump, not purify your water.
Water pump
An electrical diaphragm pump (e.g Shurflo Trial King pump) pressurises the water automatically when you use the sink or shower.
Accumulator
The accumulator regulates the flow of water to be smoother, increases the lifespan of your pump, reduces unwanted cycling, and saves battery.
How to install

Surprisingly, we found installing an effective water system (filter, pump, and accumulator) in a campervan to be the most frustrating job of our van build. With so much that can go wrong, it’s extremely important to get everything right the first time to avoid disaster! Therefore, we have created this post to make sure you don’t face the same difficulties that we did.
The method below is designed to walk you through each component in the order that they are situated in a plumbing system.
Water tank –> shut off valve –> filter –> pump –> accumulator –> shut off valve.
Step 1 – Layout of your water system
Time: 20 minutes
Prior to securing anything in position and cutting the pipes to length, it is important to decide the layout of your water system. This is particularly important for the water pump and accumulator which need to be attached to a wall.
We recommend attaching the pump to the wall prior to connecting everything together as this job can be quite fiddly.
Step 2 – The water tank
Time: 5 minutes
We used the Fiamma 70L water tank – here
Find out how to install it here.
This water tank comes with fittings. However, they are not compatible with 12mm pipe – which is the most commonly used pipe in caravans, RV’s and vans alike. The fittings are 1/2″ or 13mm.
Attach the fitting provided with the tank.
Push 1/2″ pipe onto the barbed fitting and secure it with a jubilee clip. This pipe will run from the tank to the first shut off valve (no more than a metre from the tank).
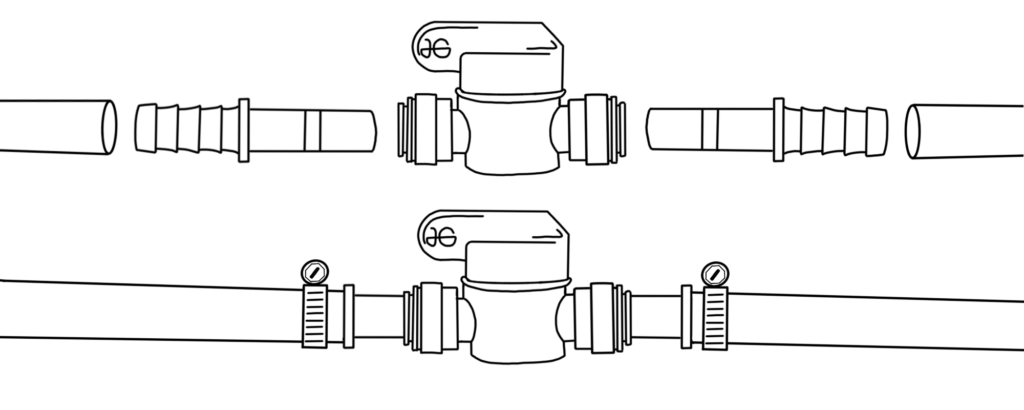
Step 3 – The first Shut off valve
Time: 10 minutes
We used a John Guest 12mm Speedfit shut off valve and 2x Whale 12mm stem connectors which reduced the 1/2″ pipe to a 12mm stem. These adapters are suitable to be used with John Guest push-fit products. Secure the 1/2″ pipe to the Whale 12mm stem connector using a jubilee clip. Push each connector into the shut off valve.
You may wish to use a 1/2″ barbed shut off valve. Unfortunately, John Guest does not make these and therefore we chose to avoid them.
Step 4 – The filter
Time: 5 minutes
We opted for a Shurflo filter because:
- it was cheap
- it’s low maintenance – only needs to be cleaned every 6 months
- it was the same brand as our pump
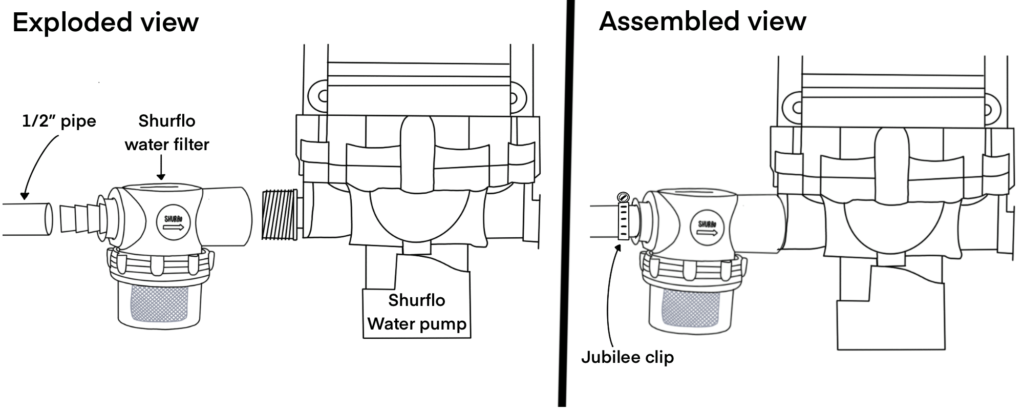
Firstly, attach the filter to the water pump. This is achieved by simply screwing it into position.
Note: make sure the clear plastic part of the filter is positioned at the bottom.
Next, simply push the 1/2″ pipe onto the barbed end of the filter and secure it in place with a jubilee clip.
Step 5 – The water pump
Plumbing the pump
Time: 10 minutes
After careful consideration and research, we opted for the Shurflo Water Pump. We chose this one as it comes with a one-year warranty and is easy to install – perfect for any novice plumbers!
The pump is directly connected to the filter as stated in the previous step.
There are several fittings provided with the water pump. Attach either the straight or elbow barbed fitting. Push 1/2″ pipe onto the fitting and secure with a jubilee clip.
Wiring the Pump
Time: 40 minutes
The water pump requires 12v electricity to operate. Simply connect it to your 12v circuit.
Although technically not needed, we recommend wiring a switch. This means that the pump will not continue to pump if the tank is empty!
We chose a simple toggle LED switch.
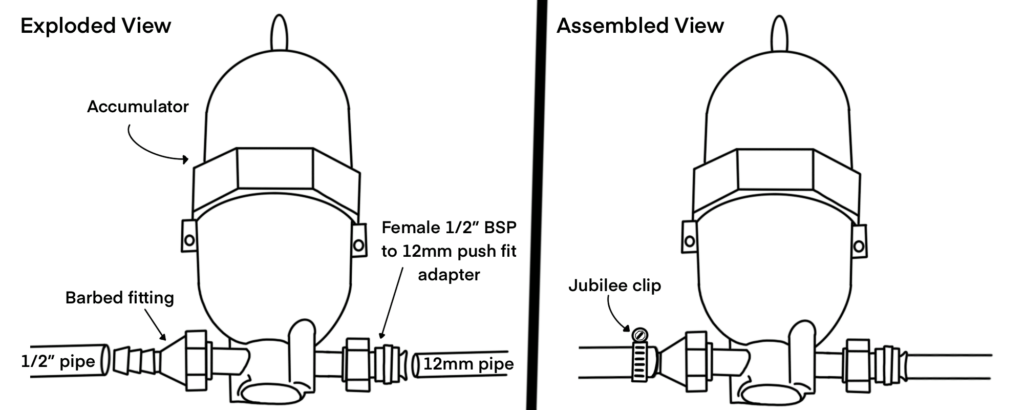
Step 6 – The accumulator
Time: 20 minutes
The accumulator we chose for the water system our campervan is the Fiamma A20 Expansion Tank. It comes precharged to 13.05psi, however, you can adapt the pressure to suit whatever water tank you choose.
The accumulator will be positioned next to the water pump, no more than 200mm away. It will need to be mounted onto the walls with the screws provided.
Firstly, attach one of the barbed fittings provided (elbow or straight) onto the inlet side of the pump.
Push the 1/2″ pipe onto the fitting and secure with a jubilee clip.
On the outlet side of the pump, attach a Female 1//2″ BSP to a 12mm push-fit adapter. This is necessary to allow you to continue the plumbing using only 12mm push-fit connections.
Push a plug into the 12mm pipe, then insert it into the fitting.
Note: push further than you think. We were caught out by not pushing the pipes far enough into the push-fit connections.
Step 7 – the second shut off valve
Time: 5 minutes
The second and final shut off valve is very simple to install.
Position it shortly after the accumulator. The shut of valve we used is a John Guest 12mm Speedfit.
First, insert John Guest plugs into the ends of the pipe to provide rigidity. Next, simply push the 12mm pipe from the accumulator into one end. At the other side of the valve, you will push in a 12mm pipe that will lead to your cold water tap and shower, and also to the water heater.
Step 8 – Testing it out
Now that the water system (water filter, pump and accumulator) in your campervan is connected together you can test if all of your hard work actually works.
In order to test it you will need to follow a few procedures below:
- Fill up your water tank
- Connect a 12mm pipe to the outgoing side of the second shut off valve. This pipe should be directed outside your van… or into a sink or shower tray. Open this valve.
- Open the first shut off valve
- Be prepared to switch off the pump if there is a leak.
Now, turn on the water pump switch that you installed in Step 5.
Everything should work seamlessly with no leaks. If there is a leak, immediately switch off the water pump and start trouble shooting.
Conclusion
Undoubtedly, installing an effective water system in a campervan one of the most complex jobs when converting a van. We found that there wasn’t much information online that really got into the nitty-gritty of it install each component – the filter, pump and accumulator – and in particular what size of pipe is needed. Therefore, this post was born.
Surprisingly, the most difficult part of the plumbing for us was finding all the right components and pipes. The comprehensive materials list at the top is arguably the most valuable bit of information we have published to date.
This step-by-step guide was designed to walk you through the process of successfully installing an effective water system in a campervan. By taking the plumbing slowly and methodically working through it, you will have running water in no time.
It will be water under the bridge (if you’ll pardon the pun!).
Feel free to ask us questions regarding installing a water pump, filter, or accumulator, whether it is about materials, price, time, or whatever else. You can always find us in the comments.
Next Step: Installing a water heater or plumbing a shower.
3 Responses
Hi Ladies,
This is so helpful I am currently renovating a vintage caravan not to tow as guest accommodation in my garden I am going to follow your lead . A couple of questions , Are you intending to continue. Your guides ? When i click on the tabs it says not there? Also I really like the clear format of your web pages, may i ask what provider/ template you are using?
A couple of points, A sign up to your site might be useful for you. Thanks enjoy your travels. Julie.
Thanks for your comment!
Yes, we are currently still in the building phase of this website, hoping to get more guides up and streamline the website over the next 2 months!
We will also be creating a sign up list with a monthly email newsletter in the coming months!
😀
– C & E
Oh, I forgot to mention we are using element of to build our site! It’s been a slow process, but hope it will be worth it in the end!