Step 1 – Decide where the tank is going.
The underslung grey water tank will be accompanied by detailed instructions on where the tank should be positioned. There is very little scope for deviating from its intended position.
If you do have some creative liberties, consider where your main waste pipes are (shower and sinks) and pick a location that is nearby so the pipes don’t have to travel far.
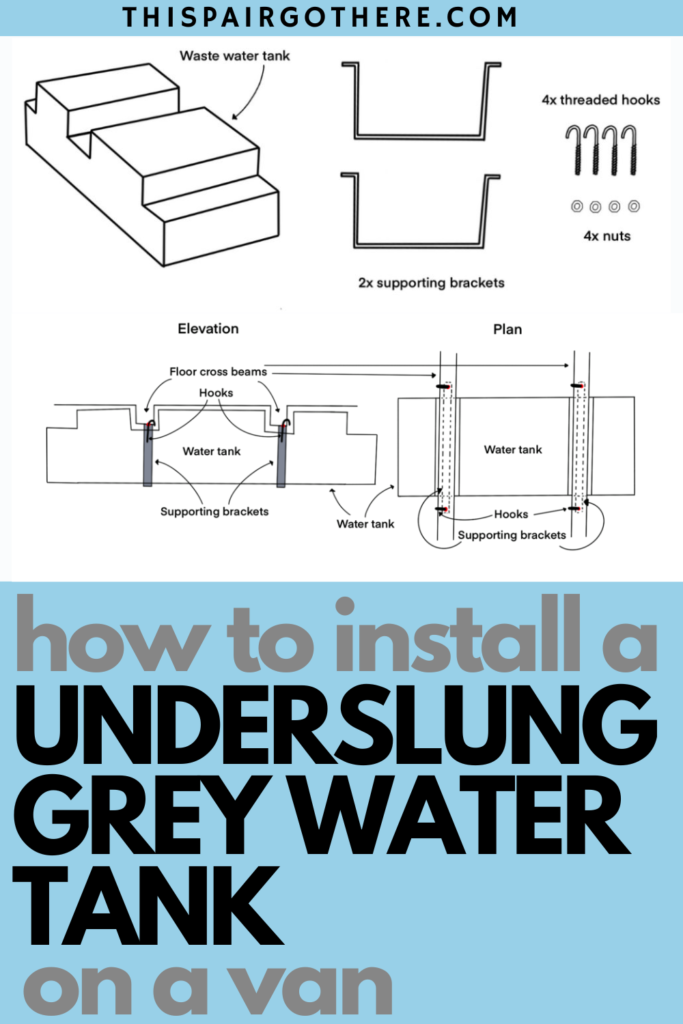
Below is a diagram of everything that comes with the tank.

Step 2 – Trial fit the underslung grey water tank
Despite knowing where the tank should go, a trial fit is important not only for peace of mind but also to see if you will need an extra pair of hands.
Lift the underslung grey water tank into position and check it fits well.
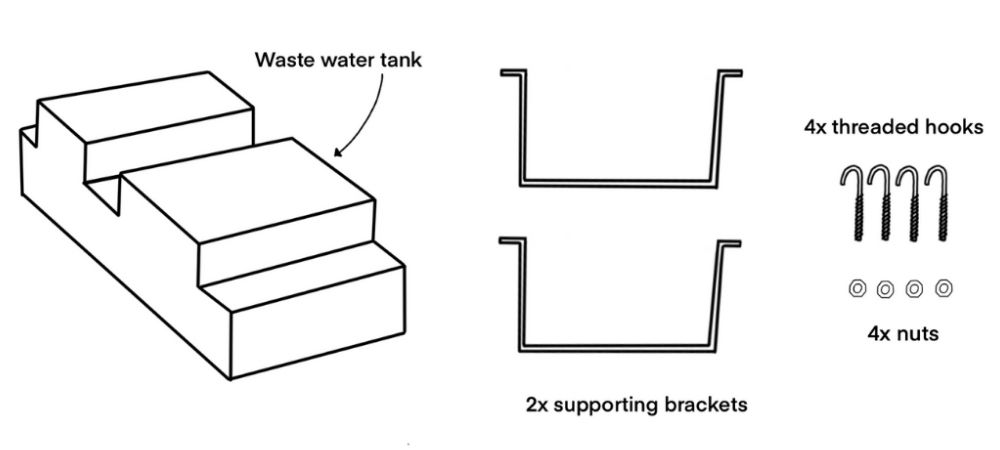
Whilst it is lifted into position, mark where you will need to drill in order to insert the hooks which will support the bracket and tank. We drilled into the cross beams. We recommend using chalk to mark the van.
To achieve the best result you will mark the vertical part of the cross beam (the distance of the hooked part of the hook up from the bottom)

Step 3 – Prepare for installation
There are several ways in which you can make the installation of the underslung grey water tank easier.
First and foremost, make sure you have a light under the van. We recommend using something brighter than a phone torch for this job.
Next, place all the tools that are needed for the installation under the van within arm’s reach of where you will be. This includes:
- drill + suitable-sized drill bit
- 4x hooks
- 2x supporting brackets
- 2x nuts
- safety goggles.
Step 4 – Drill and insert the hooks
Find the marks you made previously and begin to drill into the beam under the van. It is extremely important to wear safety goggles as the metal shrapnel really goes everywhere.
Repeat this for every mark made. Make sure to test if the hook fits through each time as you may need to enlarge the holes slightly.
Insert all the hooks into the holes just created in preparation for installing the water tank.
Note: if the hooks are struggling to fit, use an angle grinder to slim down the end to a point. This will make fitting them 100x easier.
Step 5 – Lift the grey water tank into position
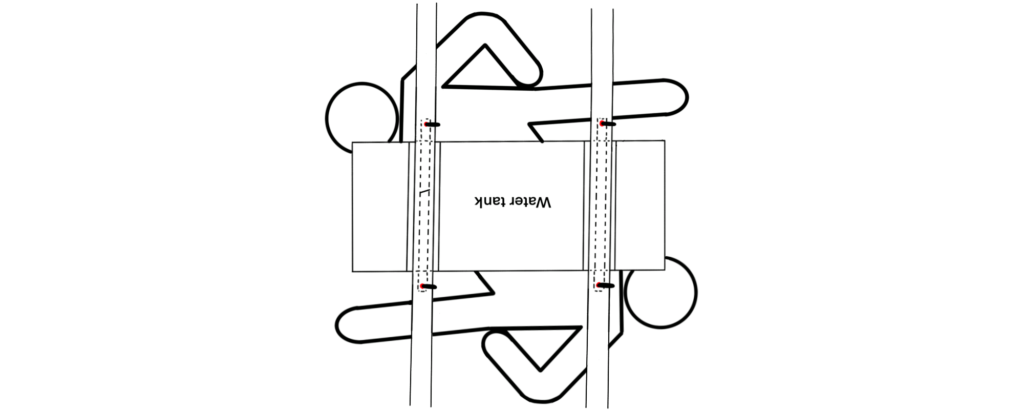
This is a two-man job.
Lift the water tank into position. It should be relatively easy to figure out exactly where it goes as its position is dictated by the beams on the floor and the position of the hooks you have inserted.
We recommend positioning each person along the length of the tank, as seen in the diagram below.
Step 6 – Secure the tank in position
This is a two-man job.
Both people will be somewhat responsible for holding the tank up and in position. Each person will be responsible for one of the supporting brackets and 50% of the nuts (provided with the tank).
Take turns securely attaching the bracket and nuts whilst simultaneously holding as much of the load as you can.
Note: you may find that you need to use washers to bulk out the area as the hooks that are supplied are only partially threaded.
Step 7 – Connect the pipes to the water tank
There are 2x 3/4″ inlets where you can attach the waste pipes from your shower and sink using jubilee clips. There is also a 1″ outlet for draining the tank.
Conclusion
Although this task is one of the easier ones when converting a van, it is certainly not without frustration and a little bit of discomfort. These steps have been designed to take away some of the possible impending frustration.
Feel free to ask us questions regarding installing the grey water tank, whether it is about materials, price, time, or whatever else. You can always find us in the comments.
Next Steps: Installing a fresh water tank