
Internal Structure
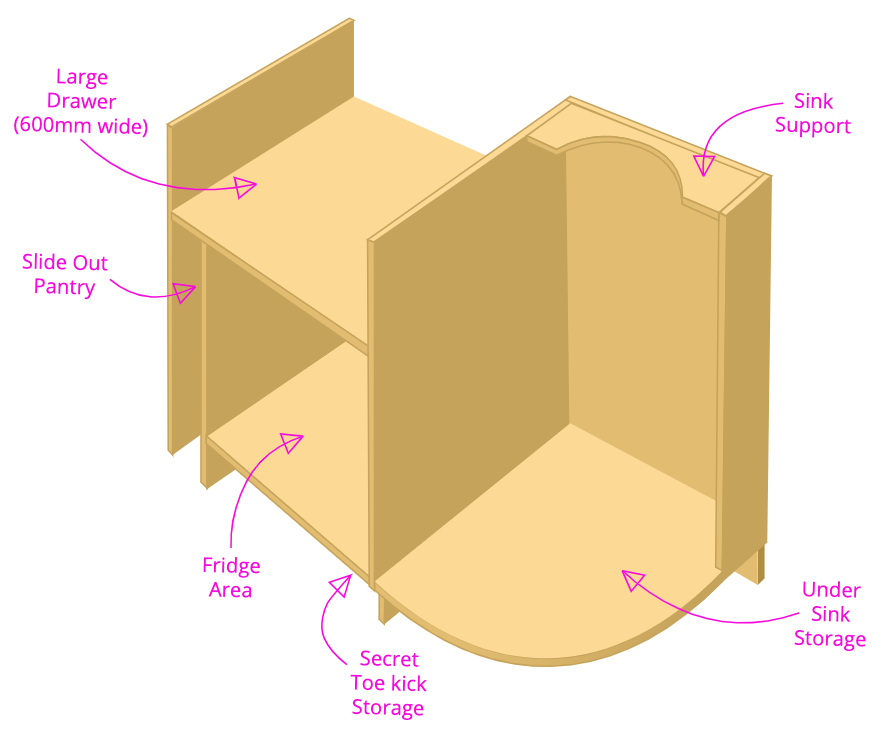
Using 18mm plywood construct the shape of your kitchen. Be sure to get your measurements as accurate as possible. As always, measure twice and cut once. We used a jigsaw to cut all of our plywood pieces using the factory cut straight edge towards of the front of the structure for the best finish. Do not secure all of your pieces together for final construction. Use minimal screws so that it can easily be deconstructed for any amendments or add ons. Below is a general diagram of how all of our 18mm plywood pieces fit together.
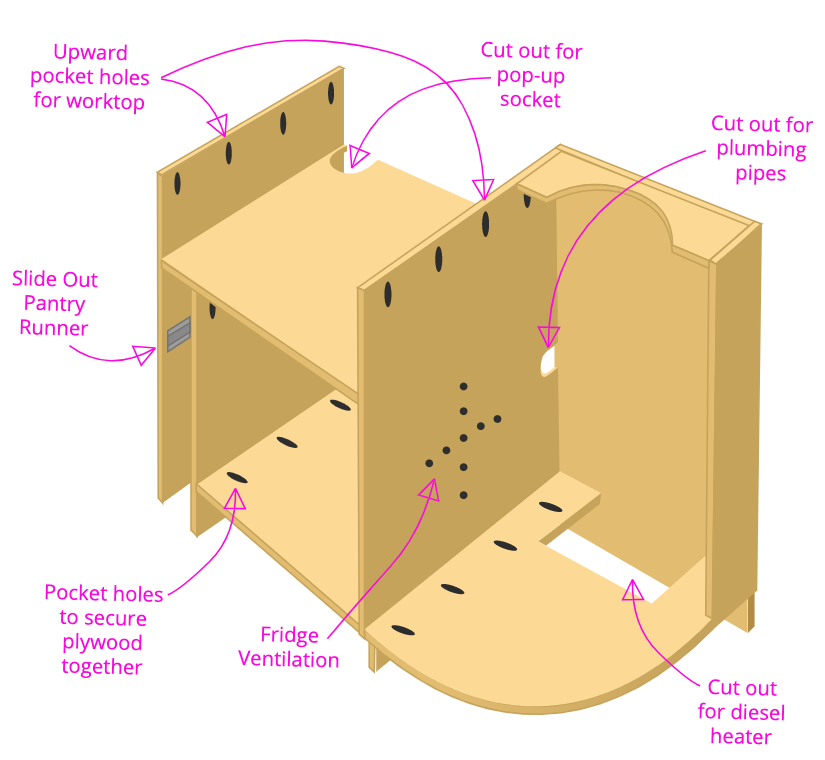
before it is constructed there are a number of things to do to each piece of plywood. It is easier to cut and dill the panels when they are flat – not constructed. Below is a diagram showing all the work each panel needed before assembly. Then use pocket holes to secure all of the pieces together.
Paint
With the structure assembled, this is a good point to paint your plywood. This step isn’t essential, it just makes it a lot easier to paint the ‘difficult to reach’ areas. Also, don’t waste time painting any areas which will not be visible once everything is installed, for example underneath drawers. If you have any uneven areas on your plywood, simply apply some caulk, sand it down and paint over it.
Fix Structure To Van
As well as fixing all of the plywood pieces to each other, it is important to fix the units to the van too. This ‘how to build a kitchen in a van’ guide would be useless if the kitchen was not secured properly to the van. With the plywood structure sitting in its desired position, fix it securely to the ground using pocket holes. Also make sure to fix the back of the structure to the wall it is butted up against. With our layout we screwed directly through the backing board into out plywood walls. We also used some pocket holes too in the left section of our structure without the backing board.
Give your plywood structure a good shake. If it moves at all, you need to add more fixings. The structure should feel solid and should not budge at all once fixed in position.
Worktop
When choosing your worktop the main decision you have to make is whether you’re going to go for real wood or laminate. Real wood looks nicer, especially if it’s cut into a curve shape. Laminate however is a lot cheaper and does the same job. We opted for real wood but both options have their benefits.
Measure the top of your plywood structure and add on any overlap you wish to have to your measurements. For reference the edge of our worktop sits 5mm over the edge of our cabinets / drawers below. As always, measure twice to make sure you are happy with your dimensions.
When purchasing a worktop the standard depth is 600mm. The front edge of worktops also tend to have a small radius curve so they are soft to the touch. Make sure to use this to your advantage where possible.
Cut Worktop Shape
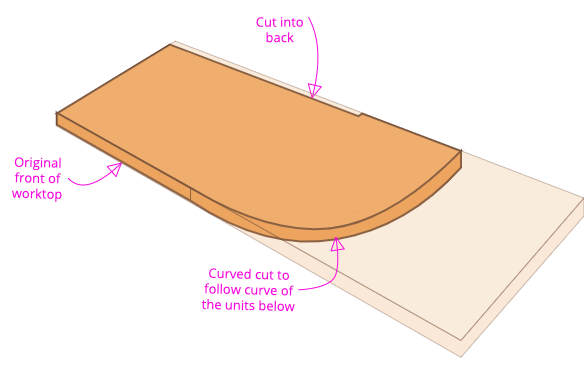
Below is a diagram showing the initial cuts we made to create our worktop. Notice how we have kept the good rounded front edge to the front. Use a jigsaw to cut your worktop. Make sure that the base of your jigsaw will not mark your wood. To avoid marking put a few strips of masking tape onto your worktop in the areas you intend to cut. After cutting your worktop, make sure to round off the exposed edges so the match they rounded front edge.
Cut Worktop Holes
After cutting to your desired shape, place the worktop in position on top of your plywood structure. Using a pencil mark the ‘holes’ you need to cut. If you are cutting circles, it is best to find the midpoint and draw the circle using a protractor.
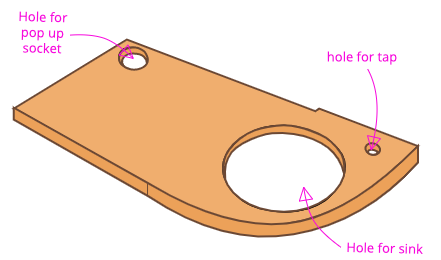
On smaller holes use a hole saw drill bit. This easily creates a perfect circle with high accuracy. On larger holes a jigsaw is your best option. Drill a few large holes inside the shape you intend to cut out to give yourself a starting point, then slowly guide your jigsaw around the lines you have drawn. Below is a diagram of our worktop with all of the ‘holes’ cut.
Mount Worktop
This step is pretty simple. Place your worktop in the position you want it to be permanently fixed. Apply pressure to the top of the worktop. Then from underneath, insert pocket hole screws through the plywood internal structure up through the worktop. be sure to check that the length of you pocket hole screws will not continue all the way through the worktop to poke out the top. It is easiest to do this with two people so one person can focus on applying pressure and the other can focus of securing the worktop.
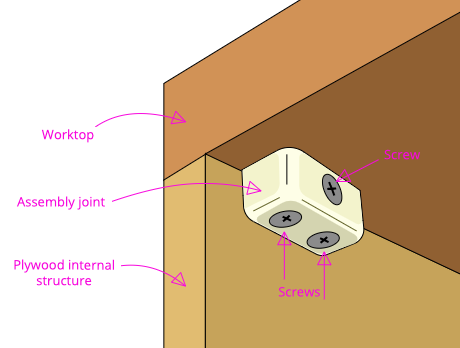
Again, give the worktop a big shake and pull up on it to see if there are any areas where the worktop is not secure. If there are areas which need more fixings we would recommend using small assembly joints like the diagram below.
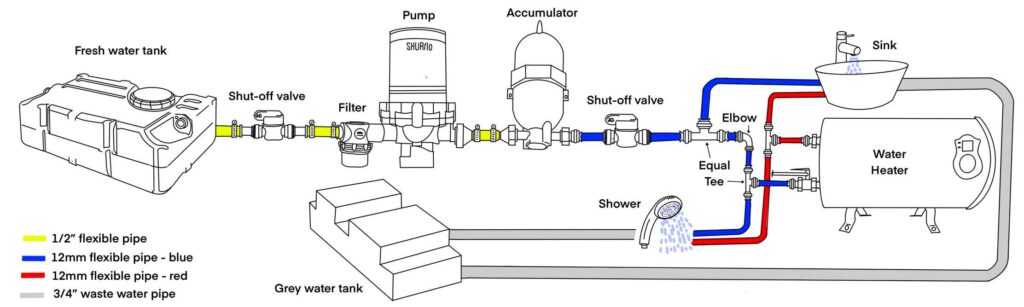
Install Plumbing
Plumbing is the most important part of the installation; without running water can you even call it a kitchen? If you are looking for some plumbing inspiration and want to know all about tanks, pumps and valves check out our page all about it below:
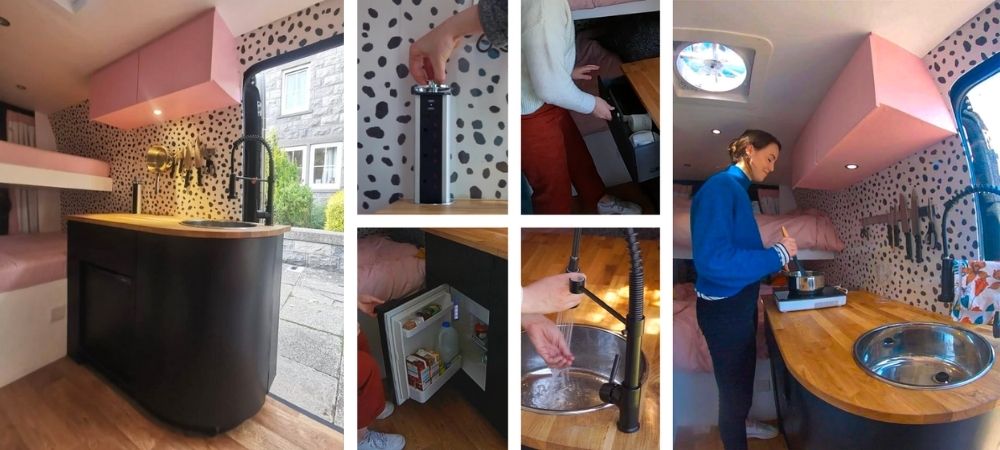
As for the sink installation, it is very easy (if your sink is top mounted). The sink should neatly sit into the hole you have cut for it – dont worry if its not perfect. Underneath the top rim of the sink apply some clear silicone and drop the sink into position. Place heavy weights into the sink to keep the sink firmly pulled down onto the worktop. Wipe off any silicone which may have seeped out, then simply leave to dry. Once the silicone has set the sink should not move at all!
INSTALL ELECTRICALS
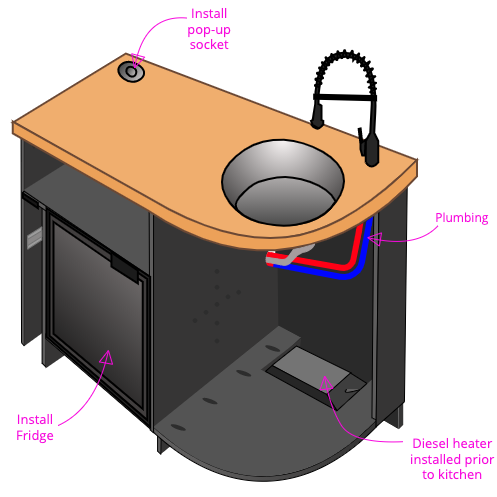
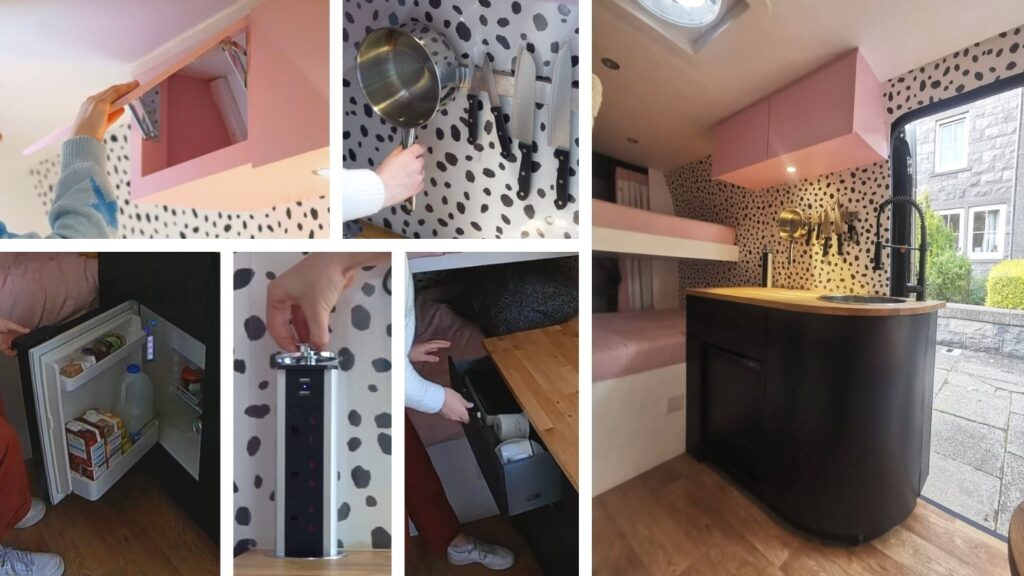
When the structure of the kitchen is easy to access, take this opportunity to install the big electrical items. This includes fridges, sockets, hobs, ovens – all of your big ‘kitchen items’. In our case it was only the fridge and the sockets as all of our other electricals are plug in, tabletop items which we will only take out when we need them. It is important that you have planned all of your electrical items before you get to the build stage so you can ensure you have run enough / correct power cables to the kitchen area. Below is a diagram of what our kitchen looked like at this point in its construction.
INSTALL DRAWERS
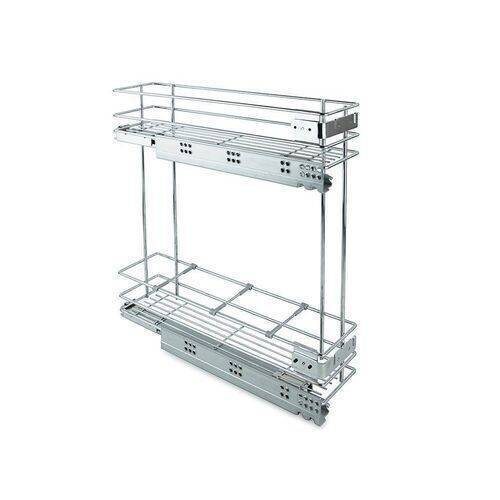
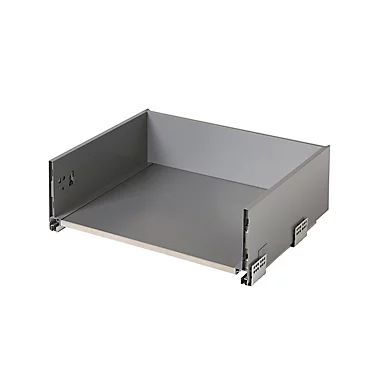
Where possible, we would recommend adding pre-fabricated parts in your kitchen, this can save a hell of a lot of time and money. There are a lot of different pre-fabricated drawers and larders available for purchase which make the kitchen building experience incredibly easy. Simply just screw them into place in your DIY kitchen. We used a prefabricated drawer and a prefabricated slide out larder, all of which work a treat and elevate the functionality of our kitchen.
Whether or not you are installing a pre-made drawer or one you’ve built yourself, make sure to position it correctly. Be sure to take into account the thickness of the front of your drawer when installing your sliders so the front of the drawer will lay flush with the rest of the structure when it is in the closed position.
As for drawer fronts, you can buy pre made ones or create your own from plywood. Prefabricated drawer fronts look fantastic as there are a variety of shapes and finished to choose from. We created our own plywood drawer fronts by simply measuring the space they needed to fill and cutting accordingly. Make sure to caulk and paint drawer fronts before installing them.
INSTALL CUPBOARDS
As well as the drawer / slide out pantry we also installed a curved cupboard with shelves to cover the curved section and add some handy storage. You can learn how to make the door in the post below.
INSTALL TOE KICK
A toe kick is a completely optional feature for kitchen cabinets. It is a small recess for your feet so you can stand closer to the worktop at a more comfortable angle. Although it is optional, we would recommend it, all professionally installed kitchens will have this feature.
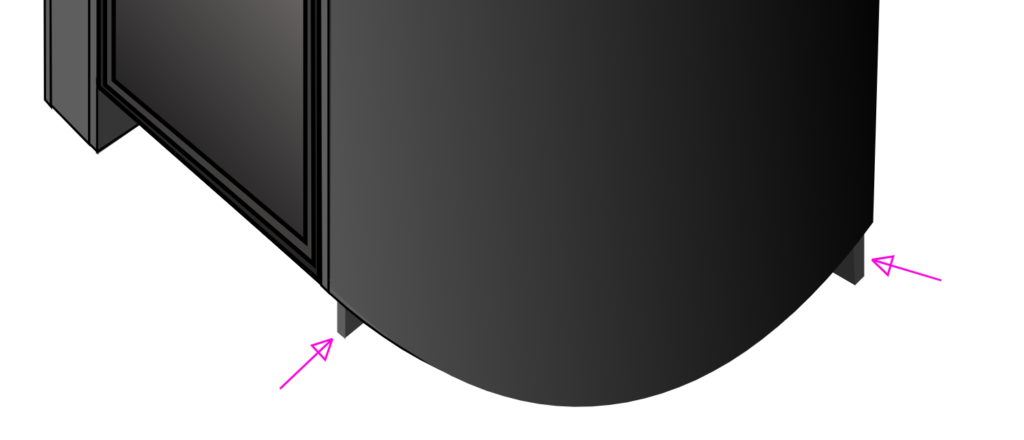
The toe kick has a very quick and easy installation process. Measure the size you need your toe kick to be, then cut some 2mm acrylic to the correct dimensions. The acrylic works especially well for a curved toe kick like ours. The above diagram shows where the toe kick will be fixed to .
The toe kick is fixed at both ends by screwing it directly into the 18mm plywood structure like the diagram below. You can purchase acrylic in a variety of colours, we purchased clear acrylic then sanded and painted it to match our cabinets perfectly.

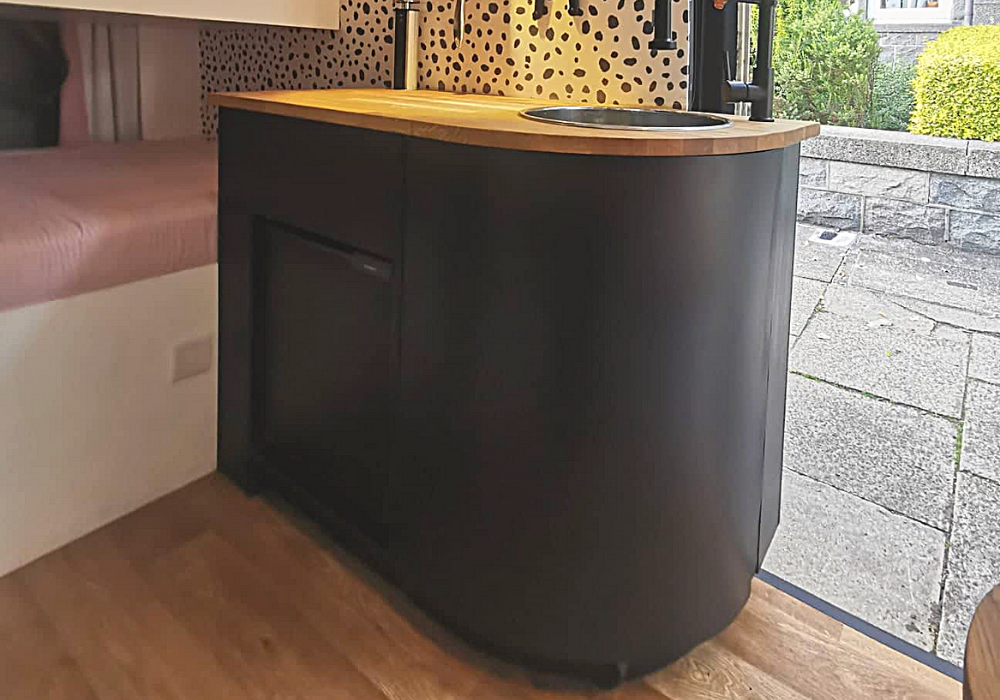
COMPLETED KITCHEN UNIT
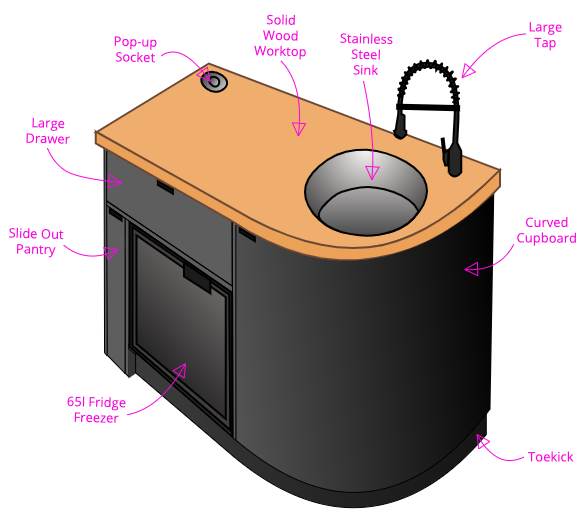
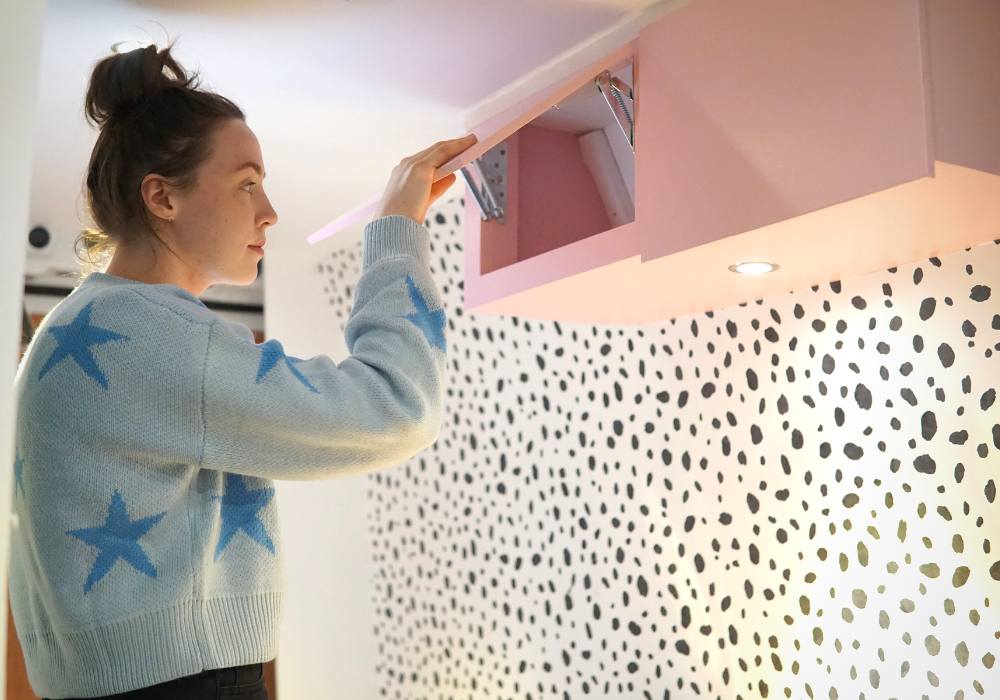
In addition to the base unit this post covers, we also included an overhead cabinet for food storage. You can learn how to build that in the post below.
CONCLUSION
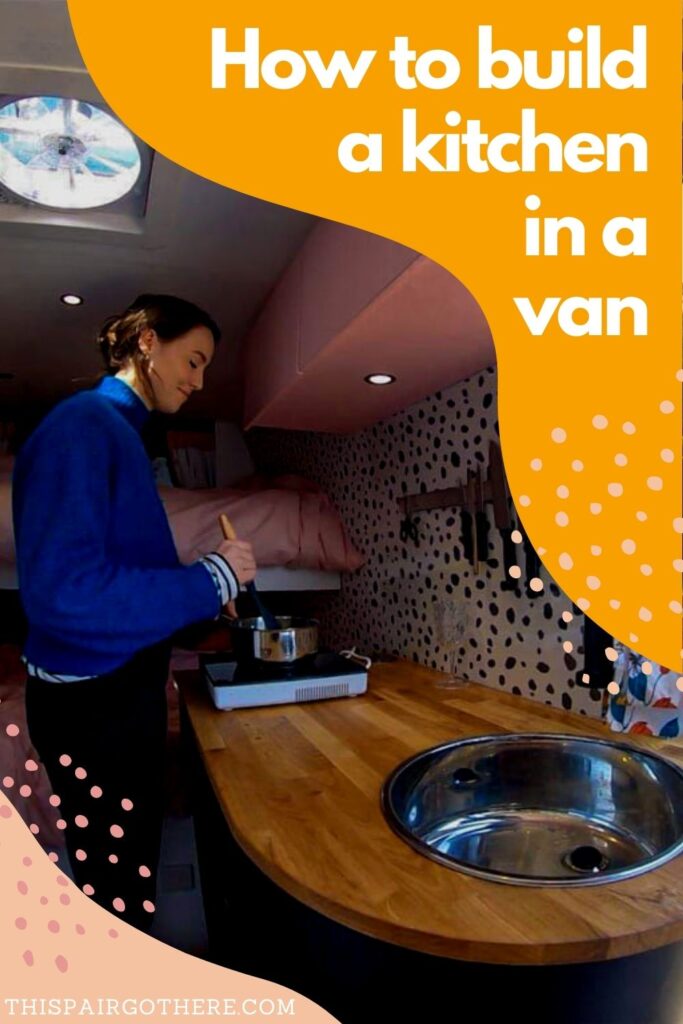
Building a DIY kitchen in a van seems like a pretty daunting task but in reality is not too difficult at all. How you choose to design and build your kitchen in your van is truly a personal choice. Everybody has different ideals on what the perfect kitchen looks like. We love our little kitchen and wouldn’t change it at all as it fits our space and our personality perfectly. We hope this post helps you in the build stage of your van kitchen.
If you have any questions about how to build a kitchen in a van, please don’t hesitate to ask!
2 Responses
This is the most amazing build I have ever seen! I’ve watched a ton of videos and have never seen the use of curves, both in the kitchen cabinet and the “living room” table. It just makes sense for moving around and adds a special beauty.
Thank so much for this comment! The curves are a bit tricky but we think it’s worth it 🙂