Instructions
Step 1 – Figure Out How Much materials you will need – panels and trim.
On the IPSL website, they sell different packages that are suited to different shower sizes, however, you can buy everything individually – that’s what we did. Roughly measure your shower and calculate the number of panels you will need. We Bought two panels for our shower and that was more than enough.
The next thing you need to do is calculate the amount of trim you will need. We used 3 different types of trim in our shower:
Bottom trim: This sits just above the shower tray. You will only need enough to go around the edges of your tray.
Interior trim: This is what you will need most of. Use this to join all panels inside your shower. This goes up every edge and where the walls meet the roof panel.
Exterior trim: This is only used at the entrance to your shower. It is used to seal the edges and give your shower a finished professional look.

Step 2 – Attach Bottom Trim
Before you do anything with the aqua panels, attach the bottom trim. To do this simply cut the trim to the width of your shower tray using a mitre box to get a 45• angle. Repeat this for all the bottom edges then stick them in place using anti-mould silicone. Press firmly for a good connection.
Step 3 – Measure Walls and create templates
Although this may seem like an incredibly obvious step, it is EXTREMELY important…. and time-consuming.
If you’re creating a shower with curved walls like us, we recommend creating templates of the curved parts using this technique – how to create a curve template
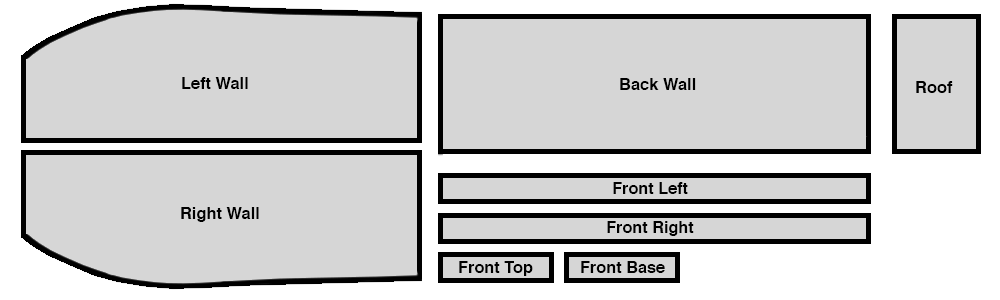
Remember to measure the length of the curved back wall and not just measure the height from floor to ceiling! Another important note is to take into account the thickness of the panels. For example, we made our side panels first and placed them into our shower. We then measured the distance between the 2 side panels to calculate the width of the back panel. Below is a Diagram of all the pieces of aqua panel we cut out.
Step 4 – Cut Aqua Panels
Trace your templates/measurements onto the back of your panels. This is the side without the protective film on it. A pencil draws nicely onto the plastic.
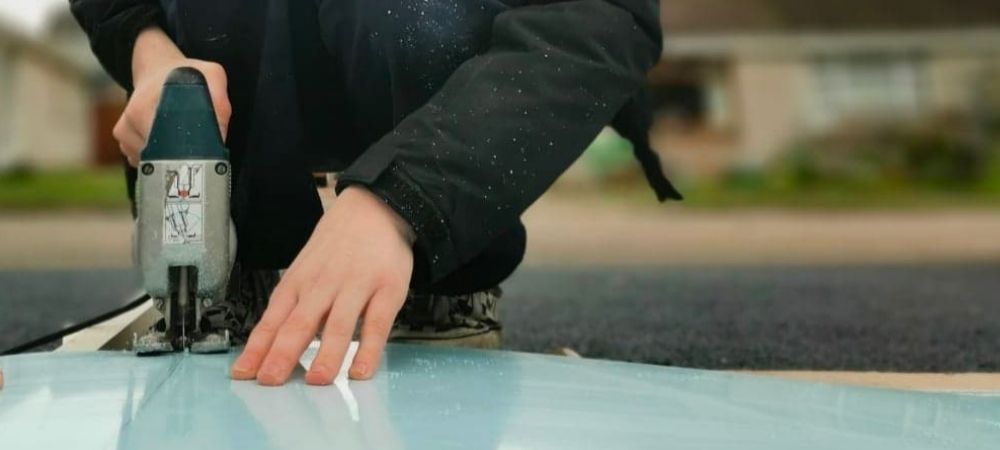
Once you are happy that all the measurements/traced parts are correct its time to cut the panels. This is surprisingly easy to do. Use a fine tooled jigsaw blade to cut through the panels – the jigsaw glides through like butter! Cut along the inside of the sizes you have drawn – this is because the panels need to be a little smaller than the actual walls to allow room to attach the trim.
The great thing about using aqua panels is you don’t have to be particularly accurate with your cutting. The trim gives a good amount of wiggle room to work with.
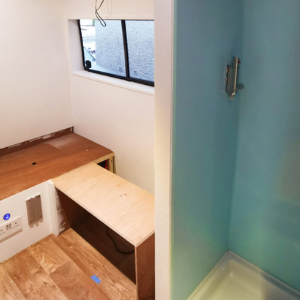
Step 5 – Trial Fit your panels
Once you have cut your pieces to size place put them up against the walls. Attach some trim temporarily to see if the panels sit fit. If it’s too tight with the trim you can amend the size of your panels. The Aqua panels can be sanded down to shave off excess material. Again, don’t worry too much about the accuracy of the panels – the trim will cover everything!
Make sure that the aqua panels are easy to get into position and don’t require a lot of force to squeeze them in. This trial fit will stop you from making mistakes when the adhesive is involved.
Step 6 – Attach Side Panels
Now that the aqua panels are cut to size, give the back of them a quick clean. Clean the walls you intend to stick these panels to as well. This just ensures no dust/dirt will be caught behind the panels and affect the adhesion.
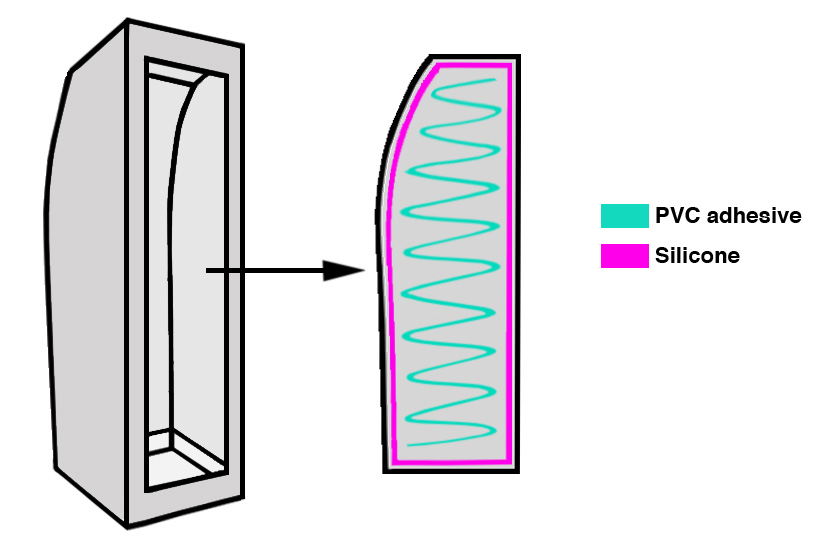
Use PVC adhesive and apply directly onto the wall. Use generously over the majority of the wall. Below is a rough diagram of how much adhesive we used. We also used clear silicone along all of the edges. This step is optional. We were just going a little overboard making sure the edges were 1000% watertight – belt and braces.
When you’re happy with the adhesive on your wall it’s time to mount the aqua panel. Begin at the bottom. Line up the bottom of the panel so it rests just above the bottom trim. Then flatten the rest of the panel against the wall. Make sure to push down every inch of the panel so it is completely secure and flat. Then repeat this on the other side wall.
Step 7 – Attach Back Wall Panel
This step is just as simple as the last. The only difference with the back panel is that you apply interior trim to it before sticking it into place. Cut two strips of interior trim to the exact same length as the back panel. The trim cuts easily with a jigsaw. Slide the trim onto both sides of the back panel before sticking it into place with the PVC adhesive and silicone.
As with the other panels, it’s very important to press down on the panel to make sure there is good contact with the adhesive. Also, make sure to push against the interior trims so that they sit right into the corners.
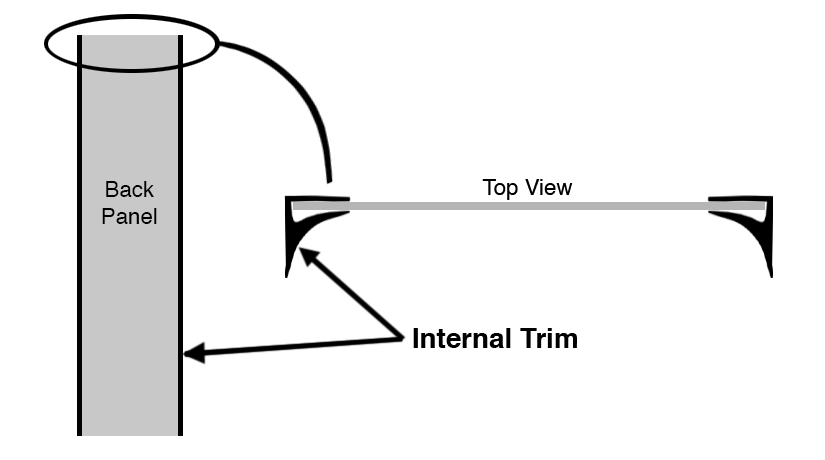
Below is a diagram of how the trim slides on. For reference, we chose to apply the trim to the back panel rather than the curved walls as the interior trim bent a lot more easily in this direction.
Step 8 – Attach Front Panels
The next step is the front of the shower. We chose to have a frame going all the way around the front of our shower to hide the shower tray and curtain. The frame also adds a lot of strength to the shower design in general. So naturally, this frame needs to have Aqua Panels on it too.
We chose to simplify things here by splitting up the frame shape into small rectangles. This is optional however saves a lot of material. Below is a diagram of the panels we cut to create our front frame.
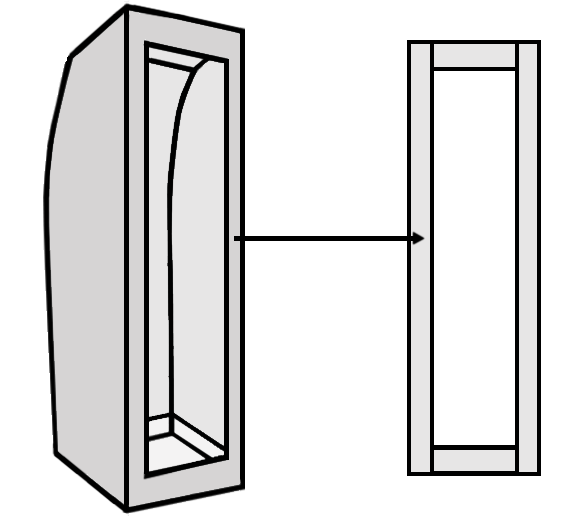
These panels are attached to the wall the exact same way as all other panels. Again, we cut the aqua panels a little smaller than the size of the wall to make them easier to put into position. Cut two strips of interior trim to the length of your wall and apply them to the long rectangular pieces. PVC adhesive and silicone is applied to the wall as per all other panels and the pieces are placed into position. We butted the small rectangular pieces against each other to look as seamless as possible. Make sure to push the trim pieces right into the corners so everything drys in the correct position.
Note: you may wish to put a clamp on the small pieces to hold them in position overnight whilst the adhesive dries.
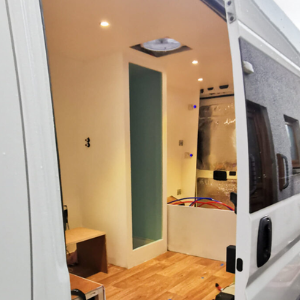
Step 9 – Attach roof panel
The shower should look almost complete with just the roof showing at this point. The roof panel is applied in the exact same way as all other panels. The tricky part here is cutting the trim. The roof panel needs to have interior trim along all four edges (if the walls are at a right angle to the roof). To make this look as seamless as possible the trim is cut at a 45• angle.
Measure the panels to figure out the length of the trim you will need. Then using a mitre box cut the interior trim at a 45• angle. It is important to keep trying the trim onto the panel to see how neatly the trim meets.

We found that sometimes the 45• angles didn’t meet perfectly so we sanded down the trim at a slightly different angle to achieve a neat join. There is a good amount of trial and error here. Make sure to put all the trim on and trial fit your roof piece before sticking it into place permanently.
Once you are happy with your panel and its trim stick it up with PVC adhesive and silicone the same as every other panel. Again make sure to push the trim firmly into the corners.
When installing our shower we did not apply interior trim to the back edge of the roof panel. This is because the trim is designed for 90• angles and the curvature of our back wall meant the adjoining angle became more than 90•. This would mean that the trim would look a little gappy at the top. To overcome this we butted the roof panel against the back wall and applied clear silicone over the join to make sure it was completely water tight. IPLS do sealants in colours that match the aqua panels – this would be a good option too.
Step 10 – Exterior Trim
Adding the exterior trim is the final step. Unfortunately, it is also the most tricky step. Measure the front frame of the shower to figure out the length of trim you will need.
Cut 4 pieces of exterior trim to fit around the perimeter of the shower frame. The difficulty comes when cutting the exterior trim to the right length at a 45• angle using the mitre box. Take your time with this to get it as perfect as possible – these joins will be very visible.
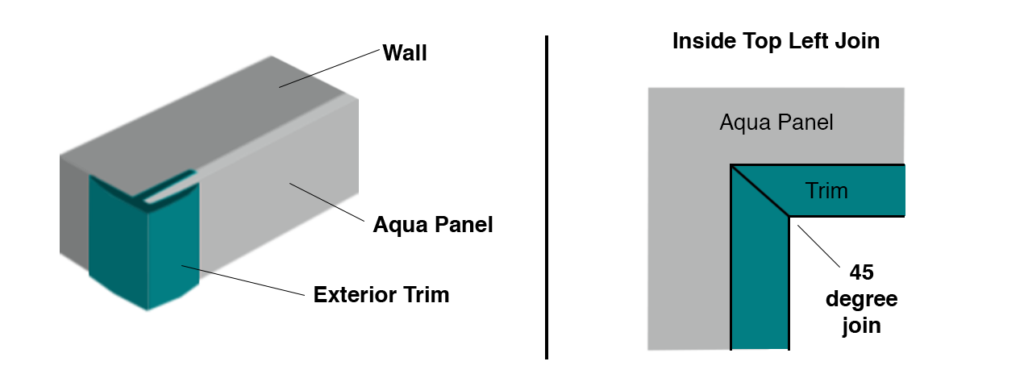
Again, it’s very important here to keep trying the trim onto the shower frame to see how neatly the trim meets. A lot of trial and error will be needed here. Below is a diagram of how the exterior trim fits over the Aqua Panel to seal the edge. It also shows how The exterior trim should meet in the corners.
Conclusion
If you’re toying with the idea of installing aqua panels in your van we would definitely recommend them. One of their best features is how lightweight they are. You really want to try and make your van as lightweight as possible – people often overlook this. The installation is relatively foolproof as there is a pretty decent margin for error. Just make sure to take your time for that professional finish.
Feel free to ask us questions regarding aqua panels, whether it is about materials, price, time, or whatever else. You can always find us in the comments.
Next Step: Plumbing the shower.