
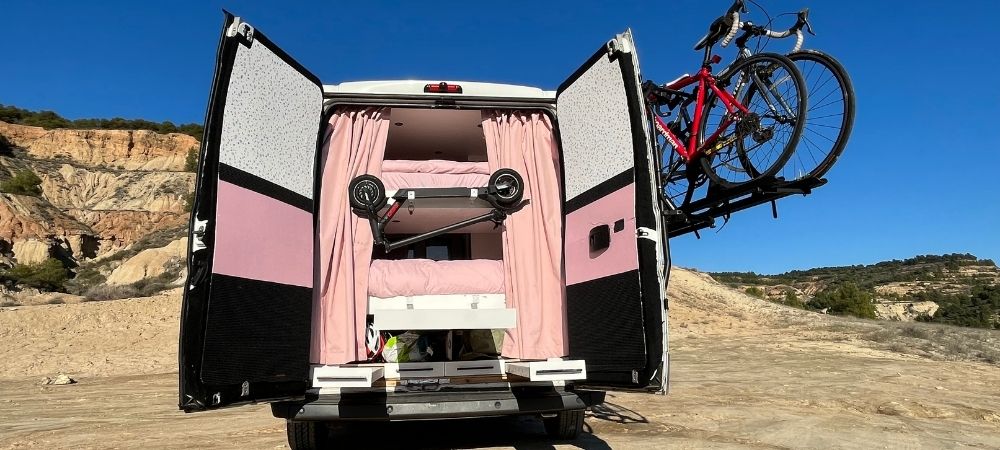
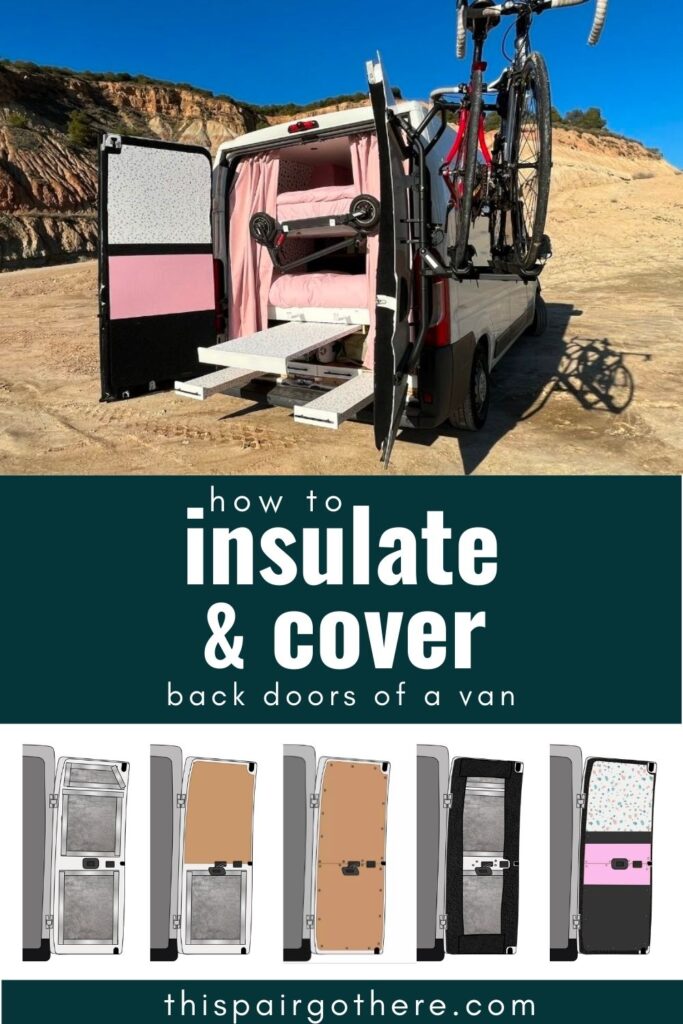
Step 1 – Fill Doors With Insulation
The shape of the metal van back doors means they are pretty simple to insulate. You want to fill all available space with insulation. This will help keep the inside of the van cool during hot summers and keep the inside of the van warm in the colder winter months. Check out or post on insulating your van below
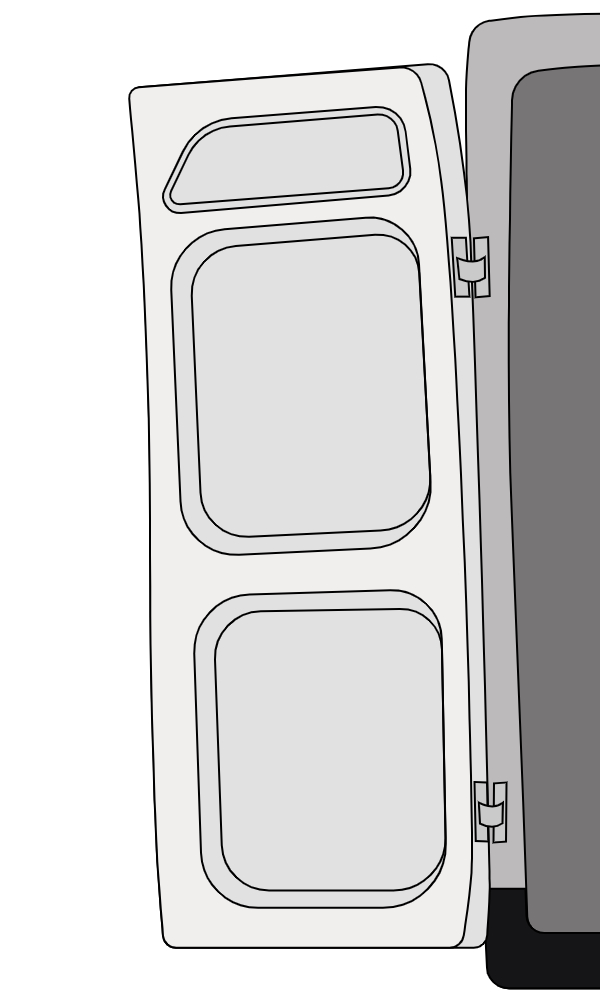
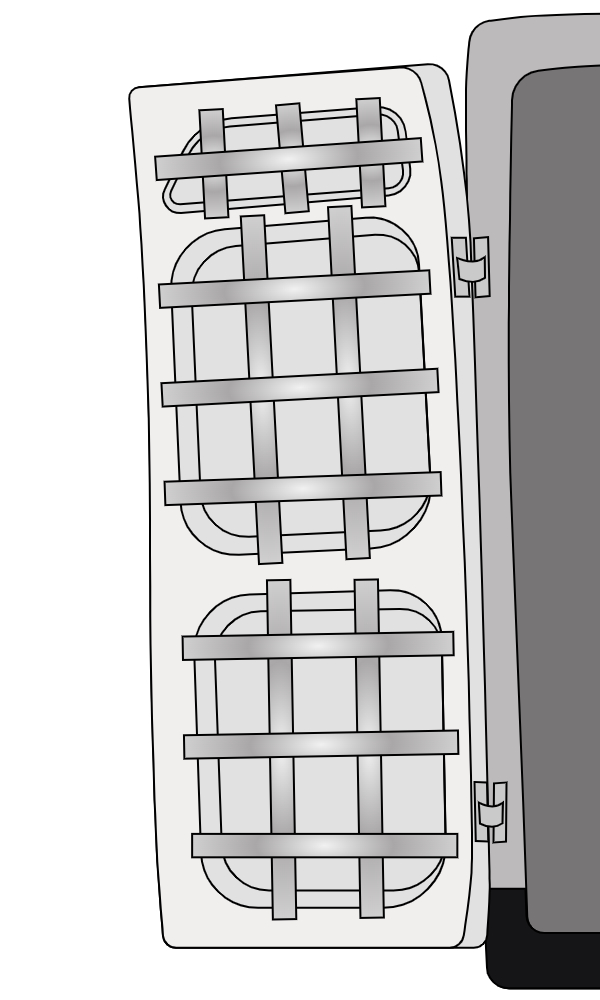
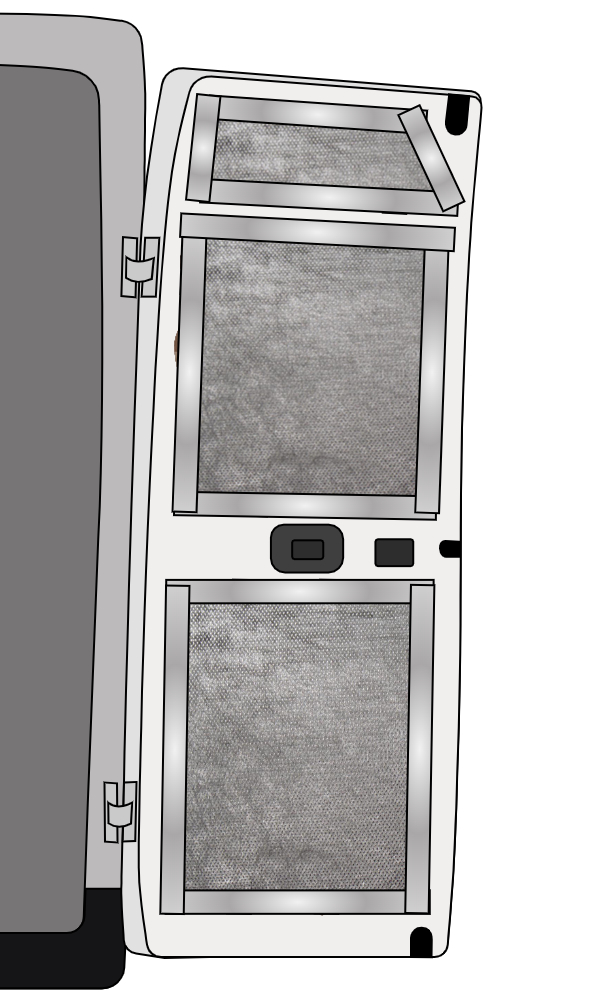
Begin by creating a grid structure over the cavities on the van back doors with metal tape like the diagrams below, this gives you a great structure which you can now insulate. Stuff loose insulation in behind the grid structure so it will be held in place. We used Knauf Eko Roll Loft insulation roll, (L)7.28m (W)1.14m (T)100mm. Be sure to stuff insulation into all the little nooks and crannies so your doors are a insulated as possible.
Step 2 – Cover With Vapour Barrier
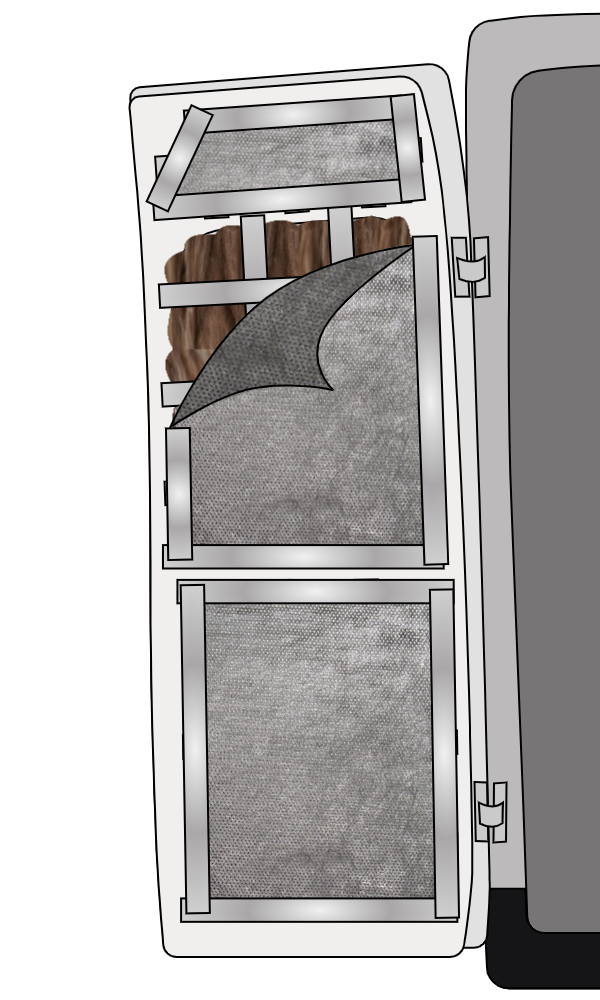
When you are happy with the fullness of the insulation it is time to apply a vapour barrier on top to secure the insulation inside. A vapour barriers purpose is to help prevent water vapour from reaching the insulation and metal panels of the van – therefore preventing a climate in which rust can occur.
The vapour barrier is secured with more metal tape around the outside.
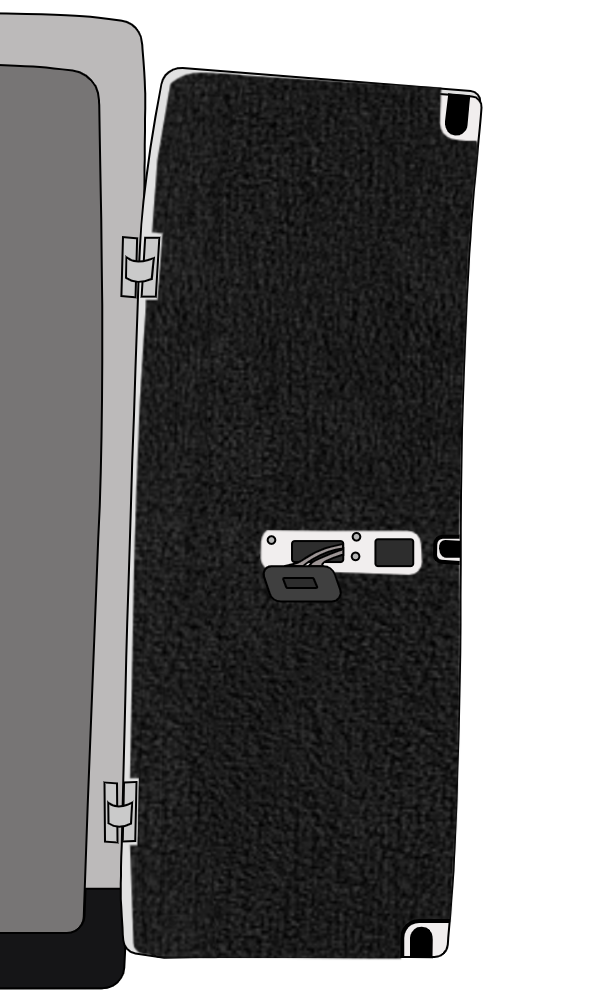
Step 3 – Create The Door Panel
Begin by creating a template of the shape of the door with scrap cardboard. This can be done fairly quickly. If your not sure how to go about creating a template check out the post below
Be sure to leave holes for the doors locking mechanism and handles etc. The door panel doesn’t have to span all the way to the edge of the door, just cover the majority so that it looks aesthetically pleasing. Cut the cardboard to the desired shape and keep lining it back up to the door to make sure that is is sitting right. Trial and error is what makes the template perfect.
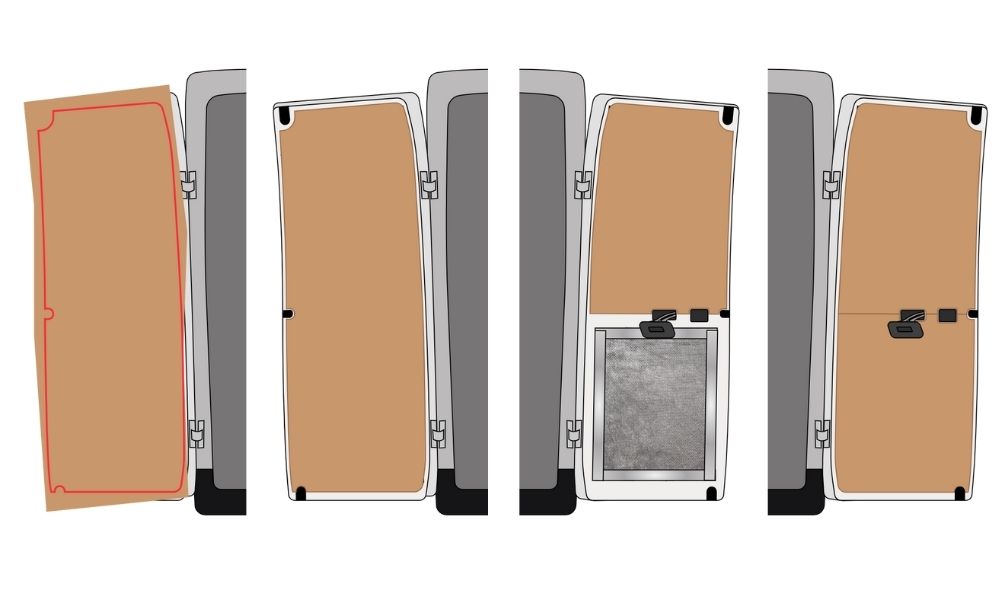
The easiest way to tackle the door with the indoor handle is to temporarily remove the handle and split the door panel into 2 halves – top and bottom. This way the door panel / cardboard template can slide in behind it to make it look extra neat.
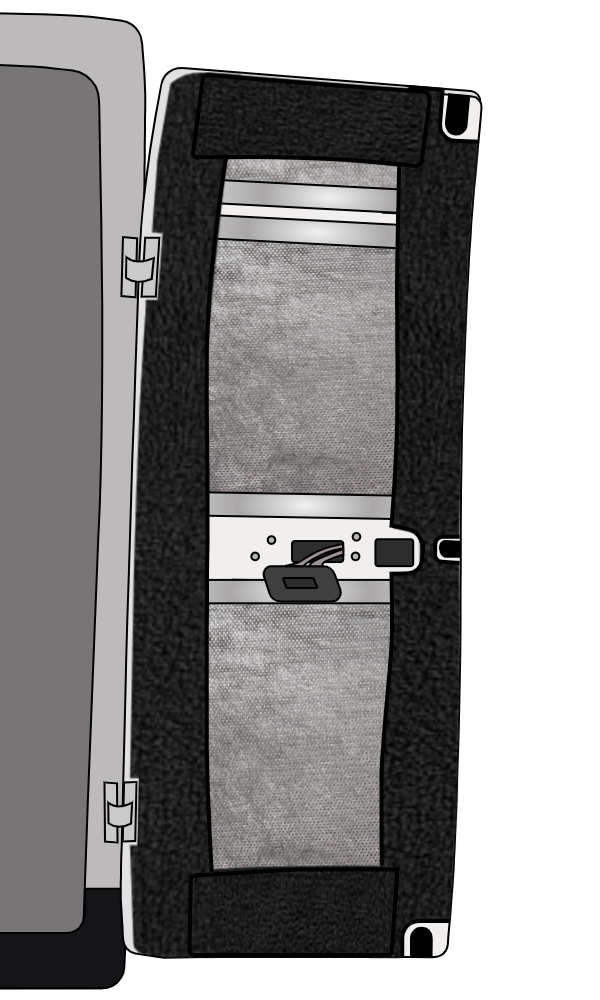
Once you are happy with the fit of the cardboard templates you can trace the template onto 5mm plywood. 5mm plywood has enough bend / flex in it to match the contours of the door. Cut out the back door panels using a jigsaw to follow the traced lines. Sand any sharp edges to keep the panels nice and smooth.
Place the plywood panels up against the back doors to make sure that everything lines up perfectly.
Step 4 – Temporarily Secure Door Panels
This step is easiest to accomplish with two people – so ask somebody for a helping hand. Have somebody hold the panel securely in position. Then go around the perimeter of the door panel drilling in self tapping metal screws. Screws should roughly be around 8 inches apart all the way around. If the panel is gapping anywhere just add an extra screw to secure.
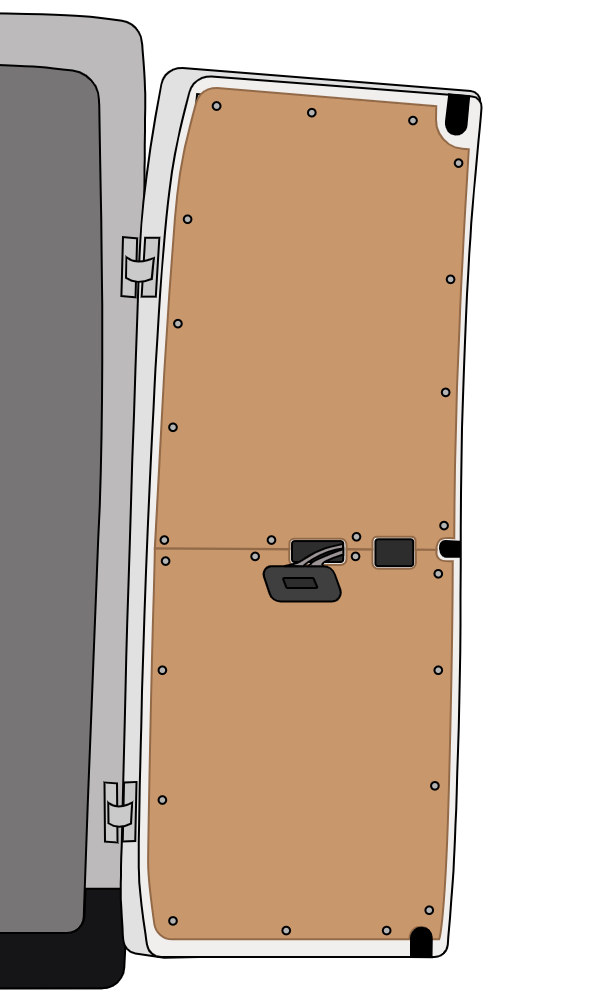
Once the door panels have been mounted it is time to take them off. We know it seems counterproductive but it is necessary. Remove all of the screws and take the panels off.
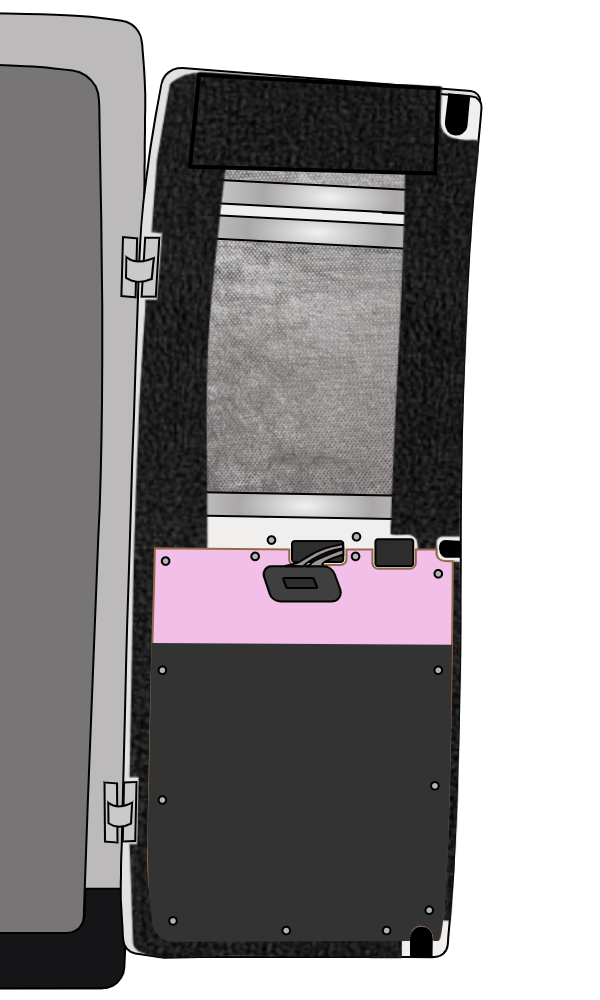
Step 5 – Carpet exposed metal on doors.
Use vehicle upholstery carpet to cover the exposed metal areas on the back doors. This type of carpet stretches so it can mould to the shape of the metalwork quite easily. Apply the carpet using spray adhesive. The most effective way to use spray adhesive is to spray onto both the back doors and the back of the capet – make sure the direction of spray is different on each. Then place the carpet in position and start stretching from the centre outwards. Pull the carpet tight around the corners / curves to get a nice smooth finish.
If you want to save money / not use so much carpet it is also possible to just apply styrips of carpet to anywhere the metalwork is exposed around the outsides of the doors. This works well too as the plywood panel covers the majority of the door.
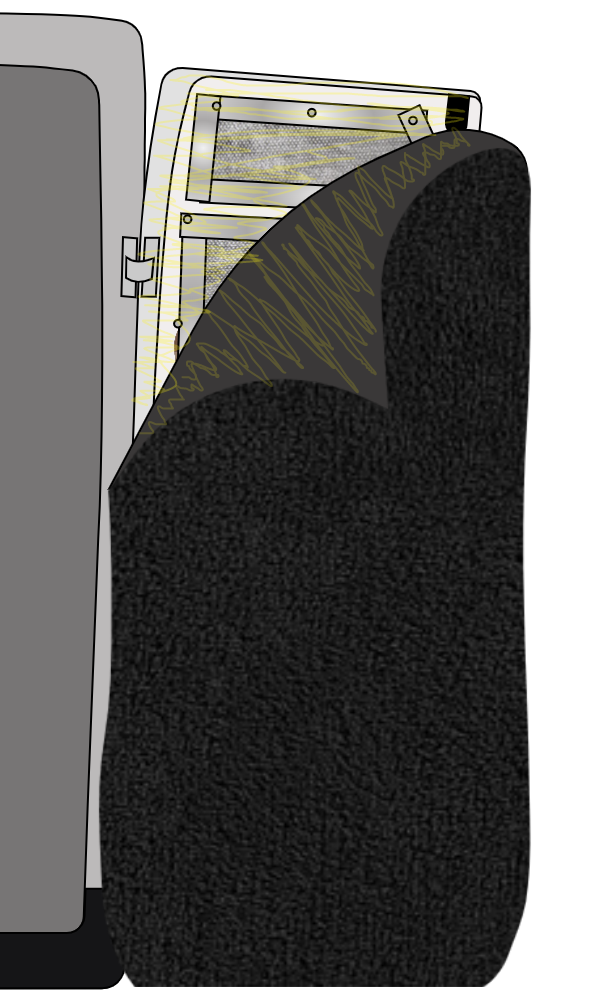
Use a stanley knife to cut away excess carpet. Be sure to remove carpet from areas such as the locking mechanism, hinges and the indoor handle. Also, do not bring the carpet too far round the side of the door as this may affect how well the doors close and may let water into the van. Leave the carpet to dry in position overnight. If the corners of the carpet are peeling the following day just spray a little more adhesive down the back and smooth it down.
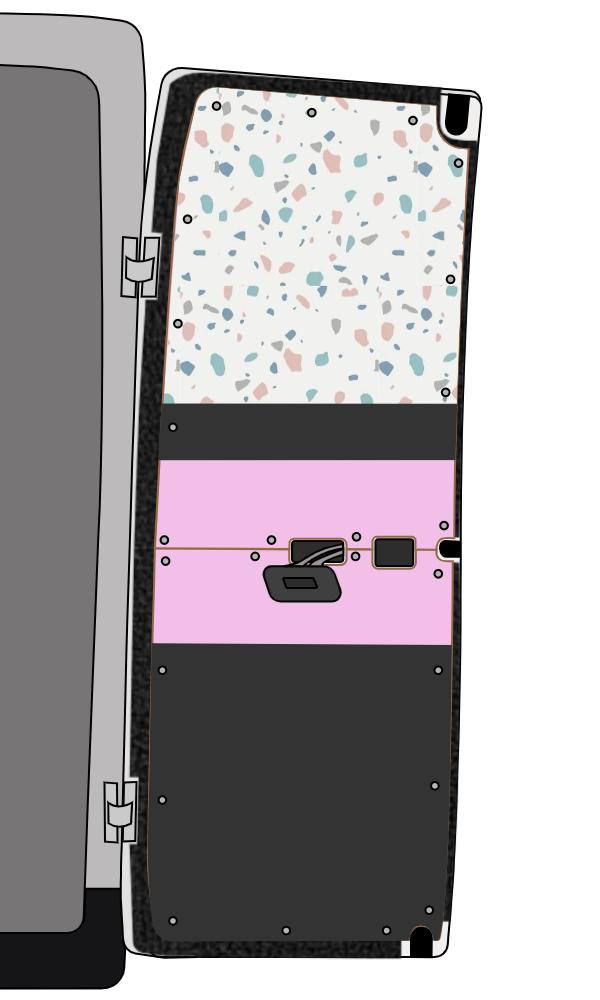
Step 6 – Decorate Plywood Panels
Decorate the panels as you wish. You can paint or wallpaper or cover your 5mm plywood panels however you see fit. We opted for a combination of paint, wallpaper and floor carpet. The only thing to bear in mind is durability and what the doors are closing onto. We covered the bottom section of our doors in a durable rubber backed flooring carpet as this area is resting up against all the equipment we keep in our garage space.
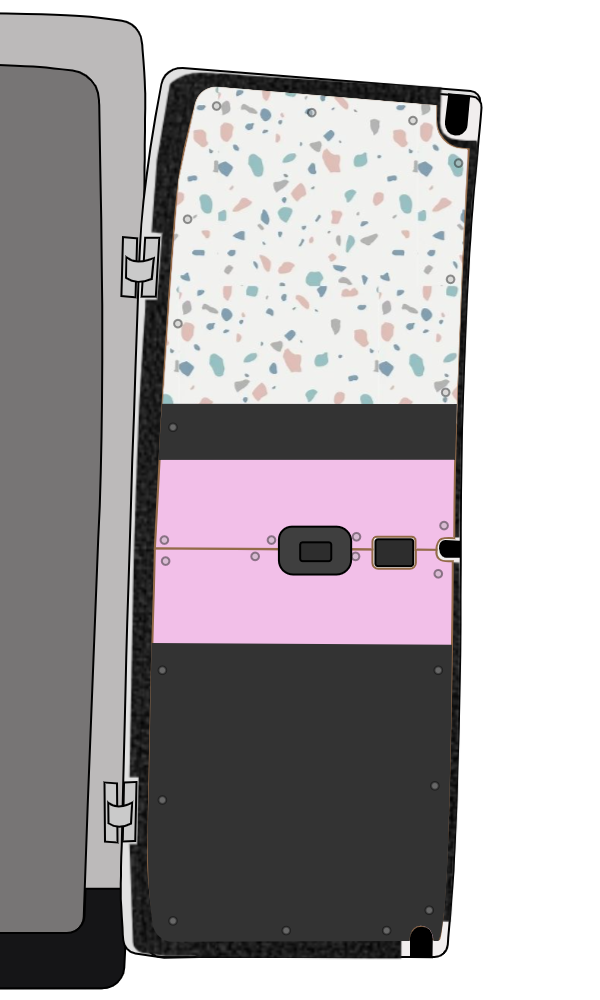
Step 7 – Mount the Plywood Panels
Now it is finally time to to mount the plywood panels permanently! Mount the panels in the exact same way as they were mounted temporarily – with metal self tapping screws. These should fit in the same holes as before. Use a pointed tool like a screwdriver to feel through the carpet to find the holes the screws should fit in. Once you have a few screws in the rest should fall in place fairly easily. Finally, when the plywood panel is securely fastened, you can fit the handle back into its original position.
Conclusion
A vans unique curves makes covering and insulating it effectively a pretty challenging task. Luckily it’s pretty simple to cover and insulate a vans back doors – compared so some of the other van jobs. The great thing about this design is that you can decorate them to suit the aesthetic of you van perfectly, or choose to make them super functional and durable.
Feel free to ask us questions regarding how to cover and insulate the van back doors, whether it is about materials, price, time, or whatever else. You can always find us in the comments.
3 Responses
hi!
as the doors have drain holes and by design are not fully watertight, aren’t you worried that blocking the ‘natural’ ability to allow water to move freely, is going to eventually lead to a buildup of mosture? E.g. the door handles and window seals are not fully water tight
Thanks for posting this! Not maybe people post about how they wall the doors of their vans (back and sliding) and I’m finding a lot of people don’t! But I don’t want the exposed metal; I want a cozy home feel. So I’m doing something similar and this post is very helpful! Only thing is, I have been so careful to not drill any other metal into the metal body of the van since it will eventually rust and ruin the body of the van ($$$). I plan on only using the spray adhesive and maybe a heat resistant glue around the edges since my van gets hot in Arizona
Glad we could help!
We love the look of having no metal showing 🙂