Step 1 – Choose the location of the fan
Picking the correct location to install a Maxxair fan is an art. If you are only installing one Maxxair fan you may wish to consider these factors prior to deciding where to install it:
- Where will you be cooking?
You may want to position the fan near where you will be cooking, therefore it can double up as an extractor fan. - Do you have a shower?
If you are installing a shower, we recommend you place the fan close to the shower to keep condensation in the van to a minimum. - Where is the bed?
You may wish to position the fan over, or near the bed in order to cool you down, and not be stuffy in bed. - Where are the windows?
Airflow is essential in a van. By opening a window and putting the fan on you can create effective airflow throughout the van.
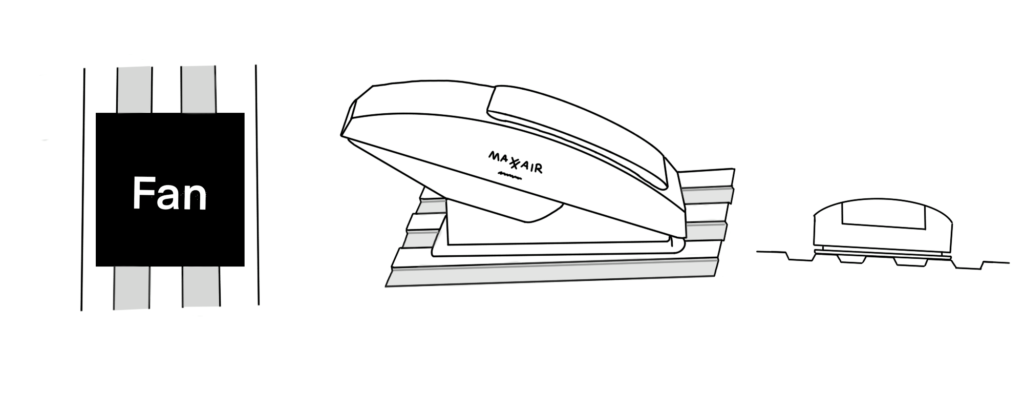
If you are installing two fans, we recommend placing them at either end of your vehicle to promote good airflow and optimise the area each fan covers.
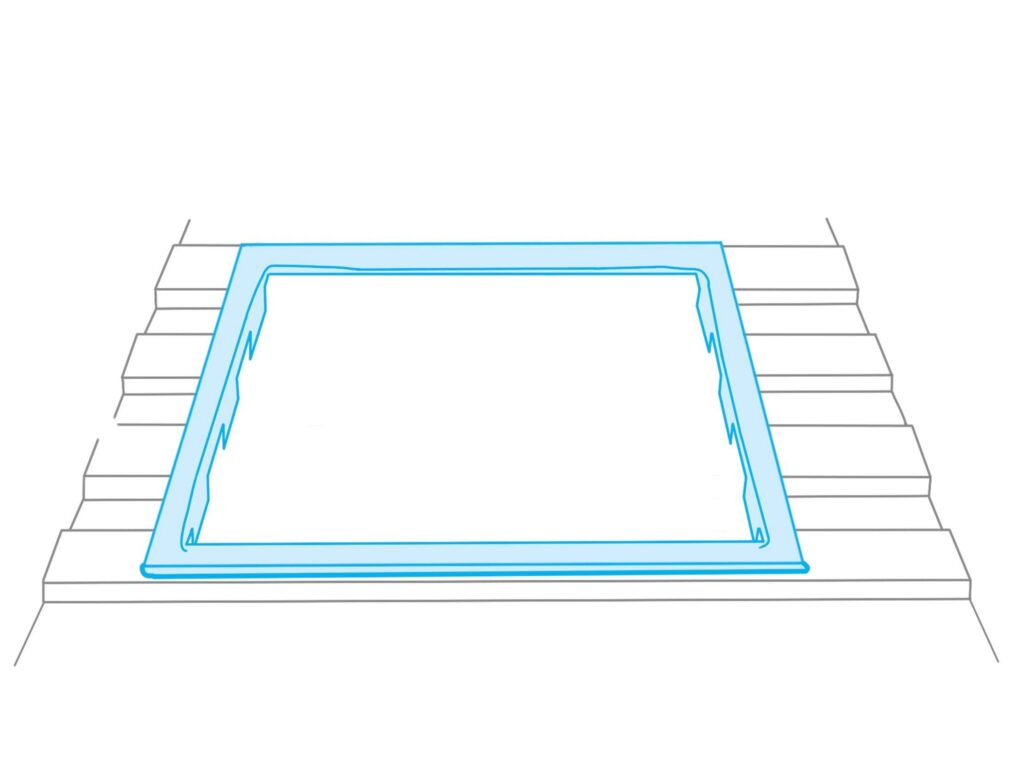
Another thing to consider when you install a Maxxair fan is the grooves on the roof. These grooves can be a nuisance, therefore we recommend positioning the fan on top of the grooves to minimise the excessive use of adhesive. Please see the diagram below.
Step 2 – measure, measure, and measure again
Time: 15 minutes
You know how the saying goes, measure twice, cut once. We recommend measuring at least 5 times for this particular job!
Measure the fan as this will dictate what size the internal frame has to be. Particularly, measure the external flange of the fan as that will be secured to the roof with screws that will bite into the internal frame.
Once you have collected all the measurements, create a cardboard template of the fan to be used in Step 4. Alternatively, you could place the fan on a piece of cardboard and draw around it.
Note: the cardboard template should only be the size of the hole that needs to be cut, and not the complete width of the fan and the flange.
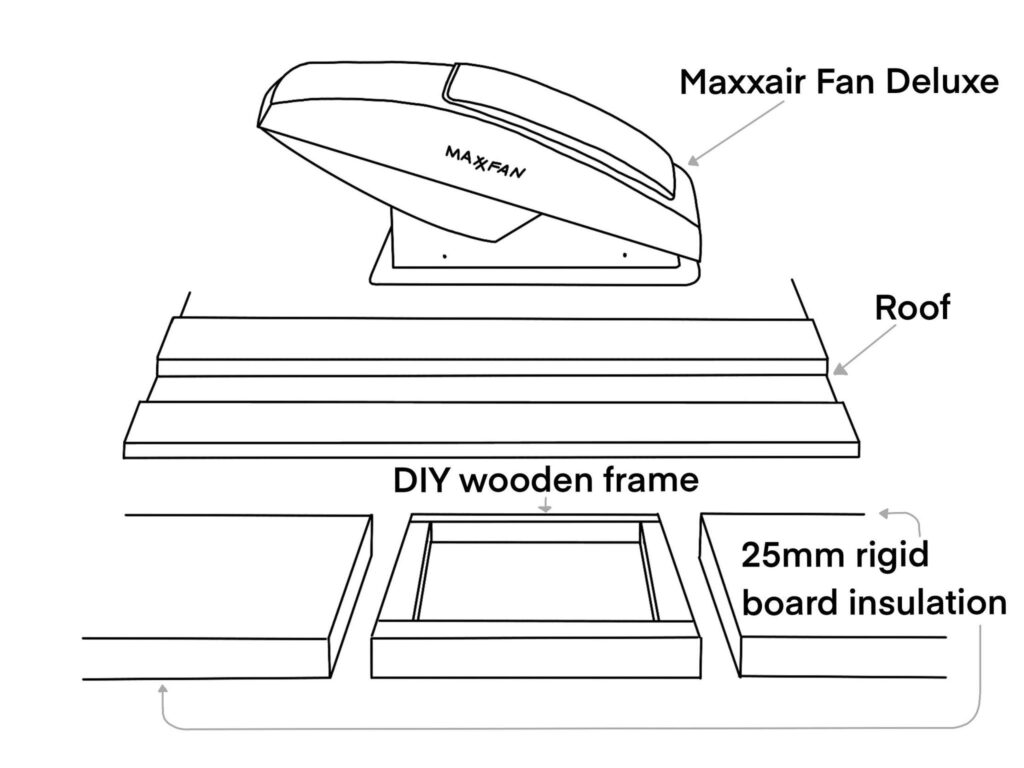
Step 3 – Create an Interior Frame
Time: 30 minutes
Using wooden battens, construct a frame that will be positioned on the inside of the van.
The primary function of the frame is for the screws to bite into when securing the fan to the roof of the van. This will create a strong and secure connection, minimising the risk of leaking.
The frame also provides a substantial bit of wood for the internal screws to bite into when securing the internal flange to the ceiling.
The battens you should use for constructing the frame should be the same size as the rigid board insulation used on the ceiling of the van to provide a flush finish – we used 25mm rigid board insulation and therefore opted for 25 x 25mm battens.
For more information regarding how to create an effective ceiling in a van, click here.
Step 4 – Drill pilot holes
Time: 5 minutes
Place the cardboard template of the fan on the roof (inside the van) and draw around it.
Drill a pilot hole in each corner. This will allow you to easily mark up where to cut through the roof from above. Make sure the pilot holes are large enough for your jigsaw blade to fit through.
Step 5 – Prepare for Cutting
Time: 5 minutes
Prior to getting on the roof of your van, it is important to take a few precautions within the van.
Firstly, attach a black bag to the underside of the roof in order to catch any loose filings that are created as a result of cutting into the roof. Make sure you don’t attach the bag too close to where the jigsaw will be penetrating the metal.
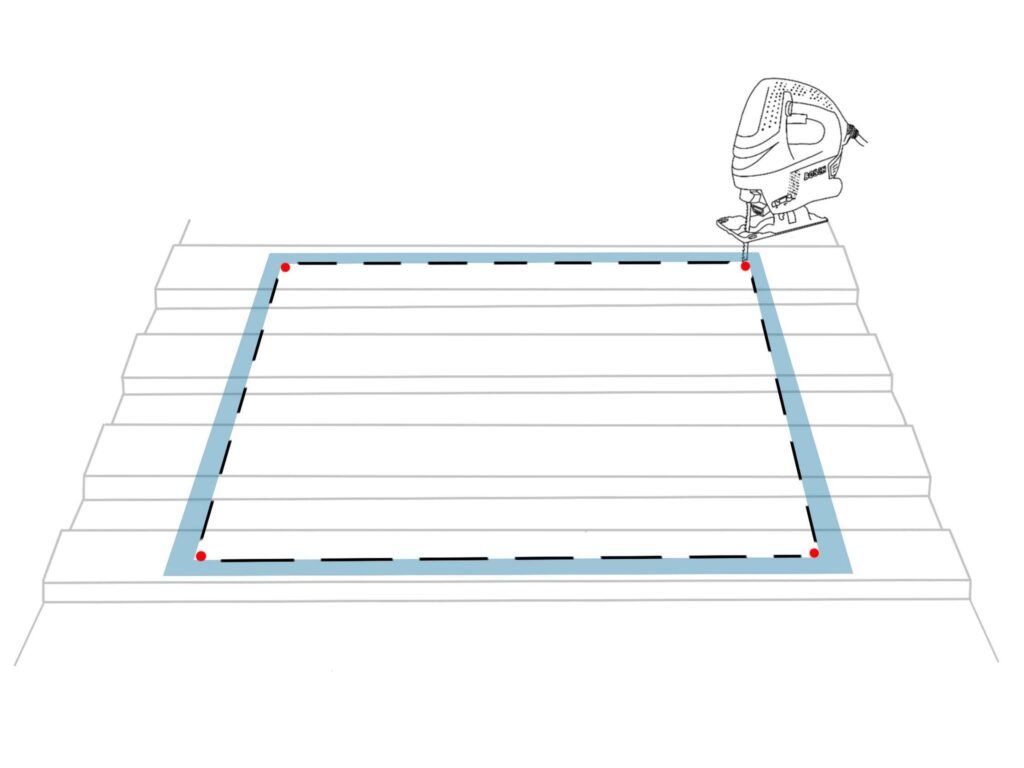
Step 6 – Cut the Hole
Time: 20 minutes
Finally… the exciting part – cutting the hole!
Firstly, get on the roof!
Bring with you:
- template
- jigsaw
- masking tape
- metal file
- sandpaper
Place the template on the roof between the pilot holes created earlier. It should align perfectly. You may wish to draw around the template in order to dictate where to apply the masking tape. Next, connect the dots with masking tape. This will act as your cutting guide. The masking tape will also provide a little bit of protection to the roof of your van by preventing scratches – not that anyone will see them!
Slowly and precisely follow the line and cut through the roof with a jigsaw.
The scrap bit of metal will fall into the black bag you placed under the roof earlier.
The edges may be quite rough. Use a combination of a metal file and sandpaper to smooth out the edges.
Step 7 – Clean and Treat the Hole
Time: 10 minutes
Once satisfied with the hole for the fan, it is important to treat it to avoid rust. Clean the hole with a damp microfibre cloth and apply Hammerite Kurust generously to the raw edges of the hole. Leave to dry for 20 minutes.
Step 8 – Trial Fit the Roof Receiving Flange
Time: 5 minutes
Place the flange on the roof of your van with the metal clips facing to the sides of your van.
Once happy with the position, draw around the flange with a pencil.
Step 9 – Attach the Interior Frame
Time: 40 minutes
Prior to applying any sealant to the roof of your van, attach the internal frame you made in step 3 to the inside of the van.
To do this, simply stick it to the roof using a strong adhesive (we used no more nails). Clamp it in position and allow it to dry for at least 30 minutes – we left ours to dry overnight.
Step 10 – Apply Sealant to the Traced Area
Time: 10 minutes
Next, perhaps the most important step, applying a generous layer of sealant – we used Sikaflex 522. Make sure to apply a thick solid bead of sealant the entire way around the hole (within the pencil mark you made in step 8). The sealant should be applied evenly in order to prevent the fan from leaking. When applying the sealant, it’s important to consider the grooves on the roof of the van and apply additional sealant where necessary in order to fill them out.
Instead of applying copious amounts of sealant, you may wish to use butyl tape to build up the areas on the roof that are in the grooves. We did not use this method and have not experienced any problems.
Step 11 – Fit the Roof Flange
Time: 10 minutes
Place the roof flange onto the sealant and press firmly down to get a good bond. Make sure the are no gaps when inspecting the perimeter of the flange. If there is a gap, or the sealant is undercutting the flange apply more. We recommend being extremely generous!
Note: you may wish to use a couple of clamps to hold the flange in position extra firmly.
Step 12 – Screw the Flange into Position
Time: 40 minutes
Screw through the designated screw holes on the flange. The screws provided with the fan are long enough to bite down into the interior frame. These screws create an even more watertight bond as they pull the flange down tight.
Apply sealant over the screws. Unfortunately, this doesn’t look neat, but must be done!
You may wish to run a wet finger along the sealant if there is any excess. This is purely cosmetic though!
Allow the sealant to dry for at least 30 minutes, we recommend leaving it overnight if possible.
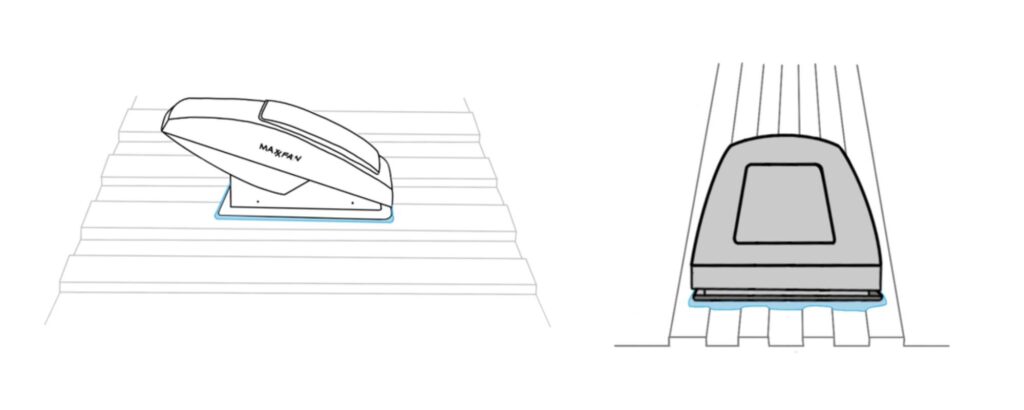
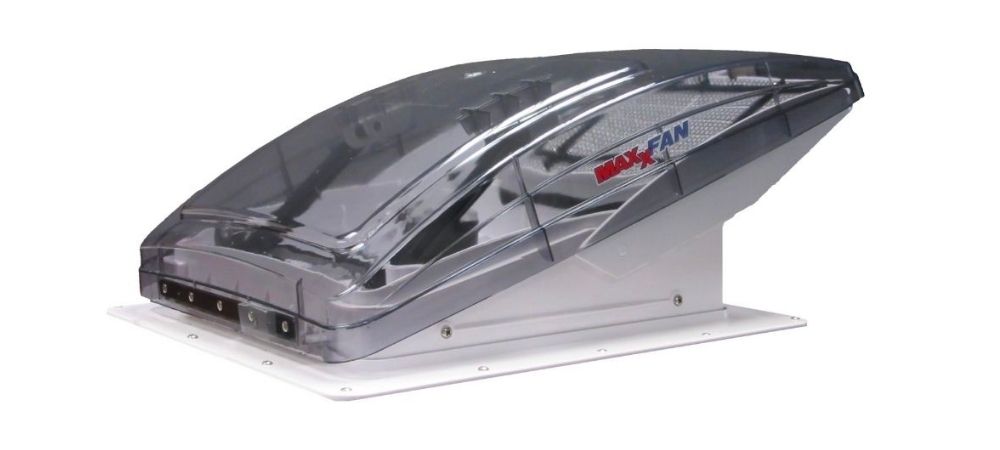
Step 13 – Install the Maxxair Fan
Time: 10 minutes
Once the sealant has dried, it is time to install the Maxxair fan. Position the large overhanging side to the back of the van and push it into place. Make sure the wires have a clear passage into the van and won’t get crushed. Once in position, screw the 4 screws provided into the side of the fan.
Note: this may require a bit of brute force to get the fan to align with the screw holes. Don’t be afraid of pushing it into position firmly!
Step 14 – Connect the Maxxair Fan to 12V power
Time: 10 minutes
Simply connect the wires that are dangling from the fan into your 12V circuit.
Step 15 – Attach the internal Flange.
Time: 10 minutes
Finally, attach the internal flange once the ceiling within your van has been completely installed (and painted).
The flange is simply screwed into the internal framing made in step 3. Use the screws provided with the fan for this step.
Although trying to install a Maxxair fan is one of the more daunting jobs, it is also one of the simplest. The fan comes with clear, concise instructions and there aren’t too many nasty surprises. Arguably, the most surprising part when you install a Maxxair fan is the need for brute force when putting it into position.
Feel free to ask us questions regarding how to install a Maxxair fan, whether it is about materials, price, time, or whatever else. You can always find us in the comments.
If you liked this post, pin it – pretty please xoxo