
Instructions
Step 1 – Measure the available space and buy a shower tray.
Due to the limited space within a van… picking the perfect space-saving shower tray is essential. The shower tray is the foundation of this project.
Firstly, decide on the location of your shower. This may dictate not only the size of the shower but also the shape of it. Measure the available area and start scouring the internet. Typically mainstream bathroom retailers don’t make small enough showers, so you may need to browse amazon and specific caravaning retailers.
Note: you may wish to make a shower out of cardboard to get a real feel for the size, as when enclosed a tiny shower is just that, TINY!
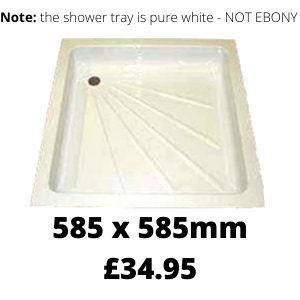
We opted for the smallest shower tray available online for our van. It’s a measly 585x585mm. We also liked it as it is deep.
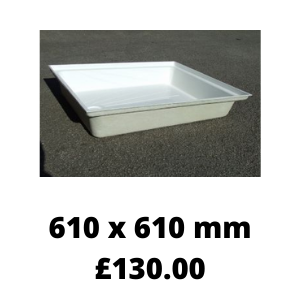
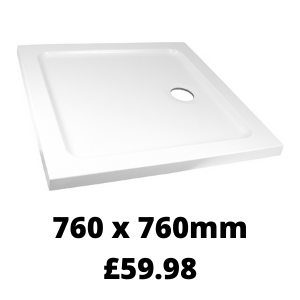
These are a few of the smallest showers we could find:
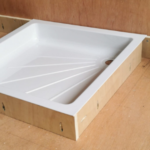
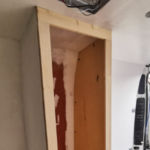
Step 2 – Support the shower tray
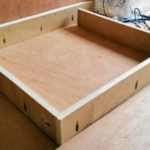
Create a frame to support the shower tray. We used 18mm plywood and cut it to the correct height, however, 18mm battens may work too depending on the depth of the shower tray.
Cut the wood to length and create a frame. The front and back pieces of the shower tray should be the longer pieces and the sides should be the shorter pieces. Make sure the right angles are accurate. Secure the frame to the floor of your van with pocket hole screws.
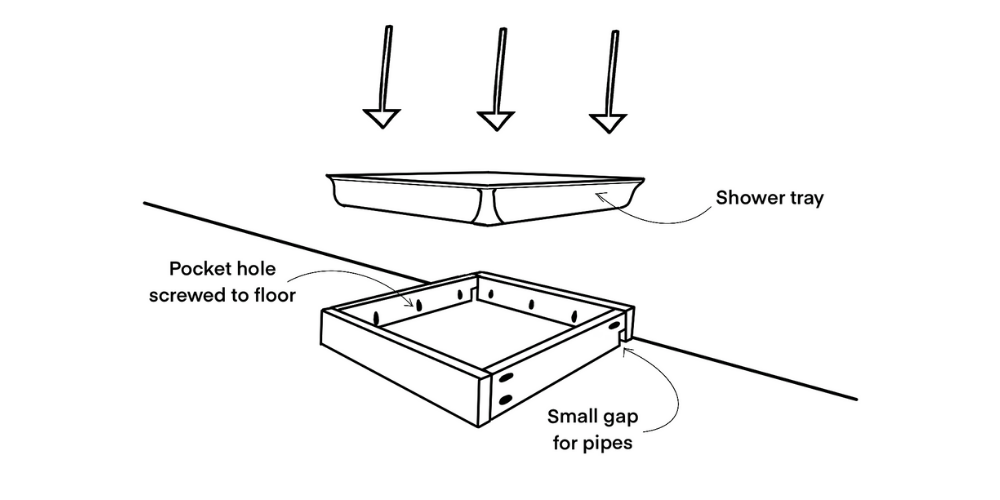
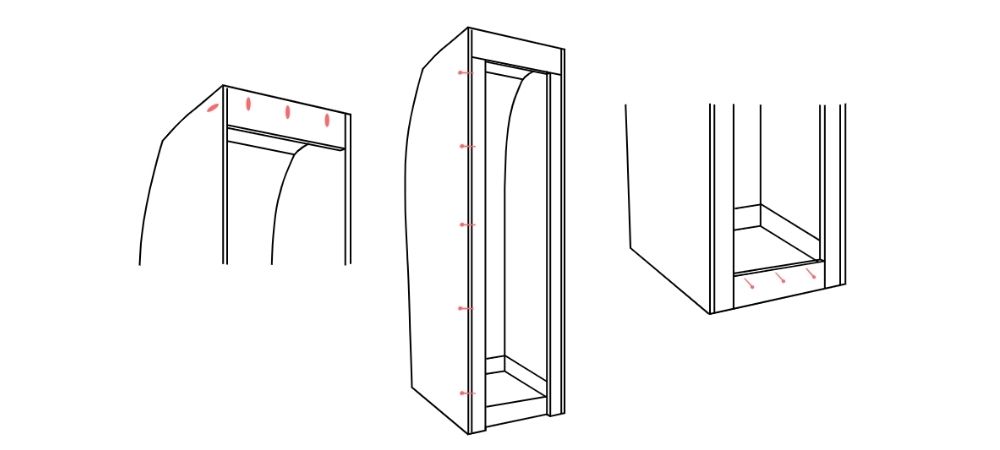
You may wish to leave a small area at the back unsupported in order to allow water pipes and electrical wires to pass behind the shower. See diagram.
Once the frame is secured to the floor trial fit the shower tray by placing it in position.
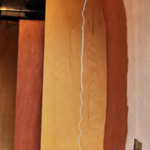
Step 3 – Mark where the walls will align on the roof
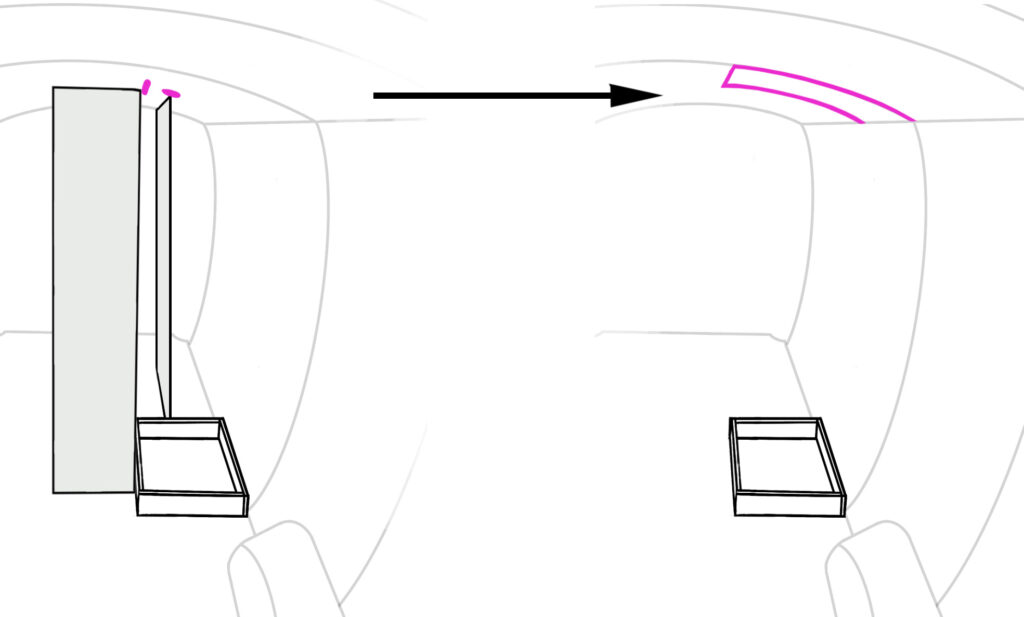
Mark on the roof in pencil where the top of your shower will be. It should be directly above the shower tray.
Unfortunately due to the curving nature of van walls, finding this exact square is trickier than expected. Especially as spirit levels are no use unless you are parked somewhere extremely level!
Firstly, using a piece of wood with a 90-degree angle, position it on the floor pressed firmly against the frame in step 2. See diagram. Mark on the roof where the wood meet.
Note: you may need to involve a second piece of wood to ensure it reaches to roof.
Repeat this for the side and front of the shower tray. From the markings you have made, create a perfect square to match the size of your shower tray. Use a set square and a ruler to help with accuracy.
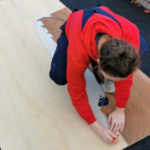
Step 4 – Create the shower walls
Firstly, create a template of the side walls by following the steps linked in the post here (How to create a curve template).
Note: the side walls, should come out as far as the frame, not past it.
Once you are satisfied with the template, draw around it onto 12mm plywood. Use the straight edge of the plywood to match up with the straight edge of the template.
Using a jigsaw, carefully cut along the line.
Once you have cut the ply to size, sand off any rough edges.
Finally, repeat this for the other side wall.
Step 5 – Secure the side walls of the shower.
Many people opt to create a frame to give the shower walls extra support. This is completely unnecessary if you do it right… like us!
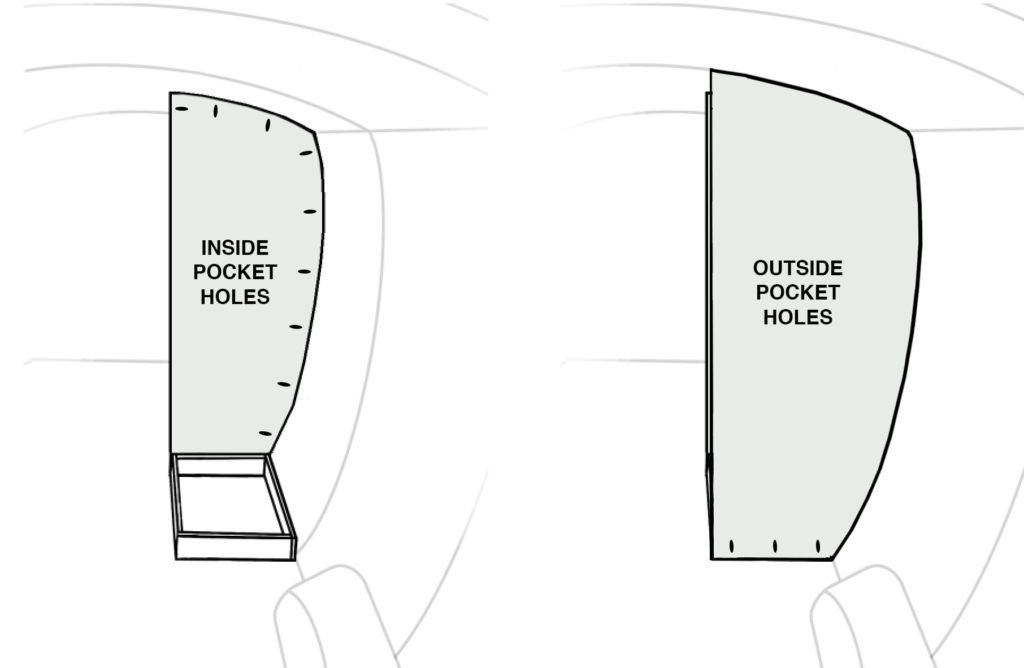
Drill pocket holes in each of the side walls. The pocket holes should be on the inside of the shower, to keep the external walls looking clean (except the pocket holes on the bottom of the walls, unfortunately.)
We recommend:
- 6 pocket holes on the curves side edge
- 3 pocket holes on the bottom edge
- 2 pocket holes on the roof
- 1 pocket hole at the top on the front straight edge (essential for step 7)
Once the pocket holes are drilled put the wall into place. The wall should be flush against the shower tray frame, tight into the back wall curve, and in line with the marking on the roof you made earlier.
Once happy, screw the wall into position.
Note: the wall will not be as secure as you may want. This will be rectified in step 7, don’t worry… yet!
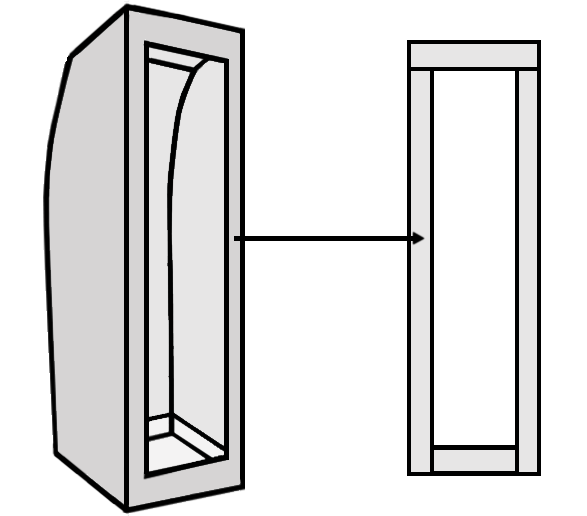
Step 6 – Create the front frame of the shower
The front framing pieces of the shower cubicle will not only improve the overall look of the shower, but more importantly, strengthen the structure.
Firstly, measure the length of the front of your shower (floor frame (585mm) + 2 x sidewall depth (12mm)). This will dictate how big your front panels will be.
You should use 70 x 18mm battens for a uniform finish.
Top panel measurements:
- Width: shower (585mm) + depth of side walls (2x 12mm)
- Height: 70mm
- Depth: 12mm
Bottom panel measurements:
- Width: width of the shower (585mm) – width of the two side panels (2x 70mm)
- Height: height of the shower tray (90mm) + 40mm
- Depth: 12mm
Side panels measurements
- Width: 70mm
- Height: height from the floor to the roof of the van – the height of the top panel (70mm)
- Depth: 12mm
Step 7 – Secure the front panels
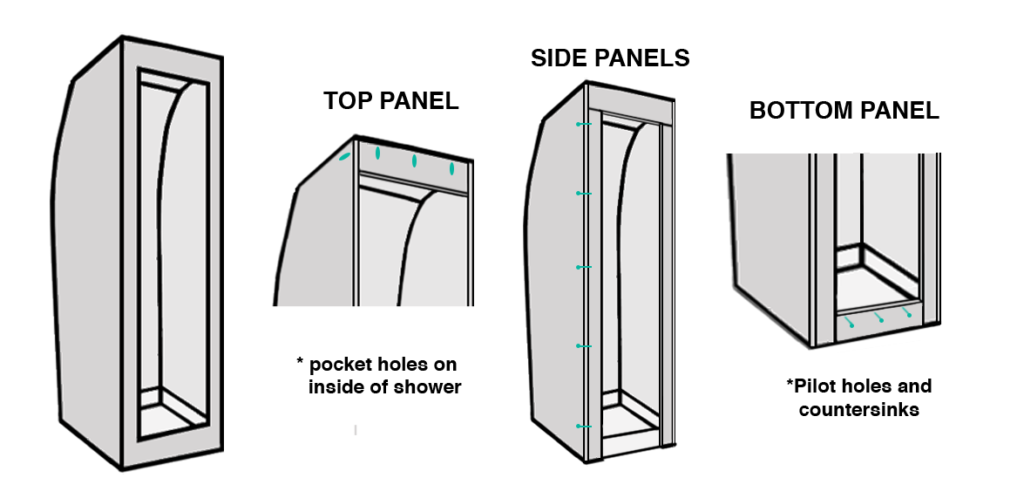
Top panel:
- On the inside side of the panel, drill 3 pocket holes evenly spaced.
- Position the panel so the edges are completely flush, and it is firmly pressed up against the roof.
- Screw into position using the pocket holes.
- Use the pocket hole at the top of each side panel to secure them to the front panel
Side panels:
- Drill 5 pilot holes at regular intervals down the side of each panel. Make sure they align with the 12mm ply behind.
- Countersink and screw the panels into position using 25 mm screws.
Bottom panel:
- Position the panel so the edges are completely flush, and it is firmly pressed onto the floor.
- Drill 3 pilot holes along the front of the panel. Make sure they are level with the shower tray frame behind.
- Countersink and screw the panel into position using 25 mm screws
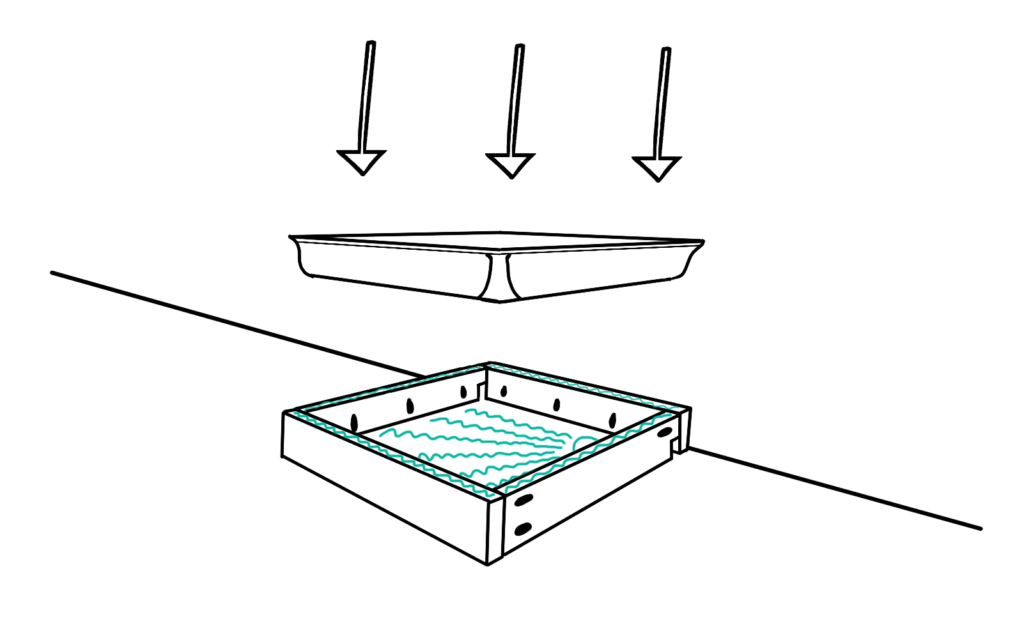
Step 8 – Permanently fit the shower tray
Trial fit the shower tray one last time to make sure it still fits comfortably before applying adhesive.
Apply a continuous, zig-zag bead of adhesive on the underside of the lip of the shower tray. You will also want to apply adhesive to any part of the base that touches the floor.
Put the shower tray into position and press firmly down to create a strong bond.
Step 9 – Finishing touches
Caulk any external screws. Once set, sand them down to create a smooth area to paint.
You may also wish to soften the sharp external corners of the shower cubicle by sanding them down slightly.
Vacuum the shower clean in preparation to take on the next stage of the shower build… making it waterproof.
Conclusion
Once you have completed these steps you will be in a great position to start cladding your van shower, and more importantly making it waterproof!
Feel free to ask us questions regarding installing a shower, whether it is about materials, price, time, or whatever else. You can always find us in the comments.
Next Step: Cladding the shower – aqua panels.


Hola me interesa saber si venden los materiales
This is great.
Do you have thoughts on how to deal with the door to the shower?
Thank you
Richard
Hi there, we never really put any thought into how to install a door as we knew we were going to use a shower curtain to leave the space as open as possible.
Sorry I can not be of more assistance!
Christie
Pingback: How To Install Aqua Panels In Your Van - This Pair Go There