Time: 30 minutes
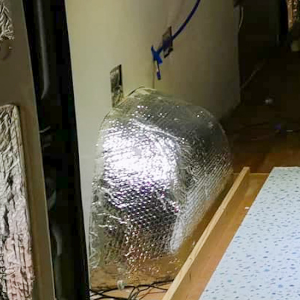
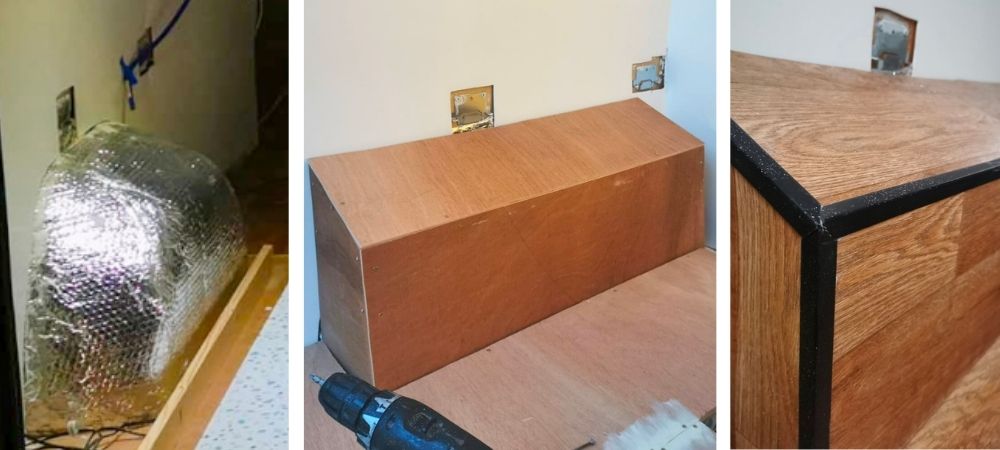
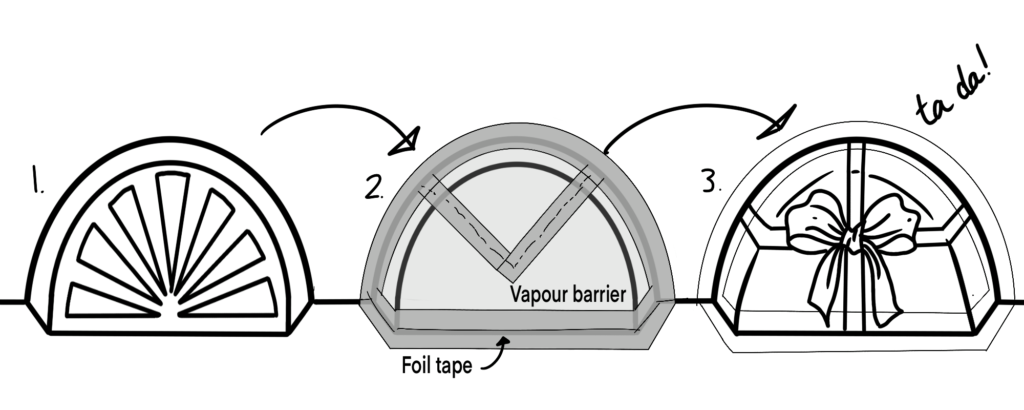
Wrap the vapour barrier foil around the wheel arches (just like you are wrapping a Christmas present). Connect the vapour barrier to the floor and walls to provide a seamless barrier. Use foil tape to secure the vapour barrier down, and to connect it to adjoining areas.
Note: the vapour barrier is insulated, however, not very much. If you intend on using your van in a cold climate you may wish to stuff loose-fill insulation in between the vapour barrier and the metal wheel arches.
Step 2 – Finalise the layout
Firstly, measure wheel arches (length, width, and height). From these measurements calculate the size of the box you will need to surround it. We recommend adding 20mm to all measurements. This will not only account for the depth of the ply used to construct the boxes but will also give you a small safety net if the measurements aren’t as exact as you may have thought!
Note: the shape of the boxes can be simple and rectangular or you may wish for them to slant like ours. This was done so our bed cross beams could fit snuggly above.
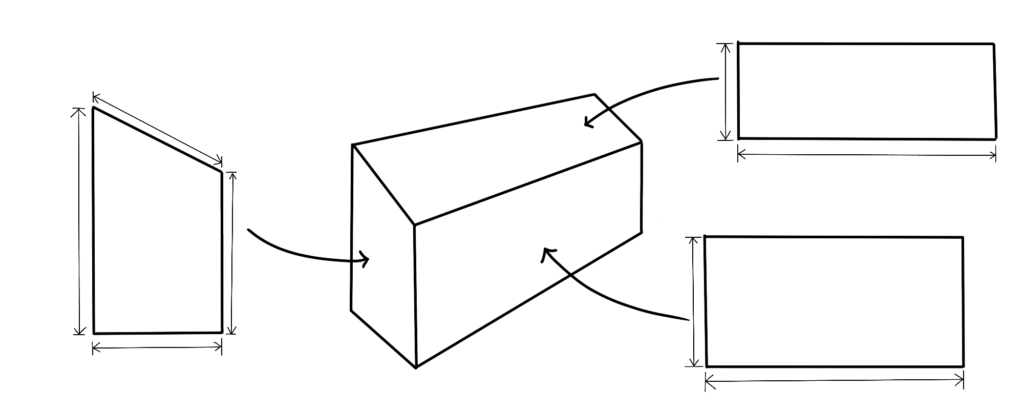
Once you have finalised your measurements and layout, create a diagram with measurements of each piece (length, width, and height). This will help avoid confusion. The wheel arches are symmetrical so you can duplicate the measurements for the opposite side.
Step 3 – Cut the plywood sheet to fit the wheel arches
Using the measurements taken in the previous step, mark onto 9mm plywood where you intend on cutting.
Using a jigsaw, follow the lines on the ply to cut out the panels to construct the wheel arch boxes from.
Note: you can use thinner plywood if the wheel arch boxes are not going to be supporting any/minimal weight
Step 4 – Cut out small supporting battens
Cut battens to fit in the corners of the boxes. This will not only provide something for the screws to bite into, but also strengthen the box and make it more rigid.
The battens don’t need to be a particular size and can be made from scrap timber. We recommend using nothing smaller than 20 x 20x 80mm.
Step 5 – Attach the battens to the plywood
The diagram below indicates where to attach the battens onto the ply.

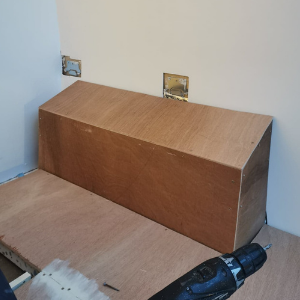
Step 6 – Connect the side and front panels together
- Align the front panel and a side panel.
- Drill a pilot hole through the front panel, making sure it bites into the batten attached to the side panel.
- Use two 20mm screws to secure the front to the side.
- Repeat steps 1-3 to attach the second side panel.
- Repeat steps 1-4 for the other wheel arch
Step 7 – Secure the wheel arches panels to the wall
- Position the front and side panels configuration against the wall. Make sure it is completely flush.
- Drill pilot holes through the back battens into the wall
- Screw it in position using two 30mm screws on each batten.
Step 8 – Insulate the wheel arches
For extra warmth, you may wish to fill the cavity with loose-fill insulation. Although it may not make a massive impact… every little helps!
Step 9 -Attach the top panel of the box
Align the top panel so it sits neatly against the wall and flush with the front panel. Drill pilot holes through the top panel into the battens placed below.
Screw the top panel into position using 20mm screws.
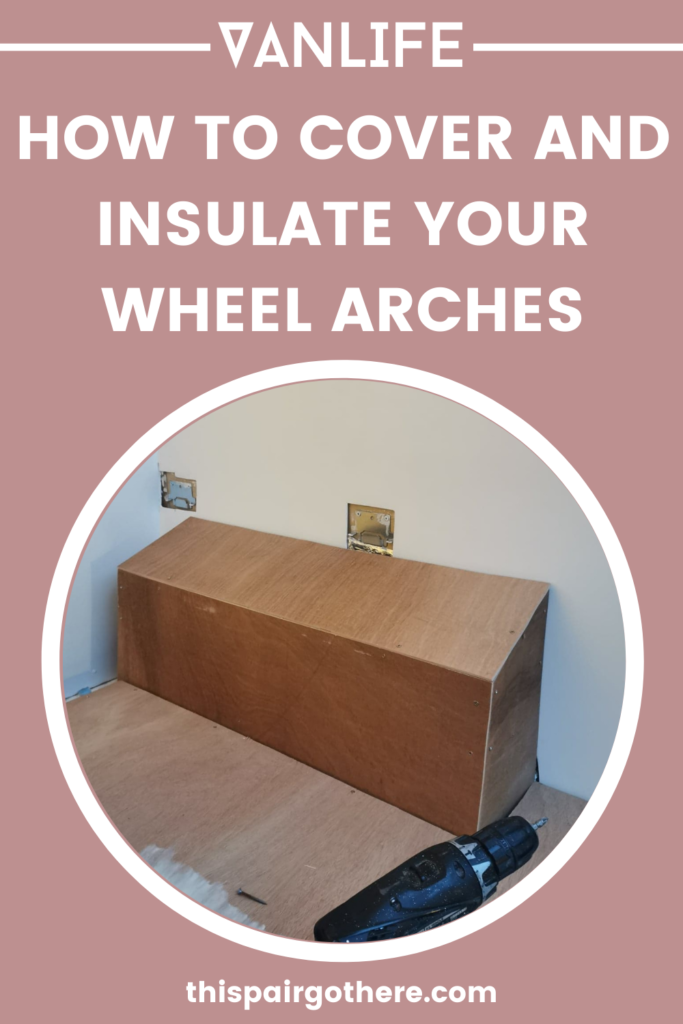
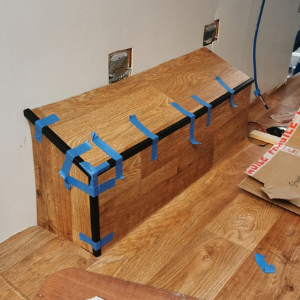
Step 10 – Finish the box
Firstly, sand down any rough edges.
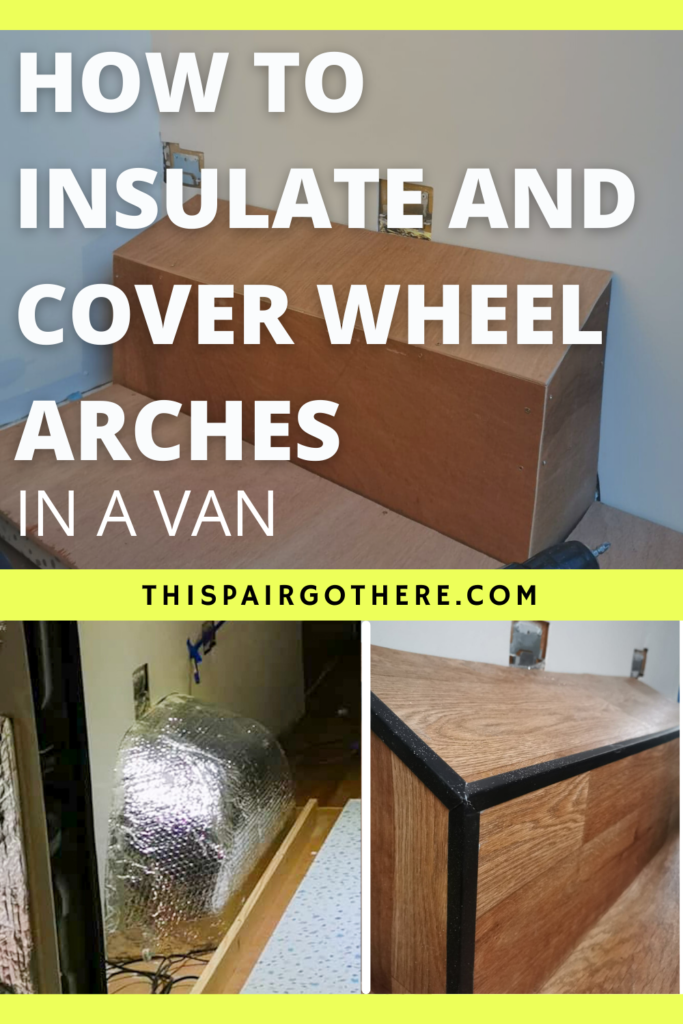
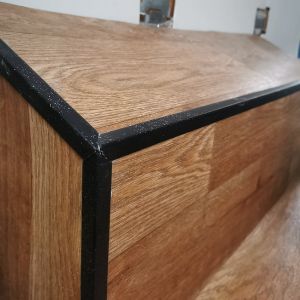
Depending on your persuasion you may wish to paint, clad, or carpet the wheel arch boxes. This step is completely optional as the boxes don’t look too shabby left as they are.
We chose to continue our vinyl flooring up and over them and finish them with some black plastic trim.
Conclusion
Insulating and boxing in the wheel arches is one of the easier jobs you will face when converting a van. However, there is ALWAYS room for error, therefore, the phrase measure twice, cut once, is extremely applicable here.
Feel free to ask us any questions, whether it is about materials, price, time, or whatever else. You can always find us in the comments.
Next Step: Laying your choice of flooring. We recommend vinyl flooring.
IF YOU LIKED THIS POST, PIN IT!… PRETTY PLEASE XOXO