
VAN COnversion diary
Welcome to the mundane day-to-day ramblings of our van conversion.
This page follows us through the highs and lows of converting a van with almost no experience.
We document every day we work on the van so you can get an idea of what you’re getting yourself into if you decide converting a van if for you!
Note: we expected to complete this build 2 months…. if only!
Welcome to the mundane day-to-day ramblings of our van build.
This page follows us through the highs and lows of converting a van with almost no experience.
We document every day we work on the van so you can get an idea of what you’re getting yourself into if you decide converting a van if for you!
Note: we expected to complete this build 2 months…. if only!!
Stripping the van.
Windows and sound deadening.
Flooring.
Reversing camera, Maxxair fan, and early wiring.
Maxxair fan, insulation and not framing our van.
Insulation and creating “floating” bunk beds.
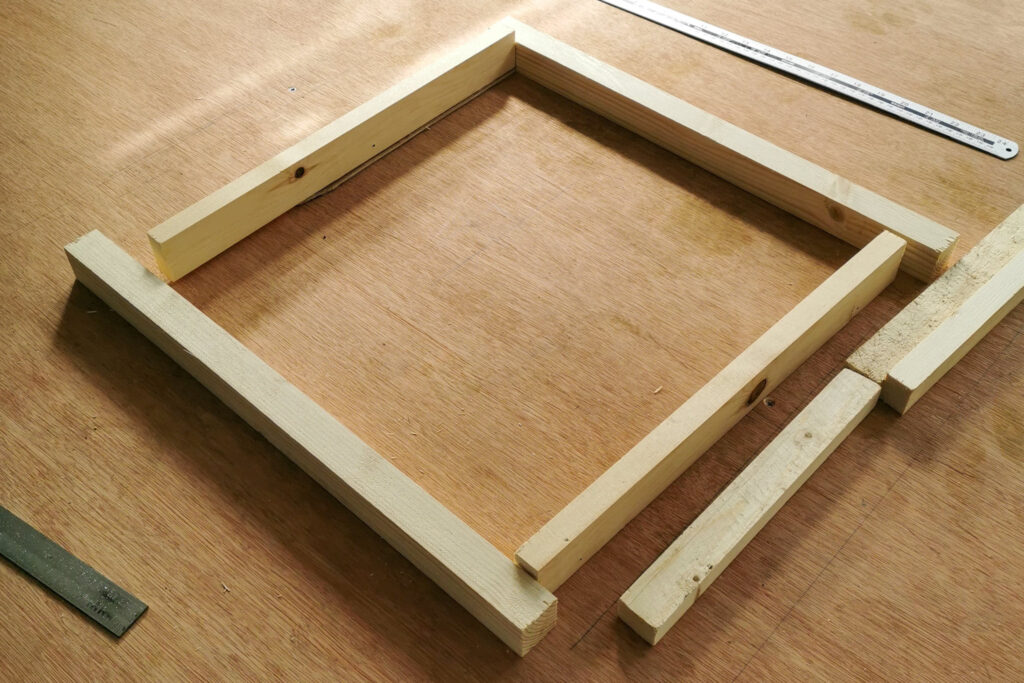
Creating a window frame and bed frame.
Window frame and wall panel.
Window frame, underslung grey water tank, insulation, and panelling.
Installed shower tray and walls, fitted roof panels and lights
Unboxing solar panels, constructing sofa area, and laying
Installing solar panels and fitting sheet vinyl flooring
Created pull out picnic benches from the garage, and cover the wheel arches.
Fitted aqua panels, cladded bulkhead, finished garage storage, and fitted the water tank.
Wiring the van electrics – including; batteries, DC to DC charger and solar controller.
Installed the diesel heater, played around with the electrics, and stated fitting out water tank.
Continued wiring up the electrics, fitted a Lagun table mount and started the plumbing.
A plumbing disaster, a bit of sofa construction, and more electrics.
A lot of plumbing and painting.
Creating an upright practical storage unit.
A little bit of plumbing, and constructing our storage unit.
Finishing our storage unit and creating a curved coffee table.
Stripping the van.
Windows and sound deadening.
Flooring.
Reversing camera, Maxxair fan, and early wiring.
Maxxair fan, insulation and not framing our van.
Insulation and creating “floating” bunk beds.
Creating a window frame and bed frame.
Window frame and wall panel.
Window frame, underslung grey water tank, insulation, and panelling.
Installed shower tray and walls, fitted roof panels and lights
Unboxing solar panels, constructing sofa area, and laying
Installing solar panels and fitting sheet vinyl flooring
Created pull out picnic benches from the garage, and cover the wheel arches.
Fitted aqua panels, cladded bulkhead, finished garage storage, and fitted the water tank.
Wiring the van electrics – including; batteries, DC to DC charger and solar controller.
Installed the diesel heater, played around with the electrics, and stated fitting out water tank.
Continued wiring up the electrics, fitted a Lagun table mount and started the plumbing.
A plumbing disaster, a bit of sofa construction, and more electrics.
A lot of plumbing and painting.
Creating an upright practical storage unit.
A little bit of plumbing, and constructing our storage unit.
Finishing our storage unit and creating a curved coffee table.
11th August 2020
We Bought a van!
Week 1
A week fueled by the excitement of becoming van owners. A lot of demolition, cleaning, and painting! We even managed to fit a window!
Let the van conversion begin!
Relevant posts include:
Day 1
13th August 2020
Let the fun begin…
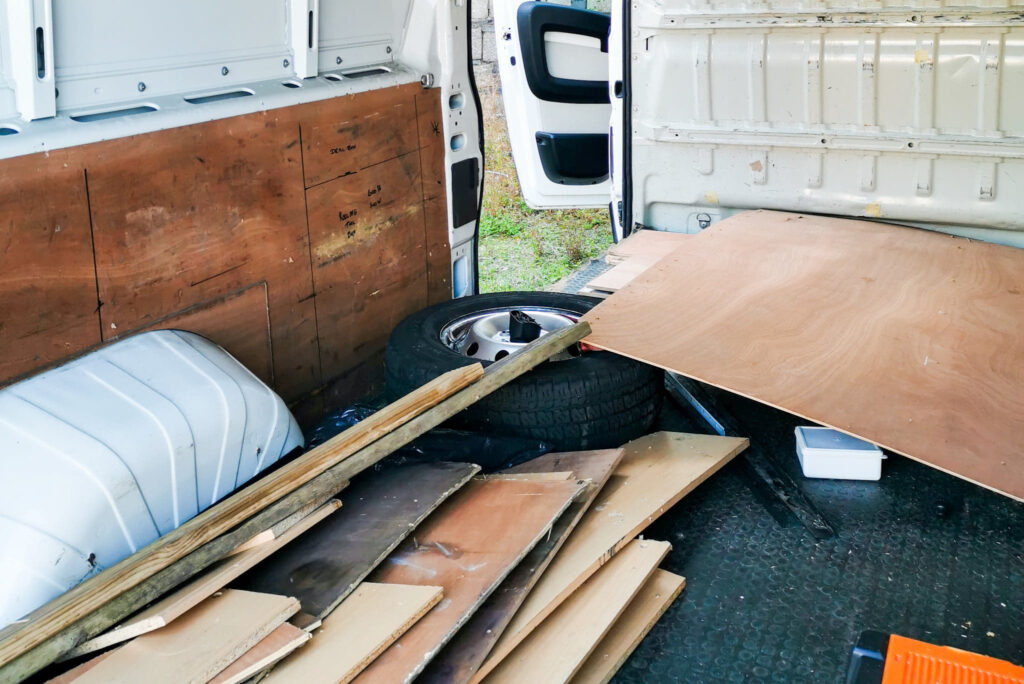
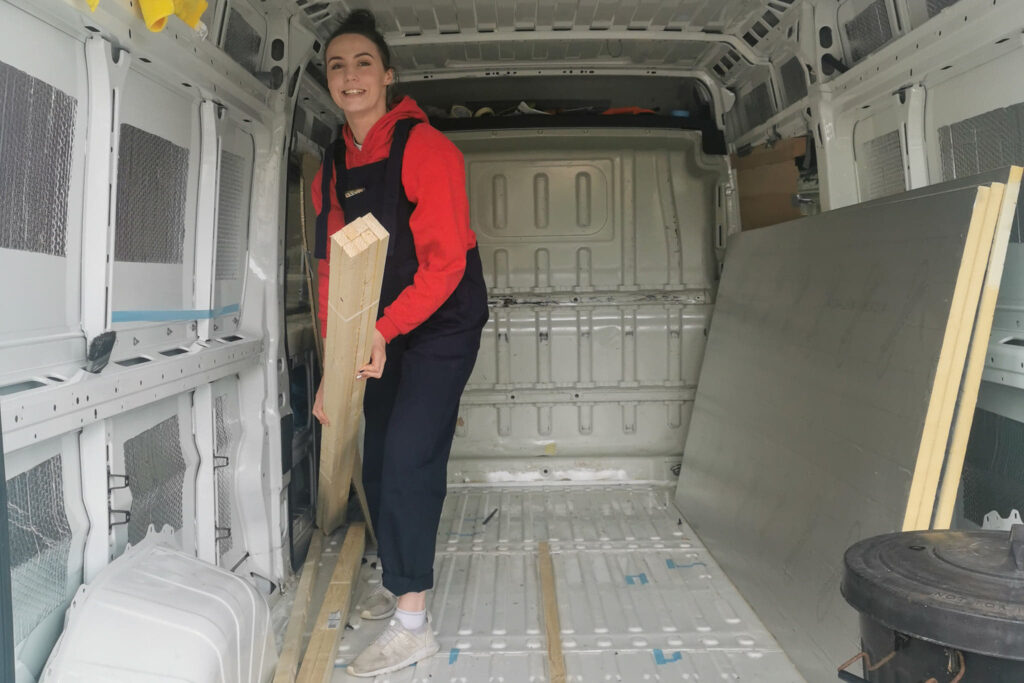
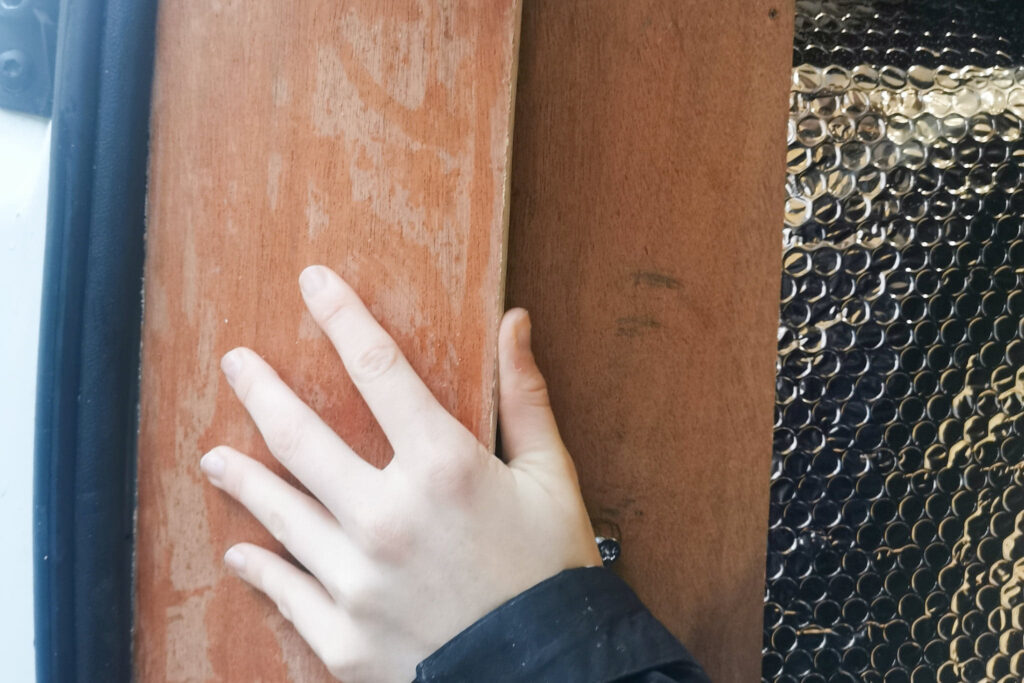
Firstly, we stripped out the shelving that was installed when we received the van. After removing no less than 200 screws it was time to take a peek at what was hiding behind the ply panels on the wall. Thankfully there were no nasty surprises!
We removed all the panels with no difficulty at all – hooray!
Unfortunately, removing the flooring wouldn’t be as simple!
There was only one way to get the floor up – it was time to call in the big dog – the crowbar. The subfloor had almost completely rotted away and we were left with a moldy, smelly mess.
Thats a job for tomorrow!

Day 2
14th August 2020
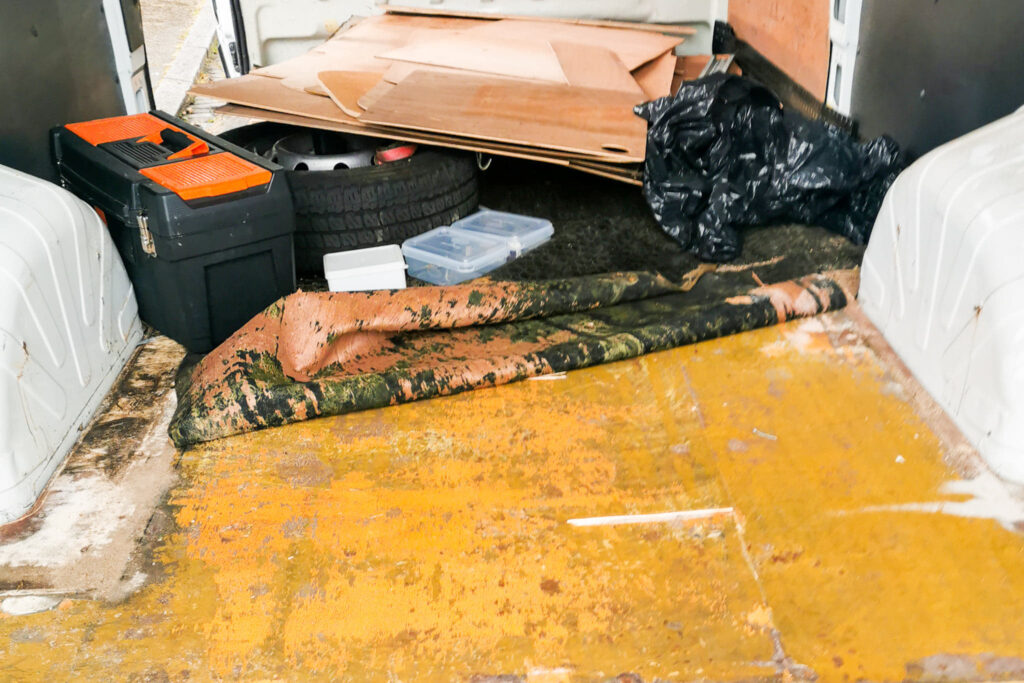
As we opened the back doors of the van to begin another day of grafting a foul stench hit us in the face. It literally smelt like our guinea pigs cage on a particularly smelly day (R.I.P. Inca, Bertie and Alfie), or like extremely potent cat piss!
Because we removing some of the flooring yesterday the mouldy subfloor was free to stink out the van – and boy did it!
After acclimatising to the stench it was time to rip the floor out for good. Unfortunately, because it was so rotten it was no easy feat.
Today also marked our first trip to the skip! First of many, we presume!
Finally we gave our van a much need bath to get her smelling a bit more tolerable!
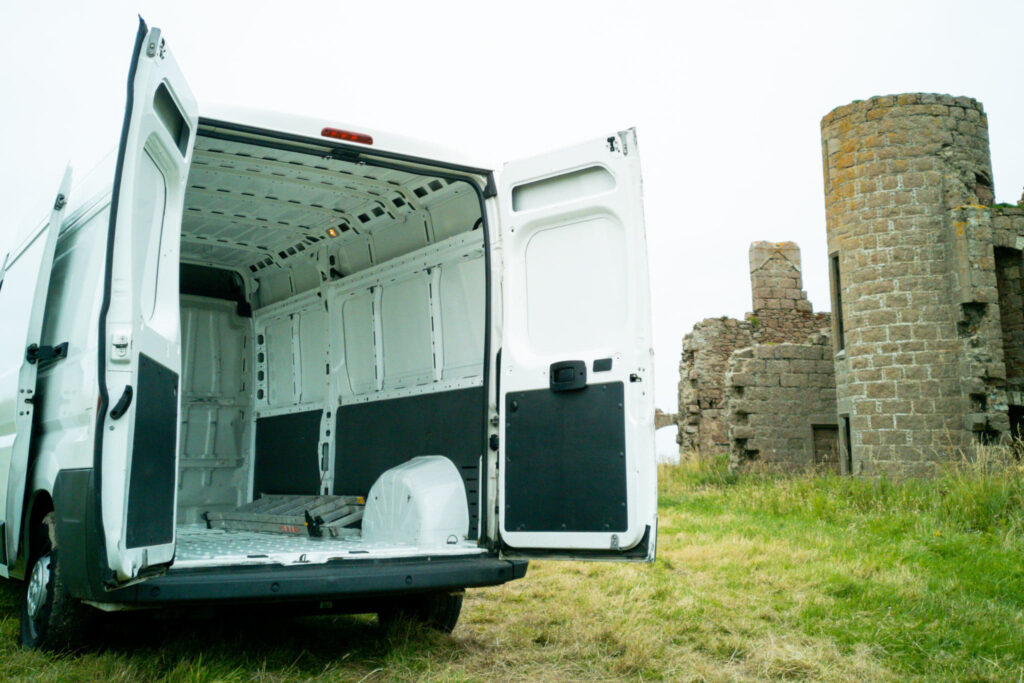
Day 3
15th August 2020
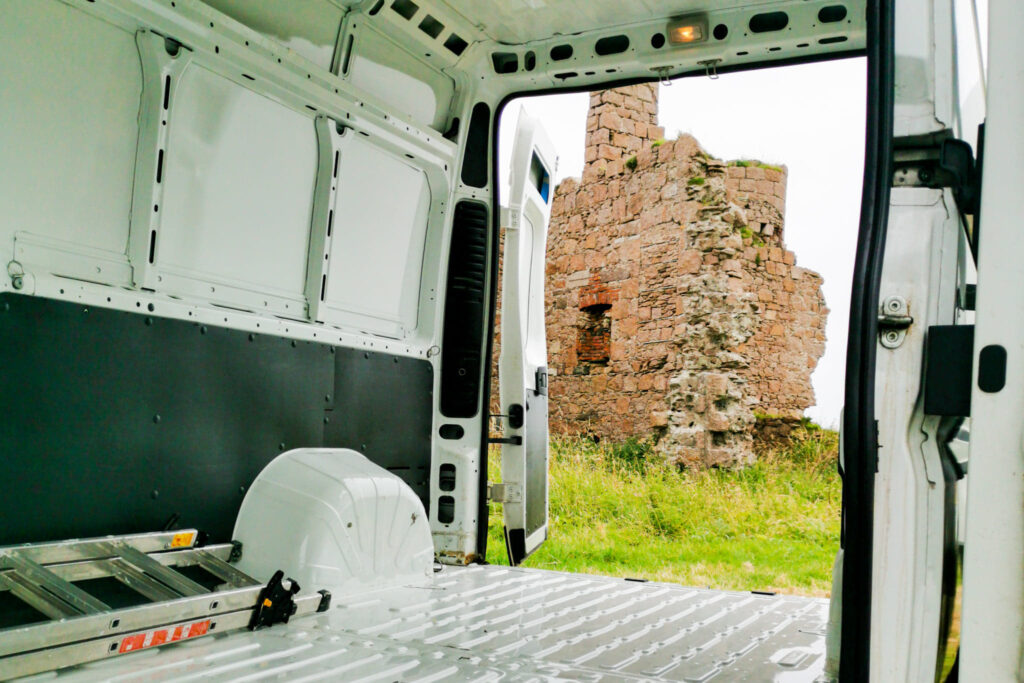
After a morning of cleaning the van it was time to take our van for a photoshoot! We obviously needed to get some before photos, and we definitely wanted a pretty impressive background. Therefore, we took her where any self-respecting Scot would – a castle, Slains Castle to be precise! She’s an absolute stunner – the van… and the castle, I guess!
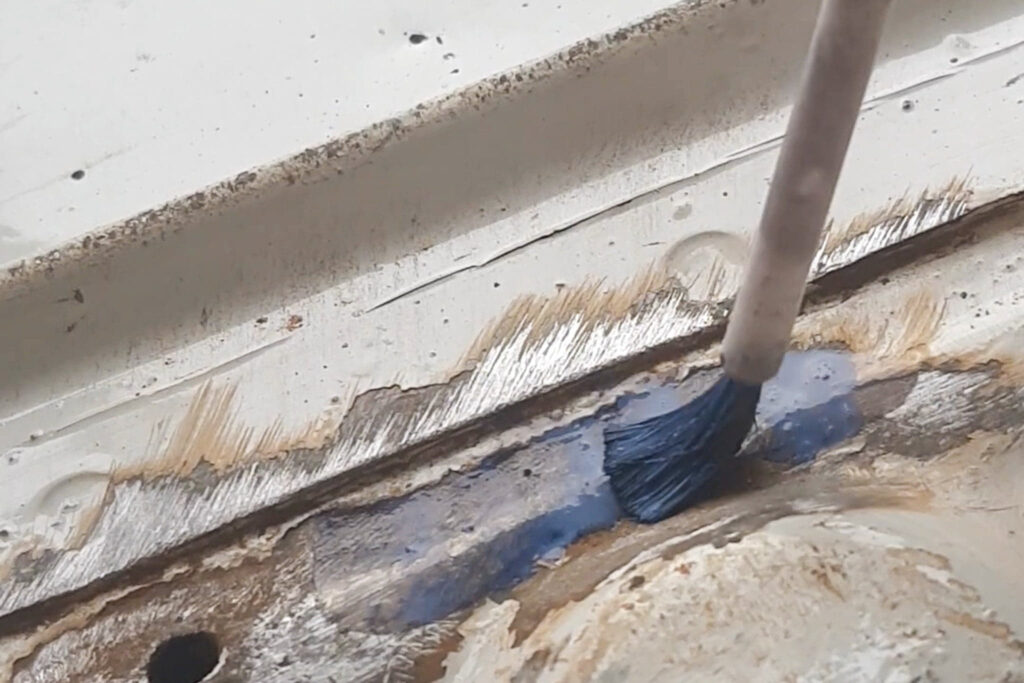
After, we went straight back to fixing the vans minor flaws! Since the floor was so rotten there were a few TINY specks of rust on the floor that we sanded down and treated with Hammerite Kurust.
Day 4
16th August 2020
We continued “giving the van a factory refresh”. This included:
- Removing/treating more specks of rust
- Removing the black plastic panels
- More cleaning (it’s never-ending!)
- Painting the treated sections white.
She spruces up a treat!
We started discussing possible layout ideas and even ordered some windows. It feels like it all happening so quickly.
Day 5
17th August 2020
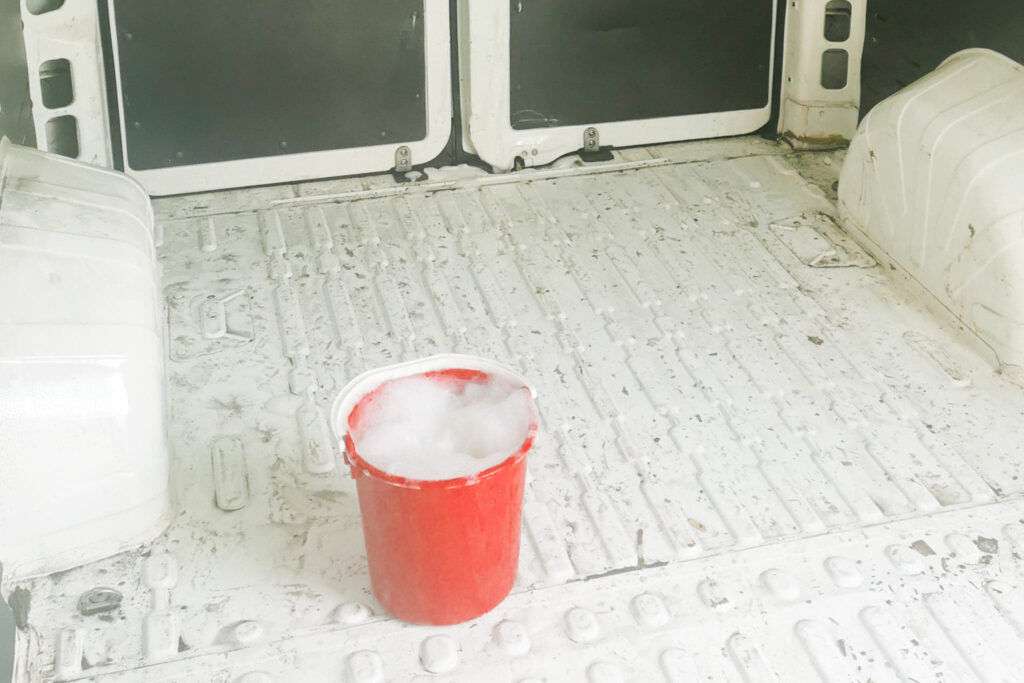
Painting, painting, and more painting!
We use Hammerite White (smooth) for the perfect full-coverage finish! If only they made make-up with the same coverage!
It’s crazy how much time cleaning and sprucing up can take. Even in these early stages of our van conversion, we are over obsessive perfectionists!

Day 6
18th August 2020
Finally doing the finishing touches to the paintwork on the floor. We are absolutely ecstatic to be done with that thankless task, but if it prevents rust and keeps the van in top-notch condition then count us in!
Today we also received a very special package. The van will be looking like a new woman tomorrow when we are done with her!!

Day 7
19th August 2020
A week into the build and she still looks like, well, a work mans van. But not for much longer.
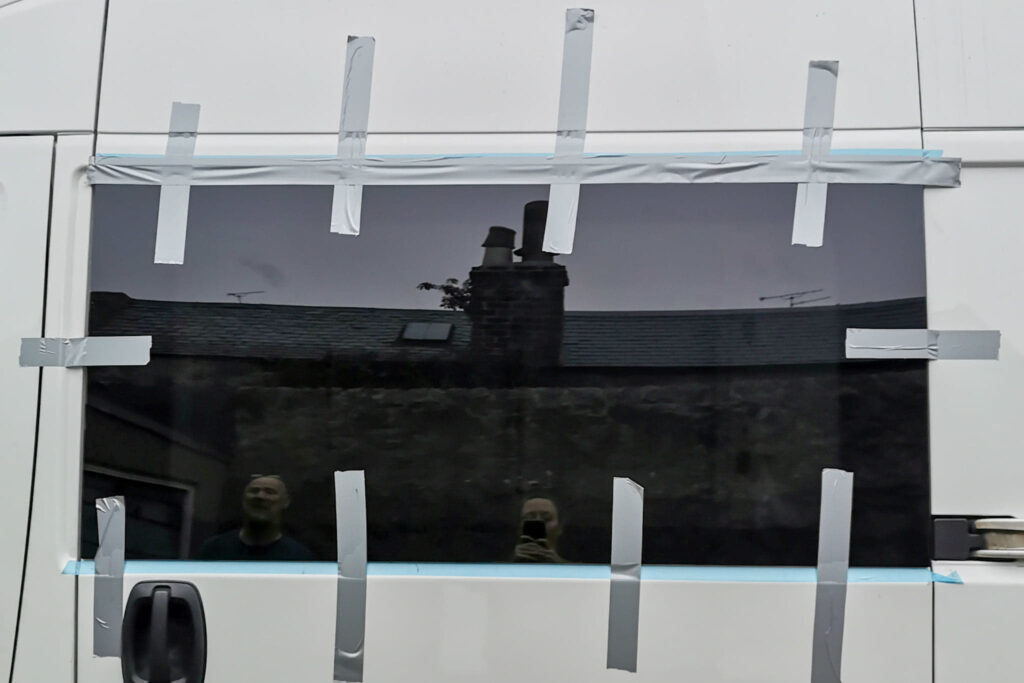
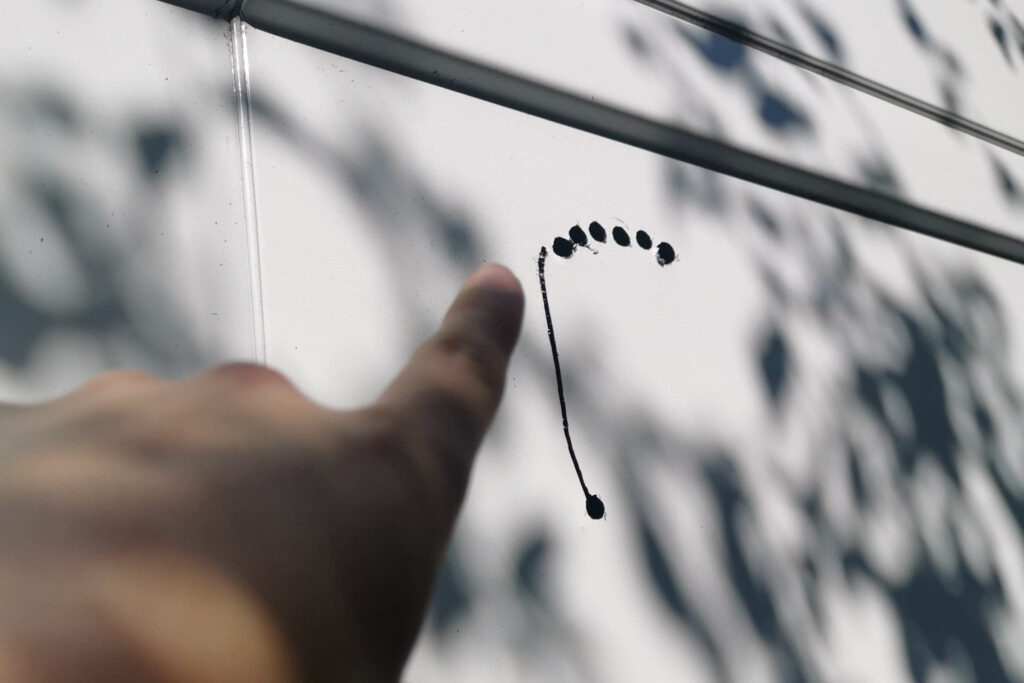
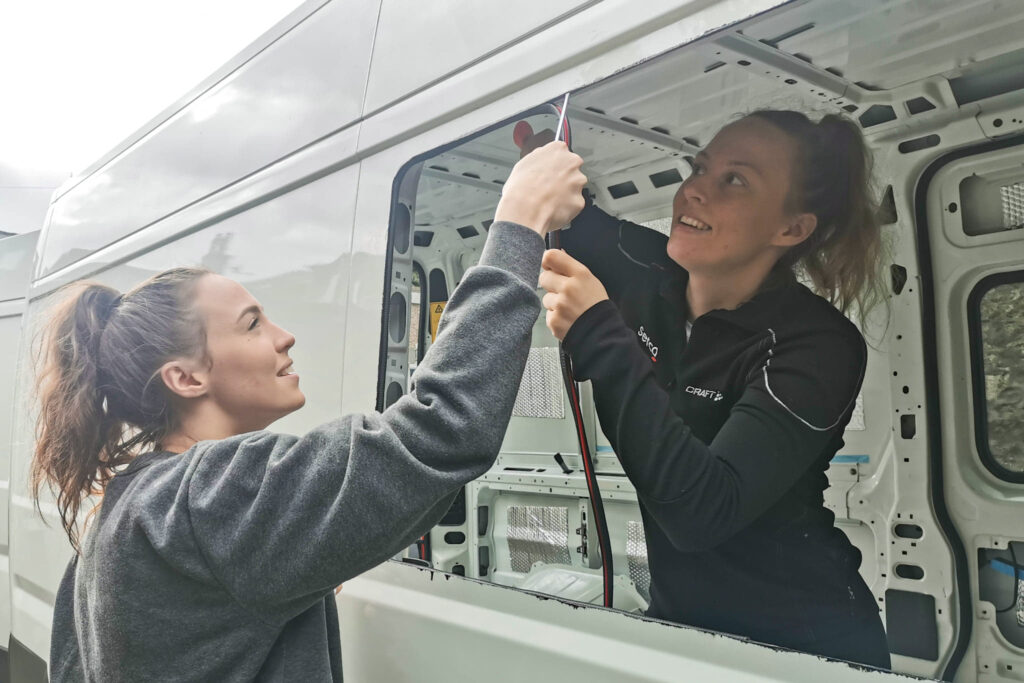
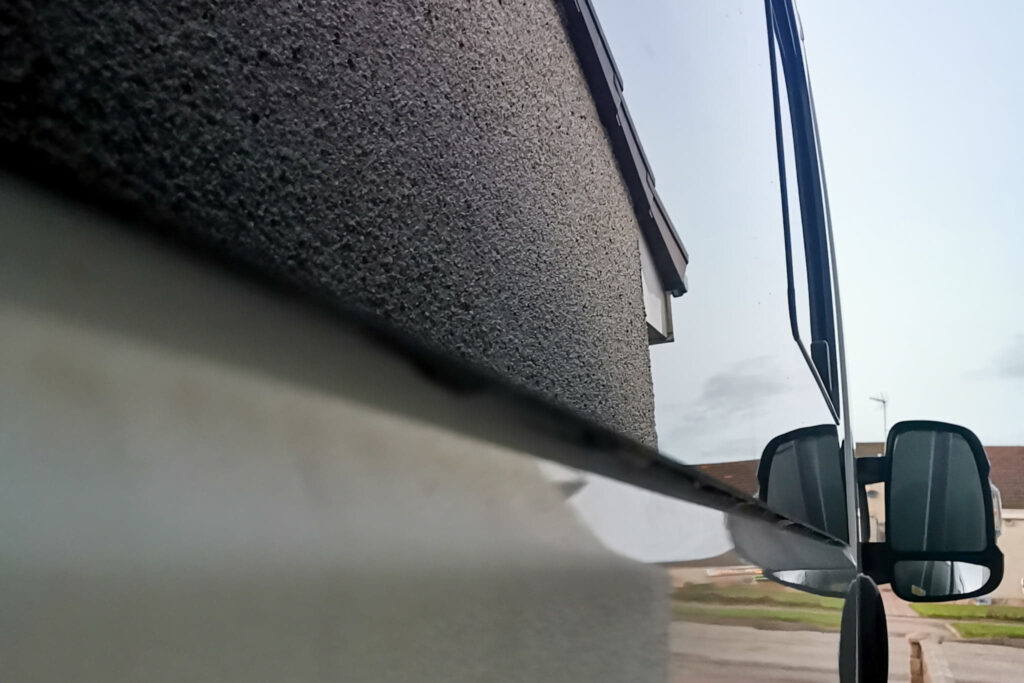
We took a much needed, but scary step and cut holes in the side of our van to install windows! After wrestling with a jigsaw, file, and sandpaper the hole was looking mighty fine and ready to be covered with glass!
Thankfully, the whole ordeal of installing windows was not as difficult as you may think – just quite time consuming and nerve-racking. I don’t recommend doing it alone!
Week 2
This week was all about windows. We get a tiny bit too confident and immediately humbled. Consider this a polite reminder to measure twice, cut once!
Day 8
20th August 2020
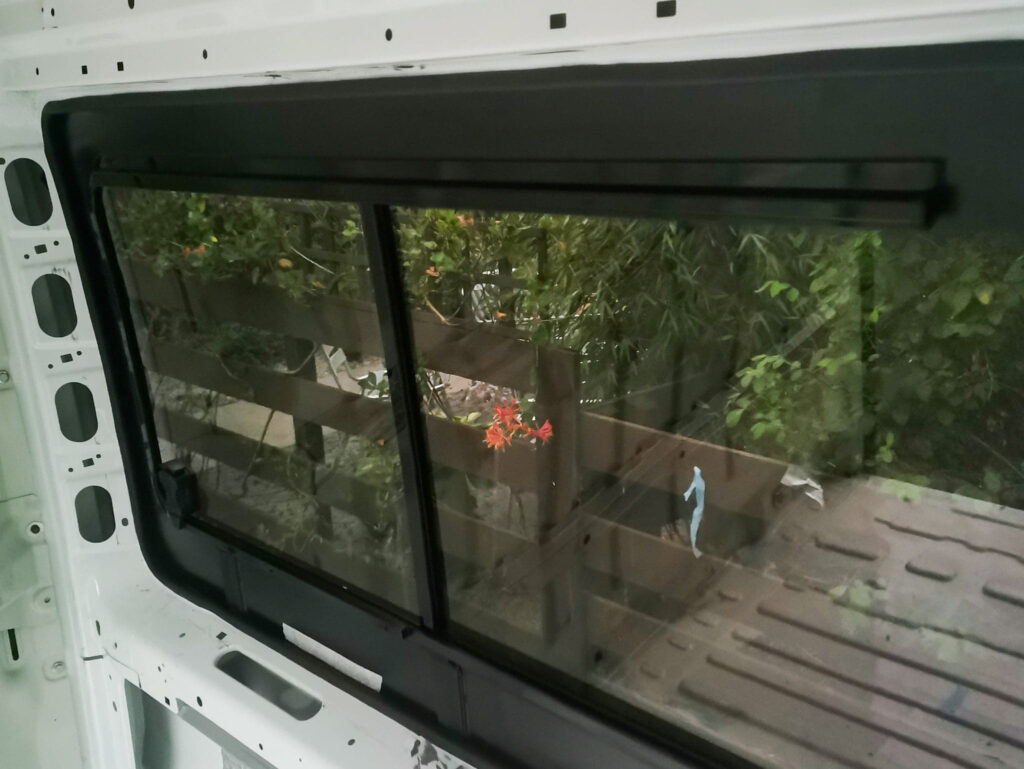
As soon as we got up we were eager to check if the window was still in place. To our relief, it looked PERFECT (we may be biased). With our first window installation being such a success we were raring to go with window number 2. After an afternoon of cutting holes in the van and carefully jigsawing through the panel, the weather took an abrupt turn and scared us off. We gaffer taped up the holes and made a run for shelter – this turned out to be a massive overreaction as we were treated to nothing but sun all evening.
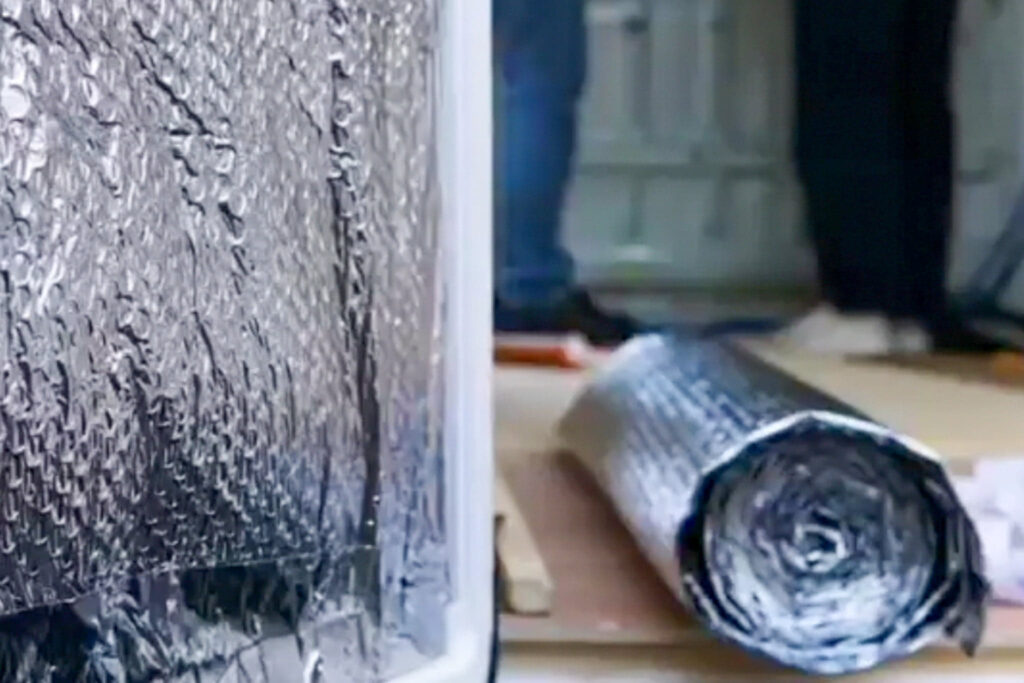
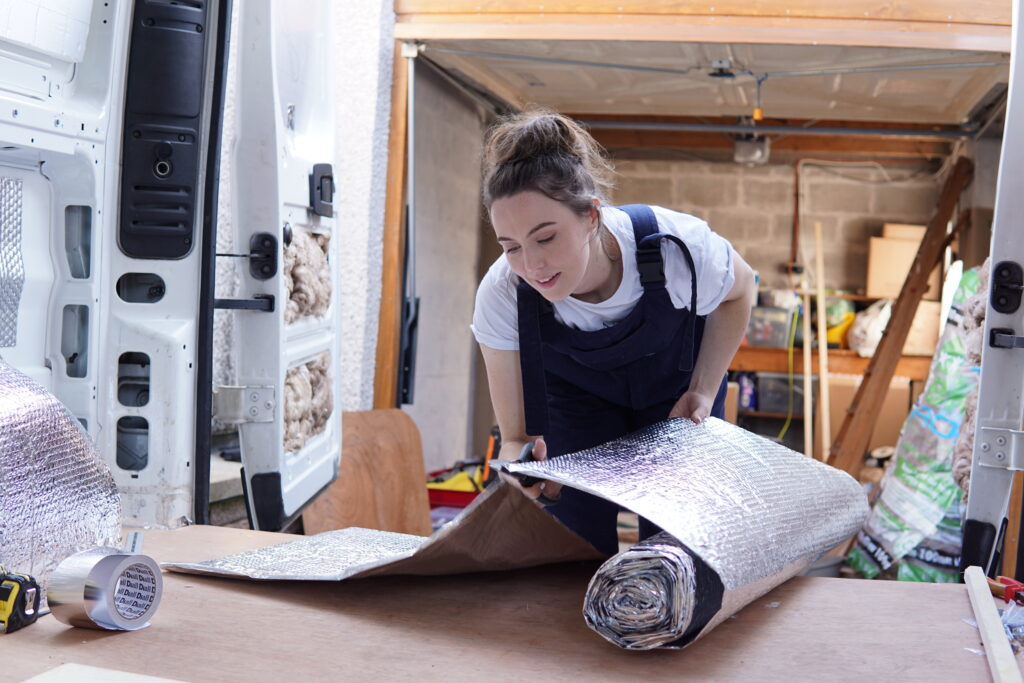
We spent our evening cutting up our roll of sound deadening in preparation to stick it to the walls and roof of the van. It felt like we were cutting through blue-tac – an oddly satisfying experience.
Day 9
21st August 2020
Picking up from yesterday’s unfinished window business we thought it would be plain sailing fitting the second window today. We were wrong – very wrong. After using almost every tool in the box we had a big (slightly misshapen) hole. We filed, sanded, and sealed the hole and will now just let it sit overnight.
In the meantime, we completely soundproofed the van. Not too sure how much of a difference it made but it was nice just to get the job done!
Day 10
22nd August 2020
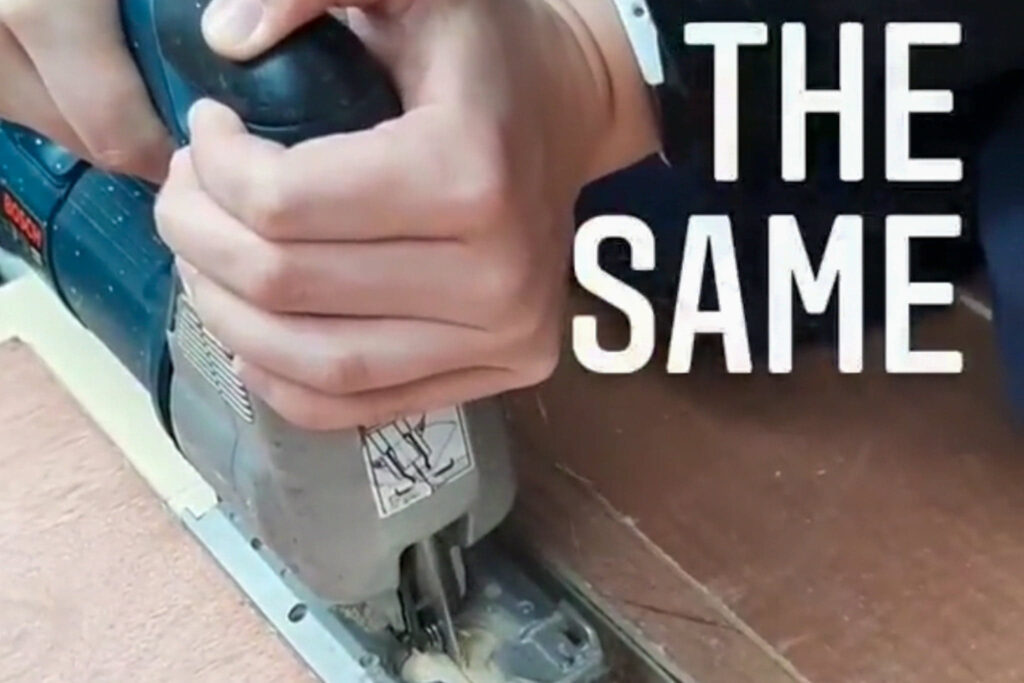
After fitting the first window relatively easily, we rushed ahead with installing the second one.
We assumed that the installation would be the exact same as the first window. We were wrong.
We didn’t take into consideration the size of the actual window and cut a hole that was MUCH TO BIG. Although this situation is far from ideal we were still able to attach the window with no problems – it even looks pretty professional from the outside. Unfortunately, it looks somewhat dodgy on the inside – nothing a well-constructed window frame can’t fix though!
Spoiler: it’s fixed!
If installing windows from Vanpimps measure them thoroughly prior to cutting a hole in your van. I realise this sounds almost too obvious but we were fooled by the ease of the installation of the first window.
Day 11
23rd August 2020
A somewhat unproductive day of browsing flooring and discussing our next steps.
It feels like we have done so much and so little simultaneously!
We did however, purchase our first piece of van decor! Perhaps a bit premature, but we couldn’t resist a statement pink velvet mirror!
Day 12
24th August 2020
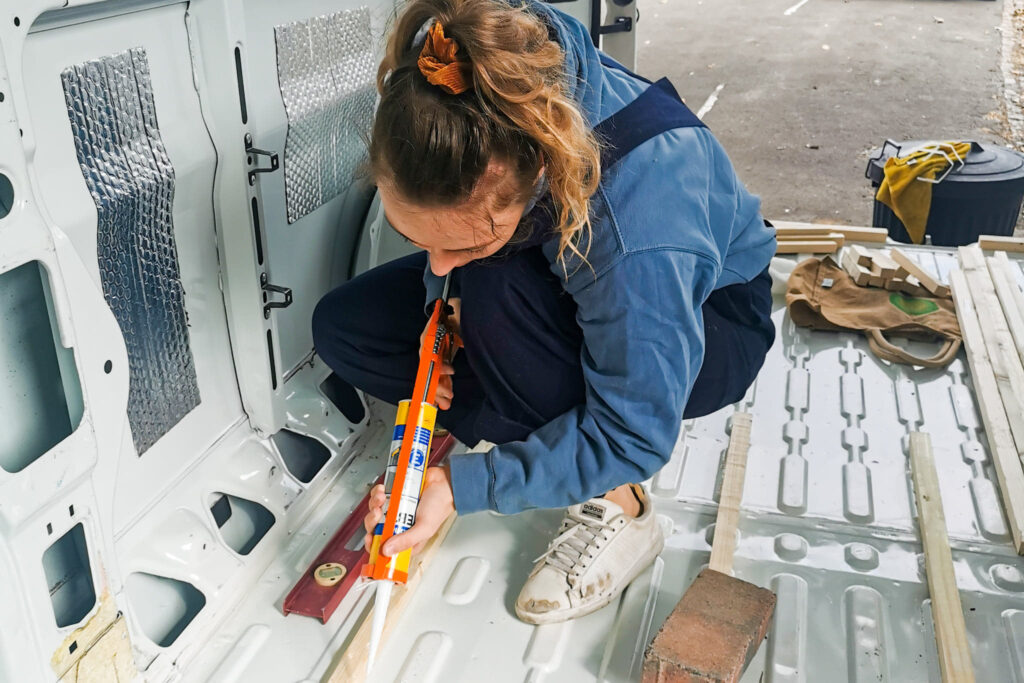
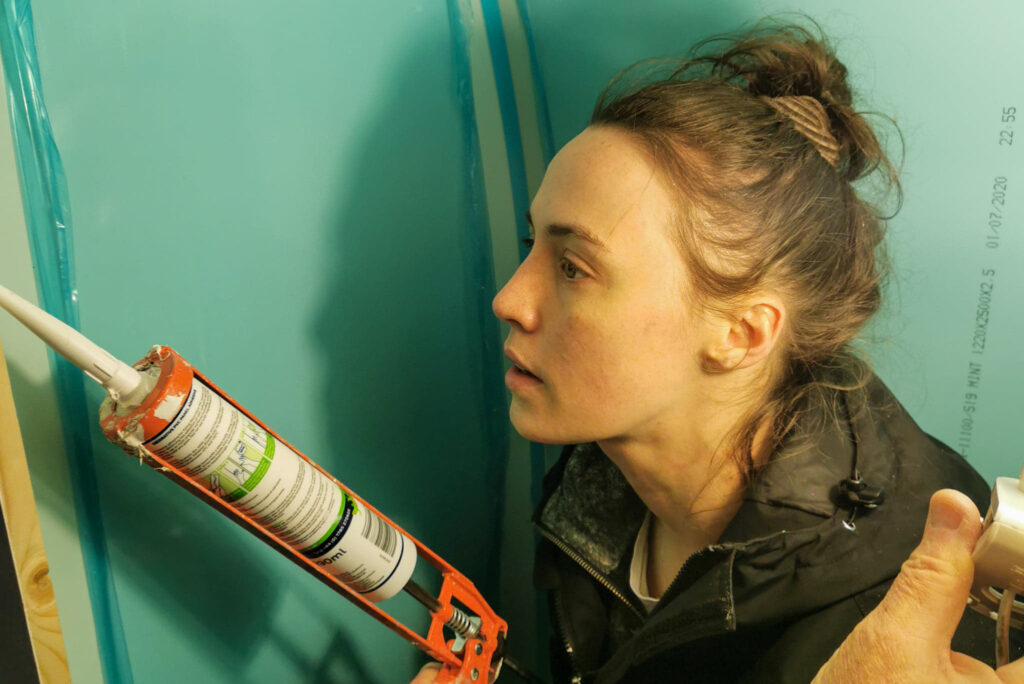
Unfortunately it was another day that didn’t necessarily go to plan. After stocking up on floor plinths, insulation, and sealant we decided to take on the somewhat cosmetic task of putting a bead of sealant round the window to give a clean professional finish. It did not look clean nor professional! I think we have learnt to not sweat the small stuff and certainly not to do unnecessary jobs!
Week 3
The first real bit of progress was made this week. We laid a floor and it is looking great. It’s nice to see a little less white on the inside of the van!
Relevant posts include:
Day 13
27th August 2020
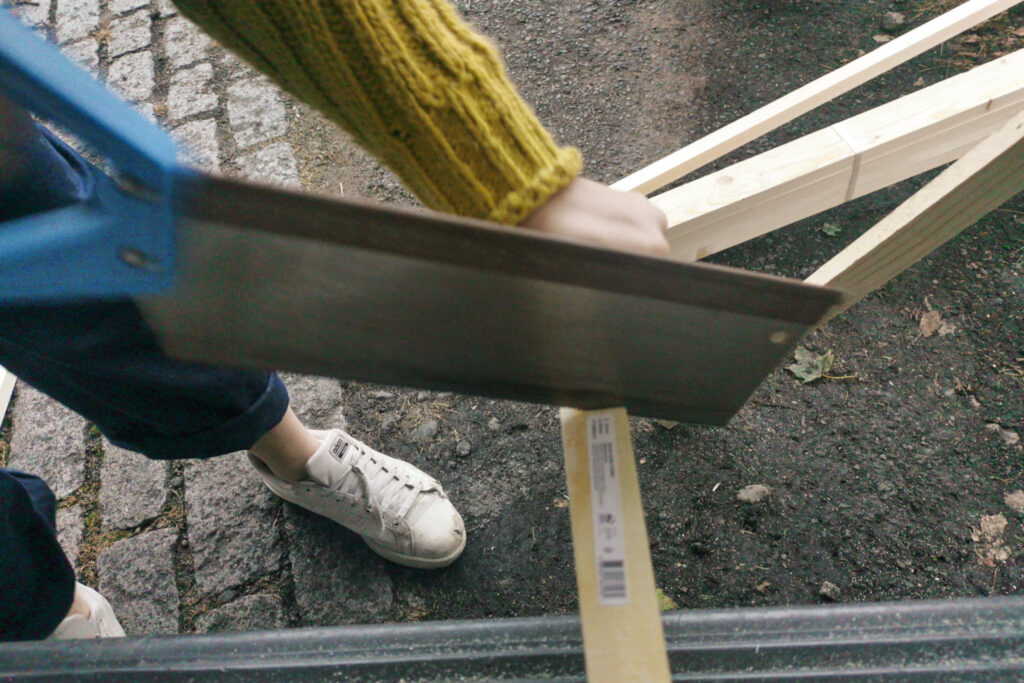
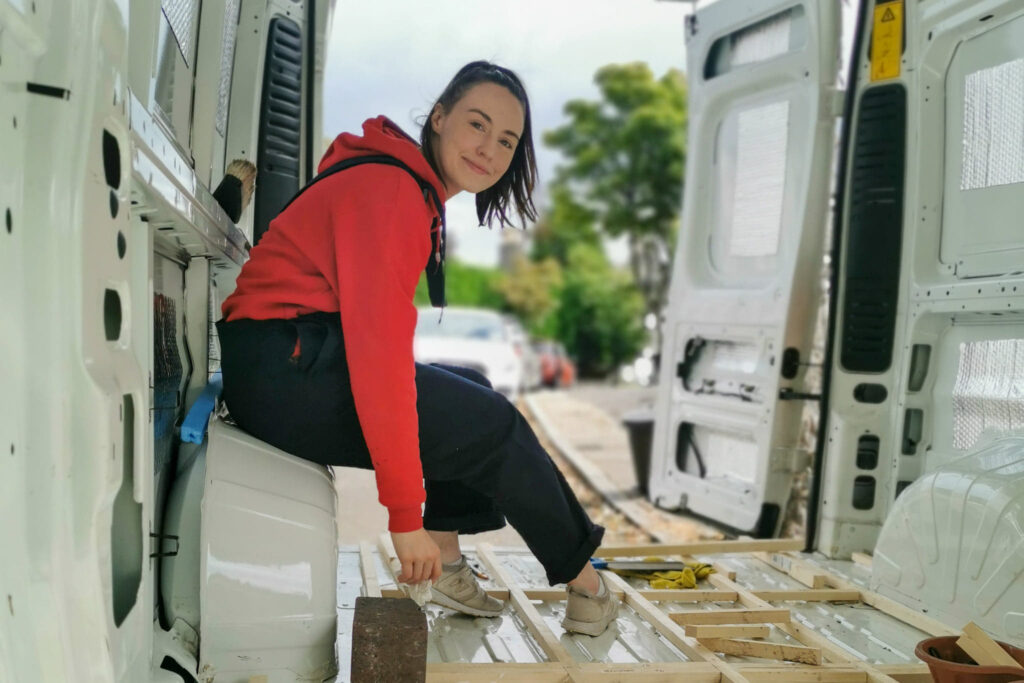
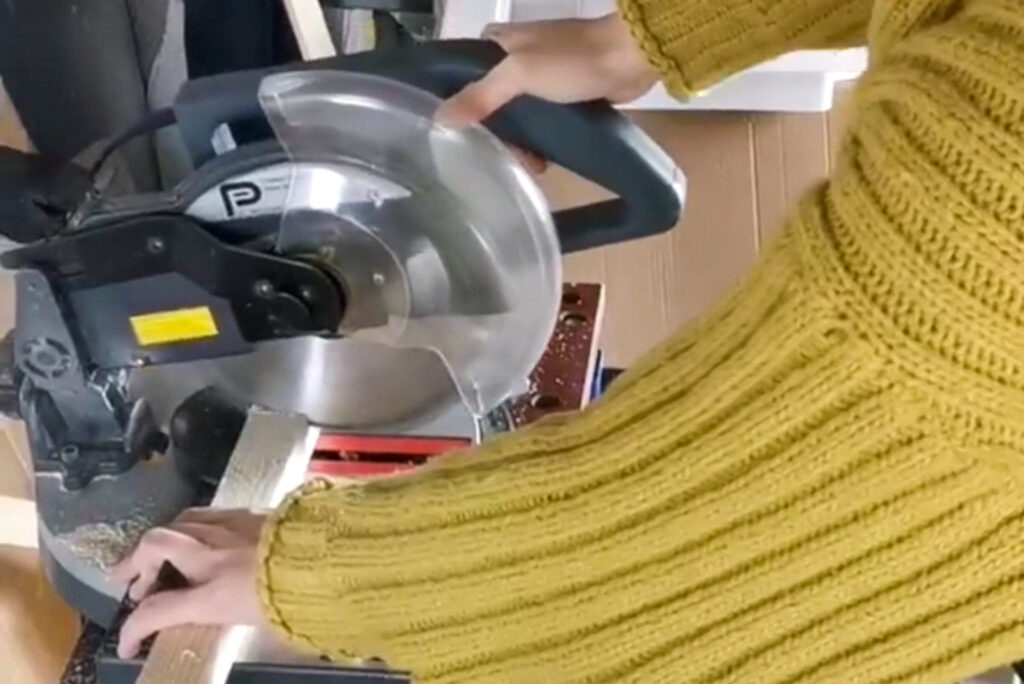
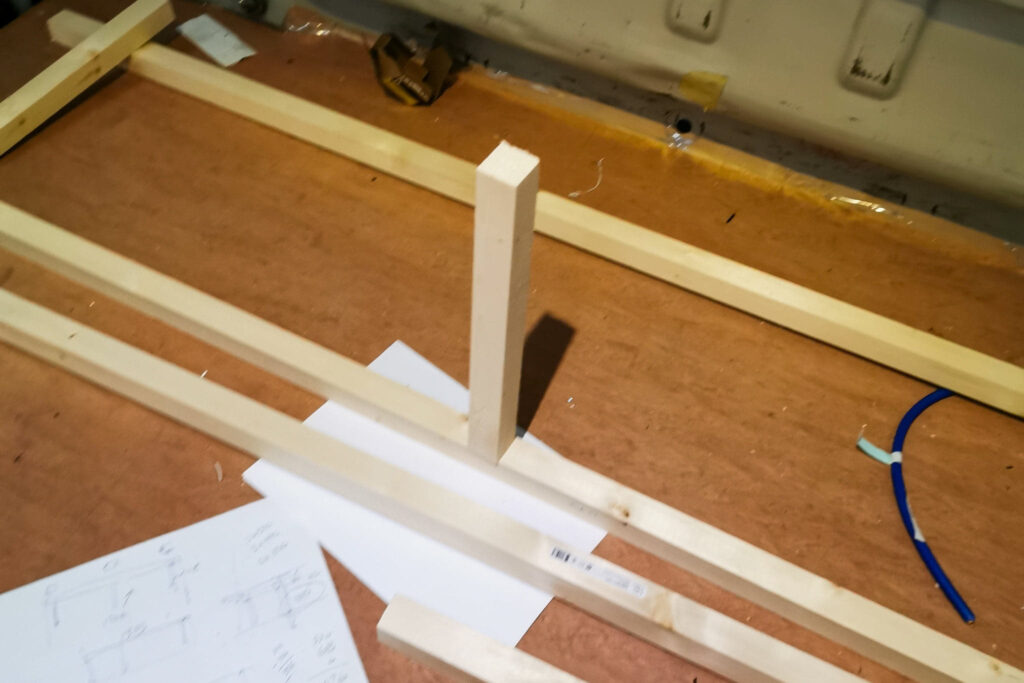
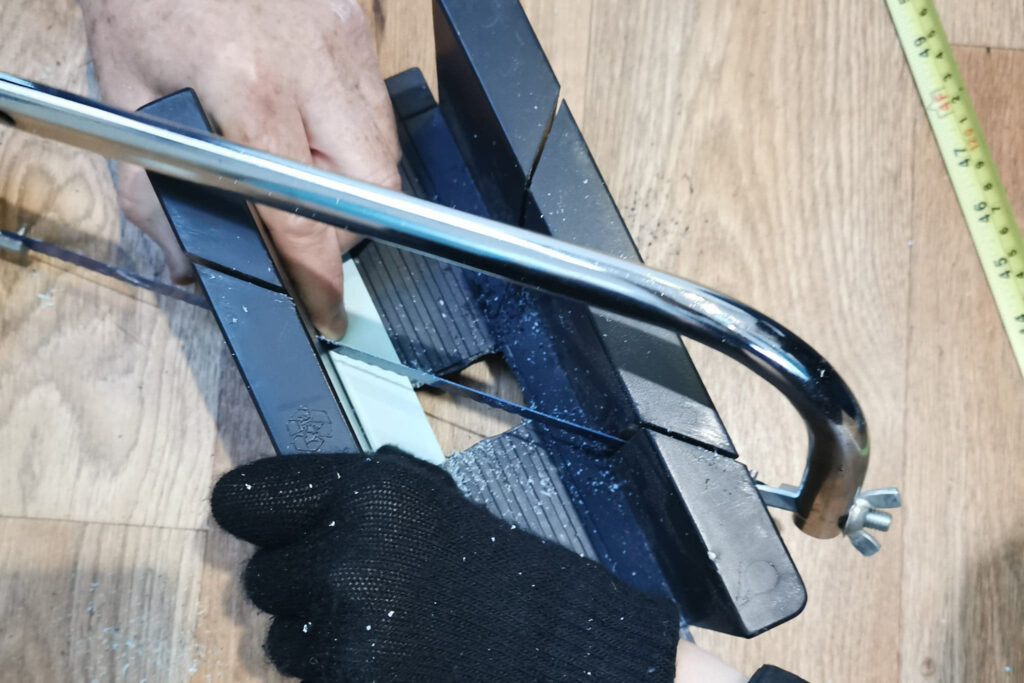
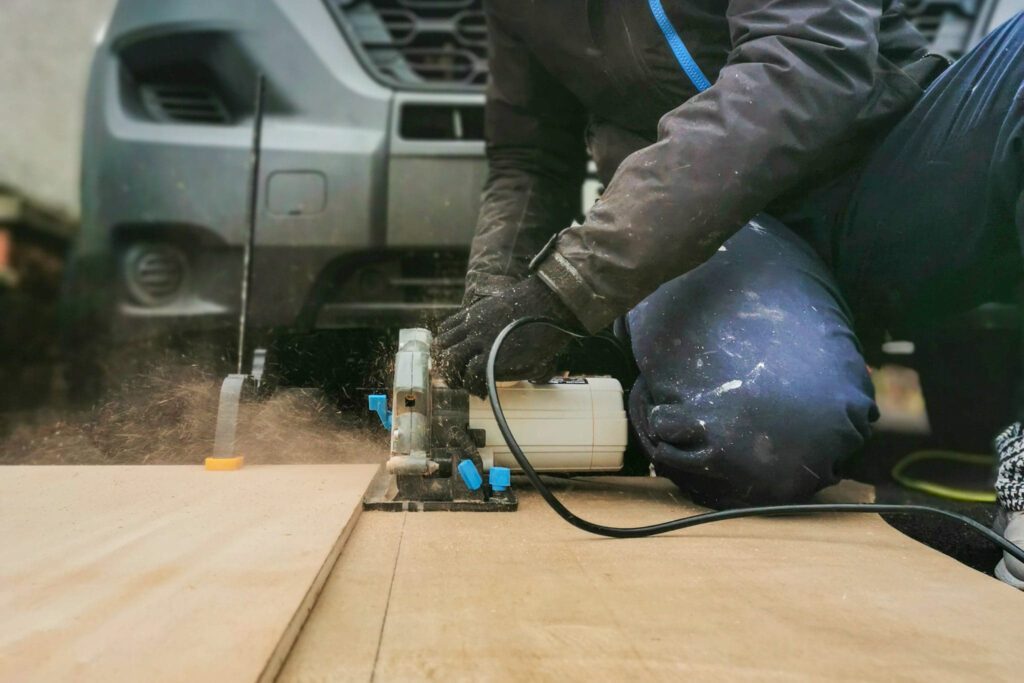
Finally… it was time to get to work on the floor. After meticulously measuring the floor we began cutting wood to create a frame for the insulation to sit in. After what felt like a hard day of work we had barely made any ground on the job. Who knew sawing wood would be so time-consuming…. not us! Especially as we were just using a manual saw as our van is nowhere near a power outlet.
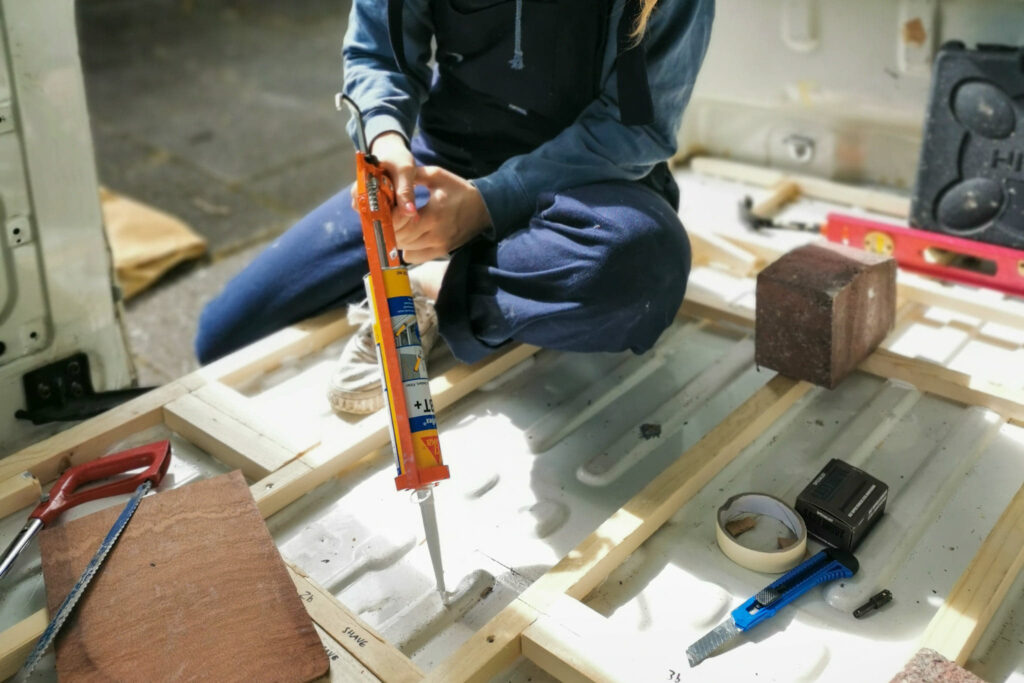
We glued some of the longer plinths to the floor using Sikaflex and called it a day!
Day 14
28th August 2020
Another day of sawing wood and sticking it to the floor.
Why is this taking so long????
Nothing else to report.
Day 15
29th August 2020
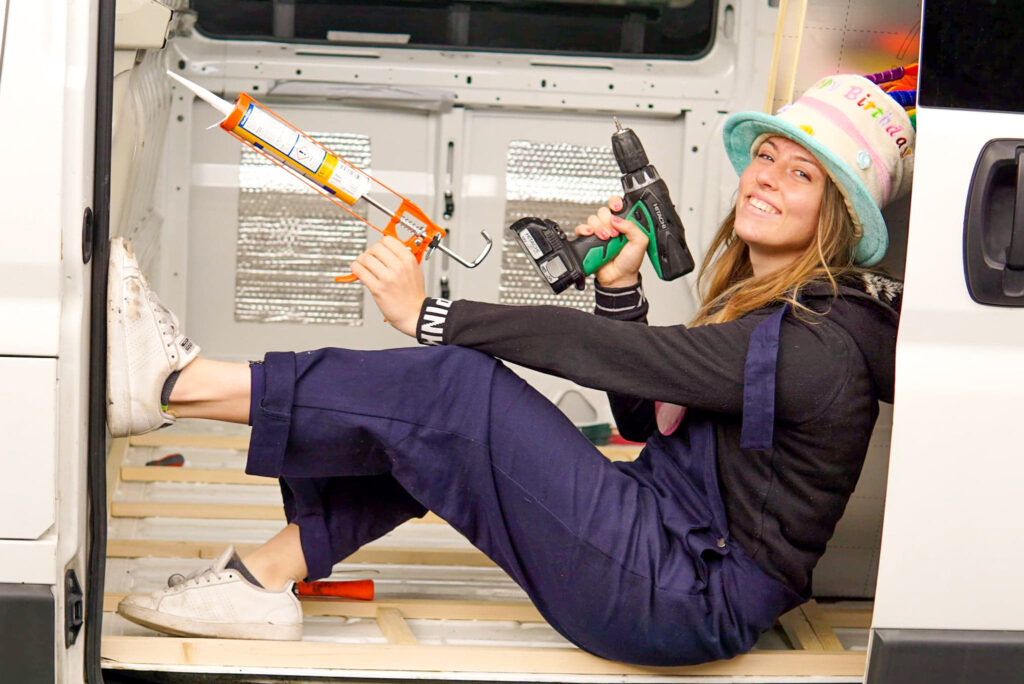
After a shameless birthday photoshoot in the van it was time to get to work.
More cutting, more gluing, and more wishing the process would hurry up!
We also continued to speculate about the layout, and in particular how we will furnish such a small space. We are currently thinking we want an Oliver Bonas / mid-century modern aesthetic.

Day 16
30th August 2020
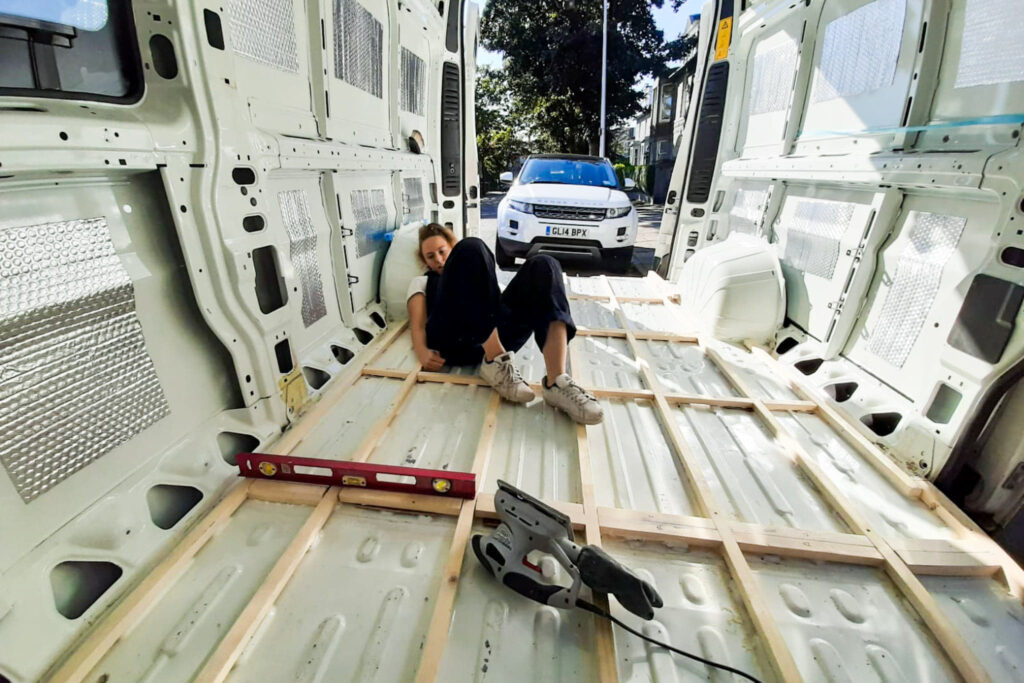
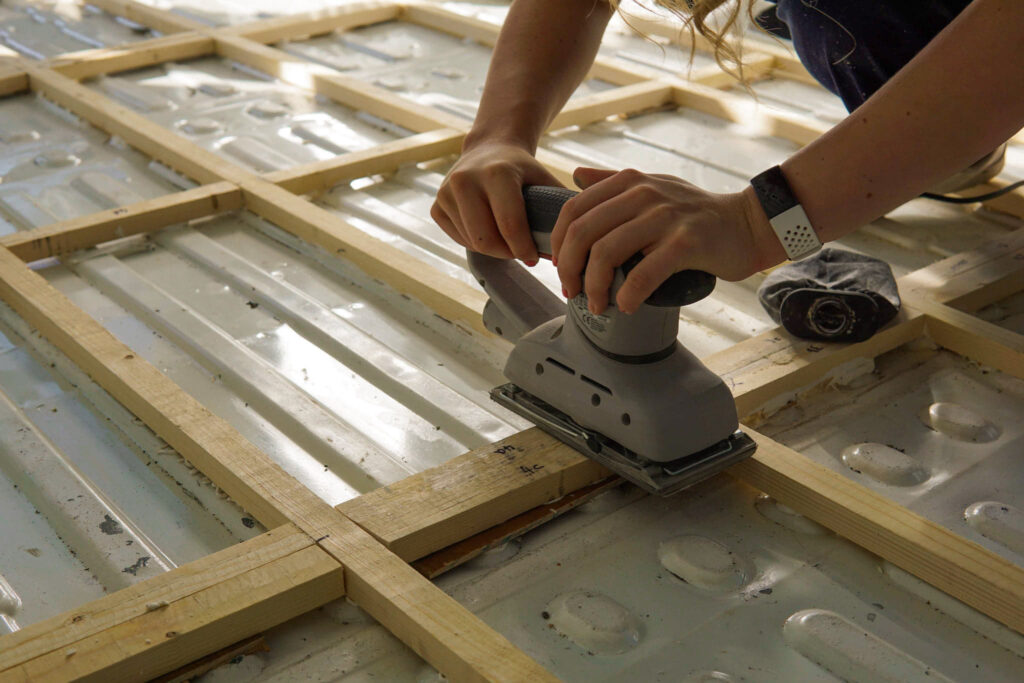
FINALLY the flooring is staring to take place. After eventually gluing every batten to the ground we could move on to something a little bit more exciting. Insulating.
We are using 25mm rigid board insulation.
We painstakingly cut 32 “unique” rectangles and placed them in their respective spot, ready for a busy day tomorrow
We also bought some vinyl floor to put down when we eventually complete installing the subfloor. It really does feel like it’s starting to come together quite nicely!
P.S. We hit 100 subscribers on Instagram!
Day 17
31st August 2020
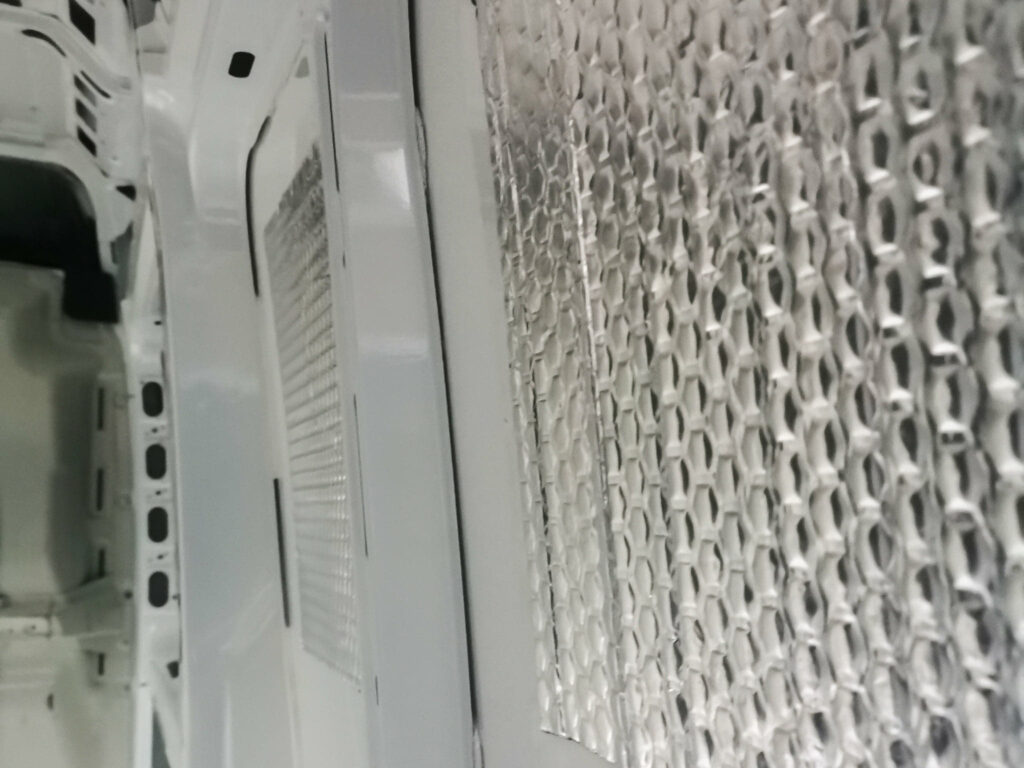
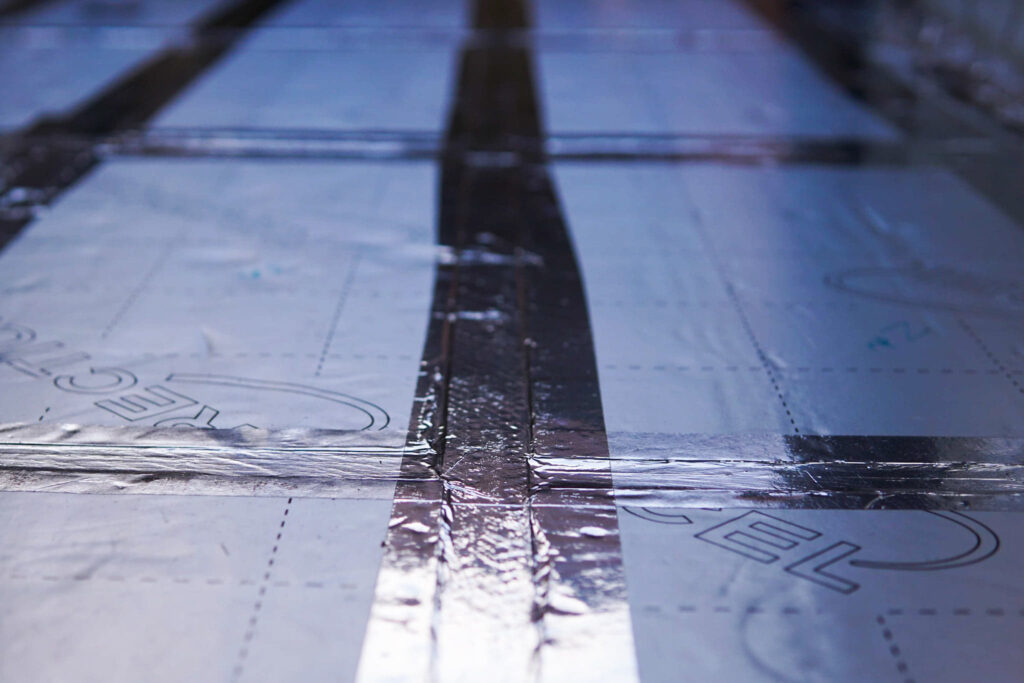
Today we were introduced to the joys of Aluminium foil tape. Perhaps the most satisfying job we have done so far.
Firstly, we sanded any areas that weren’t perfectly level. Then we glued down the insulation “rectangles” we cut out yesterday. Then came the fun part…
We taped up any and every line, gap, and edge with aluminium foil tape. Today we transformed our simple white van into something that resembles a spaceship!
Day 18
1st September 2020
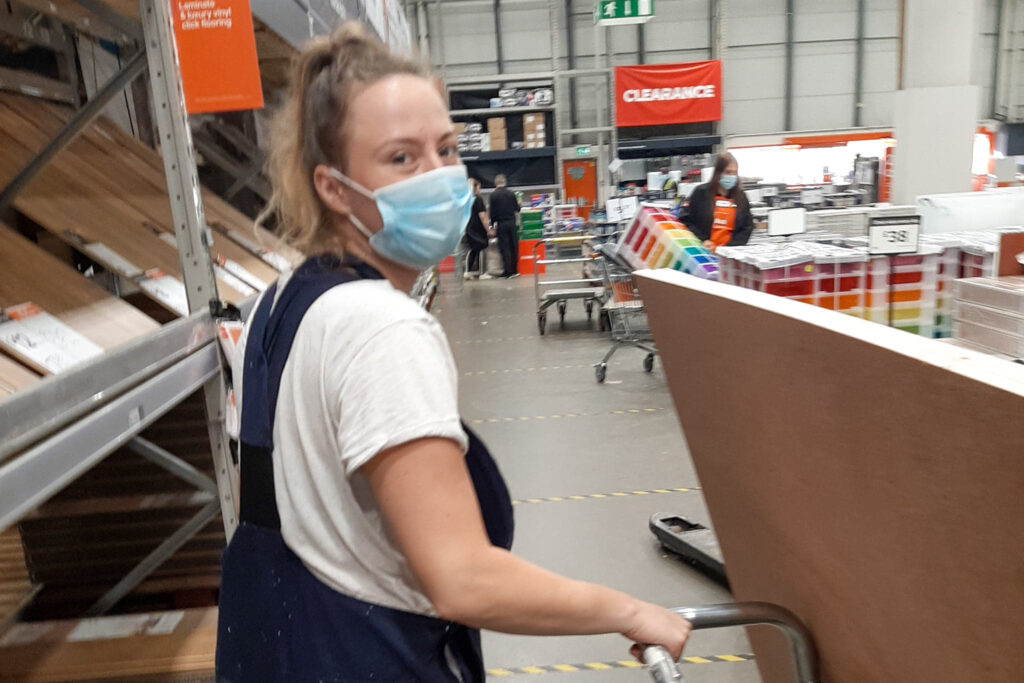
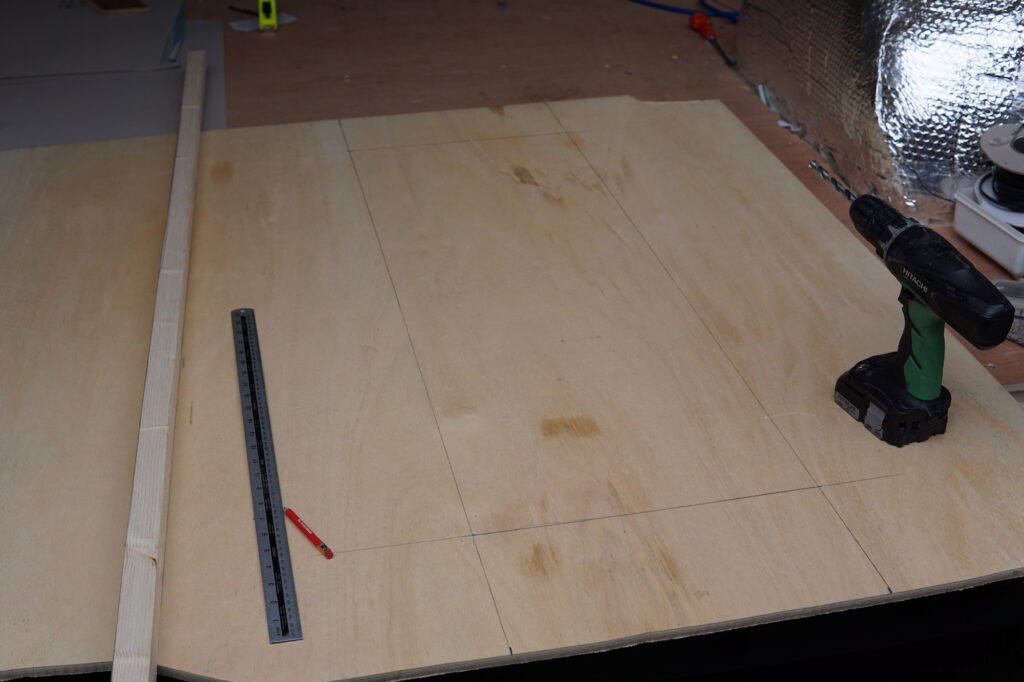
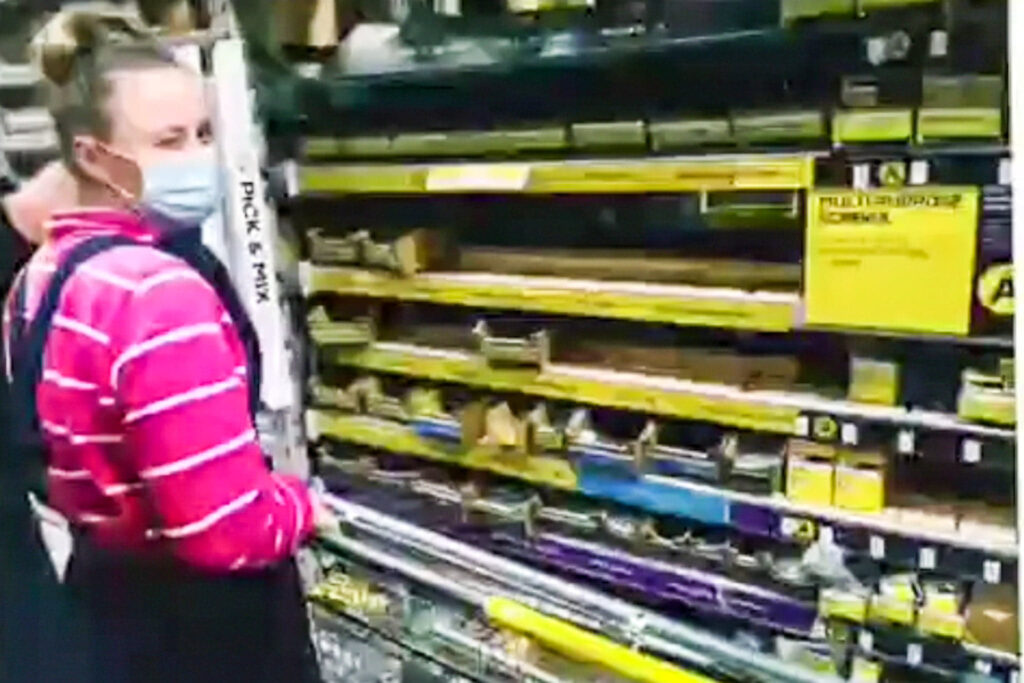
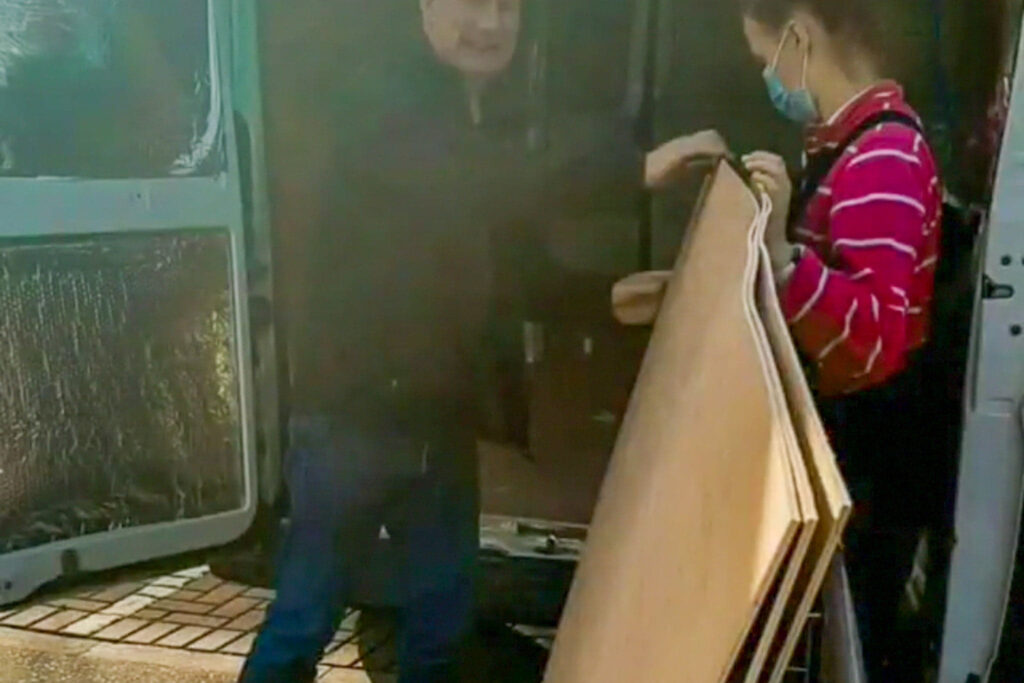
After another trip to our favourite shop (B&Q) for some ply wood we were ready to finish off installing our sub-floor… FINALLY!!
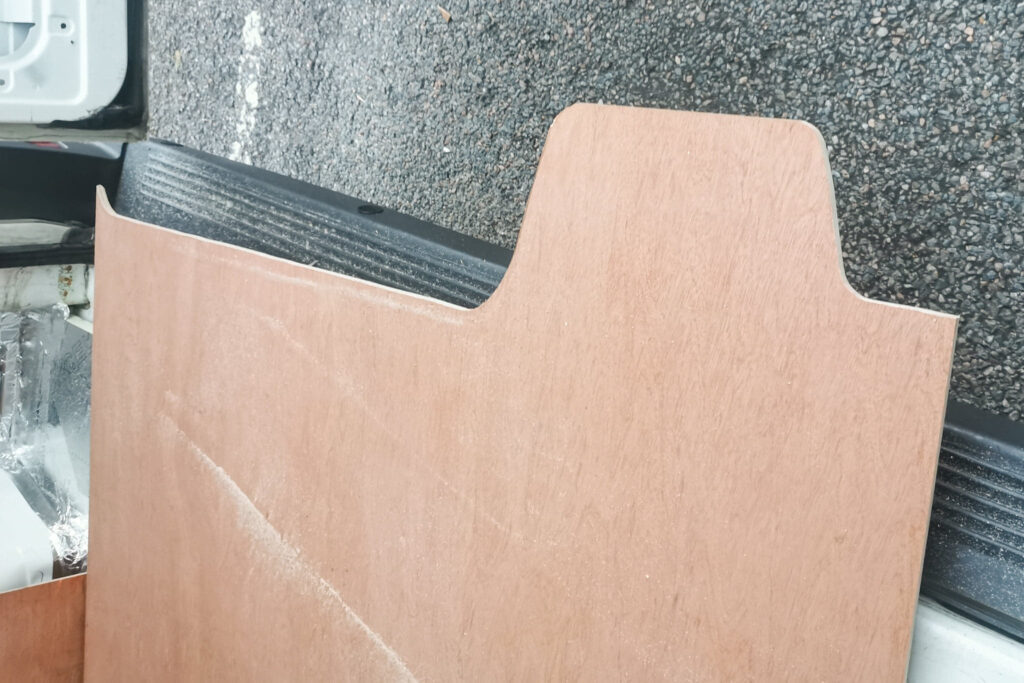
We used 12mm Hardwood Plywood for the floor.
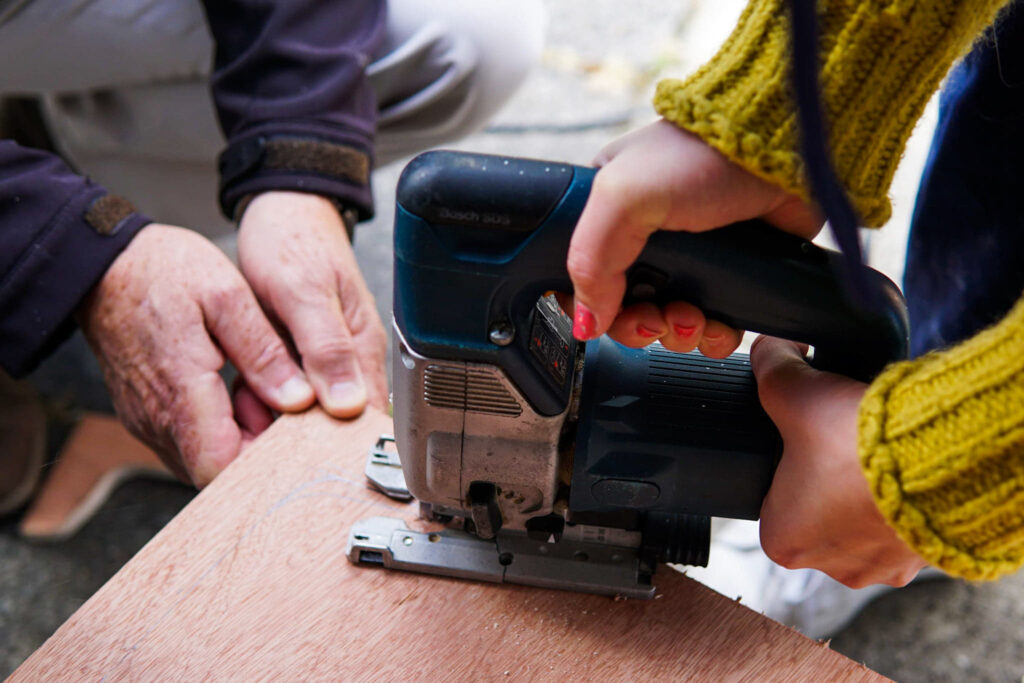
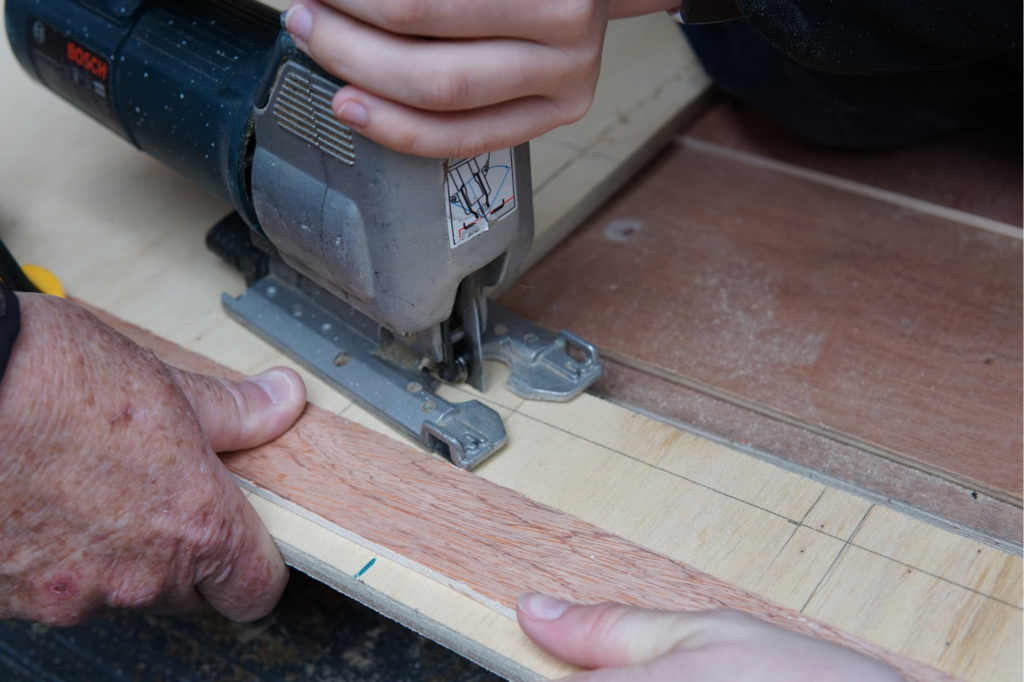
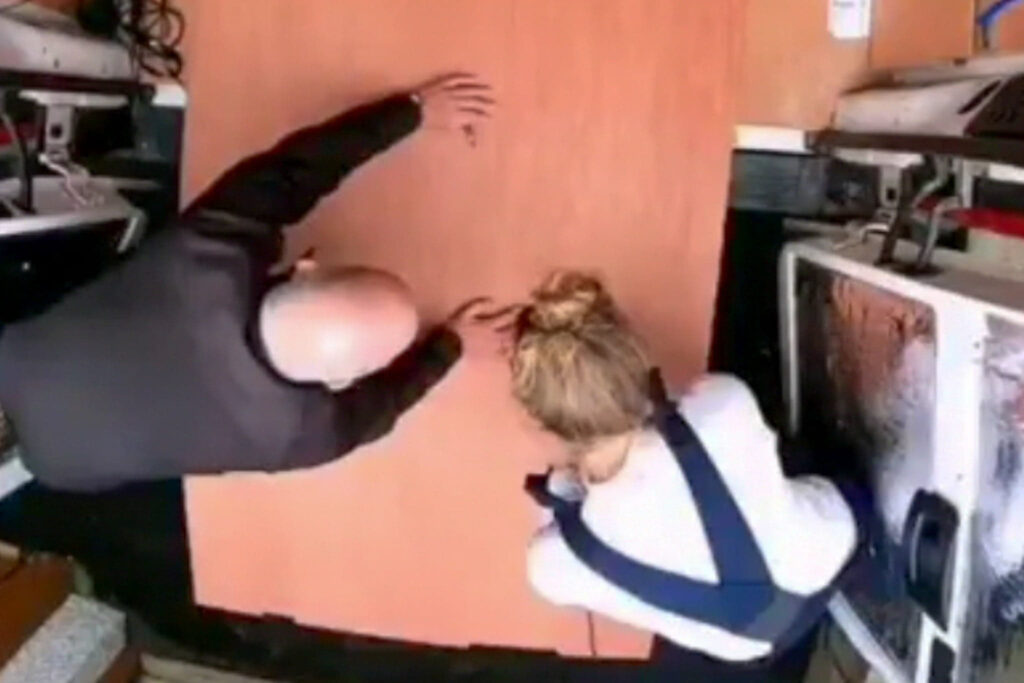
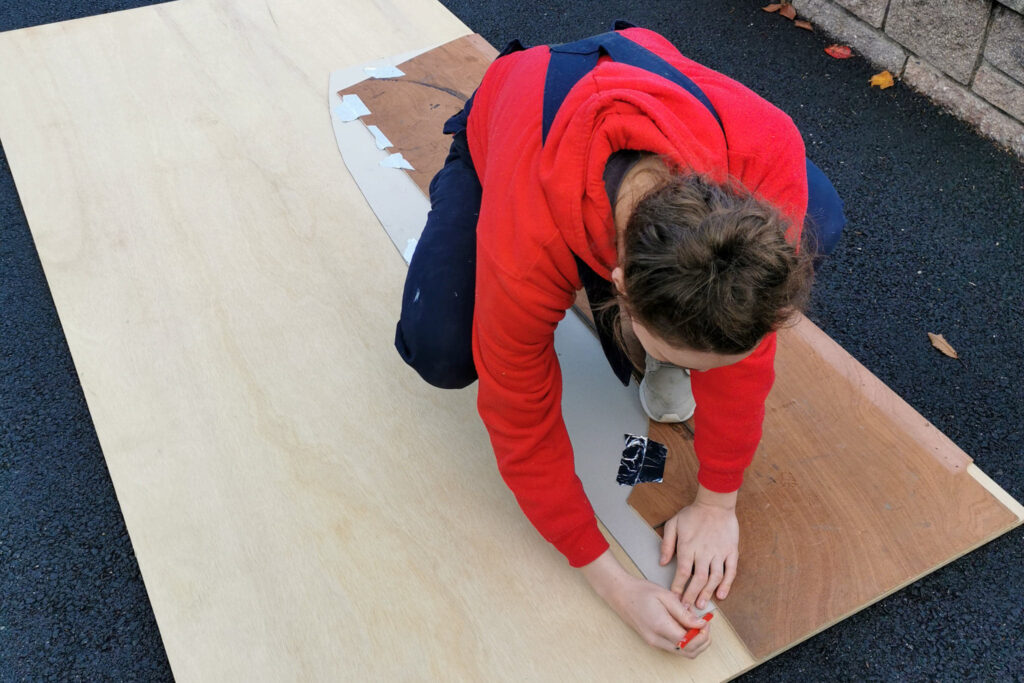
We started by constructing a simple but ingenious tool to map the curves of the van onto the ply for a bespoke professional finish! We then used a jigsaw to cut out the shape before the moment of truth… seeing if it fit!
To our relief it did. And boy oh boy it looked goooooood!
We called it a night after a copious amount of time admiring our work!
Week 4
A busy week for our postman as we received a LOT of packages. We installed a reversing camera, a Maxxair fan (almost), and even started wiring our van.
Day 19
4th September 2020
Every day more packages arrive at our door. From a Maxxair fan to a fuse box and many other “essential” van things. It was time to start fitting them!
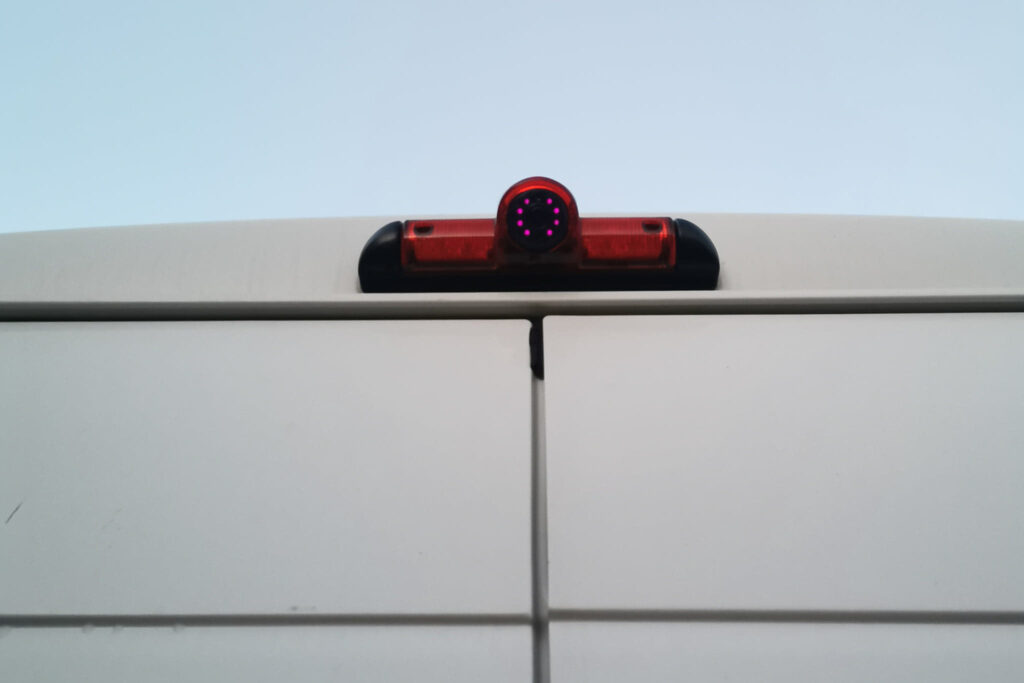
We chose to fit the reversing camera first… after all, we are women drivers!
Admittedly, we left this job primarily with our dad as he is the electrical wizz amongst us!
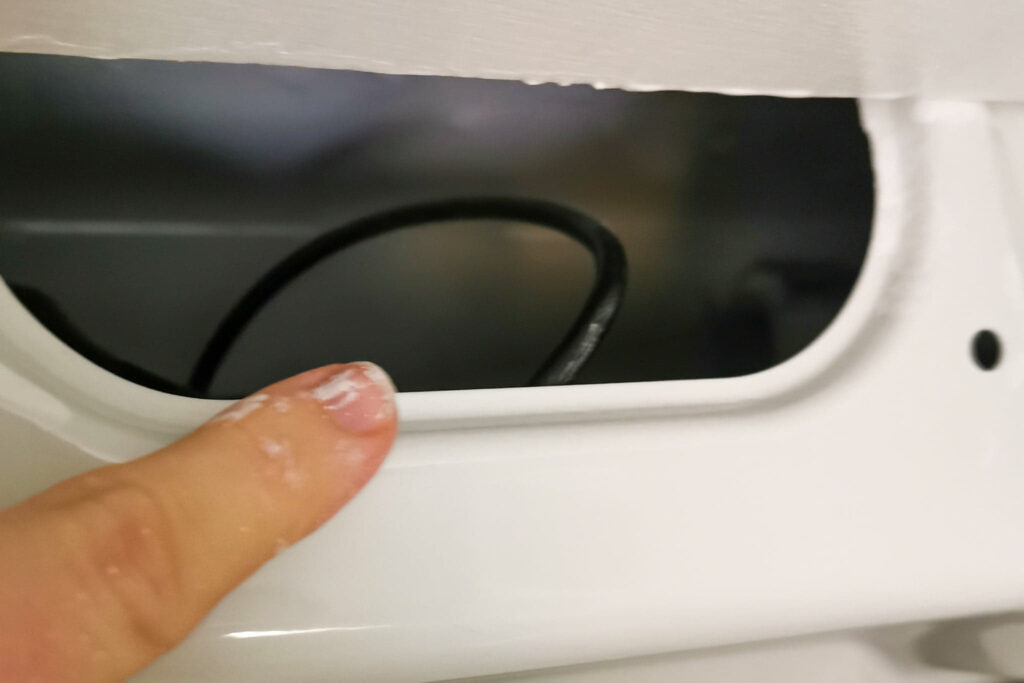
We did however help screw it in place and feed the wires through to the front of the cab.
Although this job may sound easy… it wasn’t without difficulty (as usual). We spend a ridiculous amount of time trying to find an access point from the back into the cab without drilling through the bulkhead.
Eventually, we decided to leave this task for tomorrow.
Day 20
5th September 2020
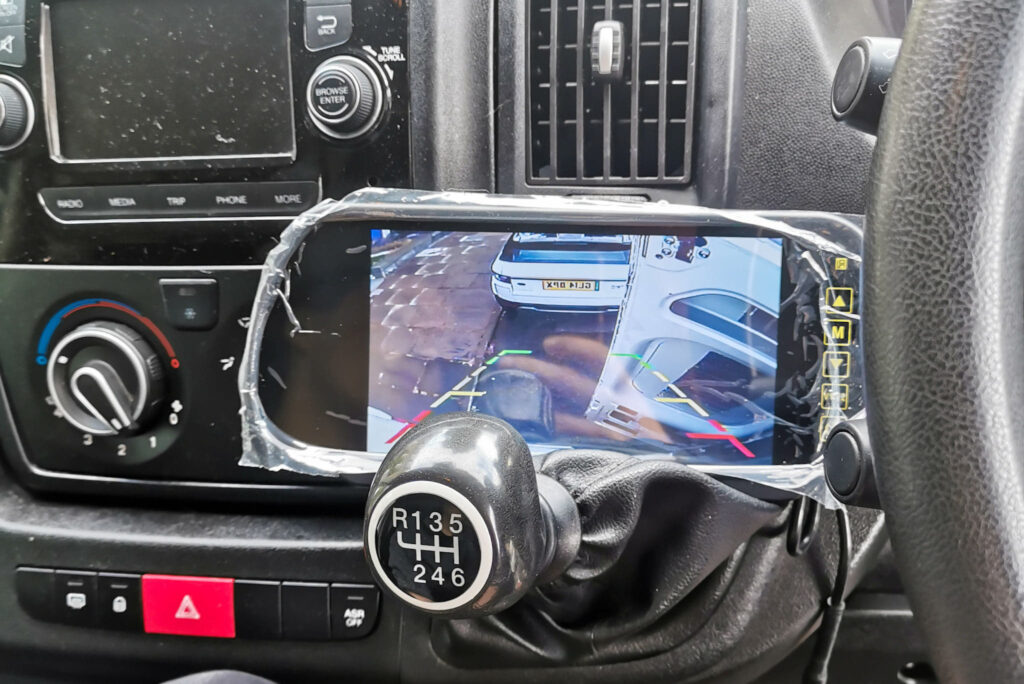
We finally finished fitting the reversing camera. What we thought would be a job that took no more than an hour took 2 days?!?
Thanks to the unpredictable (shit) Aberdonian weather there wasn’t a lot we could do, so we just spent the evening discussing the layout. Although it has many common concepts that can be seen in most vans, we believe it will be unlike anything that is being done (we are biased, of course)!
Day 21
6th September 2020
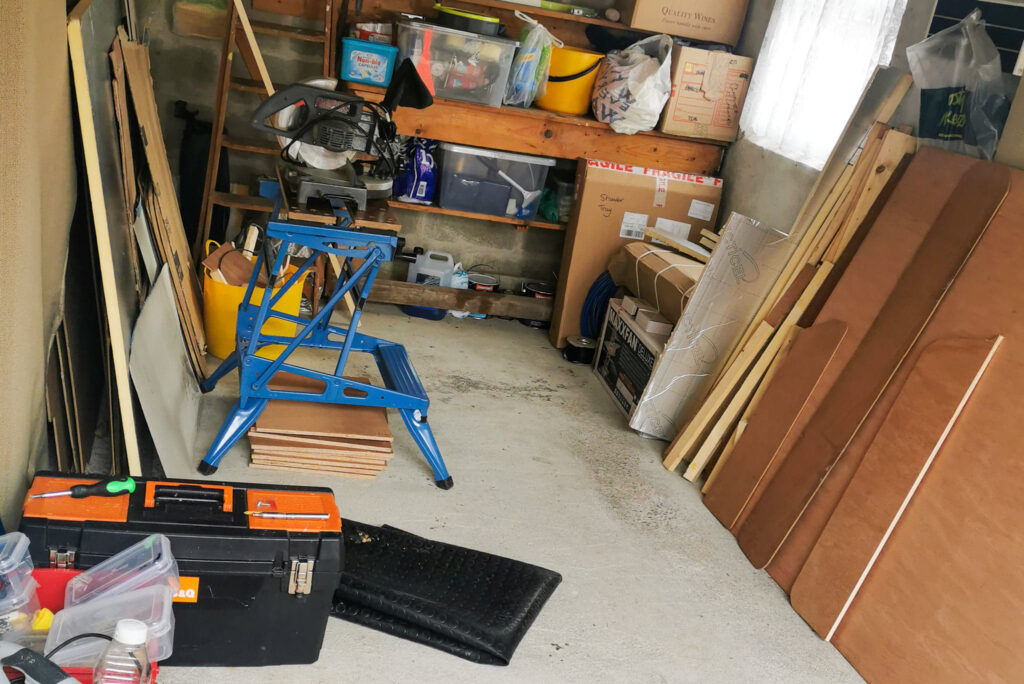
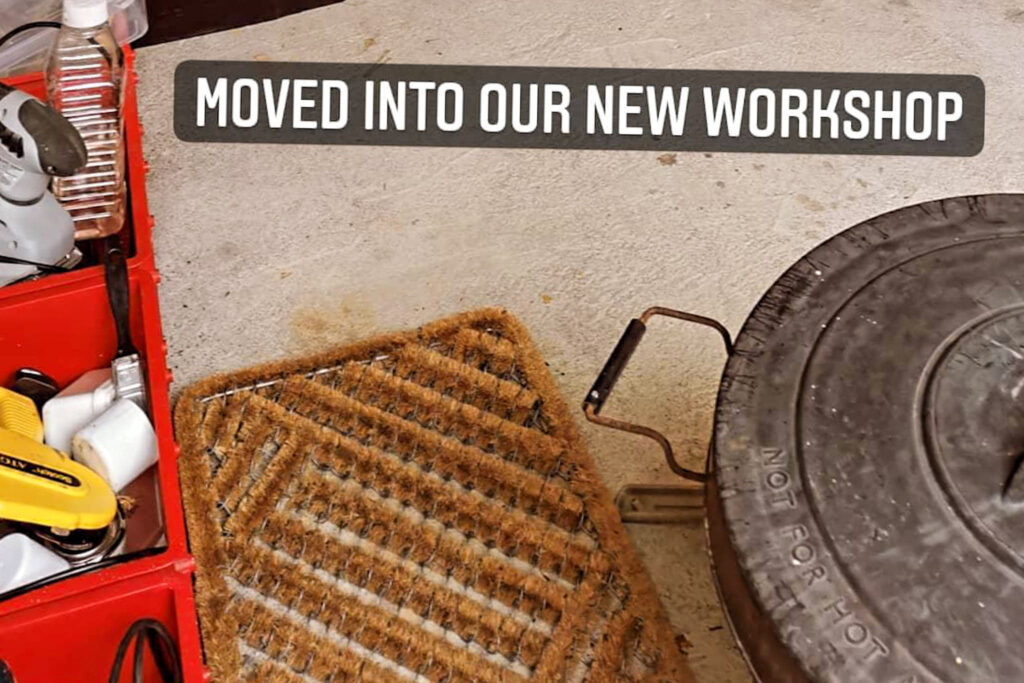
Having spent the first 3 weeks of our build on the road outside our house we had outgrown that small space… we needed to upgrade.
So we packed up and moved the van to its new home – our aunties driveway/garage.
This allowed us to finally have a good workspace – come rain or sun!
After unloading the van and making ourselves at home we mapped out where all the battens would be under the ply floor so we knew where would be best to attach things to.
After what felt like a lot of work (but no progress) we called it a day!
Day 22
7th September 2020
Despite laying the subfloor and topping it with ply a while ago we had never fully committed to screwing it in. But today is the day. The floor is officially a permanent fixture!
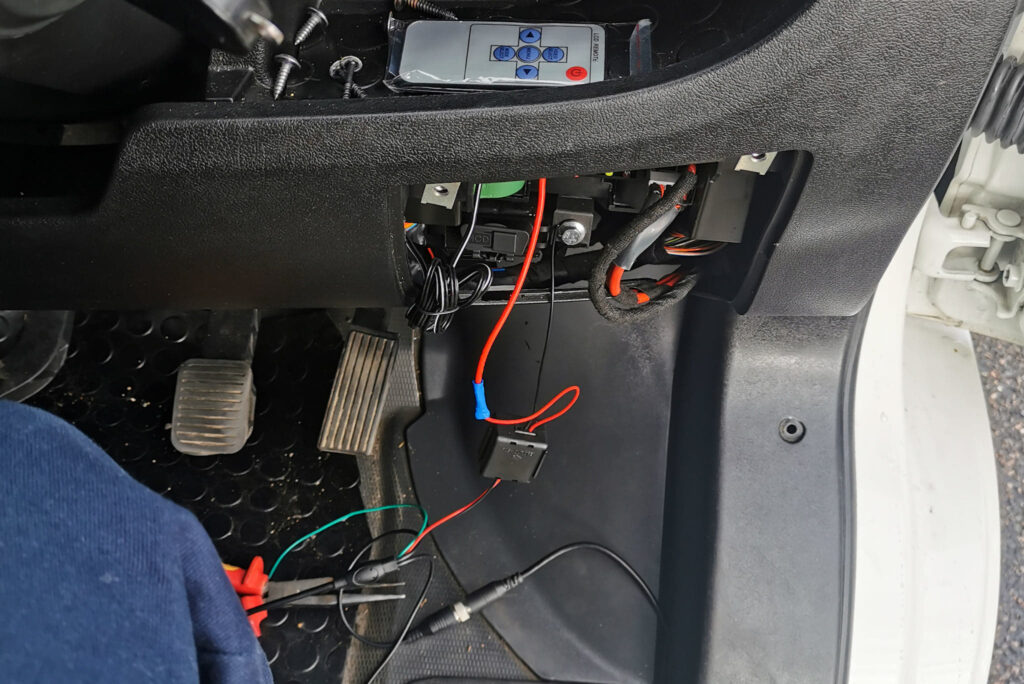
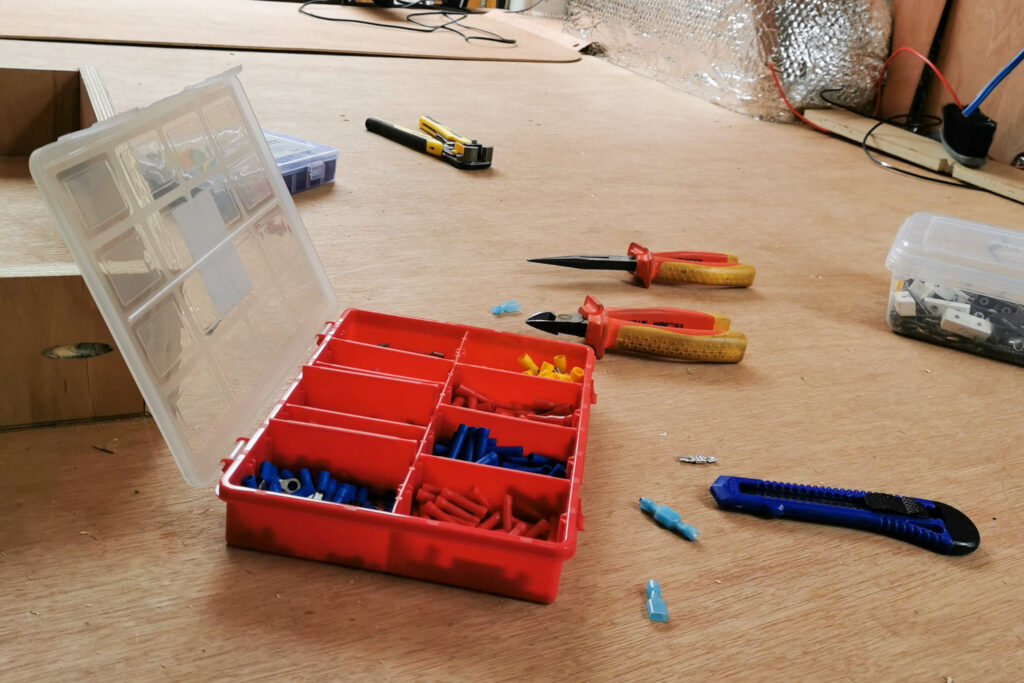
We also made a start at wiring the van. This is probably the thing we have been dreading most. Thankfully our dad is particularly handy when it comes to these things so I guess it could be worse.
We also realised how much we love and value a label maker. We honestly think it’s vital when wiring a van!
Day 23
8th September 2020
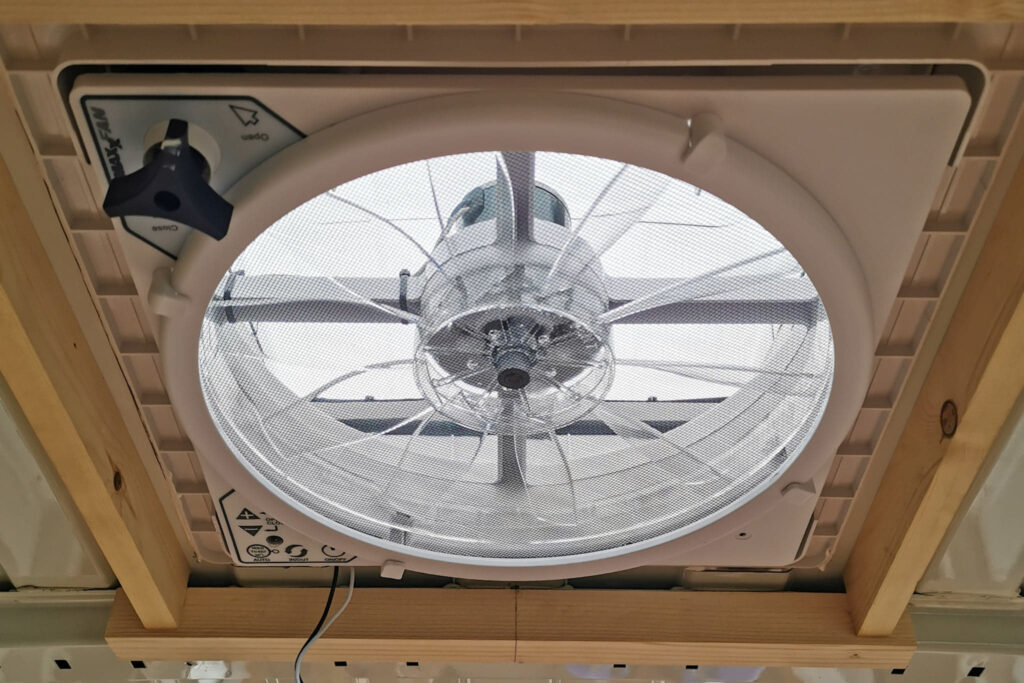
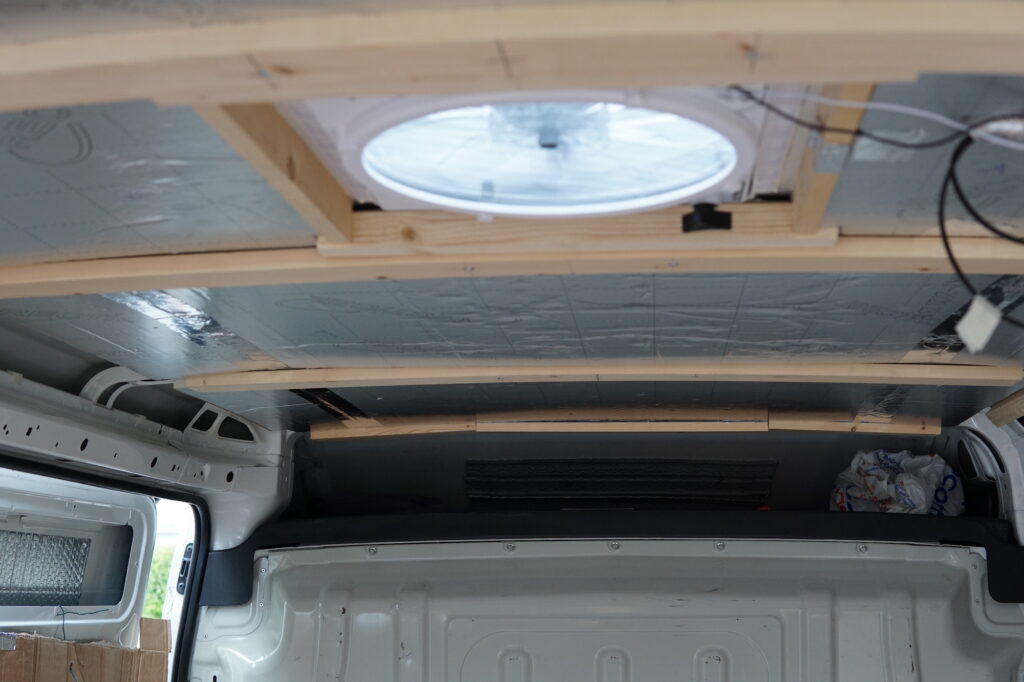
With so much to do, we were unsure where to start. We opted to install the Maxxair fan – a long overdue job!
We created a frame to place on the inside of the van that the screws could bite into. This small and pretty insignificant job took longer than expected (as usual). Partly because it require another trip to B&Q! But boy oh boy did it look good and fit like a glove when it was done! Ready for the scary part tomorrow – cutting the hole! AHHHH!!!
Day 24
9th September 2020
After plenty of procrastination, speculation, and bad weather it was time to cut a hole in the roof of our van! Perhaps the scariest thing there is to do – especially when you live in Scotland and rain is an everyday occurrence!
We carefully created a template and started sawing (jigsawing)!
In true Scottish style, the rain started pouring as soon as we made the first cut into the roof! Thankfully it was just a passing shower and we got back to work finishing the job.
Unfortunately, we hit another problem (surprise, surprise). We assumed the fan would easily slide into position and the screw holes would align automatically. This was not the case. We were too scared to push too hard on the fan so we called it a day and left the hole in the roof abandoned with a bit of ply covering it!
Week 5
We finished fitting our Maxxair fan. We also framed and insulated the roof. This week we even devised a plan to utilise the maximum width of the van and eliminate the need to “frame” the van. The van is starting to really transform, we can only imagine how good it will look when it’s completely paneled.
Relevant posts include:

Day 25
10th September 2020
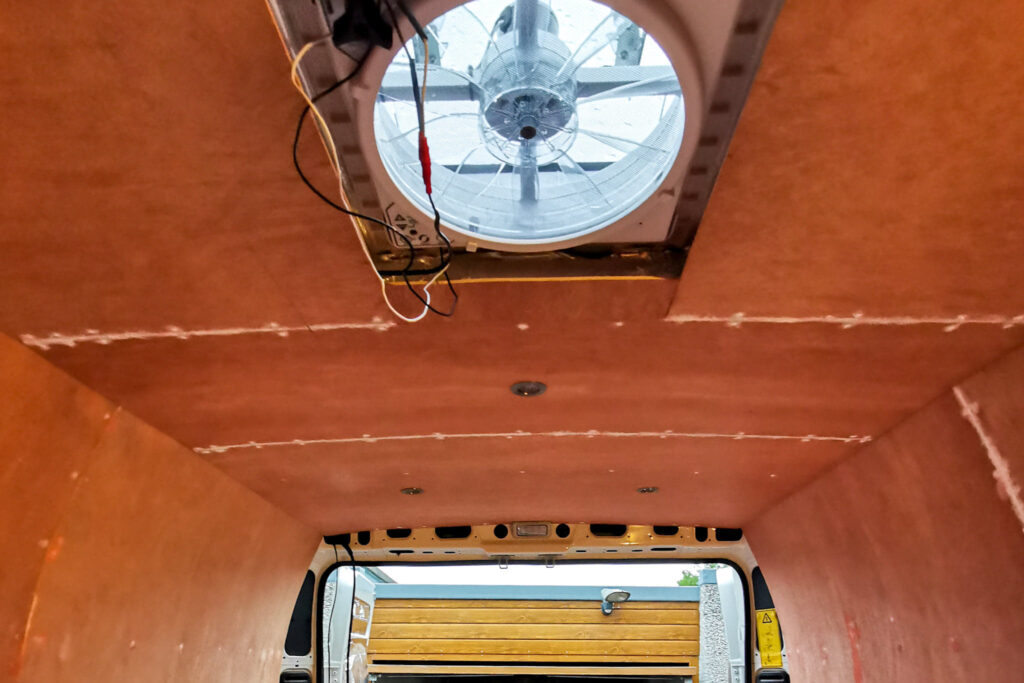
After arming ourselves with knowledge (YouTube videos) we felt a bit more confident forcing the Maxxair Fan into position.
Once we checked that job off the never-ending list, we cracked on and bought more plywood and battens to take on our next projects – building the bed and insulating the roof!
P.S. We hit 200 followers on Instagram!
Day 26
12th September 2020
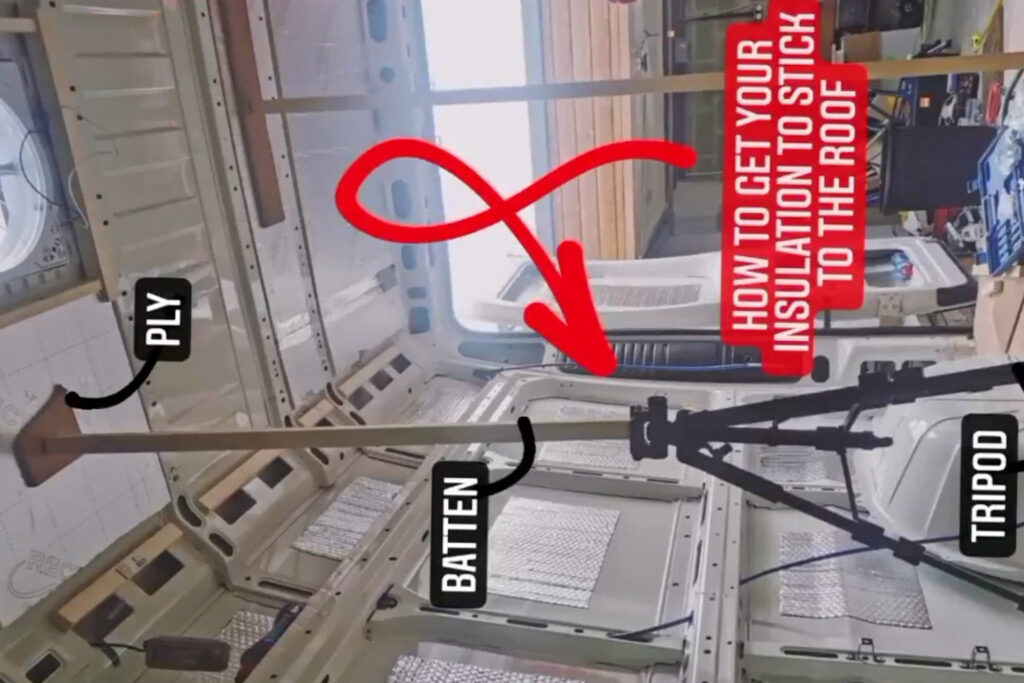
Today we took on the challenge of sticking rigid board insulation to the roof. Unsurprisingly this did not go as smoothly as anticipated, forcing us to get creative.
We propped up the insulation with a contraption made out of a tripod, a wooden batten, and a bit of ply. This held the insulation secure whilst the adhesive dried.
Spoiler: it didn’t work!
However, this is not due to a masterfully constructed device, but due to the adhesive not sticking.
Day 27
13th September 2020
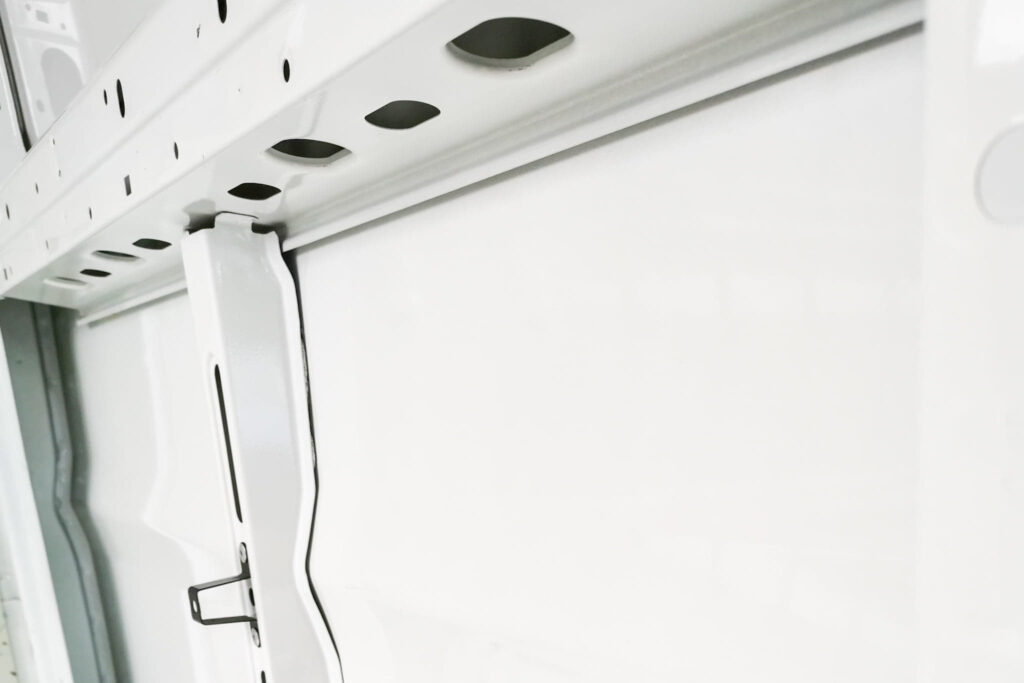
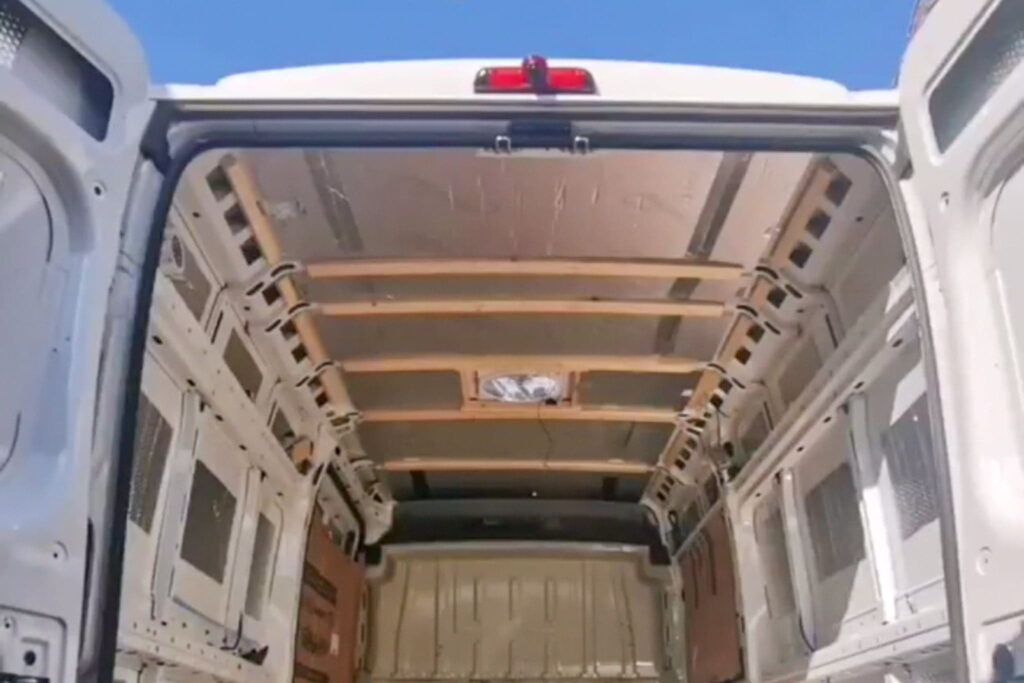
Today we spend a lot of time rivnutting (if that is even a word).
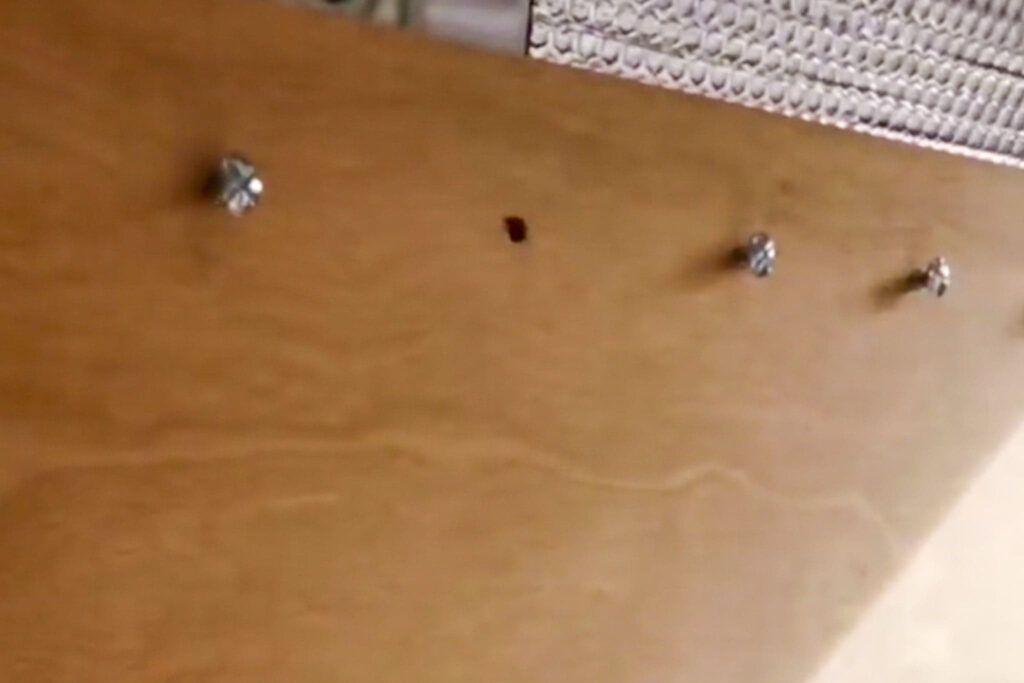
We devised a plan to attach our ply directly to the metal ribs of the van (removing the need to frame the van). We had to utilise the ribs/metal structure as we wanted our beds to be widthways, and therefore couldn’t afford to lose much of the width of the van as we are reasonably tall girls (5’8″ and 5’10”)
After a morning of lining up our plywood with the rivnuts on the van, it was finally time to take the leap of faith and start drilling.
This was reasonably successful (for us) so we called it a day!
Also, persisted in trying to stick the insulation to the roof with not much luck!
Day 28
14th September 2020
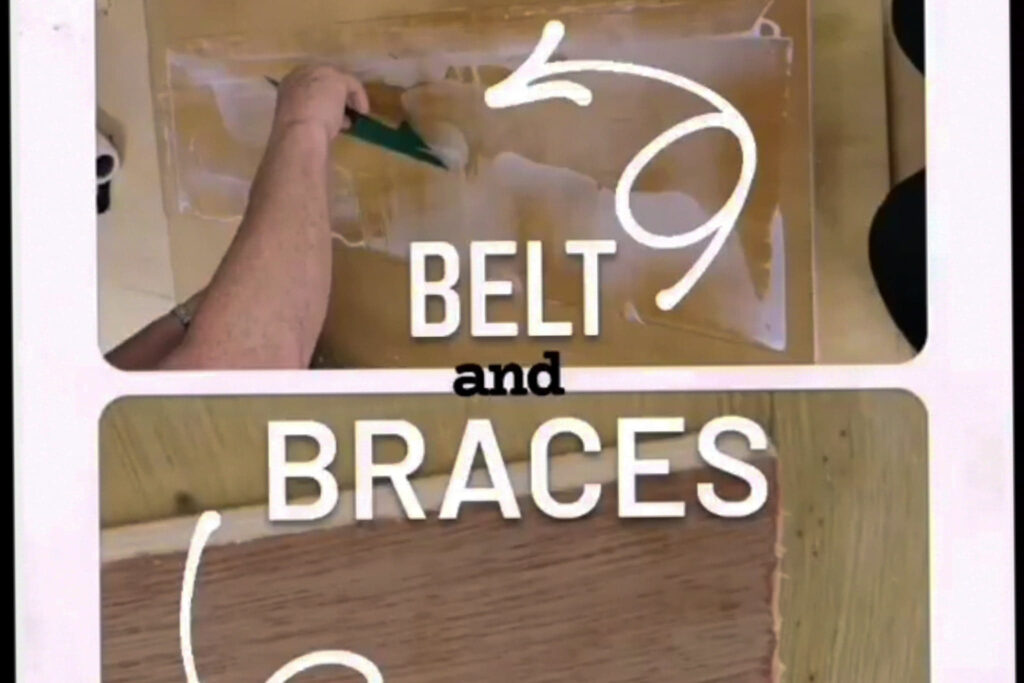
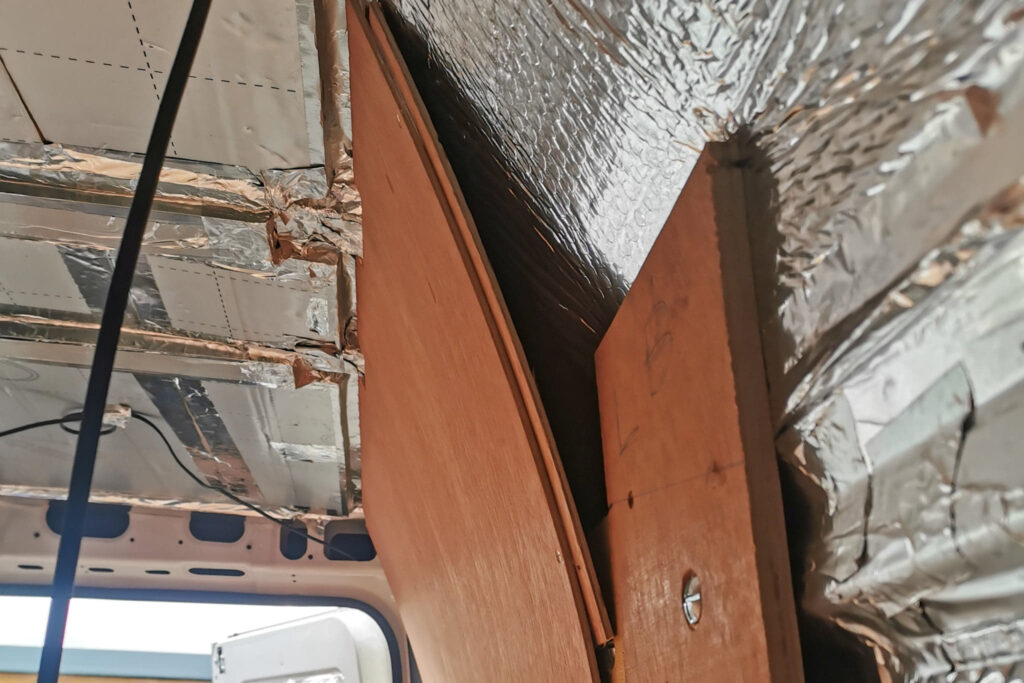
Since securing the ply to the wall was quite successful yesterday we ploughed onwards. We chose to reinforce the midsection of our wall (where a bed will be) by securing another length of ply along the back with glue and screws – belt and braces. We did this to the two panels at the back of the van and left them to dry overnight.
Once again we spent a bit of time securing the insulation to the roof. What we thought would be a 30minute job is now approaching day 4! If this doesn’t sum up converting a van – I don’t know what does!
Day 29
15th September 2020
The rainy and dull weather didn’t deter us from another day’s graft at the van. This was primarily because we wanted to check that the fan we installed a couple of days ago was watertight. To our delight it was perfect! Thank god!
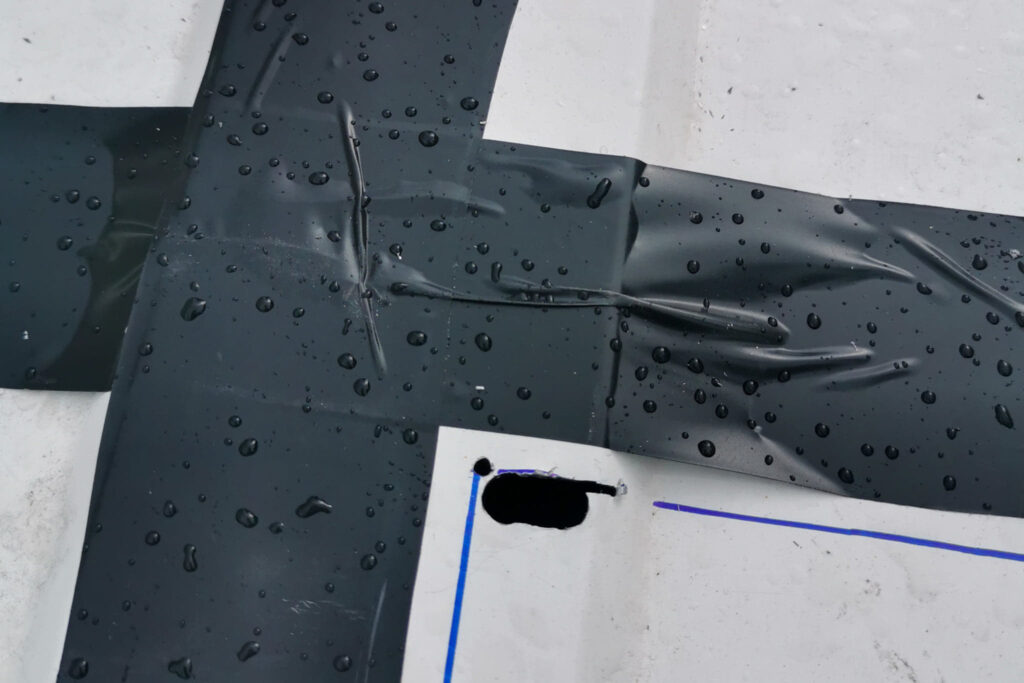
We also opted to put a vapour barrier over the wheel arches… a task that should have been done prior to screwing the floor down. None-the-less it felt good to tick off another necessary, but unseen job from the list.
We also spent more time gluing and screwing ply boards together to be extra secure when it comes to eventually mounting a bed onto the wall.
Day 30
16th September 2020
Today was a good day. It’s very rare that we start and finish a job in one day – so today was one for the books.
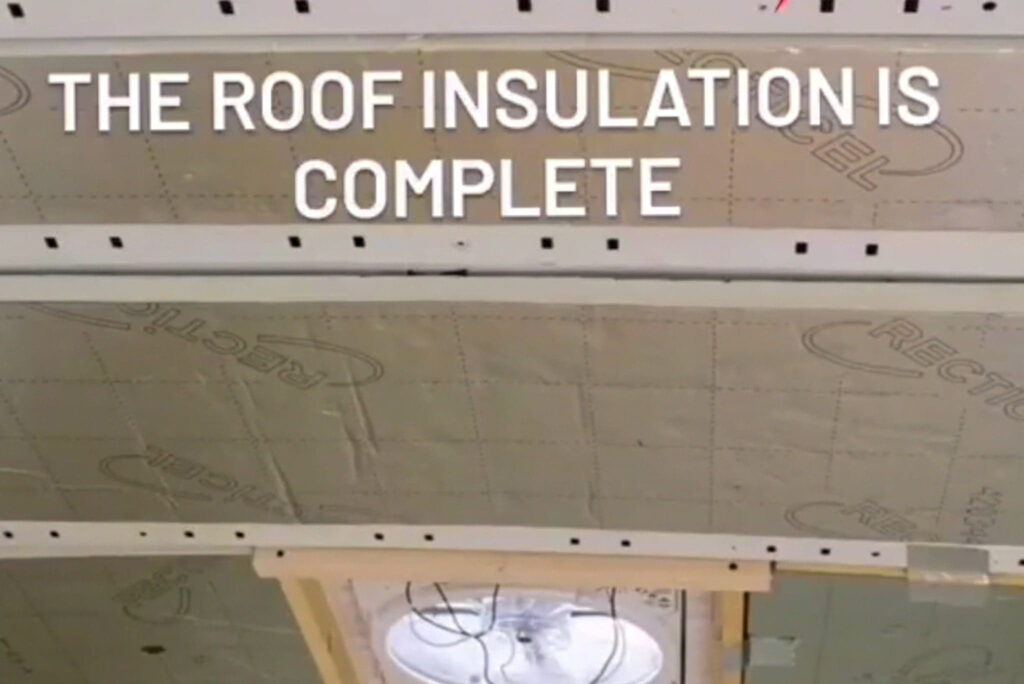
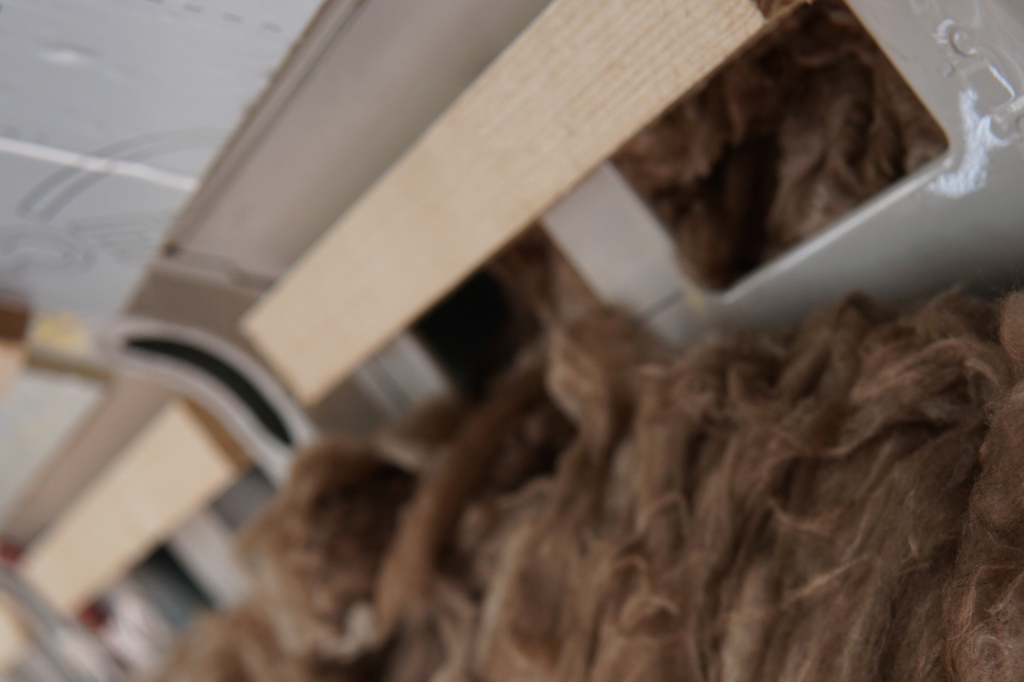
We decided to start framing the roof. After plenty of time “thinking” (more like procrastinating) we opted to get to work attaching 70x20mm wooden battens across the roof (on the ridges). We used M8 rivnuts instead of traditional self-tapping screws. To our surprise it only took two well positioned rivnuts to secure the battens. They are unbelievable solid, and I think its fair to say we are pretty proud of how they turned out!
Week 6
A lot of insulation and even more research!
We have almost completely insulated the van. We also found the perfect solution to having “floating” bunk beds!
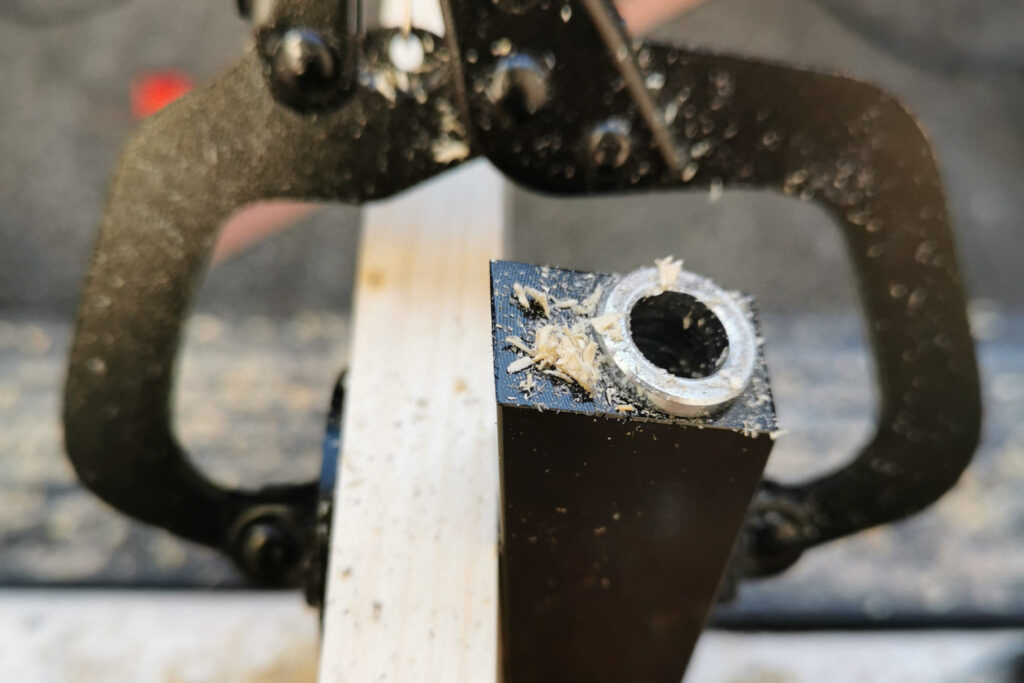
Day 31
17th September 2020
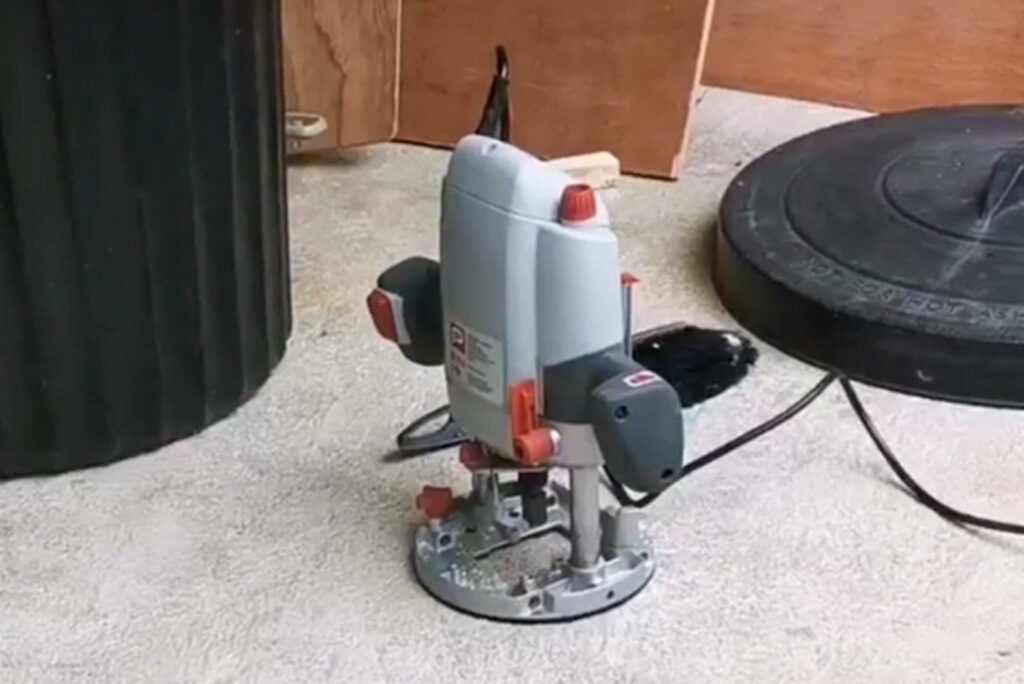
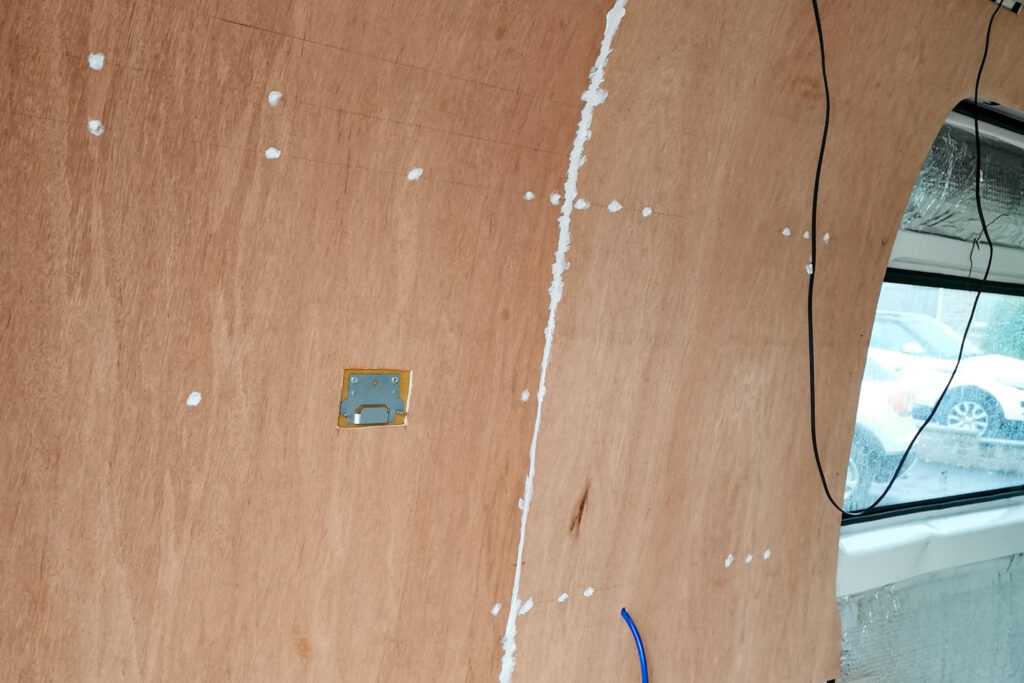
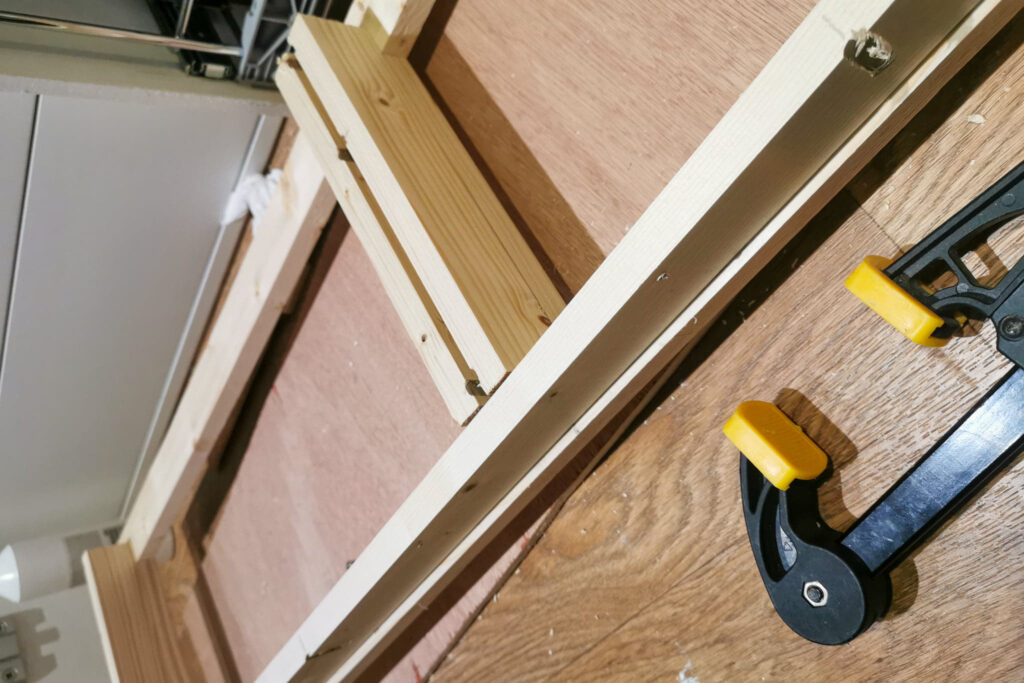
Today we became Jack of all trades. We started with a bit of carpentry and used a router to create a countersink effect for the heavy duty bolts we are using to secure the beds to the wall.
We then became electricians and fed a few wires through the van. In particular for a 12V Fridge that we will eventually install!
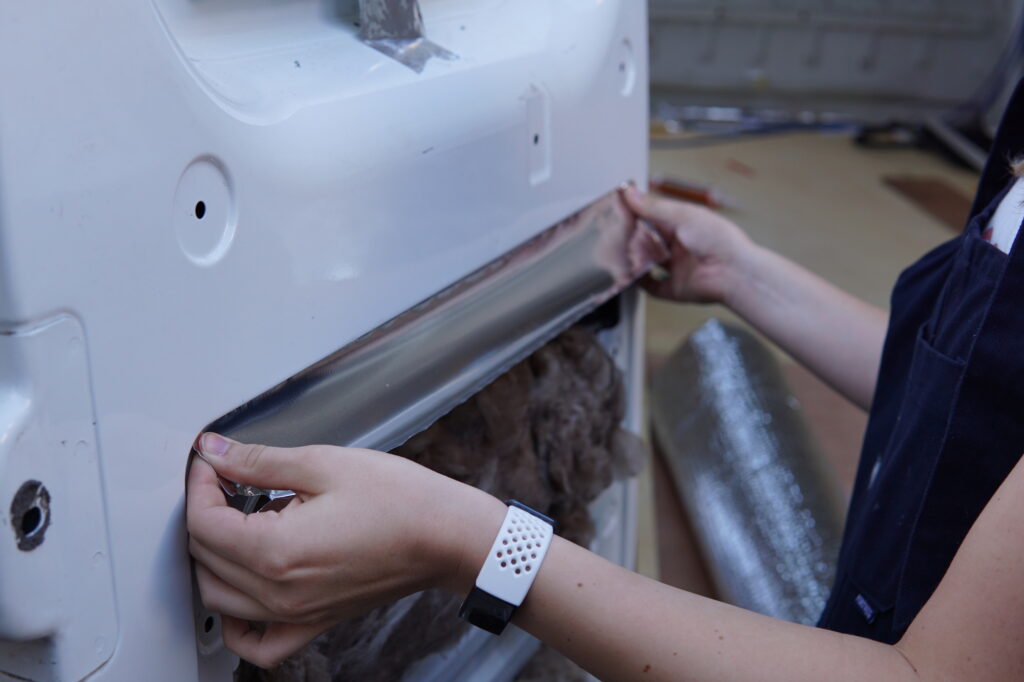
Finally we got to work insulated one of the back doors of the van. We used loose fill earthwool loft insulation as it is perfect to stuff into all the awkward spaces. After realising how simple this task was we called it a night.

Day 32
18th September 2020
Today felt like one of the most productive days we have had in a long time – which came as a HUGE surprise.
After doing a few bits and bobs just touching up our roof we continued insulating the doors of the van. We stuffed the loft insulation into all the nooks on all of the doors. We then secured it in place with a vapour barrier and foil tape. We honestly love the look of the metallic door but they will soon by lined with ply to look more finished!
We also cut up the remainder of the rigid board insulation and distributed it throughout the van. Waste not want not.


Day 33
20th September 2020
After spending yesterday browsing through TWO IKEA’s we finally found most of the things we need to make floating beds that span the width of the van!
But that’s for another day. Today we got to work running wire to the back of the van for USBs and lights. We also insulated a reasonable amount of the van. The rest should be finished by the end of next week. Finger crossed.
We constantly have so many smaller projects within the van running simultaneously so it often feels like we are very productive yet we see no change!
Day 34
22nd September 2020
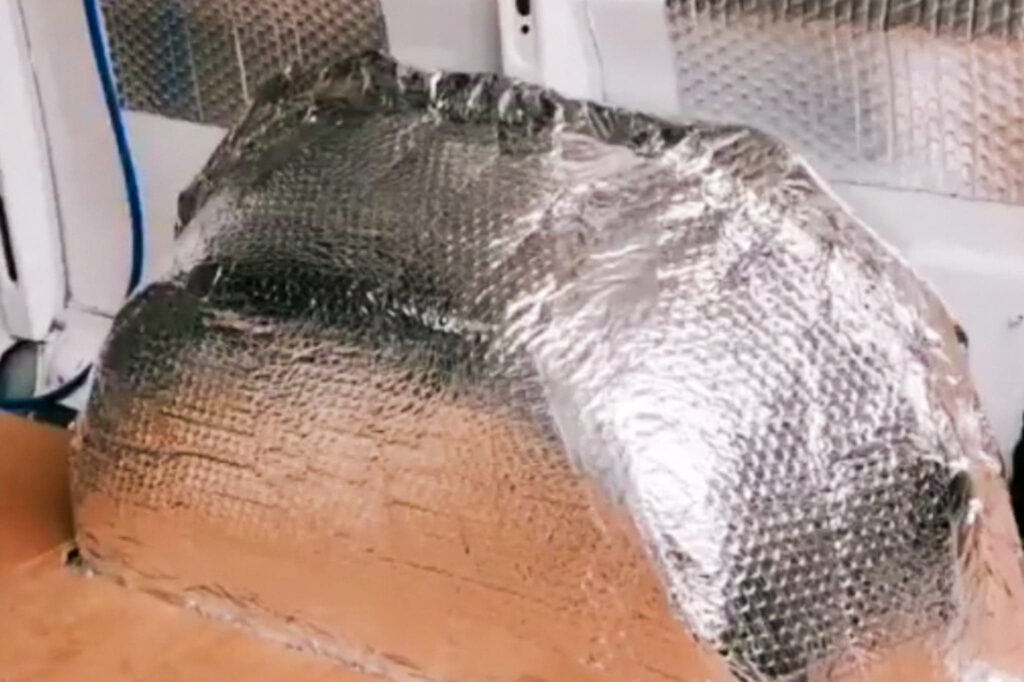
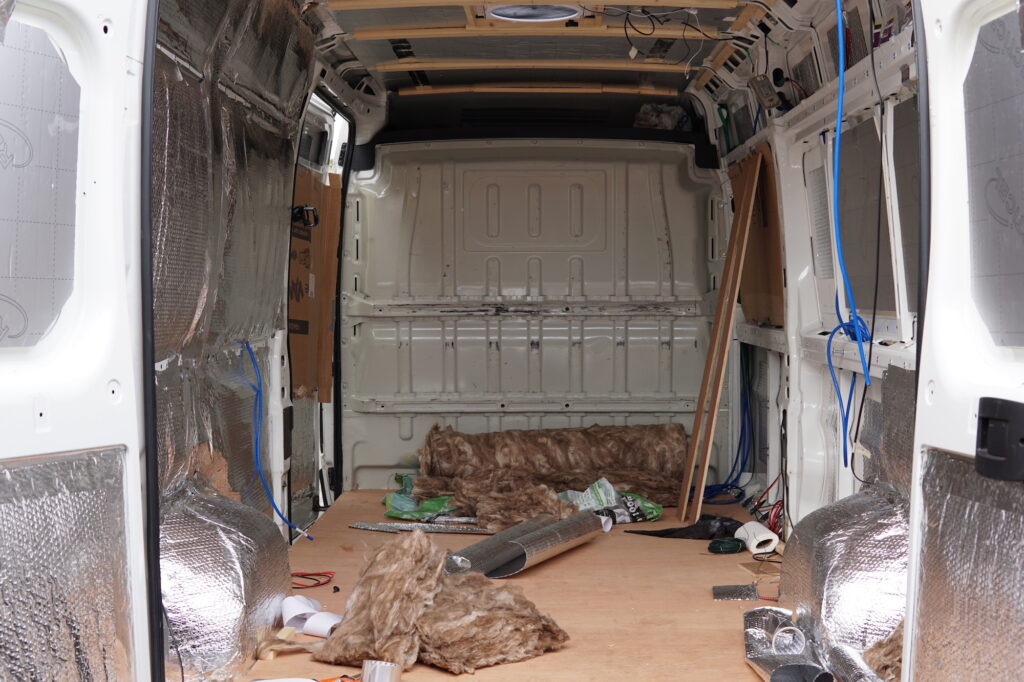
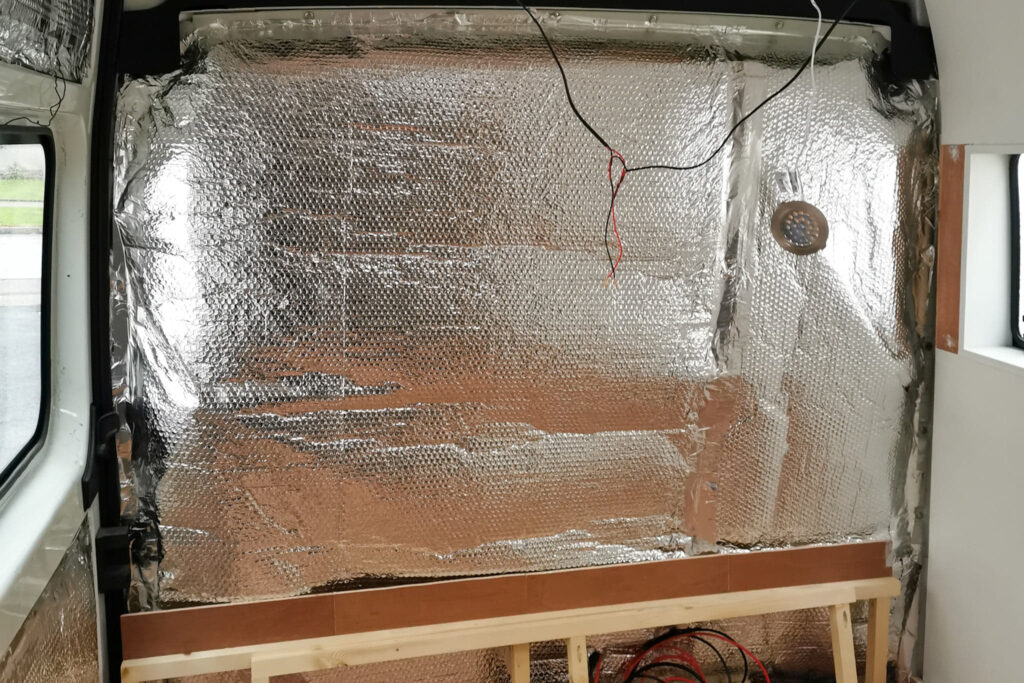
Today we took a gigantic leap forward and really got to work insulating the van. We are using a combination of 100mm Loft insulation and 25mm recticle rigid board insulation (what was leftover from the roof!).
Surprisingly insulating a van is one of the easier jobs… however, it is very itchy!
We packed the insulation into all the nooks and crannies and then held the bulk of it in place with a vapour barrier and Diall Foil tape.
Today was a good day. Its always nice when the progress you have made is visible. But the end of the day we had insulated about 40% of the walls… result!
Day 35
23rd September 2020
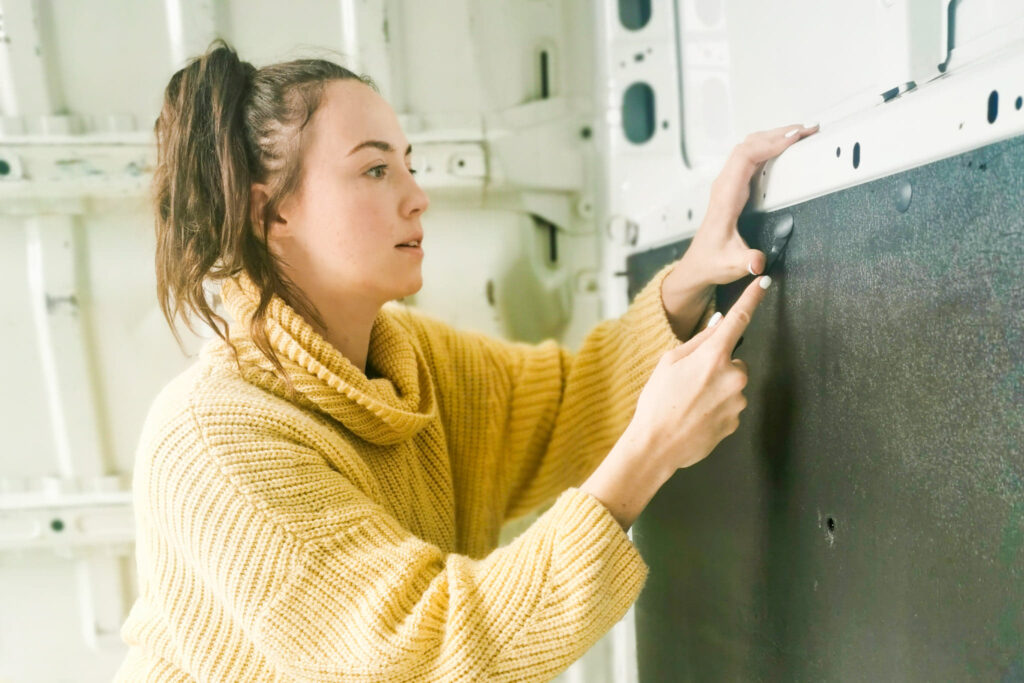
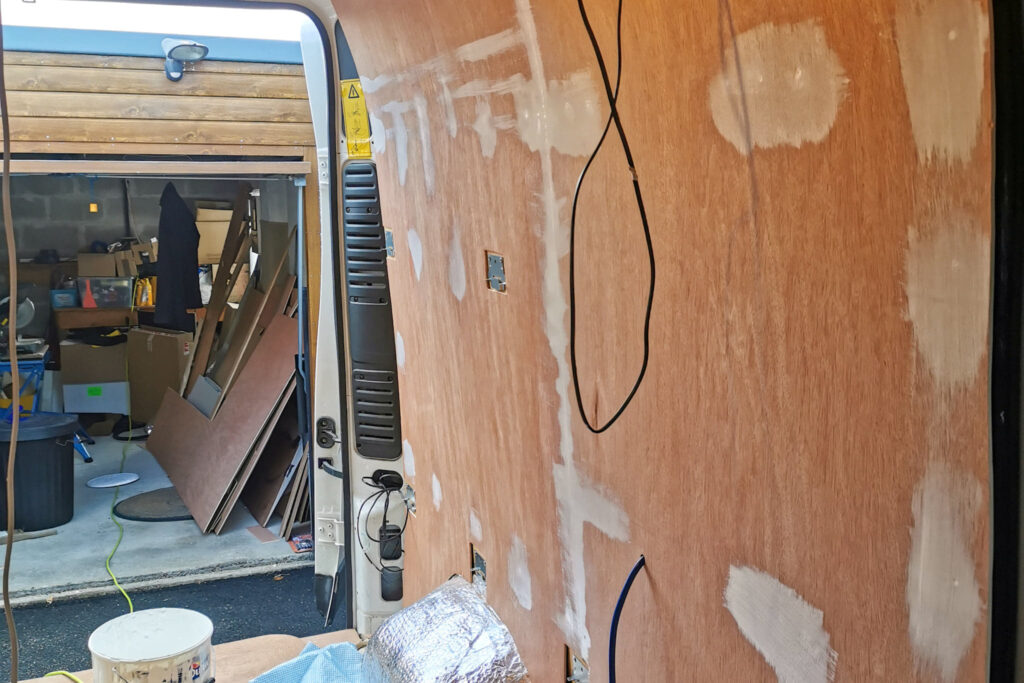
More of the same… insulating, insulating and more insulating. Using the same method as yesterday we have insulated the majority of the walls.
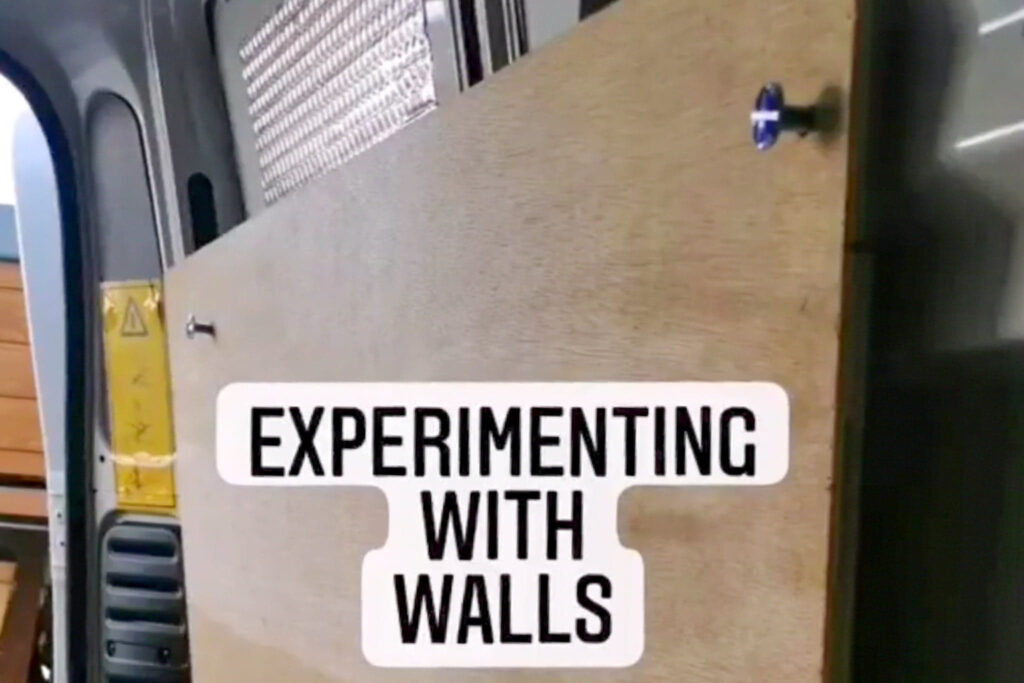
We also experimented with fixing ply panels to the walls. We are not framing the walls like most people do, instead we opted to secure panels the the walls using rivnuts so they are extra secure.
Its a long, complicated, and honestly underwhelming process… more on that later though!
Week 7
Undeniably the most frustrating week we have had yet.
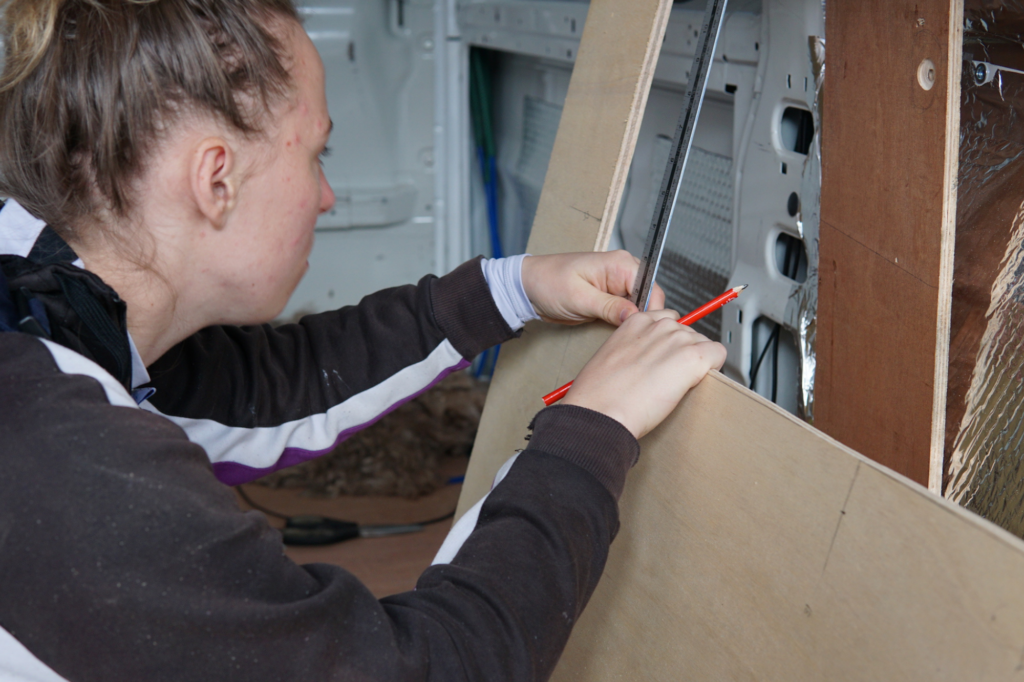
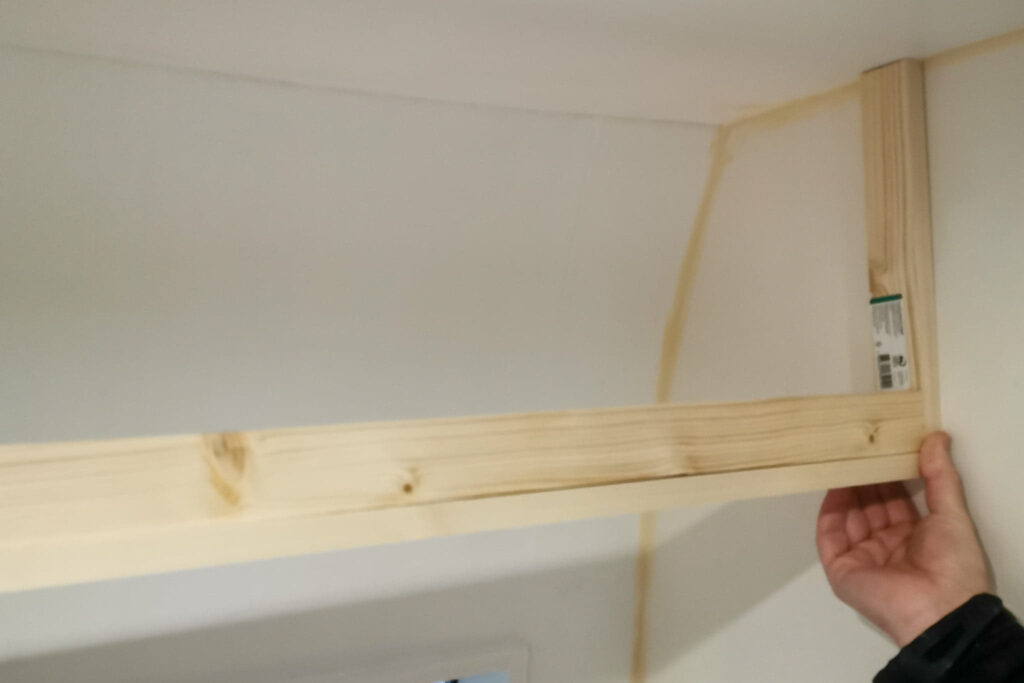
We spent the majority of the week carefully calculating and constructing a window frame. We also attached our bed “frame” to the vans ribs and added a few structural panels to the van.
Day 36
24th September 2020
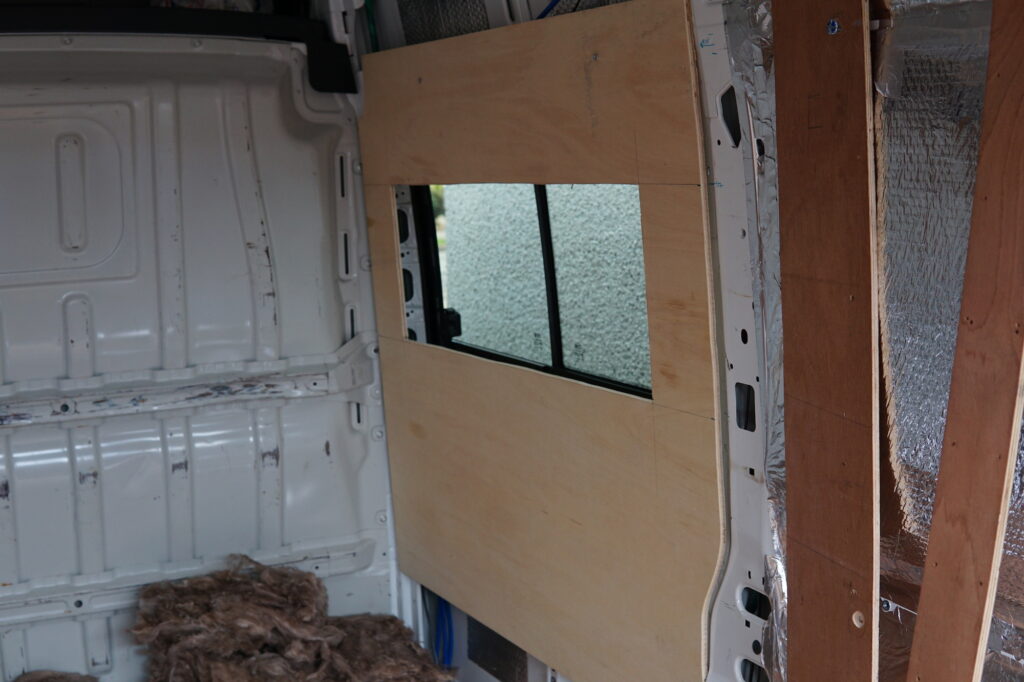
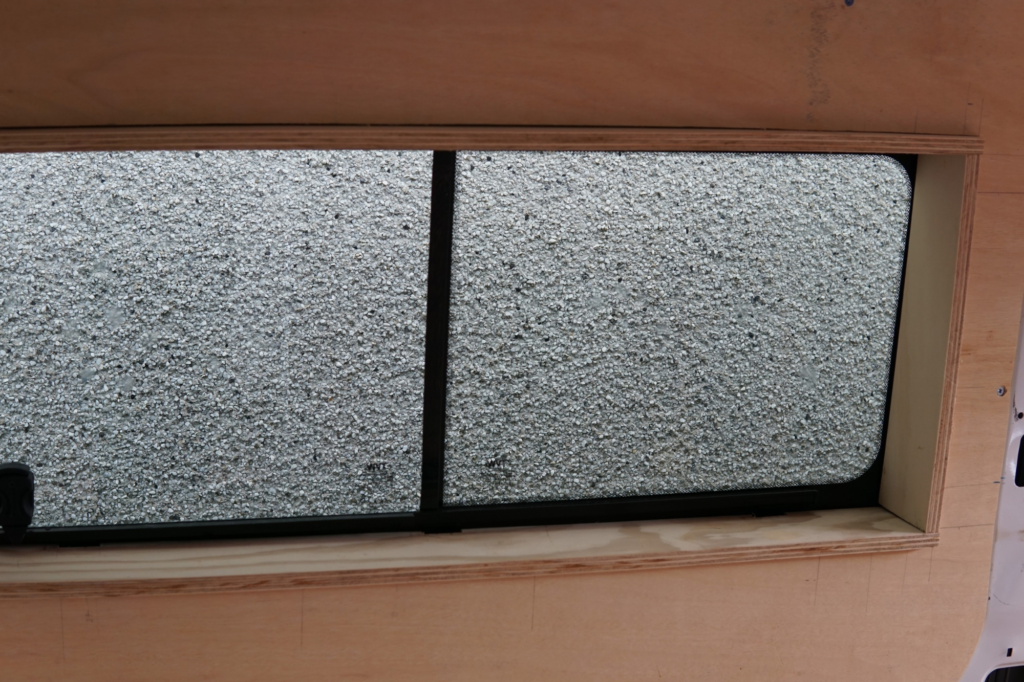
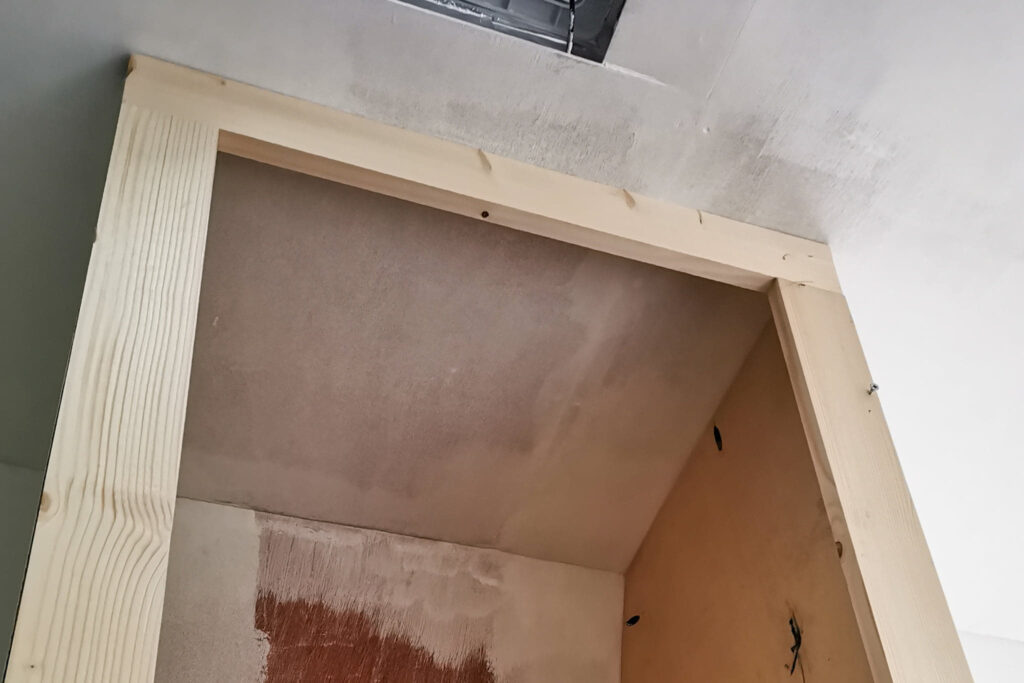
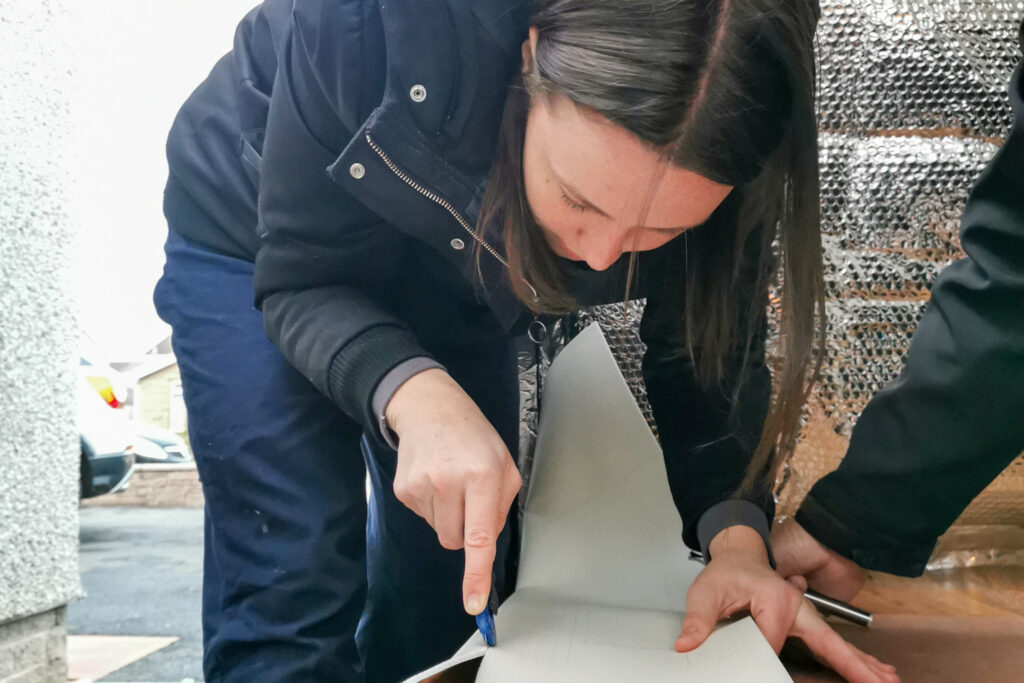
Today we got to work creating a plywood wall panel around the window. Like most van jobs, this was much more difficult than anticipated. Using a jigsaw we spend time creating the perfect shape so the ply would fit snugly in the frustratingly unique shapes of the van.
Spoiler: the windows aren’t perfectly square and have little nooks and ridges that you need to account for.
Day 37
25th September 2020
Unlike most days we only spent a short time at the van. We used today to perfect what we started yesterday – creating a wall panel around the window. After a lot of measuring and a little bit of cutting we go the window cut out to the size we wanted (almost)!
This window and its frame will be the death of us!
Day 38
29th September 2020
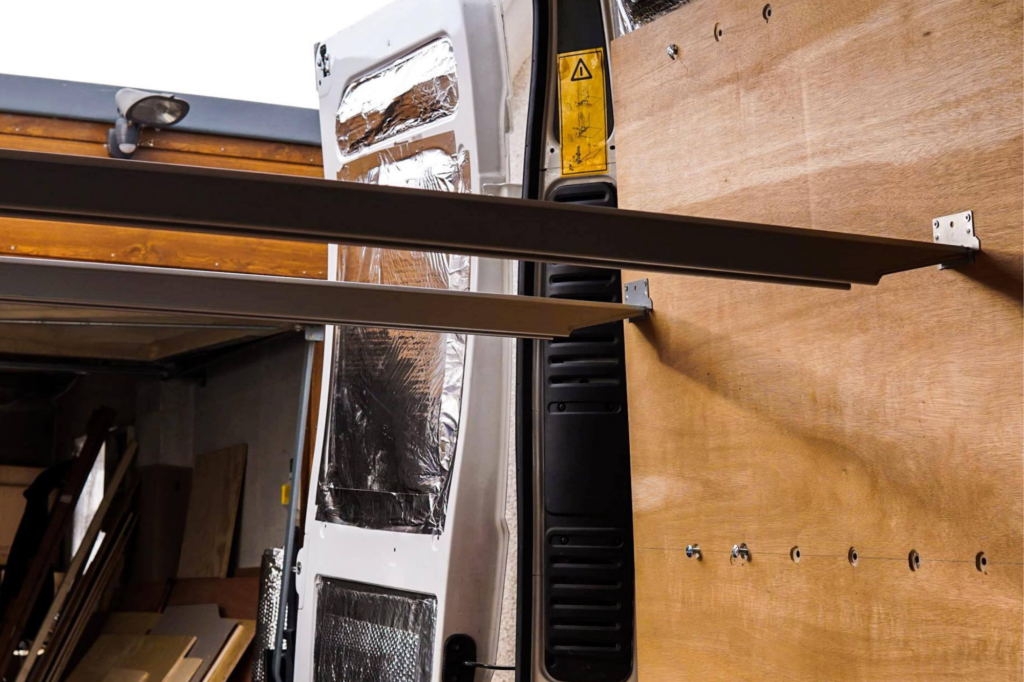
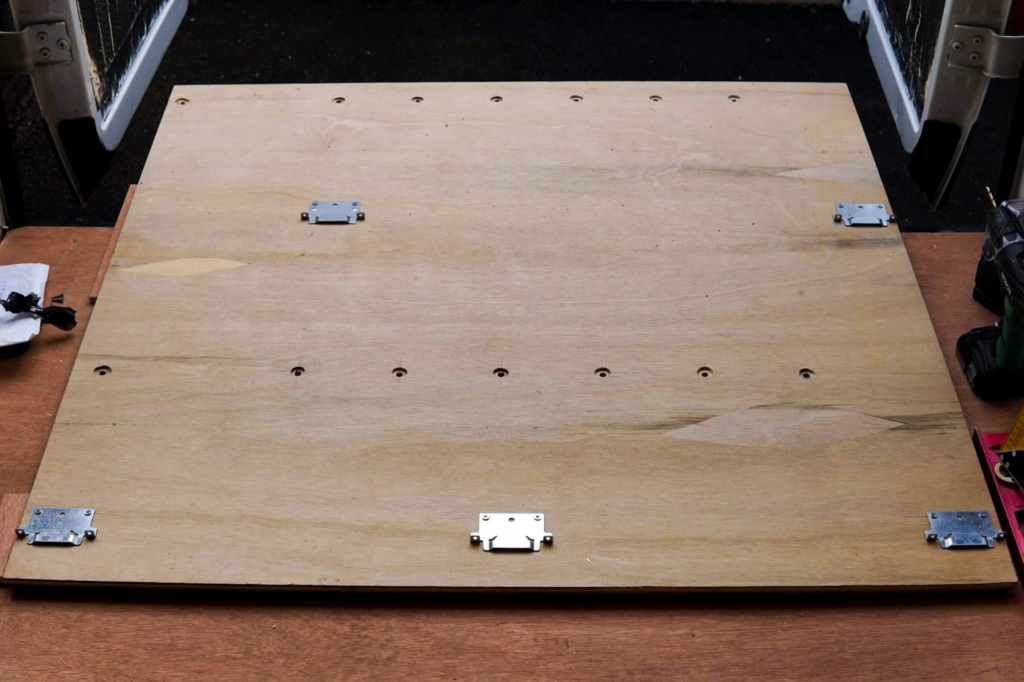
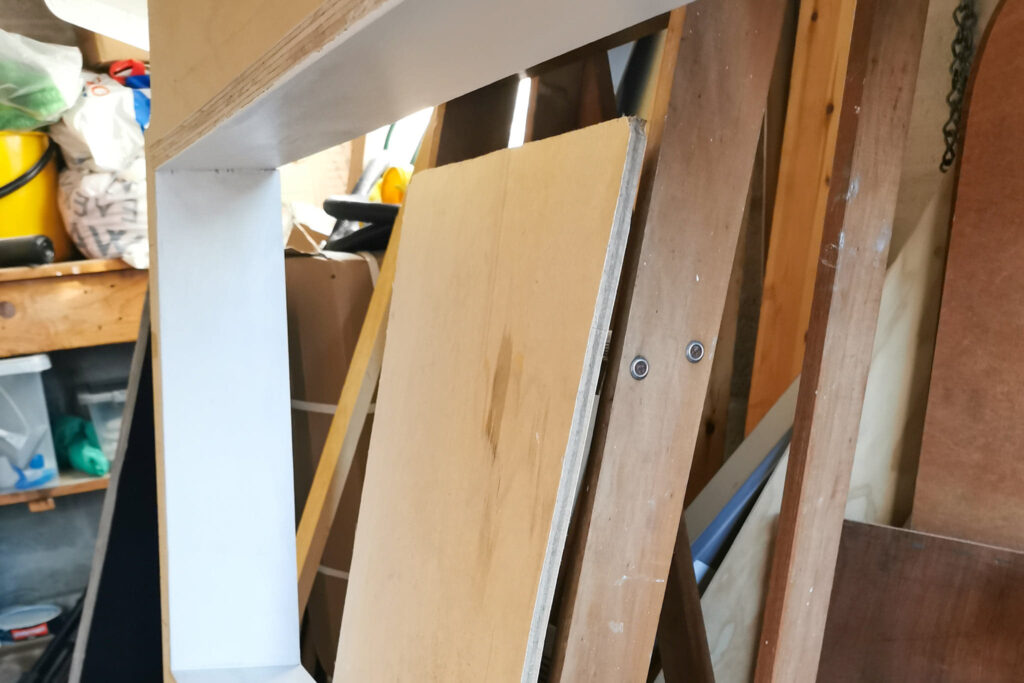
We finally received a very important package in the mail. This package included brackets and screws that would allow us to create “floating” bunk beds.
The beds are created using Skorva beams available from IKEA.
We attached the brackets onto the reinforced ply boards we created previously. They will provide an extra-strong base for the brackets to attach to.
We also finally attached several ply sheets to the van to allow us to attach the 5mm ply which will essentially be our cladding.
Day 39
30th September 2020
Unfortunately, the Scottish weather was true to form – torrential rain. This ultimately confined our workspace to inside the van – not ideal when cutting large sheets of ply.
Never-the-less, we still cracked on and even (almost) finished a wall panel.
Like always, there were plenty of challenges along the way. For example, we had to cut a hole to fit snuggly around the wheel arches. But mostly, maneuvering and cutting the ply was a right pain in the arse when confined to such a small space.
Week 8
Another excruciatingly frustrating week. We started constructing a window frame. As our van is not “framed” it made the job a little bit more tricky – a compromise we will happily accept for the extra space (even if it’s only a couple of centimetres!). We also put up a couple of wall panels too!
Day 40
2nd October 2020
With the rain almost stopped we got back to work on our never ending van conversion!
We cut a few more panels – about 35% of the van now has walls. Not too shabby. We had to cut small holes for the bed brackets to fit through and also cut notches into the top of the panel to account for the roof beams.
Every job in the van is NEVER straight forward! We are delighted that we can see less of the metal structure of the van!
Day 41
4th October 2020
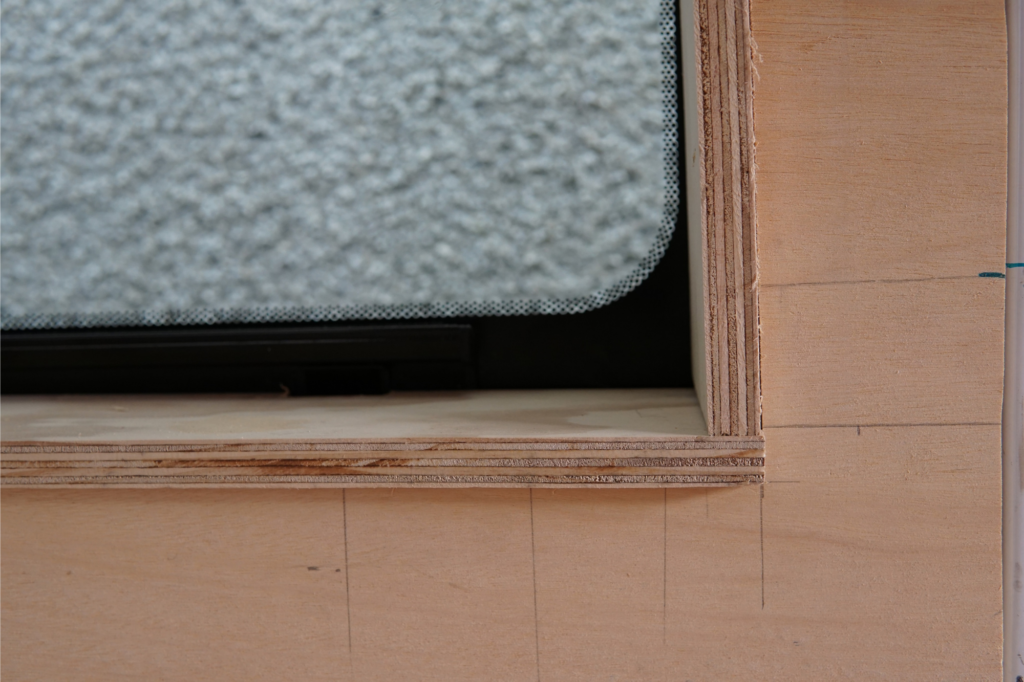
Today we started on the windowsill.
We had already created a wall panel with a window-sized cut out on it. We started by cleaning up the hole and measuring it to fit a windowsill as well.
The process required a lot of accuracy and patience (something we lack). It was a repetitive process of trial and error.
We cut out a few of the “sill” pieces and did a LOT of measuring and speculating.
P.S We hit 400 followers on Instagram.
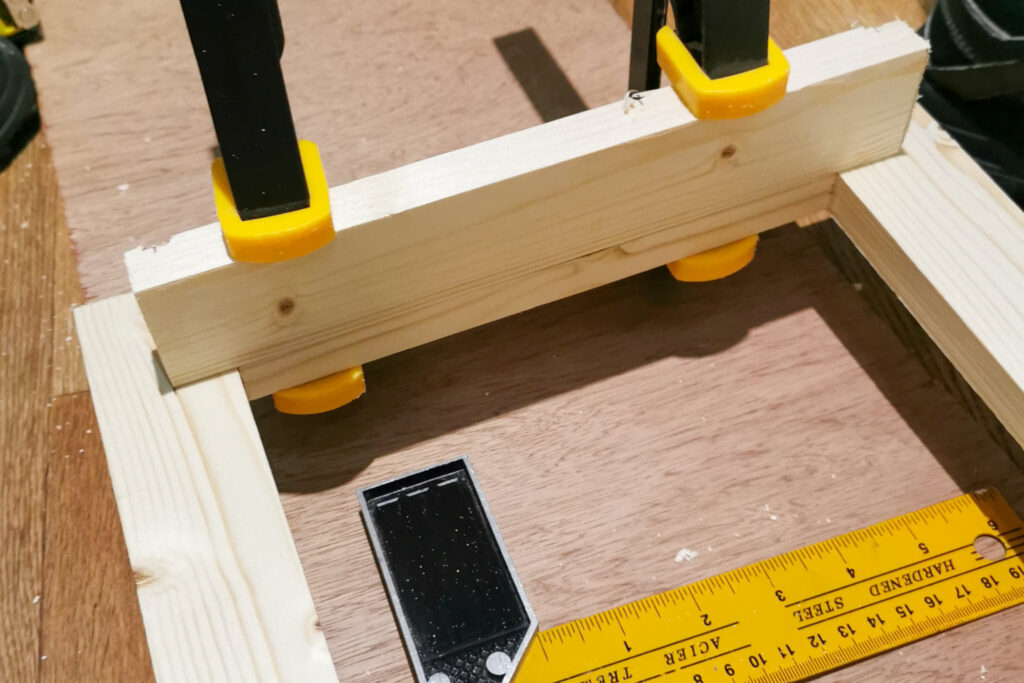
Day 42
5th October 2020
Another day that felt extremely busy, but resulted in very little progress.
Having started on the windowsill yesterday, we fully expected that job to be done by the end of today.
Spoiler: it’s not.
We cut all of the remaining pieces require to frame the window. This job was much more complicated than we anticipated as we initially forgot to account for the sloping van walls.
Once we had everything cut we fitted it all in place. We then perfected the edges until we got bored of it and called it a night!
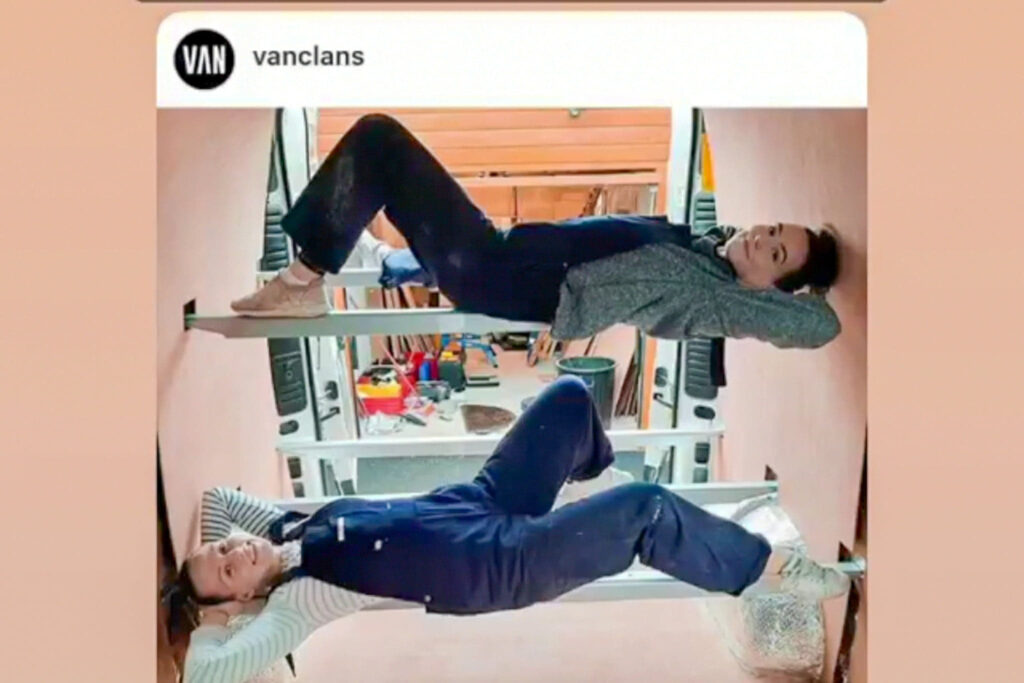
P.S VANCLANS featured us on their Instagram. We truly feel like big deals!
Day 43
6th October 2020
Today we did a lot of thinking.
Building a van is 90% thinking, calculating, and problem-solving, and 10% doing. Today we figured out how to support our shower tray, align the walls to the edge of the floor, and many other little insignificant, unseen quirks.
We even fit another wall panel – just roughly at the moment as we were a bit nervous to get cut the perfect curve around the sliding door.
P.S We hit 500 followers on Instagram! Quickest 100 follower growth we have ever seen.
Week 9
A frustrating week of walls and window frames… and fitting our grey water tank. As we are tackling the quite big job at the moment, it is pretty rewarding seeing the major renovations!
Day 44
8th October 2020
Yesterday was a complete write-off.
We arrived at the van and quickly realise that there was no sign of life. Initially, we thought the van’s keys batteries were out of power. That was not the case. The van’s battery was completely depleted and wouldn’t even allow us to remotely unlock it. We spent yesterday charging the van’s battery and got no work done.
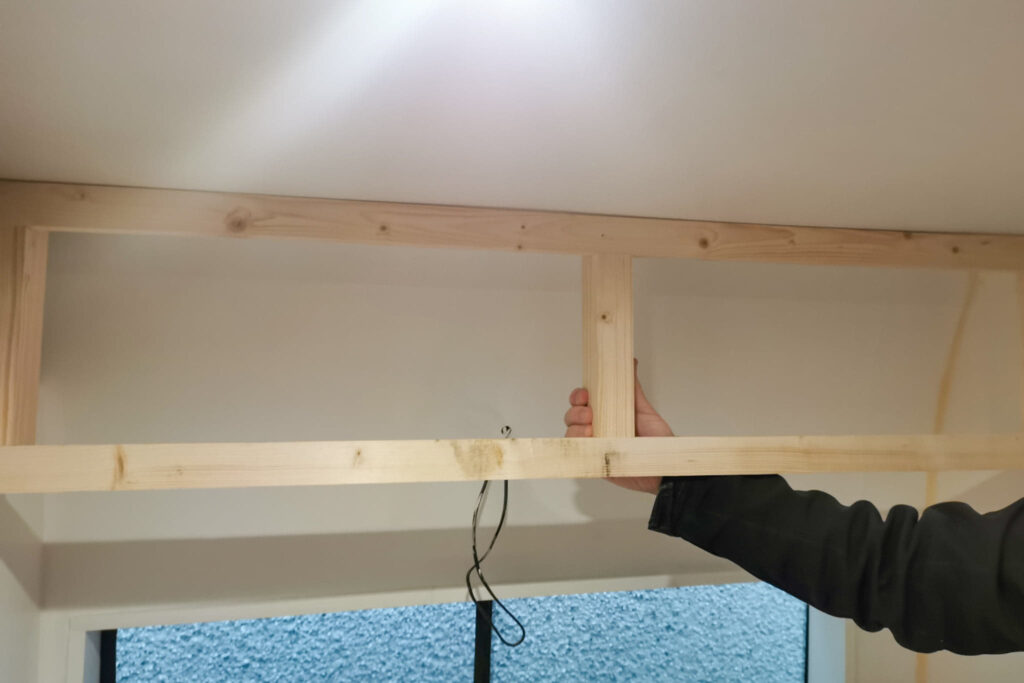
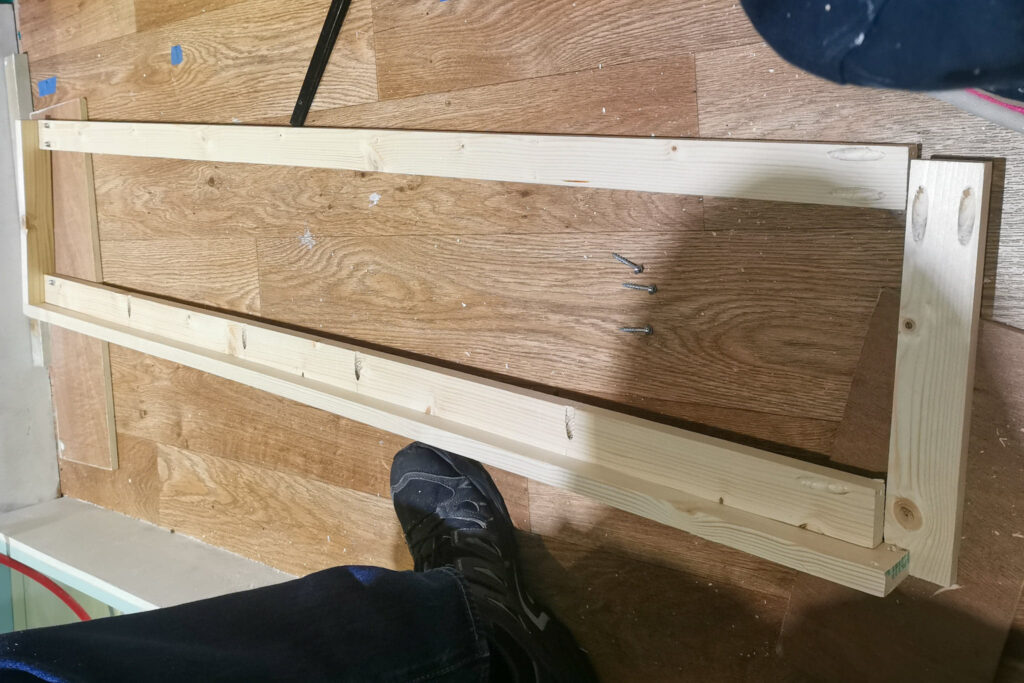
Therefore when we arrived at the van today we were on a mission to finish the window frame.
We had all the pieces cut out and ready to go. We just had to figure out how to fit them together and secure them to the wall panel.
I am pleased to report that this was plain sailing – a rarity when working on a van conversion project!
Day 45
9th October 2020
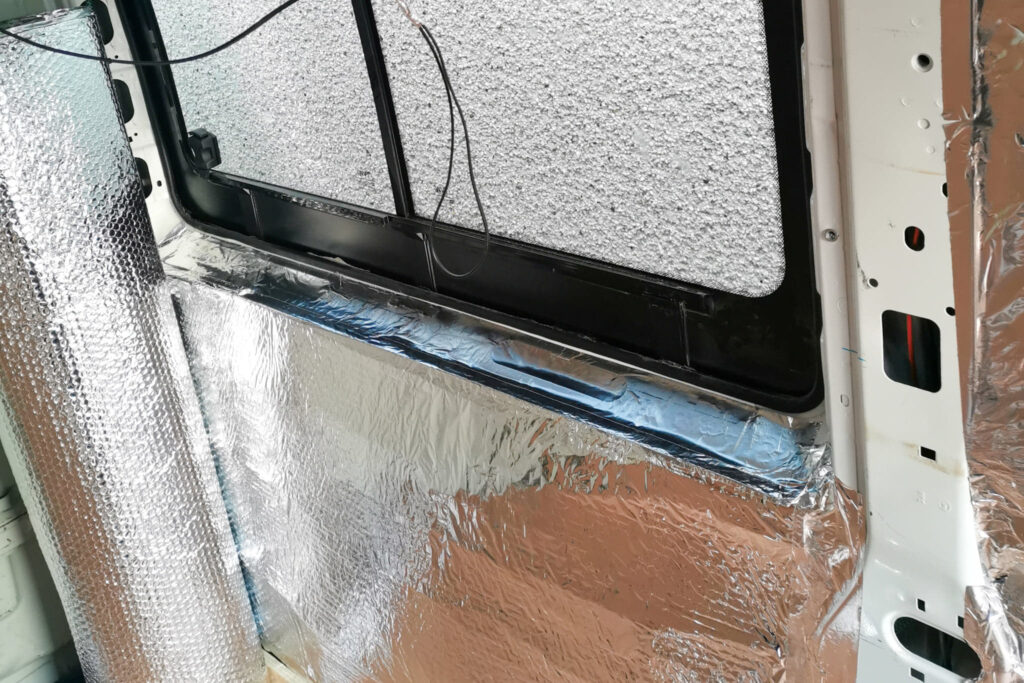
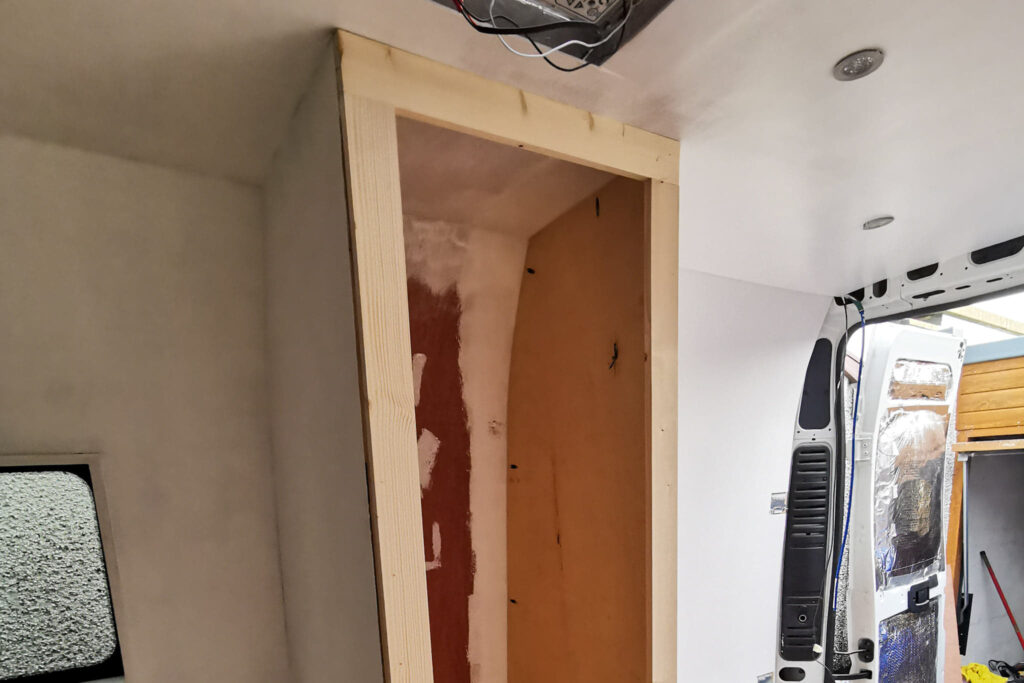
A reasonably productive day of adding the final bit of insulation (good riddance), fitting the walls, and painting our window frame
We finally secured the first wall panel. THE CURVE LOOKS AMAZING. It’s a shame that the curve will eventually be covered by cabinetry as it loos so professional (in our opinion)!
Day 46
10th October 2020
Before the rain washed us out, we put in 2 more wall panels. With the addition of these panels the van already feels 100x more homely – and we love it.
We also finished painting the window frame in preparation for putting it up tomorrow. It really feels like it is all coming together.
Day 47
14th October 2020
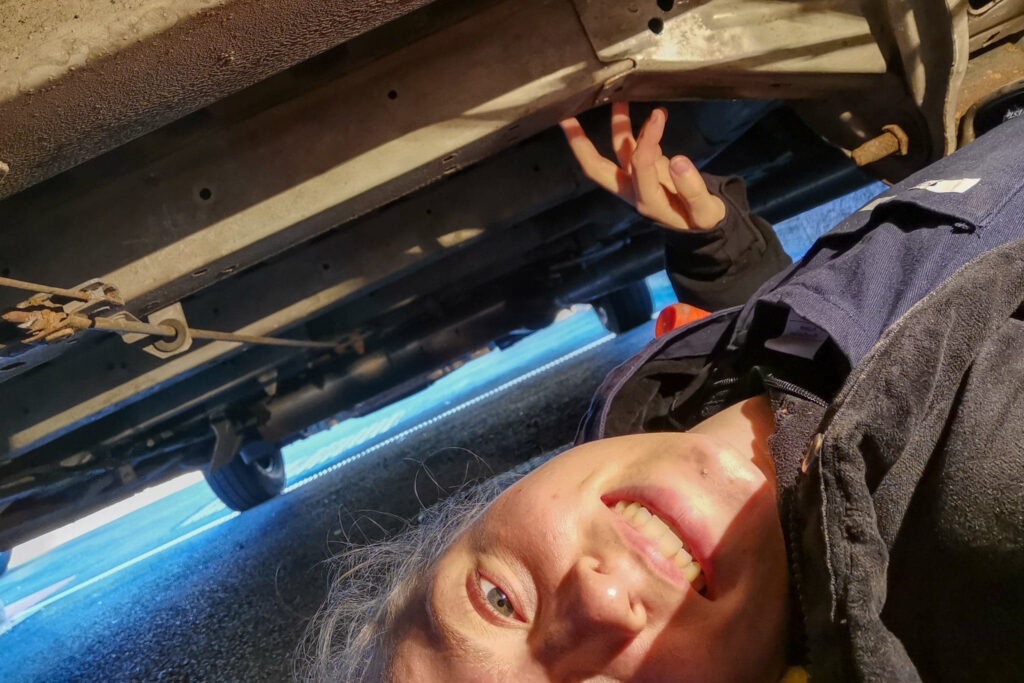
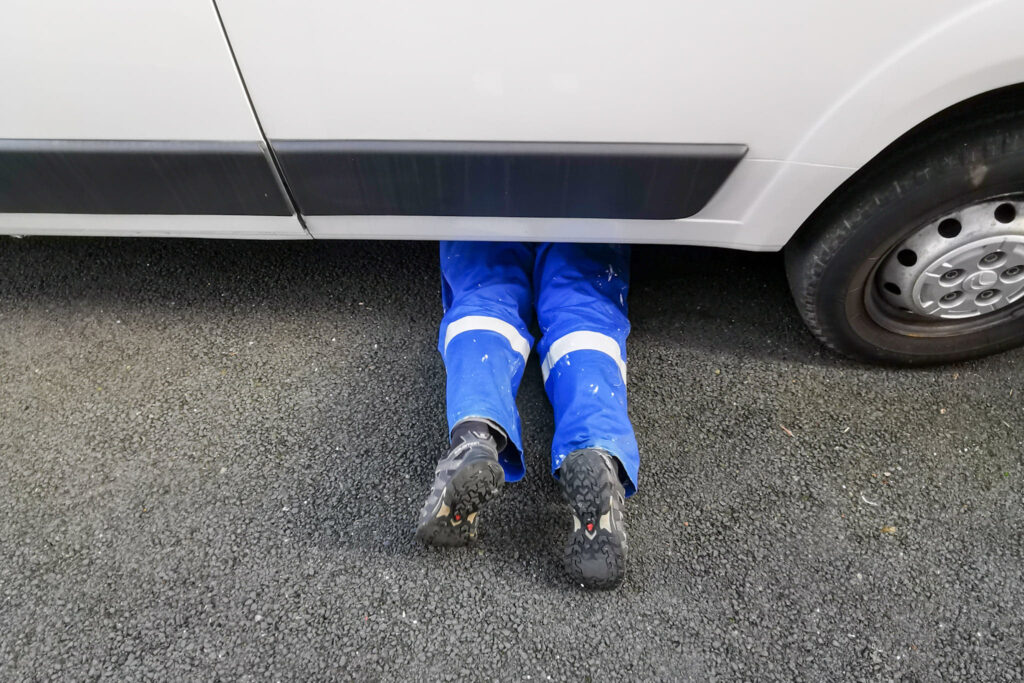
Today we spent the majority of the day under the van! It was time to fit the underslung grey water tank.
As per usual, this wasn’t without difficulty.
A couple of the bolts that hold the tank up would not get into position with brute force alone. We had to get the angle grinder out and make them into a point to be able to position them where we wanted. Once we cleared this hurdle it was relatively plain sailing. We hoisted the tank up and secured it into place. This was definitely a job for 2 people!
Week 10
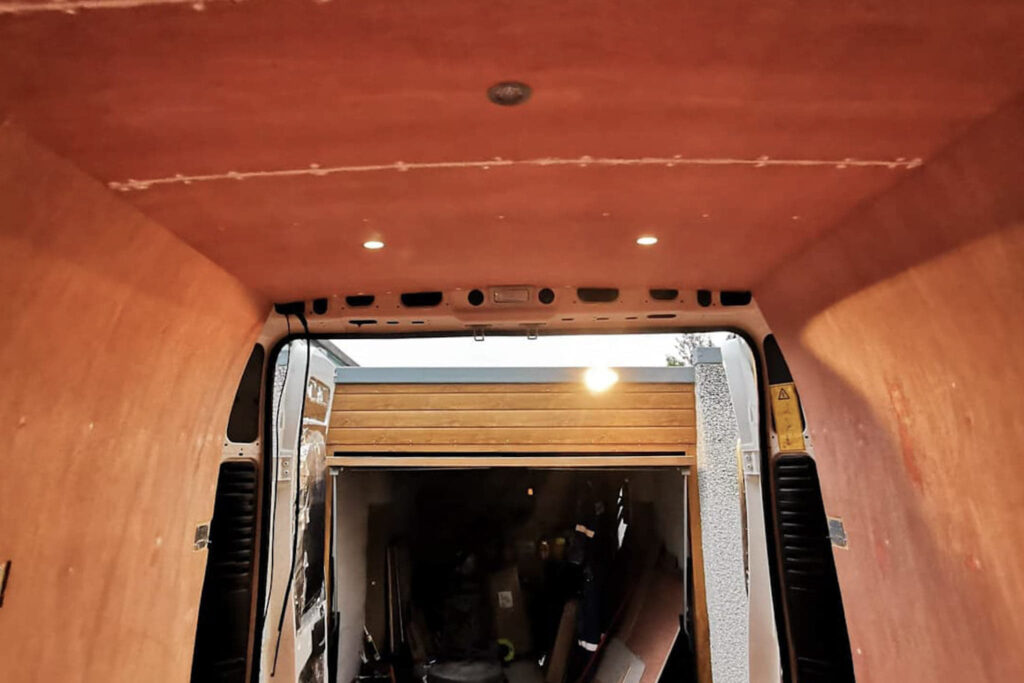
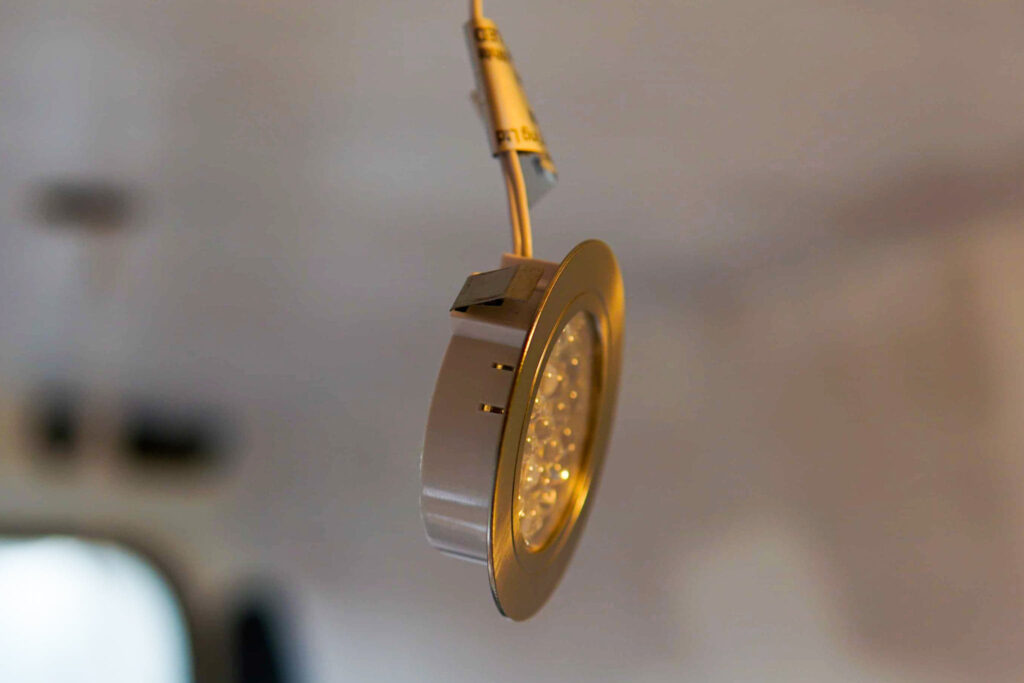
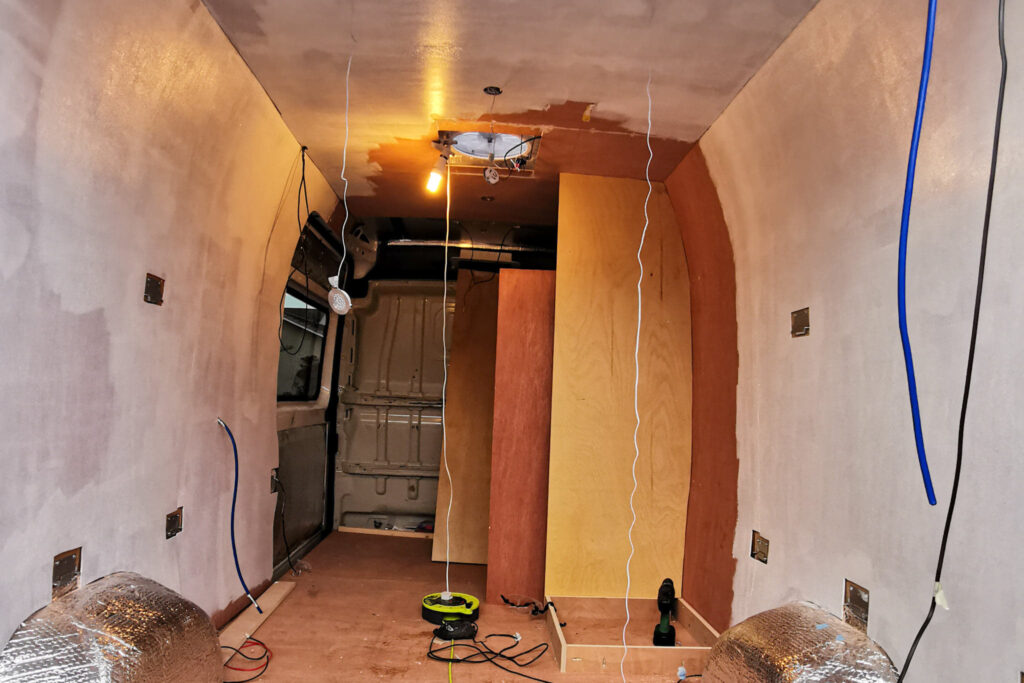
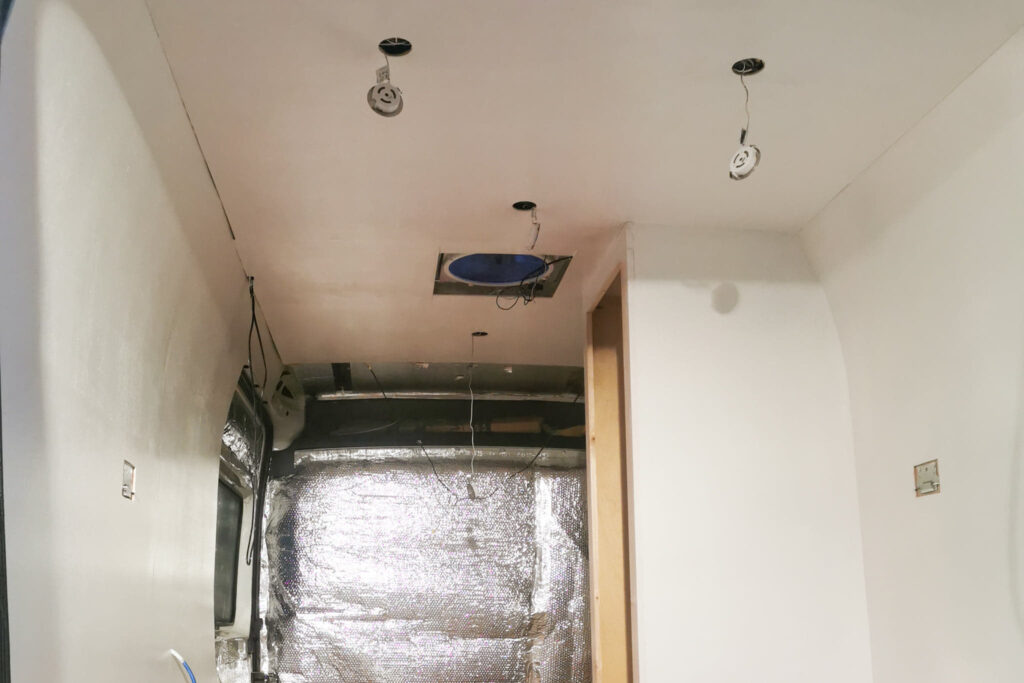
This week our van went through the biggest transformation. We started creating our shower and wired up a few of our roof lights. The roof is basically finished and just needs 100 coats of paint. We are obsessed with our lights as the are touch sensitive!
Relevant posts include:

Day 48
15th October 2020
Today we built a structure to support our shower tray.
It really highlighted just how tiny the shower will be! But I guess that’s just one of the many compromises you will make when you choose to live in a van!
We secured it to the floor using a pocket hole drill.
Nothing more to report. As per usual, the majority of today we spent problem solving and thinking.
Day 49
16th October 2020
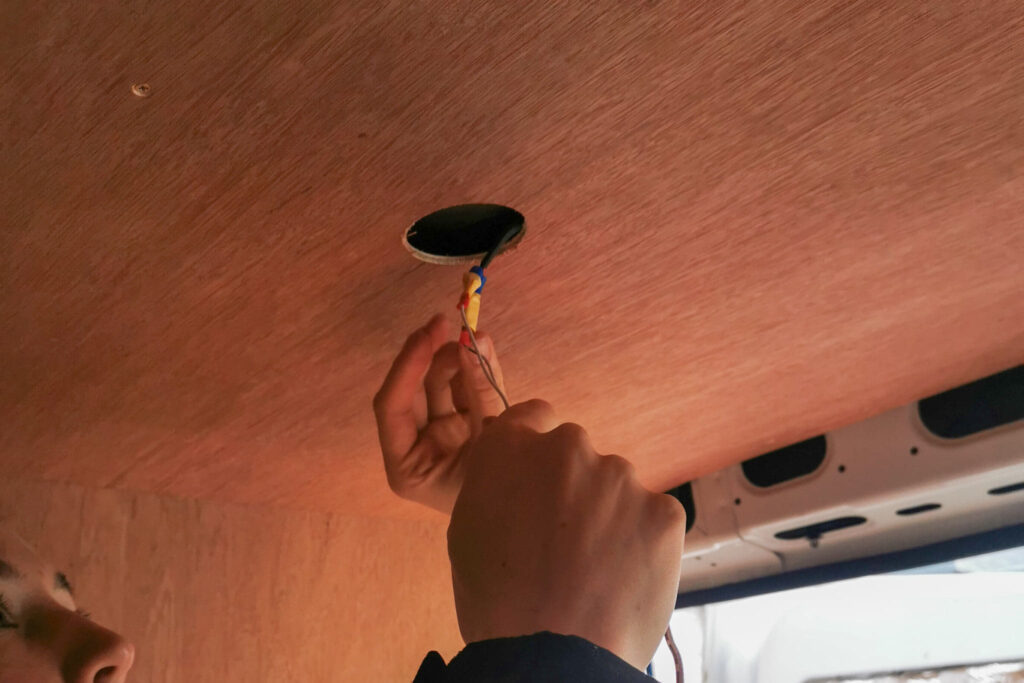
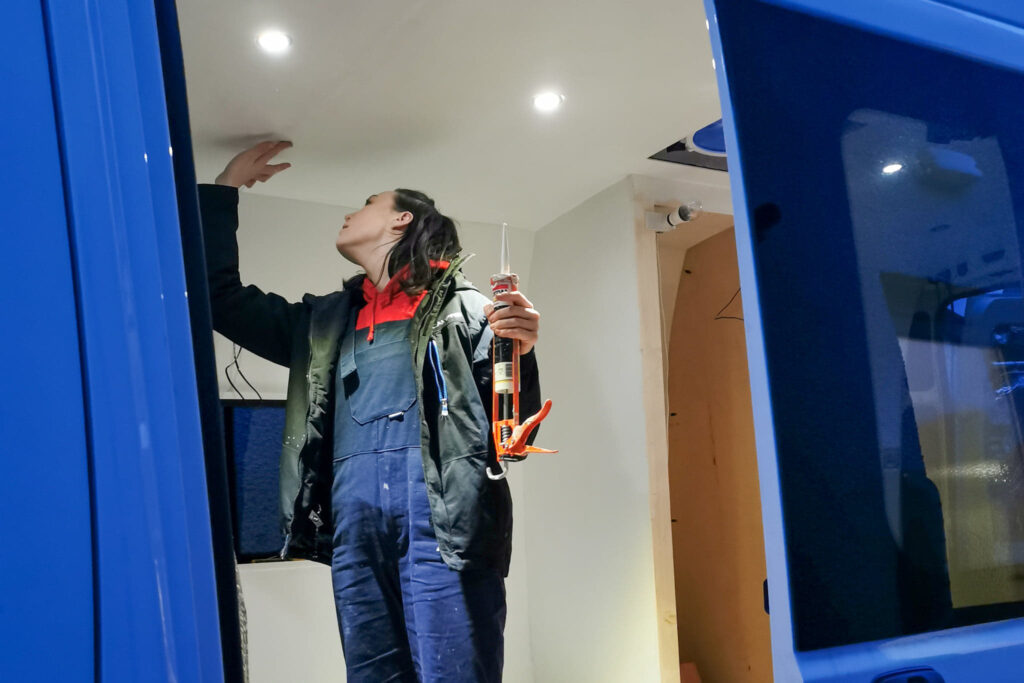
We finally started wiring the lights. A job that shouldn’t have been difficult, but it wasn’t as straight forward as we had planned.
However, once we got the knack we couldn’t be stopped and 2 lights were wired in no time!
We even put up a ceiling panel. It looks so good – we are biased though!
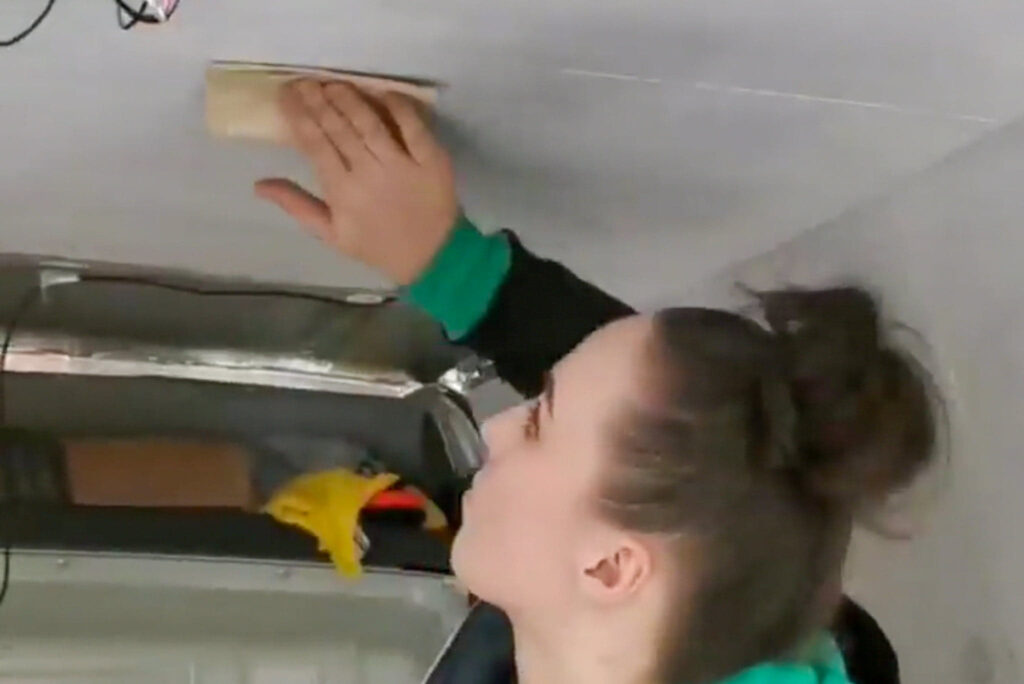
We also spend a ridiculous amount of time caulking and sanding – this is a work in progress! It will definitely take a LONG time until it looks reasonable!
Day 50
17th October 2020
We cracked on with the ceiling panels.
It’s so crazy how a couple of ply panels can transform not only the roof but the whole van quite dramatically!
Perhaps the best thing about being at this stage of the build is that we have now fitted 4 lights which are perfect for the dark and dreary Scottish days!
Day 51
18th October 2020
Today was a good day.
We built the shower walls. This may seem easy, but much like every van job, it was not.
The curved walls, combined with the ununiform nature of a self-built van really doesn’t lend itself to being a simple task. We created the uniquely curved walls by creating a template and cutting around it. It worked a treat.
It is so strange seeing the van look a little less boxy and a little more homely!
Day 52
19th October 2020
The miserable Aberdonian weather strikes again. However, this didn’t stop us pushing onward – just not as much as we had hoped.
We installed another ceiling panel, a light, AND A LOT OF CAULKING!
When building a van you completely forget to account for the time you will spend caulking and sanding and doing various other little tasks! They eat up your time like nobody’s business!
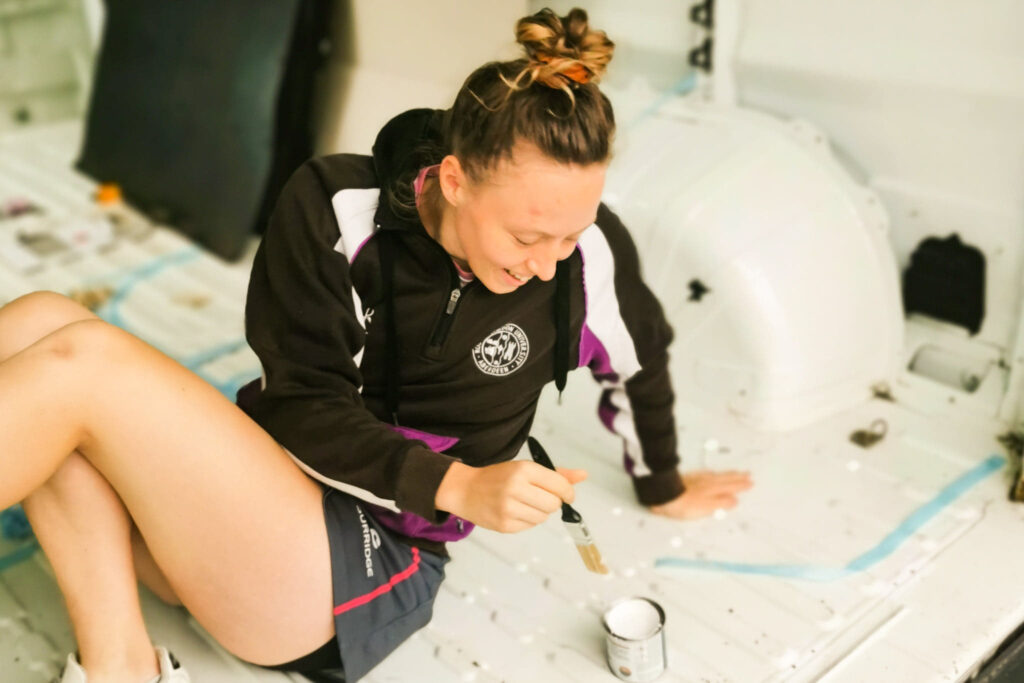
Day 53
20th October 2020
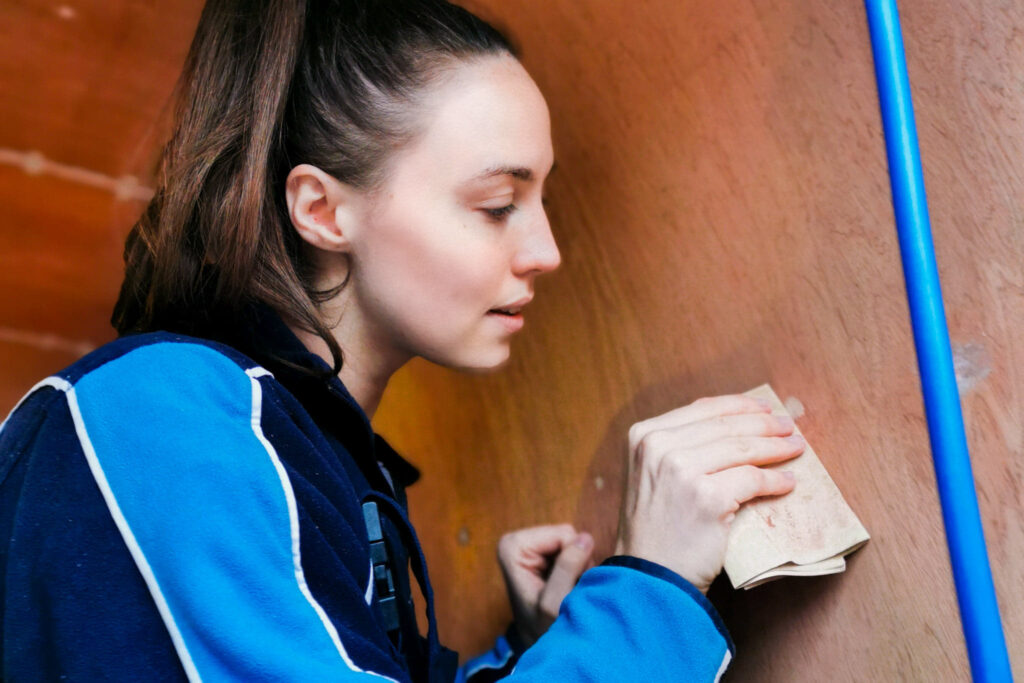
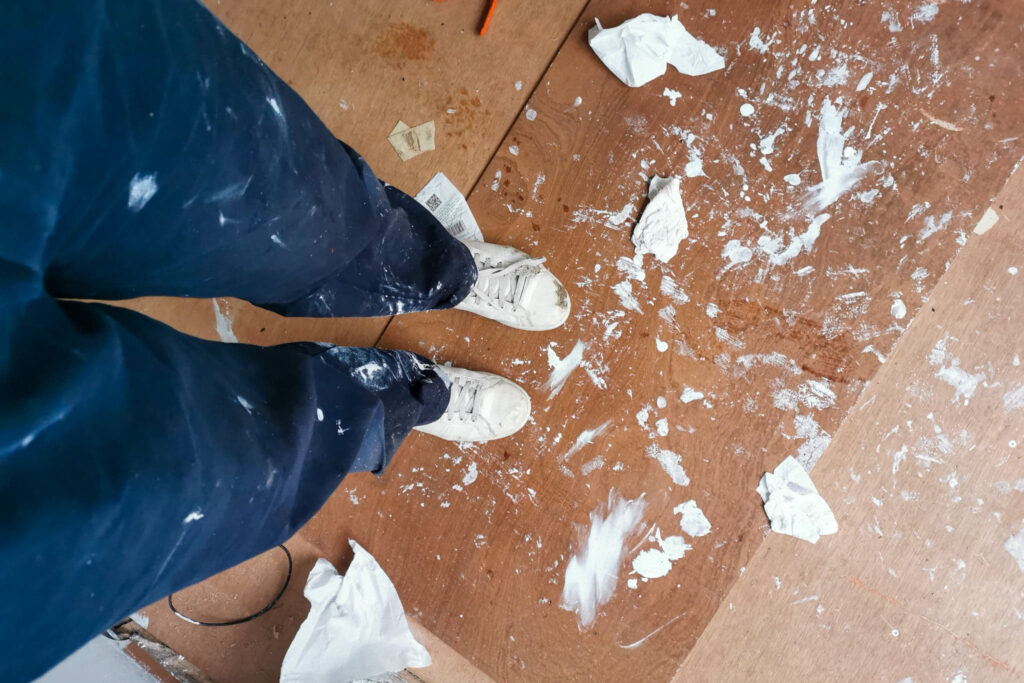
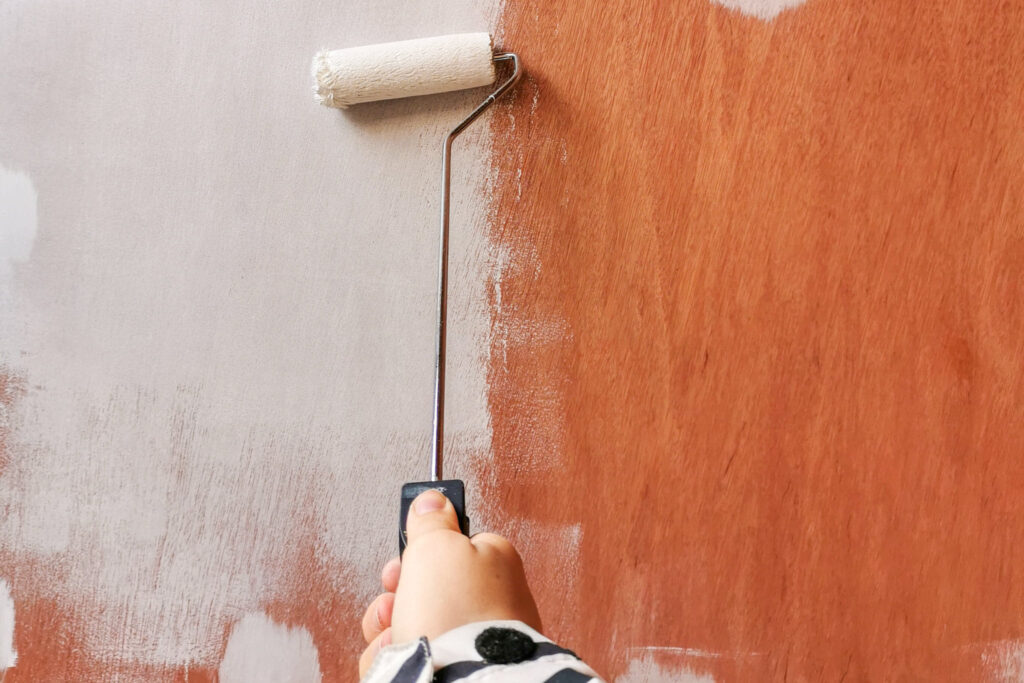
Today we started painting!!!
After caulking and sanding for what feels like years, we finally took the plunge and started slapping some paint on the walls. It is very thin and streaky at the minute as the plywood really sooks up the paint, but progress is progress – so we are not complaining (much)!!
Day 54
21st October 2020
Unfortunately, today didn’t go to plan. Once again our van’s battery was completely drained. We jump-started the van, however, it is slightly concerning that this is our second time in this predicament.
Once that problem was sorted out we got to work caulking and sanding and painting. Every day we find new imperfections that we feel compelled to correct. We are definitely going overboard!
We applied a 2nd and 3rd coat of paint to many areas around the van. It is really quite white! A bit clinical!
Week 11
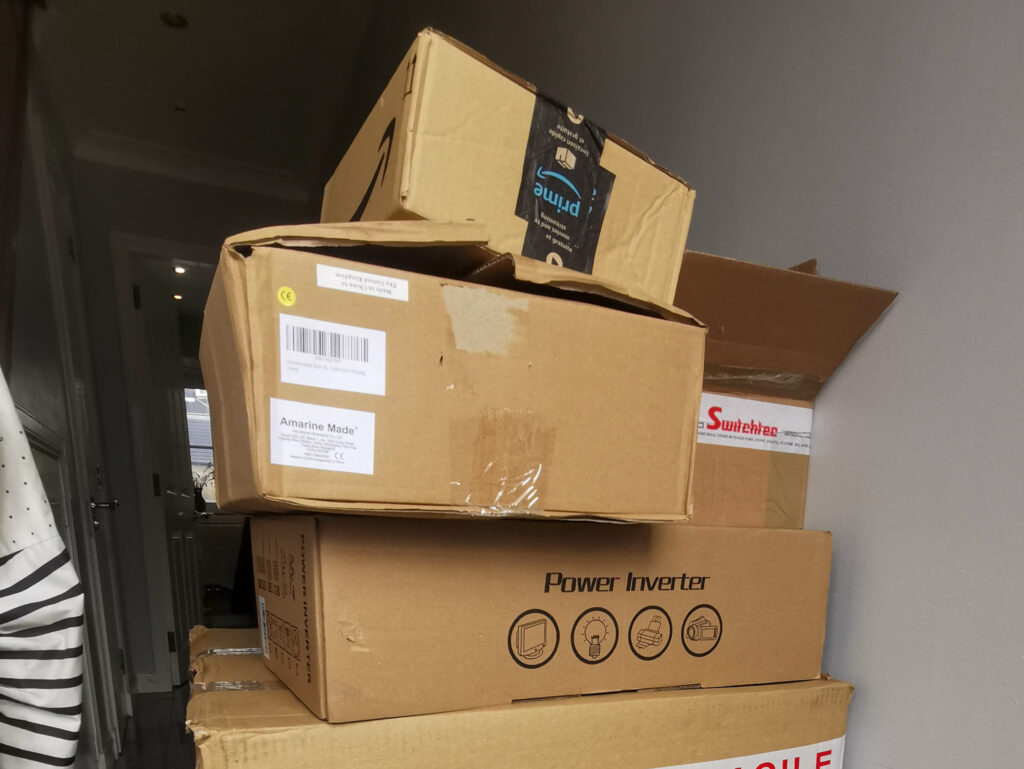
A busy week for our postman as we received numerous important deliveries – including solar panels!!
We started constructing our sofa area as this will house our electrics (and also support our bulkhead cladding). As eager as we were to get the solar panels on the roof of our van, the Aberdonian weather was not cooperating. We did fix them together and attach the feet mounts though! We also dabbled in the electrics and even took the first steps of construct our sofa area.
Relevant posts include:
Day 55
22nd October 2020
Today we received 6 DELIVERIES! Including the solar panels!
We also sanded down some caulking in the van. The sanding honestly feels never ending.
Today also marked the first day of our attempts at building furniture. We started designing and constructing the “sofa area” in the van. This area also houses all of our electrics so it was important to leave enough room for our batteries and other electrical stuff.
Day 56
23rd October 2020
We persisted onward with creating our sofa! Having meticulously planned the layout and calculated the measurements we got to work creating a frame.
However, after putting in some serious work we realised that the measurement we had been given may not align with the cushions/backrests we have been upholstering.
We also spent time trying to figure out how to clad the bulkhead wall.
Lots of thinking… not so much work.
Day 57
24th October 2020
Having cut the shower wall panels to size last week it was finally time to make them a permanent fixture. Using plenty of pocket holes, we attached the shower walls to the actual walls. To our surprise they actually were pretty sturdy.
We also enlisted some help from our friend and cracked on with painting the van. She is looking dazzling in white! We will probably still add another coat – just to be on the safe side!
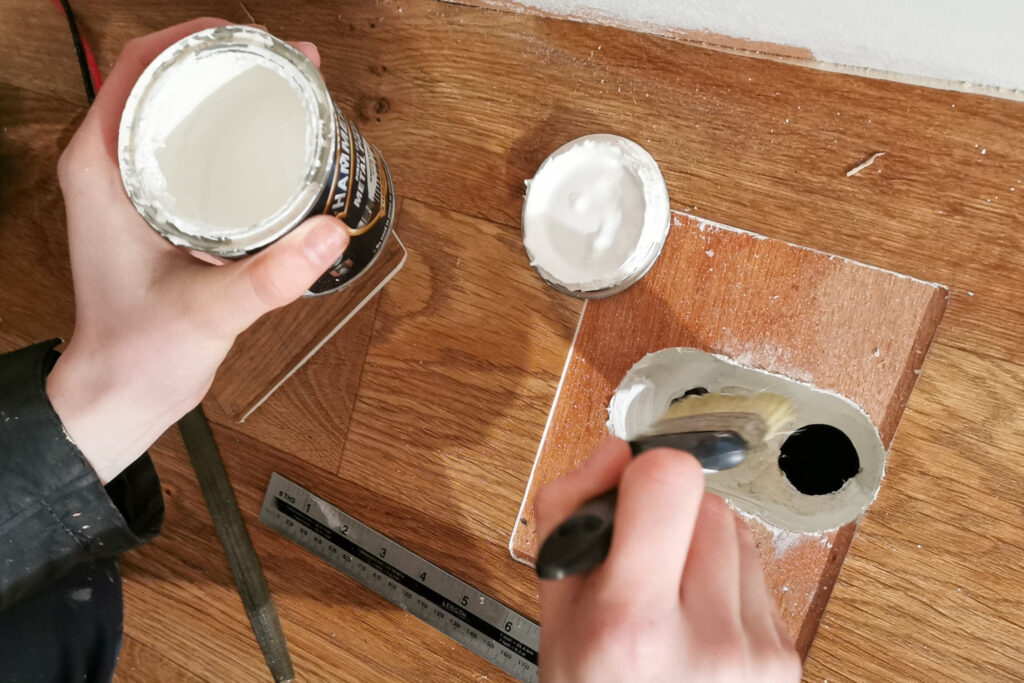
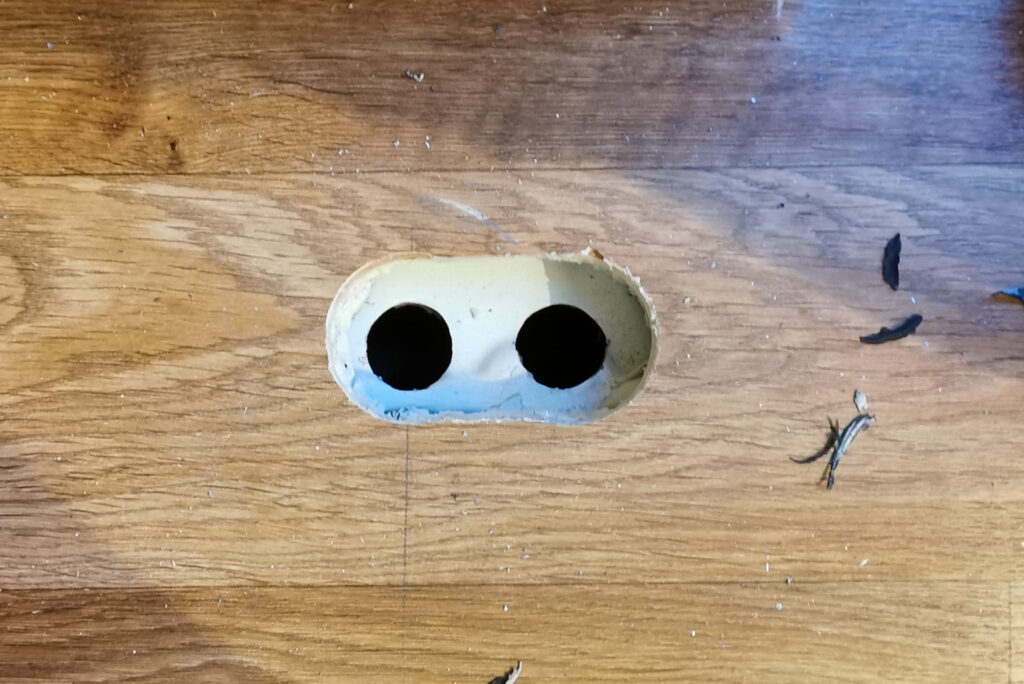
Finally we started cutting a hole into the floor of the van for where the waste water from the shower will go.
Day 58
25th October 2020
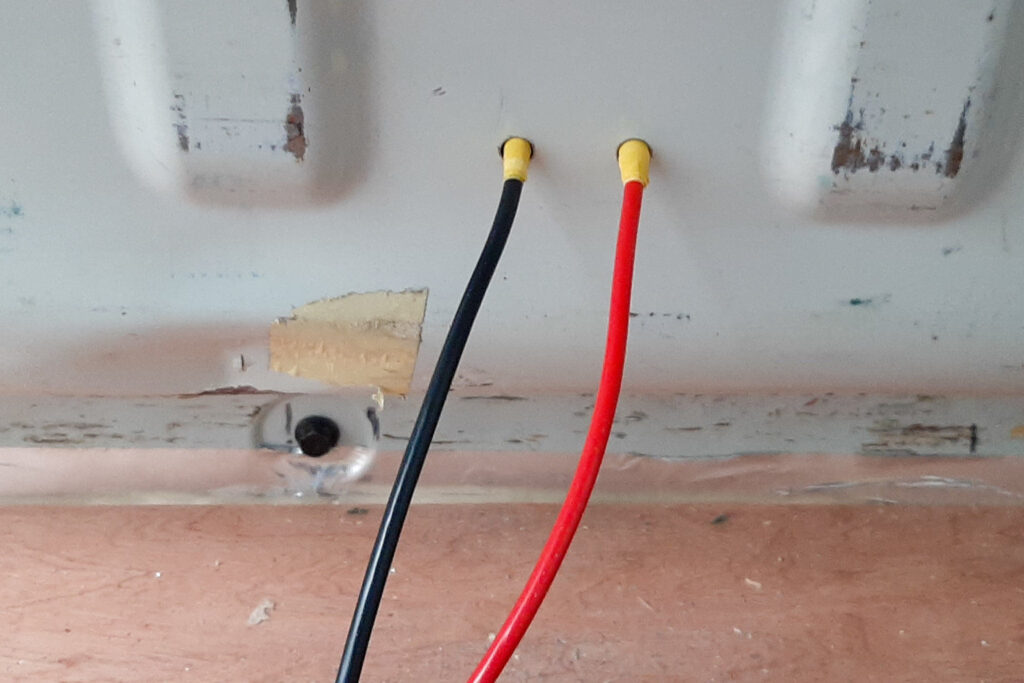
Today was fairly busy – mainly doing a bunch of small, tricky time consuming jobs. We started the day by drilling two holes in the bulkhead to pass positive and negative cables through to the battery (in preparation for wiring our Victron DC to DC charger). We managed to lift the floor in the cab so we could feed these cables to the battery and be hidden seamlessly.
After this we turned our attention to the shower. We fitted the plug to the shower tray and attached the waste water pipe. We then siliconed the bottom of the tray to secure it into place. The final job of the day was to crawl under the van and secure the other end of the pipe to the grey water tank. Everything fitted pretty seamlessly. Pretty happy with todays progress!
A rare day when everything goes to plan!
Day 59
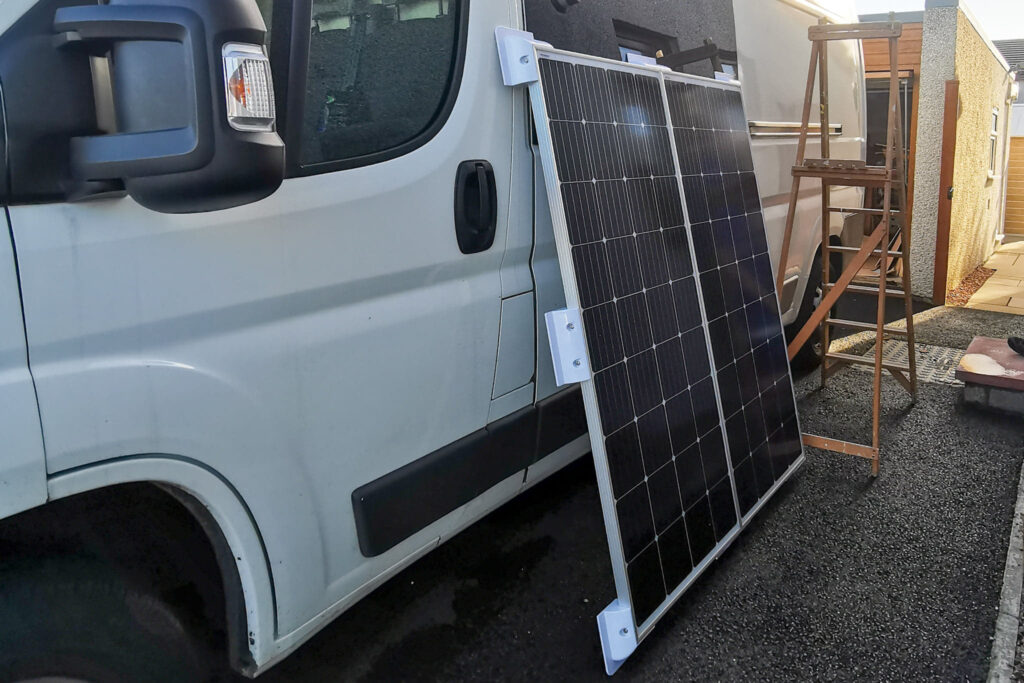
26th October 2020
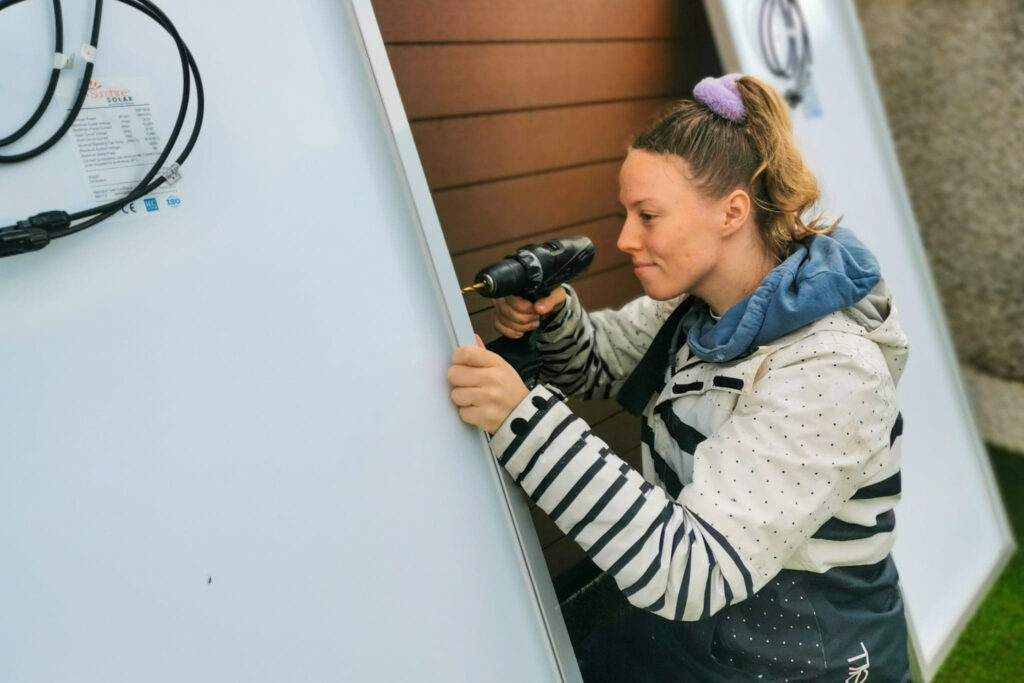
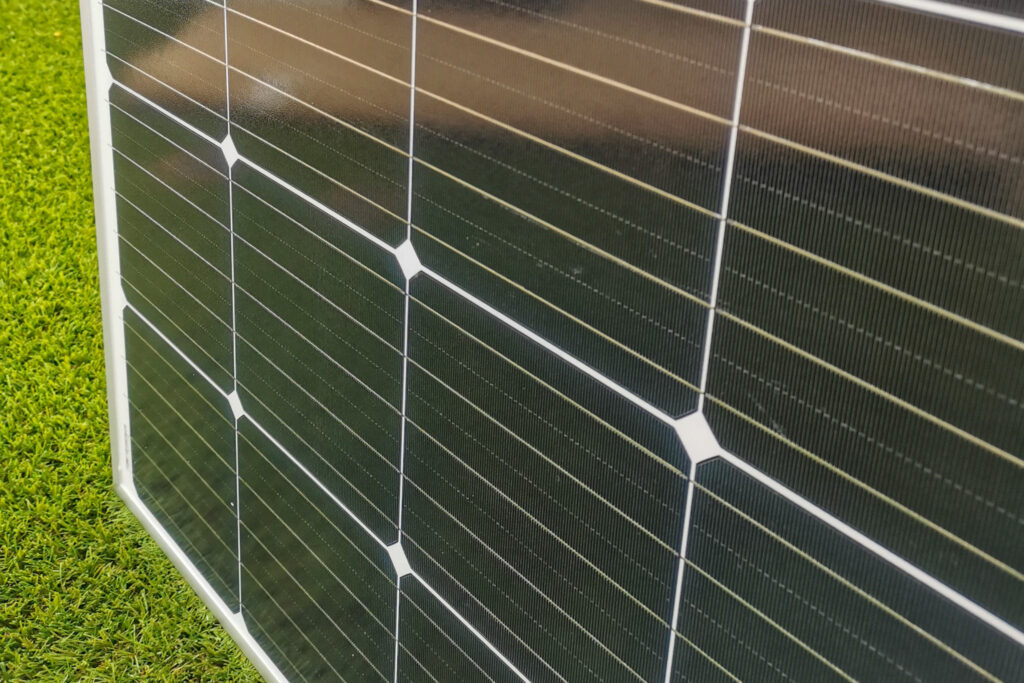
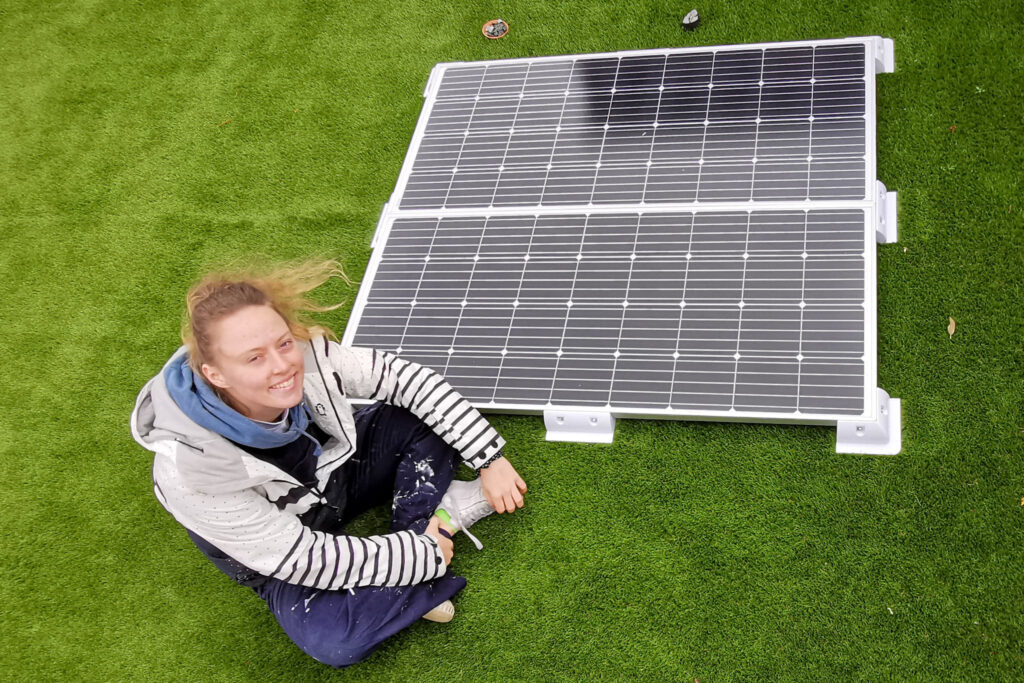
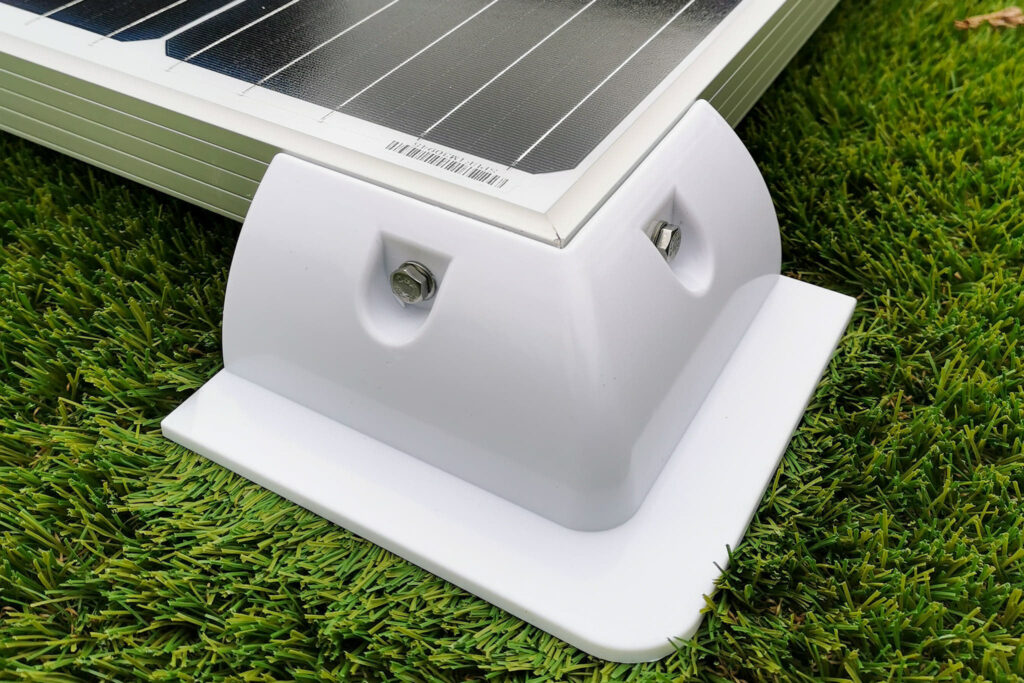
We finally took the solar panels out of their packaging.
We knew we wanted the panels to be secured together and couldn’t wait to get to work. Once again. This took us more time than we care to admit.
We match drilled 3 holes in each panel and secured them together with a nut and bolt.
We then spent the remainder of the day cleaning out the garage took make space for some new stuff.
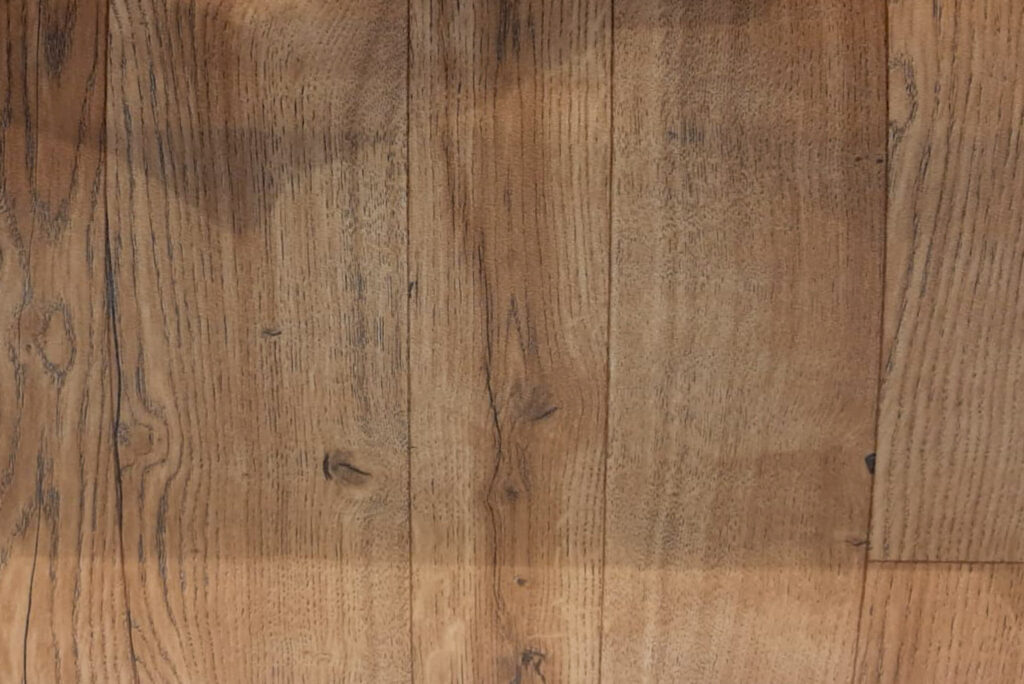
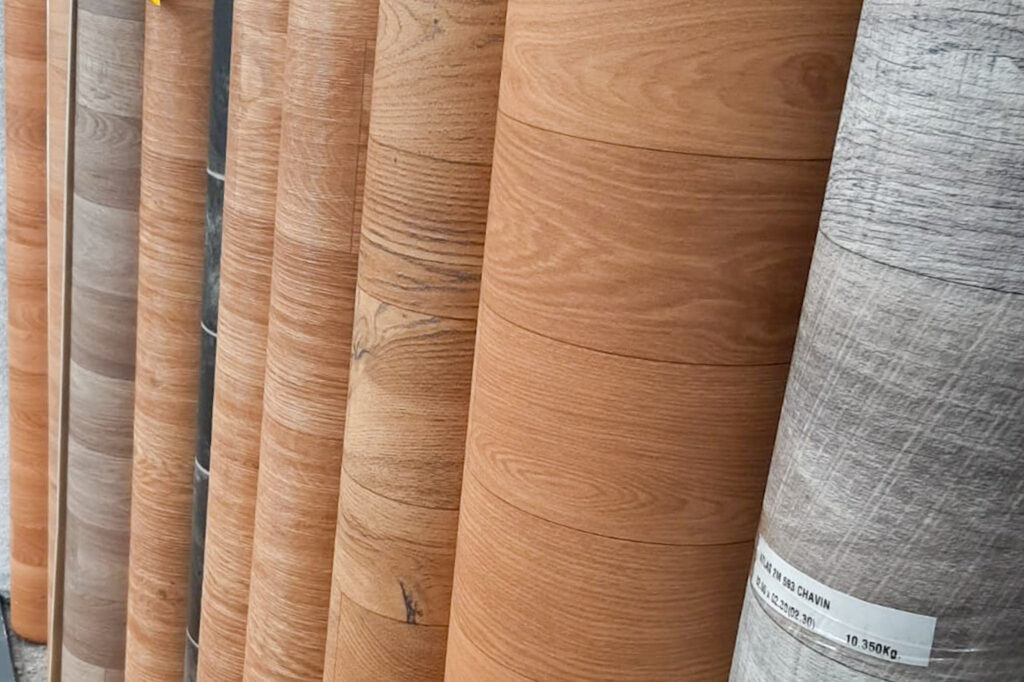
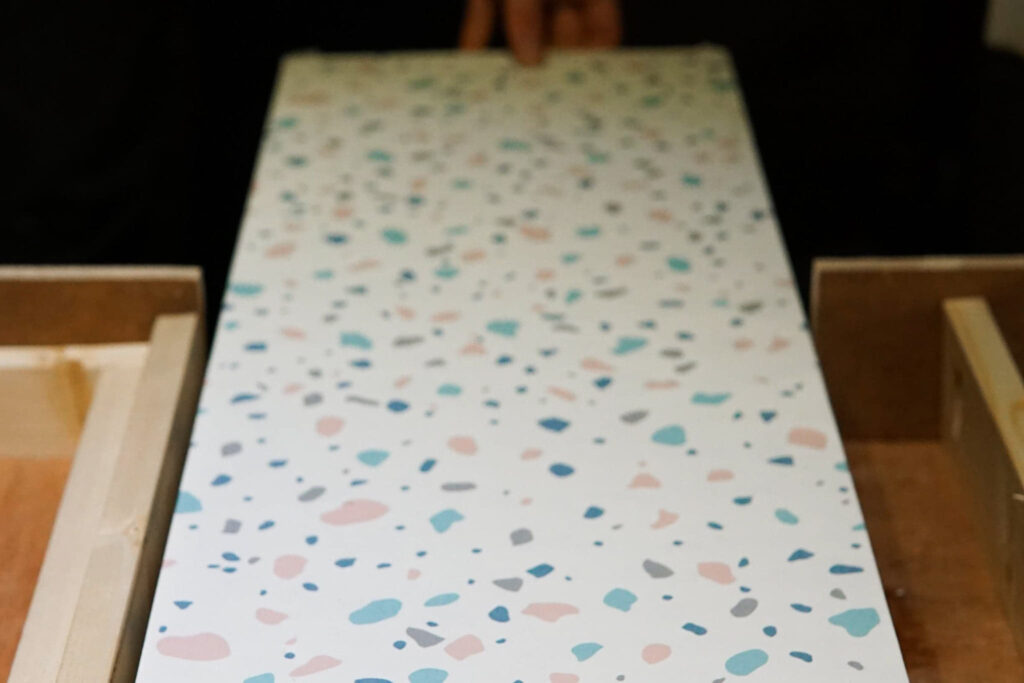
That evening we collected the vinyl flooring we ordered a couple of months ago!
Exciting times ahead!
Day 60
27th October 2020
Another not so productive day at the van as we spent the morning waiting for a very important package – aqua panels for the shower.
When we arrived at the van we attached the feet to the aqua panels .
That was literally all we did.
It is crazy how long it took. However, it did involve drilling 16 holes and attaching 16 nuts and bolts, all in the tightest of spaces. It was so fiddly and frustrating.
Day 61
28th October 2020
Today we had dreams of installing aqua panels in our shower. These dreams were NOT achieved.
Instead, we created a door/entrance frame for the shower. This will probably make our lives 100x harder when we do eventually fit the aqua panels. I guess we will cross that bridge when we get to it. However, it improved the rigidity of the shower immensely. It’s crazy to think how strong the shower is considering it has no framing… it’s basically just a 12mm ply box!
Week 12
A big week at the van.
The solar panels are finally up on the roof and wired up! We also laid our sheet vinyl flooring and are in love with the results. The van looks so much more polished! It makes us excited at the thought of what it will look like when its done!
Relevant posts include:
Day 62
29th October 2020
Once again the weather was not on our side. Therefore we took this time to get on with the “indoor jobs”. This included finally getting round to insulating and putting a vapour barrier on the bulkhead, painting, caulking, and sanding. The thankless tasks.
Day 63
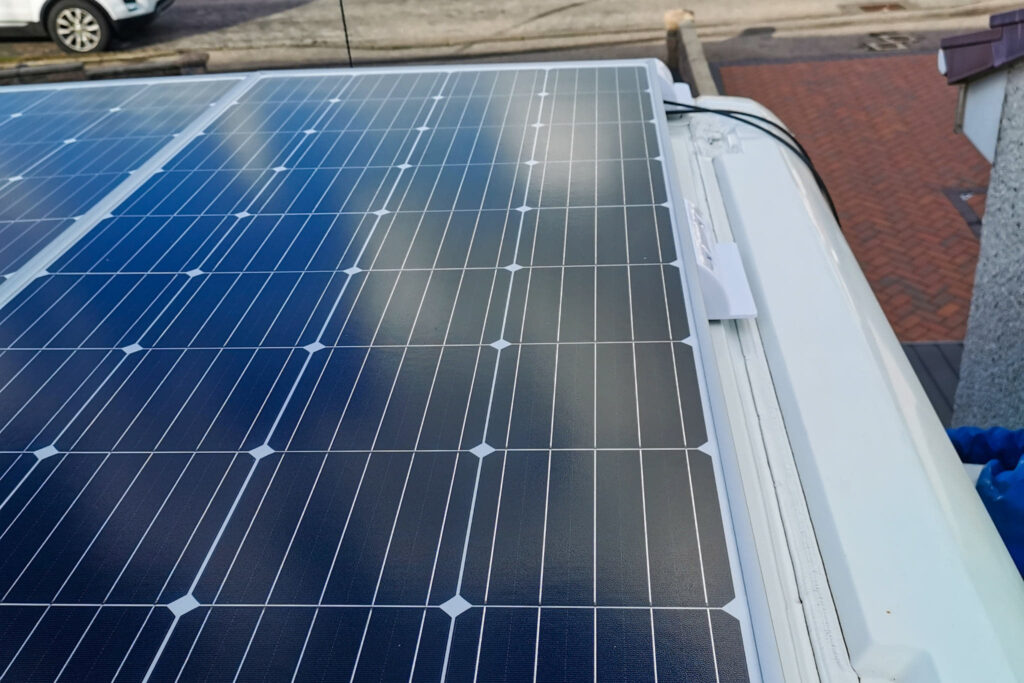
30th October 2020
THE SOLAR PANELS ARE UP.
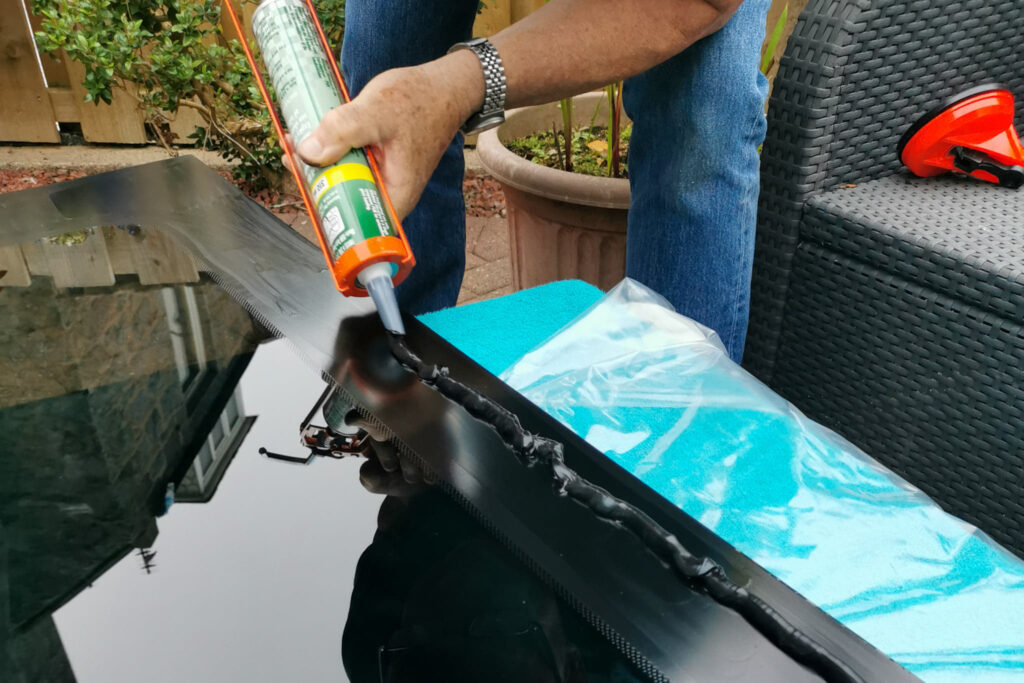
After a week of pretty dreadful weather… and some procrastination, the solar panels are finally secured to the roof!
We are mainly glad to be done with Sikaflex (for now) as that stuff gets everywhere!
The panels fit perfectly at the front of the van. We had a lot of difficulties finding reasonably big panels that fit into the slightly small area at the front of the van. So we are delighted with the result
We also installed the trim around the bottom of our tiny shower that will eventually hold our aqua panels in place!
A very productive day.
Day 64
1st November 2020
Today we discovered that the aqua panels we ordered were not the correct colour. Yet another set back on what feels like our never-ending van build.
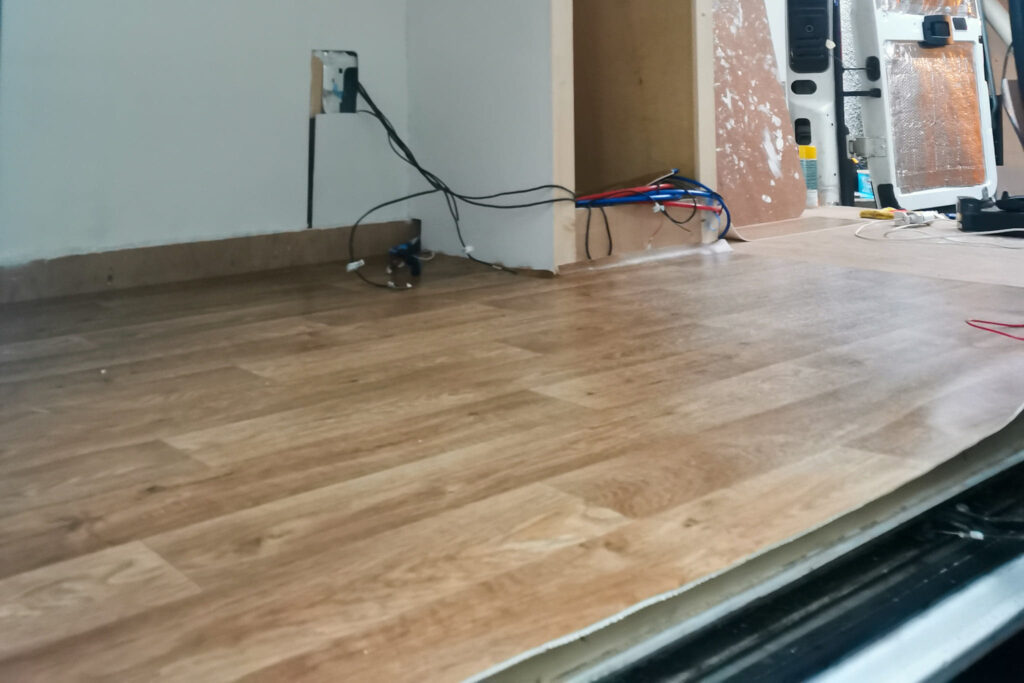
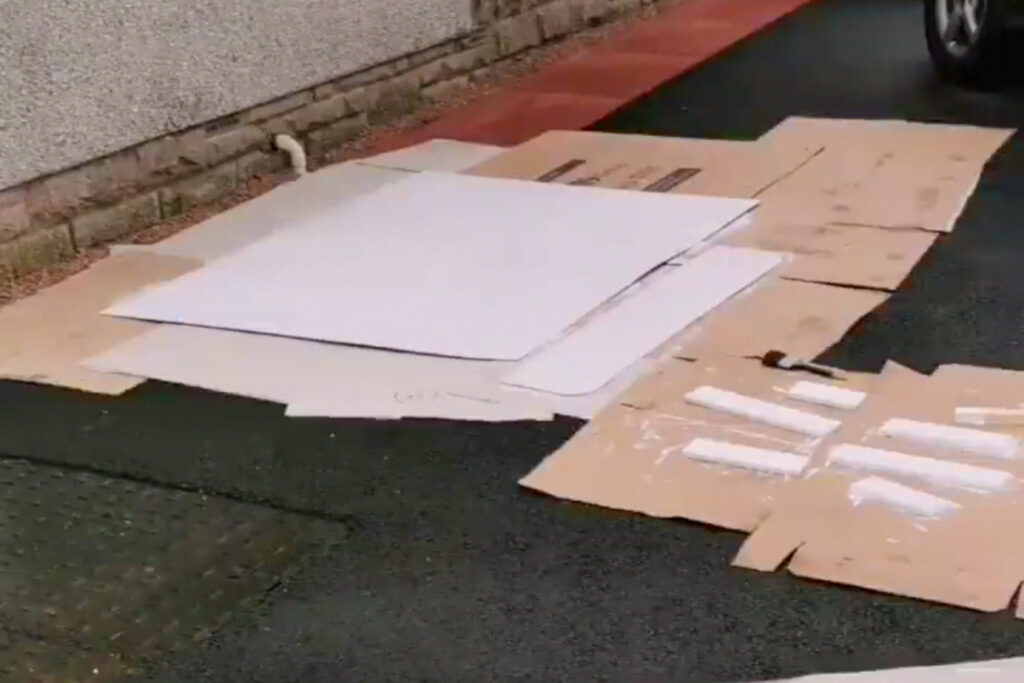
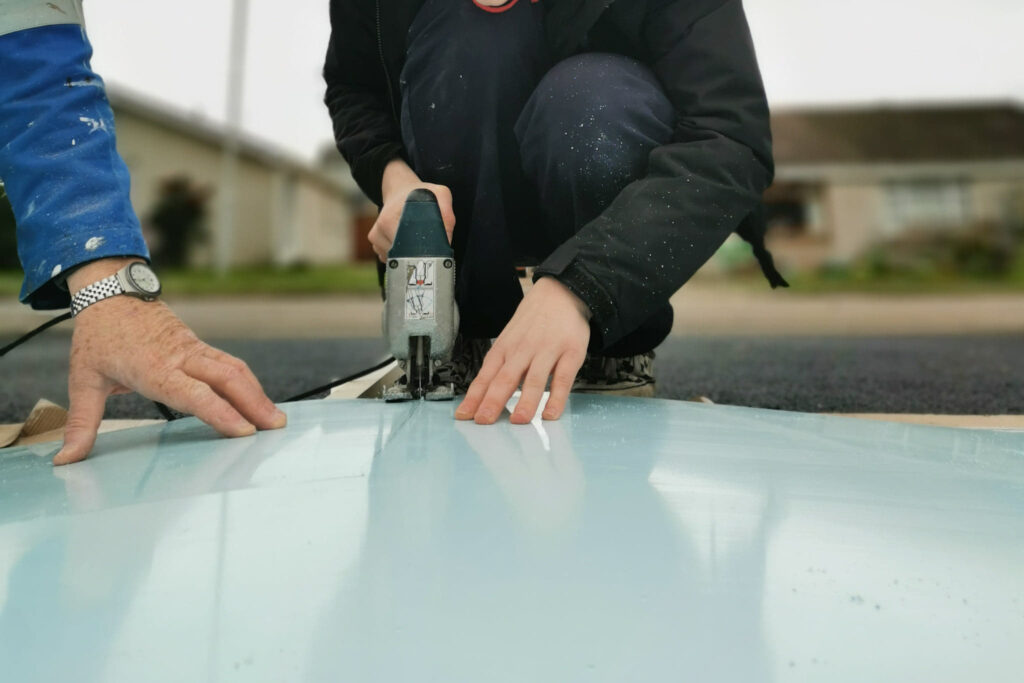
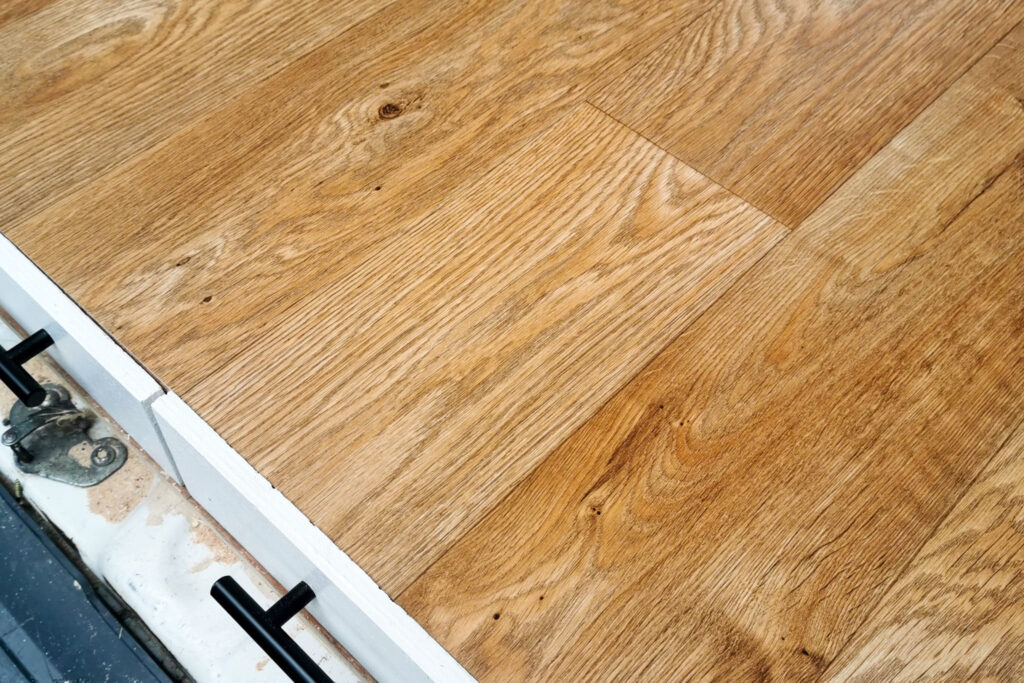
However, there is still plenty of work to do. We cut the final roof panel to size and also cut the flooring to size.
We opted for vinyl flooring as it is cheap, easy to install, and looks good.
We love the results!
We only fitted the front 2/3 of the van as we have big plans for the back of the van!

Day 65
2nd November 2020
Not the most productive day, but progress is progress.
We glued down the vinyl flooring which was pretty tricky to be honest. Spent way too long making sure the edges of the floor were perfect! I wish we weren’t such perfectionists!
After this, we went onto the roof to drill some holes. We fed the solar panel cables through the cable gland entry box and then the roof. Next, the horrible part, fixing the cable entry box to the roof with Sikaflex – such a messy job!
Day 66
3rd November 2020
We began the day by installing the D.C. isolator switch. This switch will make it easy for us to shut off the solar panel electricity in the future when everything is up and running.
We painted the final roof panel in preparation for putting it up. Now that the solar panel cables are through the roof we just have to wait until the paint dries to fit the final panel.
We finished off the day by adding more Sikaflex to the solar panel mounts. We did this to neaten them up and also add more strength (hopefully)!
Day 67
4th November 2020
A somewhat random day.
We caulked, we constructed some Ikea drawers we played around with making slide-out picnic benches, we put the final ceiling panel up, and we wired up the last roof light.
As silly as it sounds, seeing the first bit of furniture in the van really made us hopeful that the van will be a showstopper when it’s all done.
We finished the day with an overly indulgent 5 minutes of admiring our work.
Week 13
A very exciting week for us. We finally got the chance to start work on our favourite bit of the van – the pull out picnic benches. The whole garage area is really taking shape! We even boxed in the wheel arches – a long overdue job!
Relevant posts include:
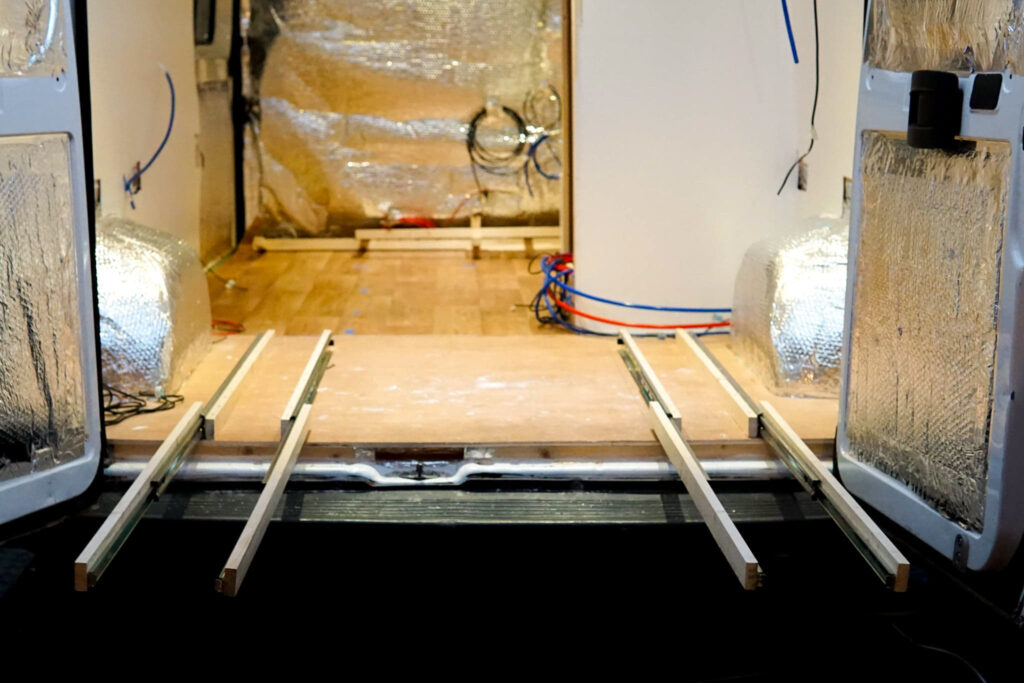
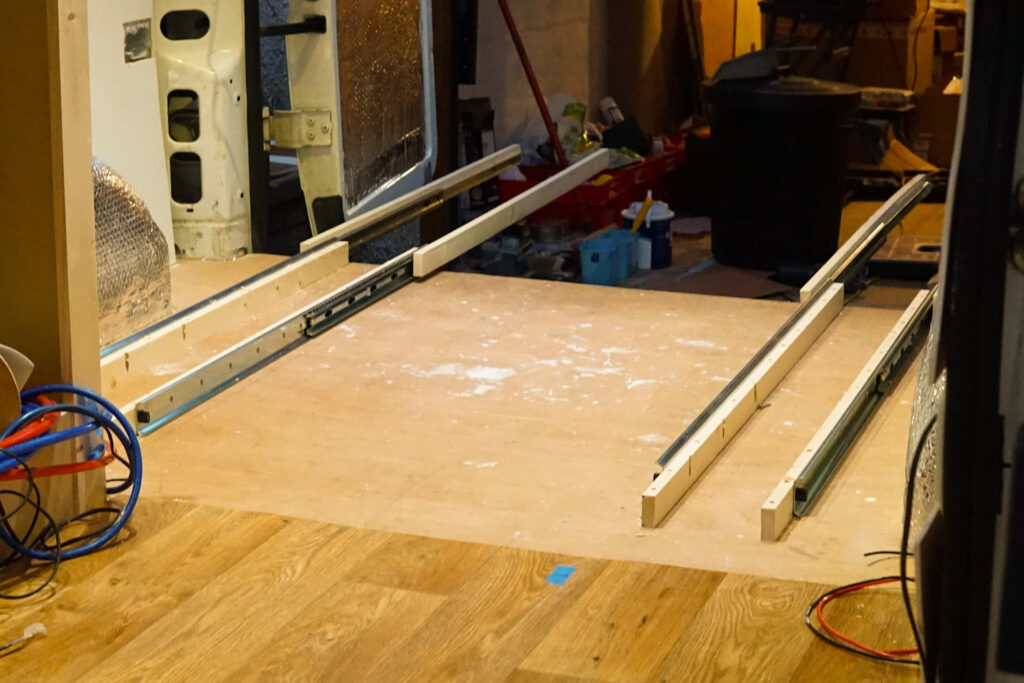
Day 68
5th November 2020
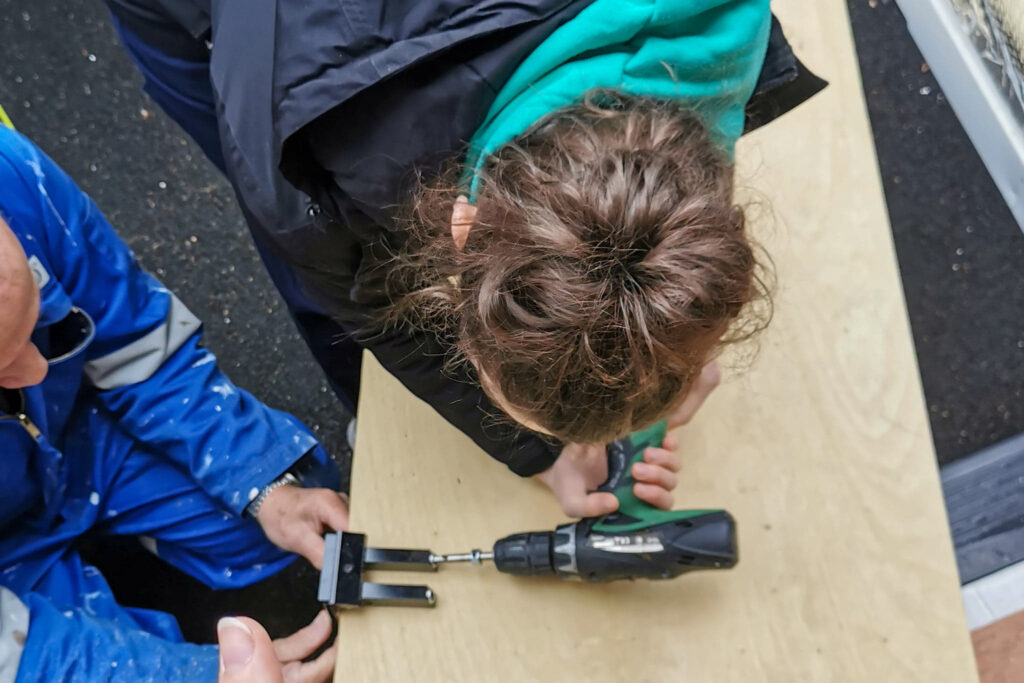
We installed two sets of drawer runners. This eventually will be our vans pièce de résistance.
Surprisingly they went in will little difficulty. However, like everything it took longer than expected.
We also spent time investigating how to protect our hook up cable when in transit.
A productive day all in all.
Day 69
6th November 2020
We started the day with hopes of completely finishing the “garage” area of the van. Once again that didn’t. happen.
We cut all the battens of wood to size. These will eventually hold our false floor in place. We then drilled pocket holes into them ready to be secure to our subfloor.
After a quick trip around Aberdeen from B&Q to B&M for wood and wallpaper paste, we were back and raring to go.
We attached a bit of ply to the top of our drawer slides effectively completing the seats. We then primed them with PVA glue to allow for a smooth application of wallpaper. Yes, wallpaper. To our horror, the glue takes 24hrs to set – screwing up our plans to finish the job!
We also started creating 2 drawers to fit between the benches. This was going to plan until we ran out of wood… and screws.
Day 70
7th November 2020
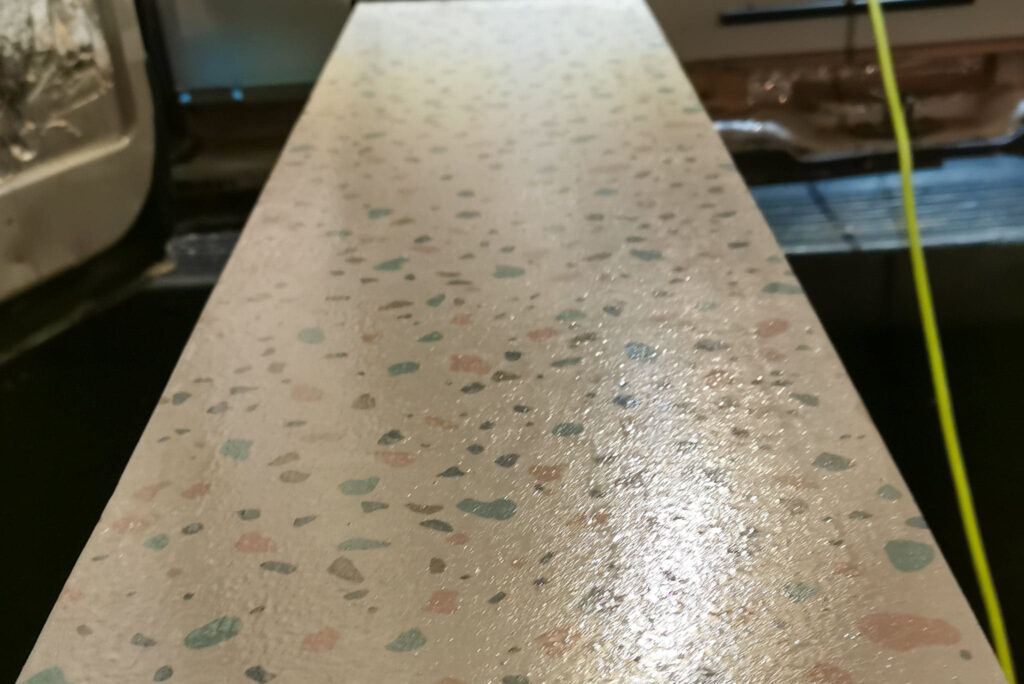
Today marked the first day we played with wallpaper.
As the benches are basically done, it was time to make them pretty before boxing them in under a false floor. We slapped on the wallpaper and covered it in PVA glue to hopefully make them waterproof and glossy. So far we are in love with the result.
We finished constructing the drawers.
Finally we cut out what will eventually be the drawer fronts.
Its all coming together nicely now!
Day 71
8th November 2020
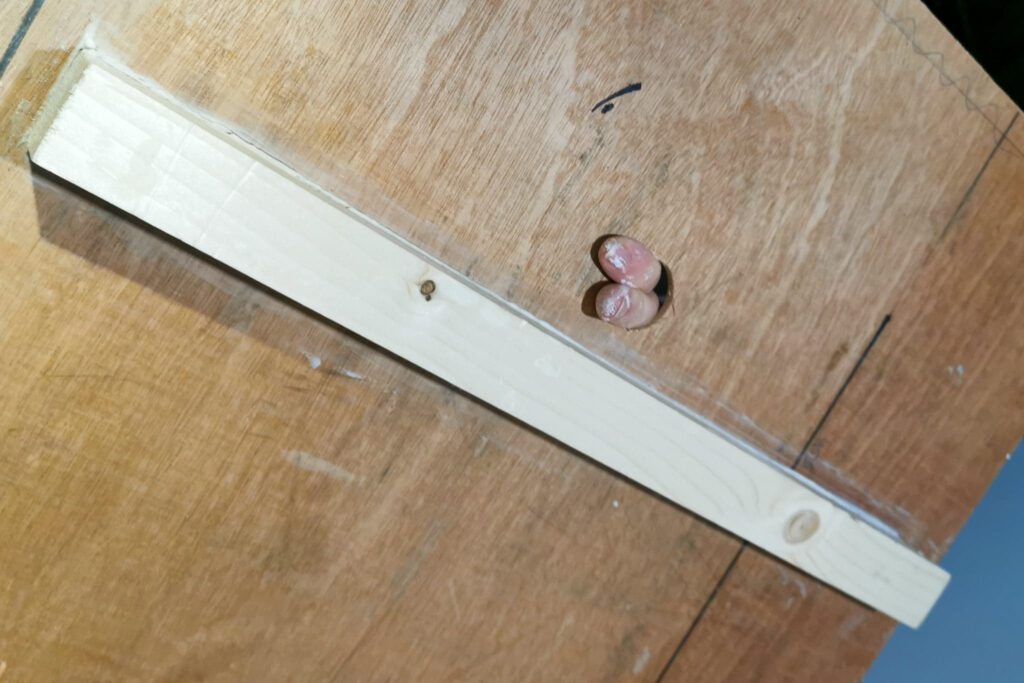
We started playing around with how we would cover the bulkhead. We had a couple of ideas but nothing concrete yet. We started by tracing the curves of the surrounding walls using our make-shift tool. We then created a template and used it to cut a perfectly curved piece of wood to slot into the awkward area.
We also used a curved batten and pocket hole drilled it to the side walls. The piece of wood will eventually be one of the main points of contact to secure the bulkhead onto.
We also added another coat of PVA glue to the benches for extra sheen… and water resistance.
Also, we covered the wheel arches… a long overdue job! We are happy how they look, as the slant snuggly under our bed beams!


Day 72
9th November 2020
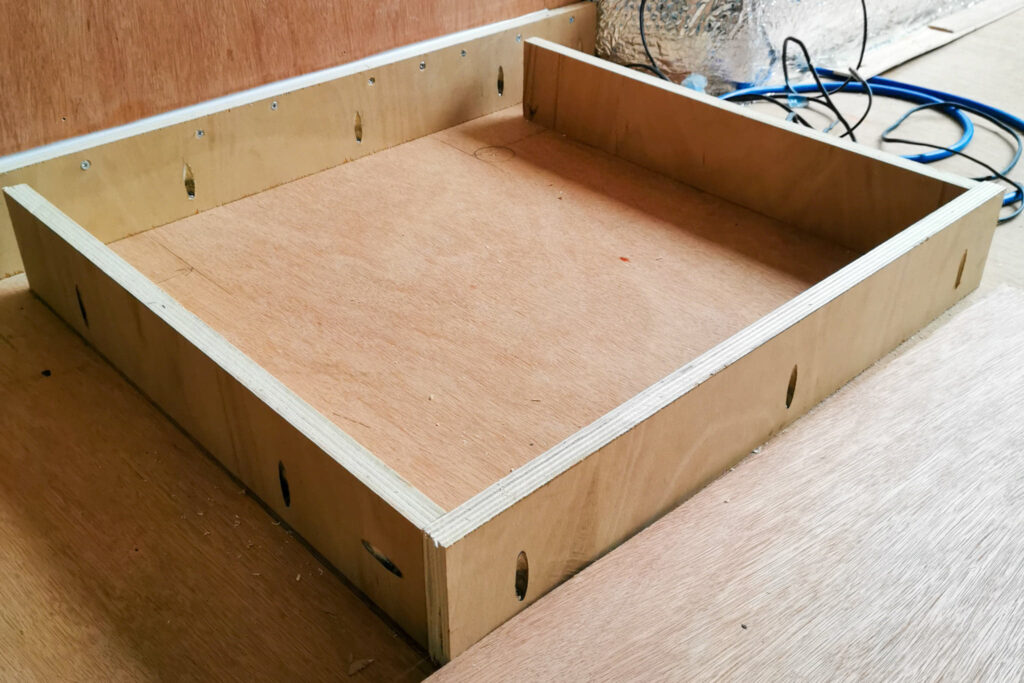
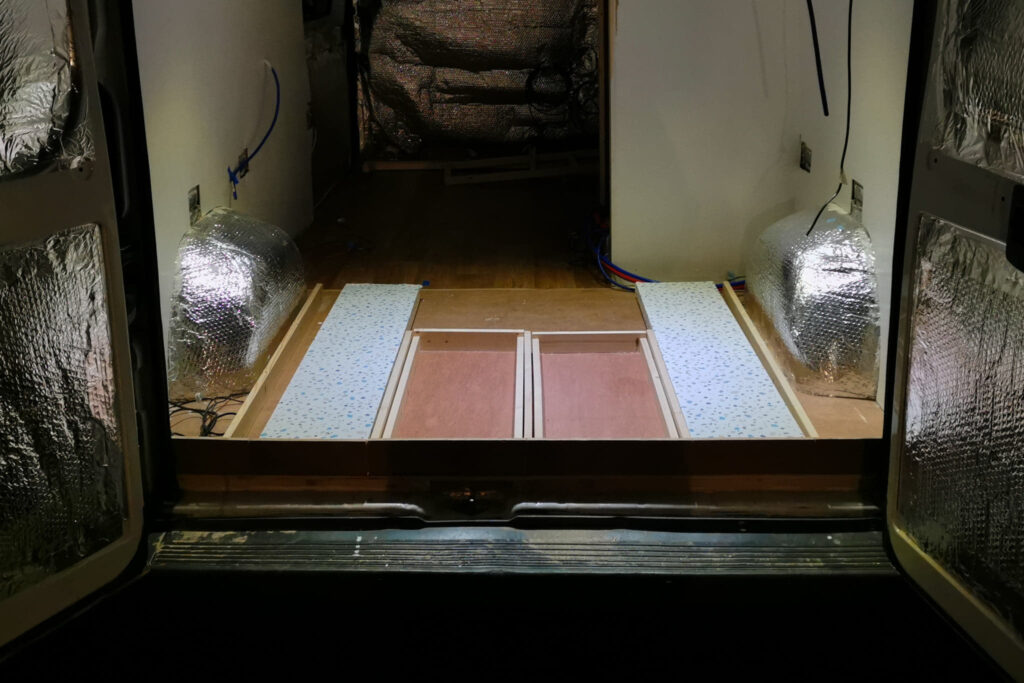
Today we finally got around to installing the false floor in our garage.
We went on our daily trip to B&Q to pick up the essentials – ply and screws!
We decided to use 9mm ply for our false floor for a little bit of rigidity. We measured the area and cut it to fit the shape. To our horror, we measured from the wrong place, this almost resulted in disaster! We definitely learned our lesson to measure twice, cut once.
We also put the first coat of paint on the bulkhead wall, the garage drawer handles, and a piece that will be fitted to the sliding door.
Day 73
10th November 2020
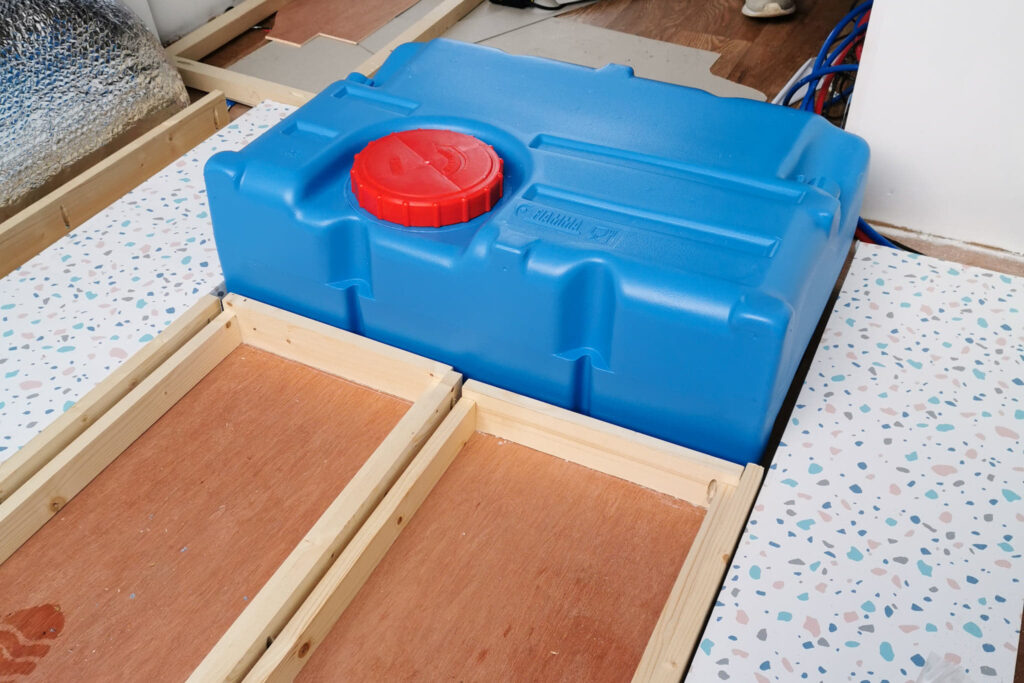
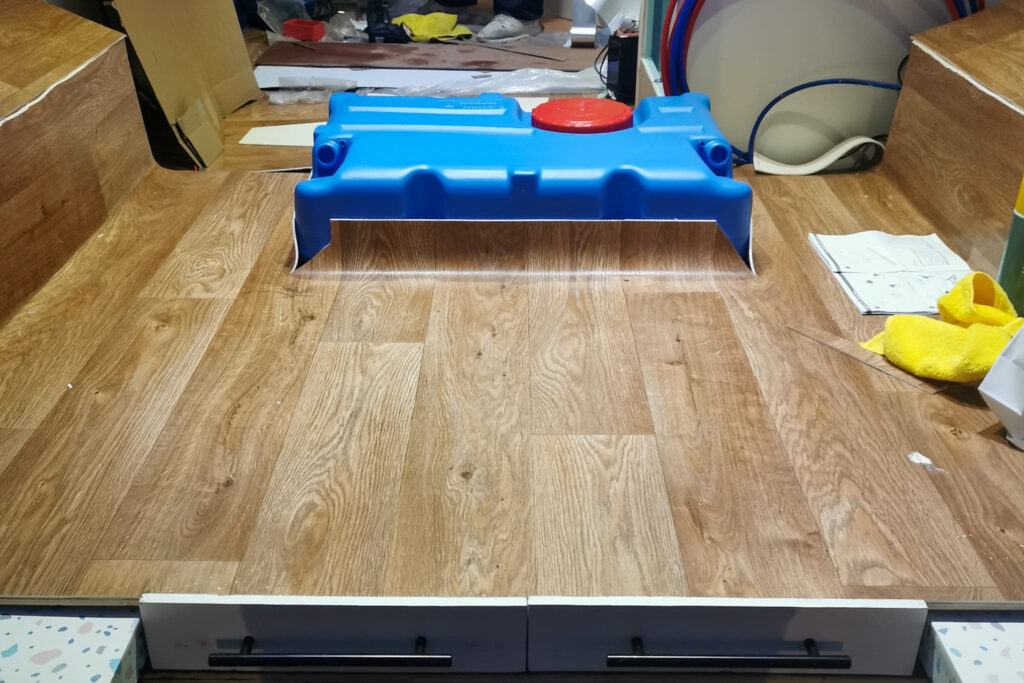
Firstly. the water tank arrived and fit into its designated area a treat.
Today we also realised that the mistake that we made yesterday was not as minor as we had hoped. We thought a bit of caulk would have been strong enough to keep the board rigid! Unfortunately, this wasn’t the case.
We spent the majority of the day rectifying this issue. We cut away sections and reattached a bit to sit on the structure underneath so it would be able to support more weight.
We also cut some of the scrap wood down to be the boxes that cover the wheel arches. It felt good to get rid of some of the “free” wood cuttings our garage!
Week 14
This week we became Jack’s of all trades.
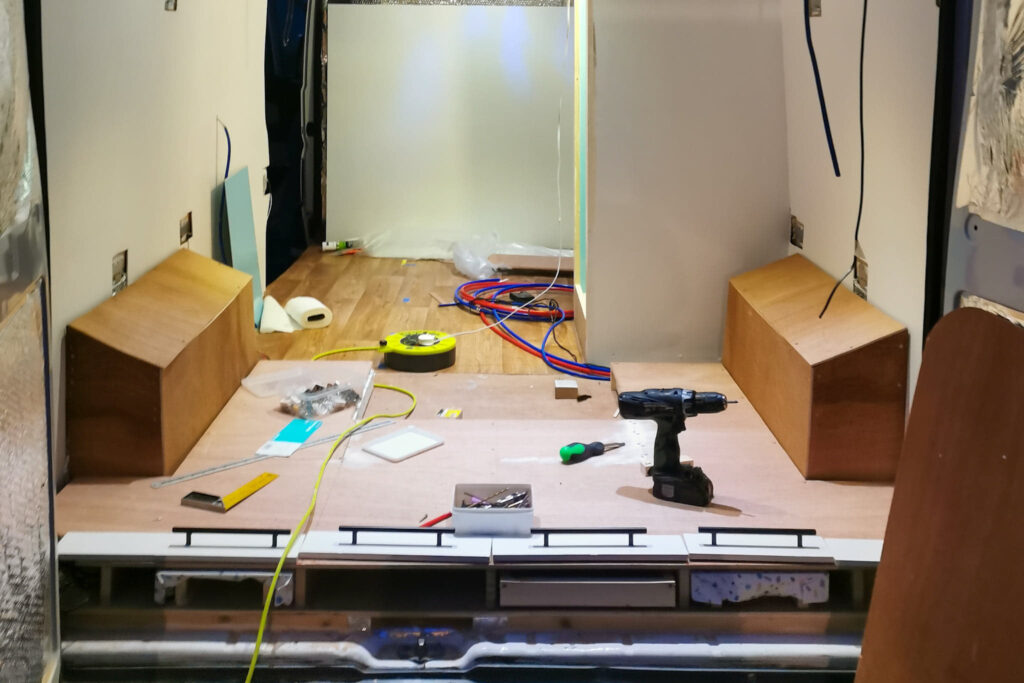
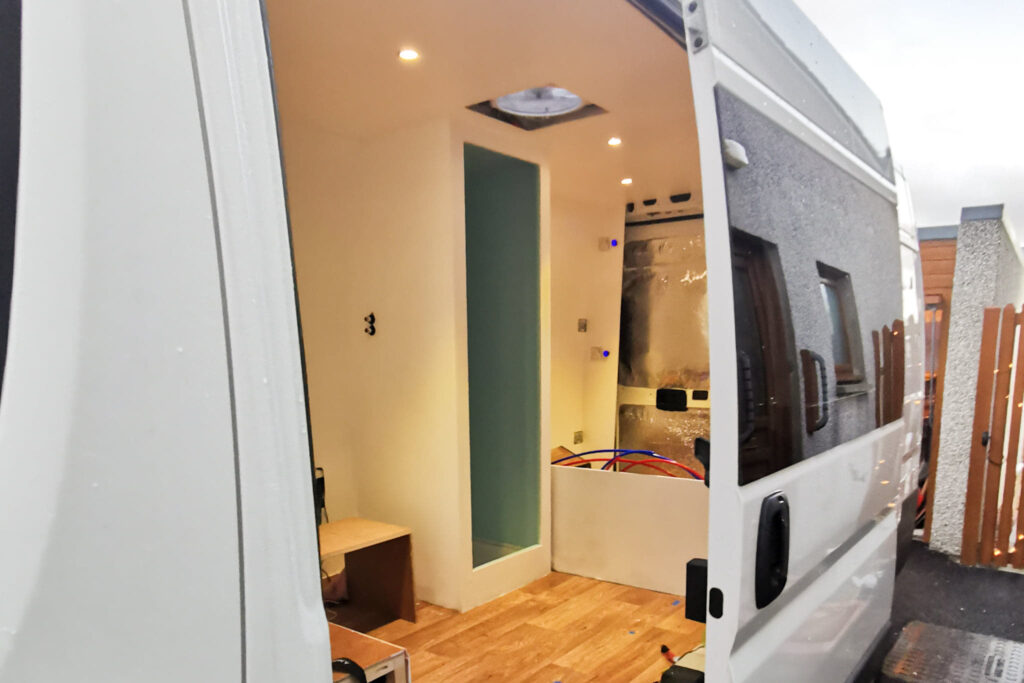
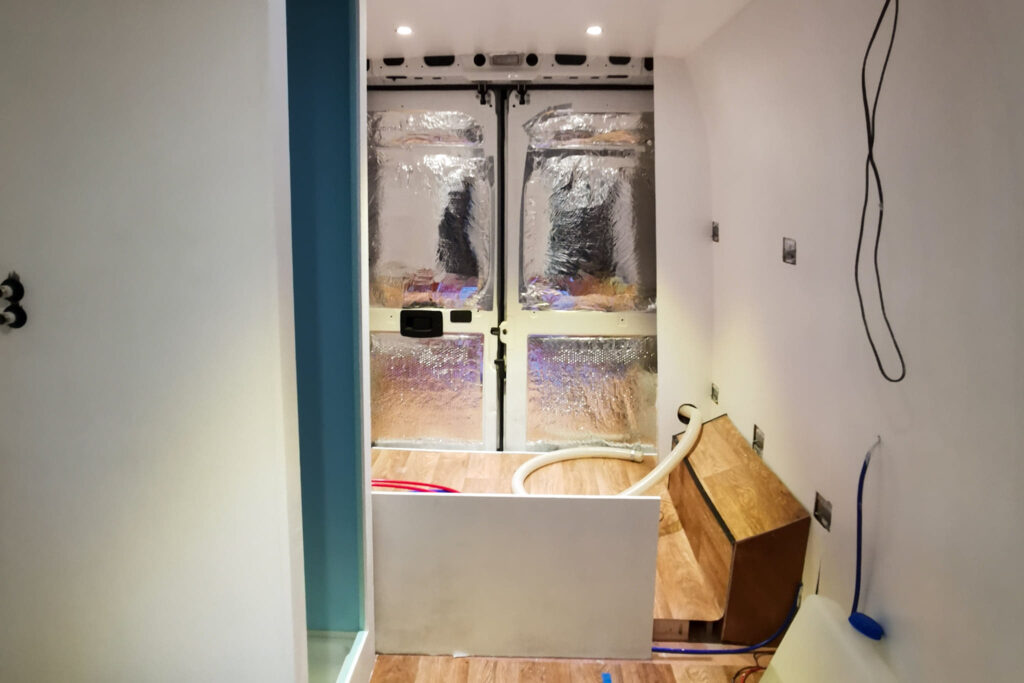
We fitted aquapanels in our shower, we finished our garage area, we fitted our water tank, and put up our bulkhead (including the fiddly corner piece that connects it to the door), and we even unboxed and secured our batteries in position!
Nothing feels better than a productive week!
Relevant posts include:
Day 74
12th November 2020
Perhaps the most productive day EVER.
We finally cracked on with installing our shower panels… just 2 weeks behind schedule. Finally, we painted and attached handles to our drawer fronts.
All in all a very busy day.
We are using aqua panels in our shower as they are lightweight… and a pretty colour. Unfortunately, building a shower in a van is no easy feat as there are so many curves to account for. Therefore cutting the panels to fit was a challenge in itself. After plenty of deliberation, we took the plunge and cut them. They fit PERFECTLY! Result!!

Day 75
13th November 2020
Another rough start to the day as the van battery was completely drained and required us to jump-start it. Not very reassuring considering this van will eventually be our home!
We continued fitting the shower. Once again this process took longer than expected. All of the panels are fully installed except the roof one.
We also attached drawer fronts and handles to our garage benches and storage. It looks so good. Shame it will be hidden the majority of the time!
Day 76
14th November 2020
The phrase 2 steps forward 1 step back could not be more accurate to describe today.
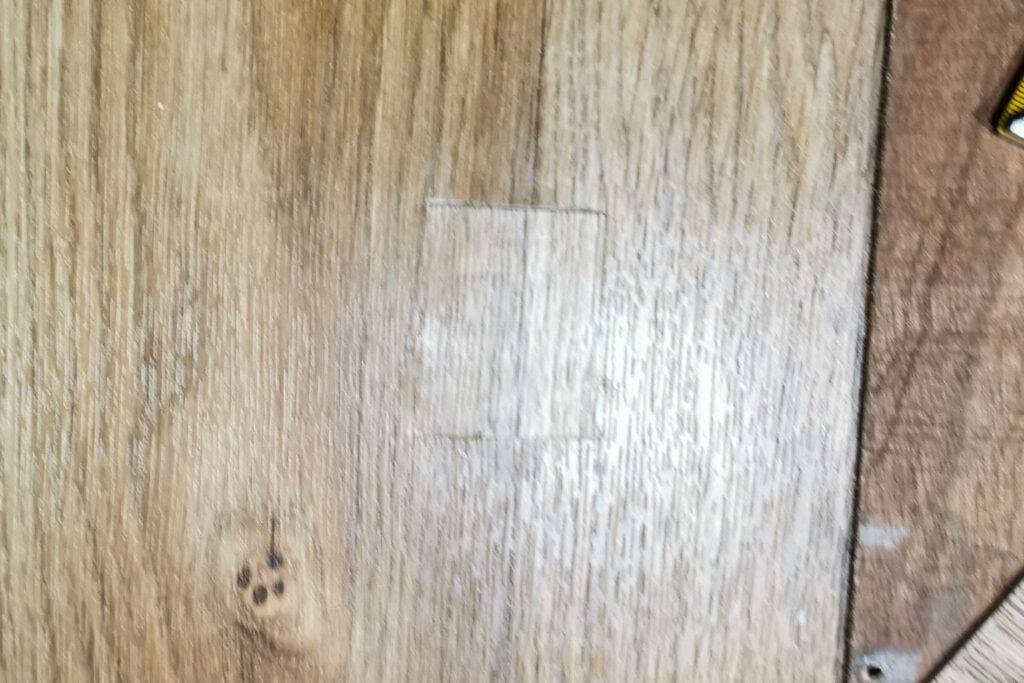
We laid the vinyl floor in the garage area. It looked good (if we do say so ourselves). It really made the area look a lot more polished.
Less than an hour later we melted it with a bloody lightbulb! This left a goopy white patch that is sticking out like a sore thumb! Another problem to add to the list of jobs!
However, today wasn’t a complete disaster. We also fiddled around with the shower roof panel. As the shower is curved it is creating a bigger challenge than anticipated! We also put a few nails in our drawers front to make them more sturdy. These are now caulked and awaiting sanding!
Day 77
15th November 2020
After much perseverance, the shower is finally complete! If we weren’t such perfectionists this job would have been finished days ago!
The wheel arches got covered in vinyl (the leftover from the floor). It looks pretty decent. All it needs now is a bit of trim to put on the edges and it will be looking as professional as can be expected for complete novices!
We took on the task of creating a curved wall to sit at a 45-degree angle to the bulkhead cladding, This was no easy feat and required a lot of measuring and patience. None the less, the job is well underway.
We also trial fitted the water tank and added another layer of PVA glue to the pull out benches. Another busy day for the books!

Day 78
16th November 2020
Today was predominantly about solving problems.
The first problem was fixing the burn mark in the vinyl flooring. We cut out the area affected and put in a small patch. It looks pretty good, all things considered. Just don’t look too closely!
Secondly, we had to reattach one of the drawer fronts that fell off. It was previously secured with nails, this time we thought we would experiment with no more nails adhesive. So far so good!
Finally, the most difficult problem of all, create the 45 degrees piece that fits between the bulkhead wall and the edge of the door. Like I mentioned yesterday… this job is deceptively tricky. We finally configured it and attached all the pieces together. We even added a lick of paint as it may be slightly awkward to paint when it is fully in position.
On top of this, we also put some trim around the edges of the wheel arches!
Day 79
17th November 2020
Today we fitted the water tank and bulkhead. Not that impressive, but it definitely felt like a step in the right direction.
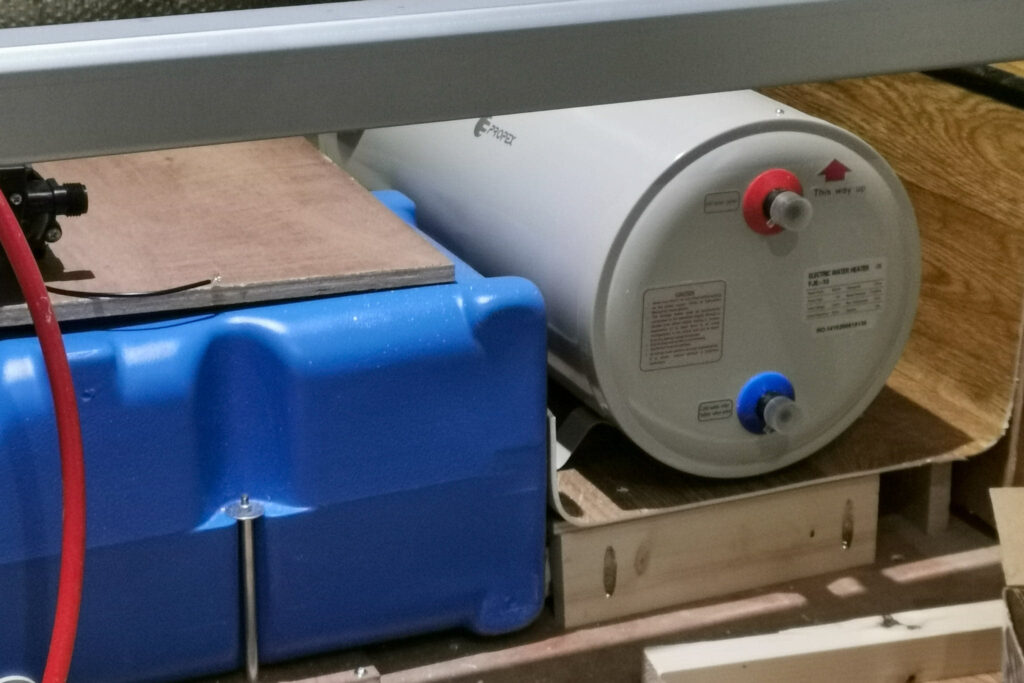
We secured the water tank to a piece of ply then screwed the ply to the floor. This prevented us from cutting holes in the floor – thank God!
The bulkhead has been a work in progress for some time now, so we were delighted when we finished fitting it. We caulked the over the joins and any screws in preparation for several more coats of paint.
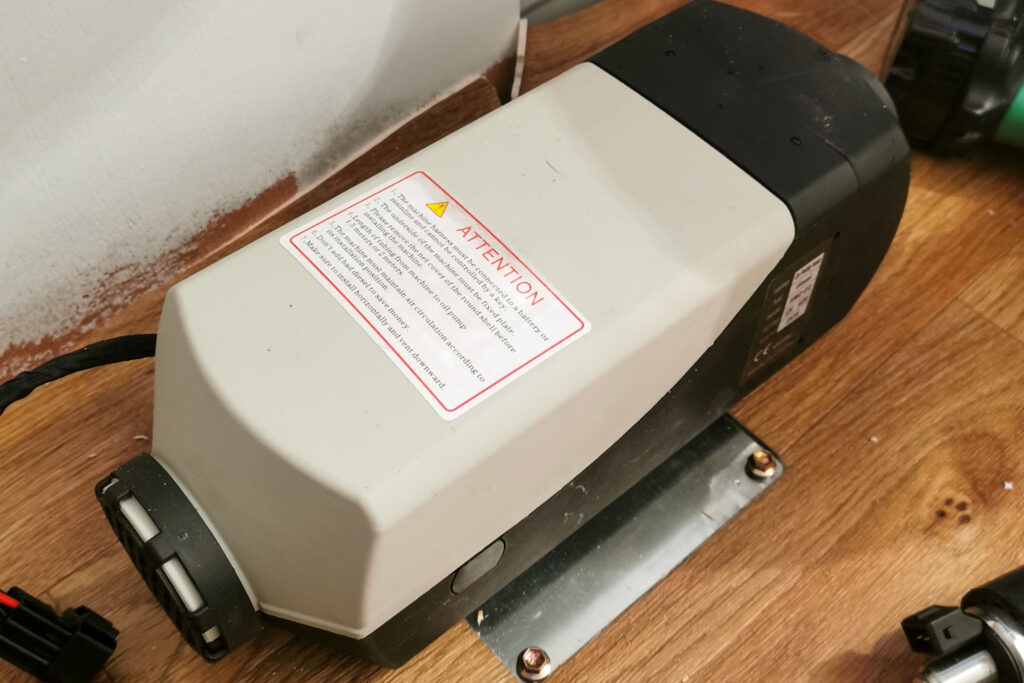
We also had a look at the diesel heater we ordered. Unfortunately, it came slightly broken. One of the pipe things was pretty bent which will make fitting it a bit tricky. These adversities have become the norm when converting a van. Onwards and upwards.

Day 80
18th November 2020
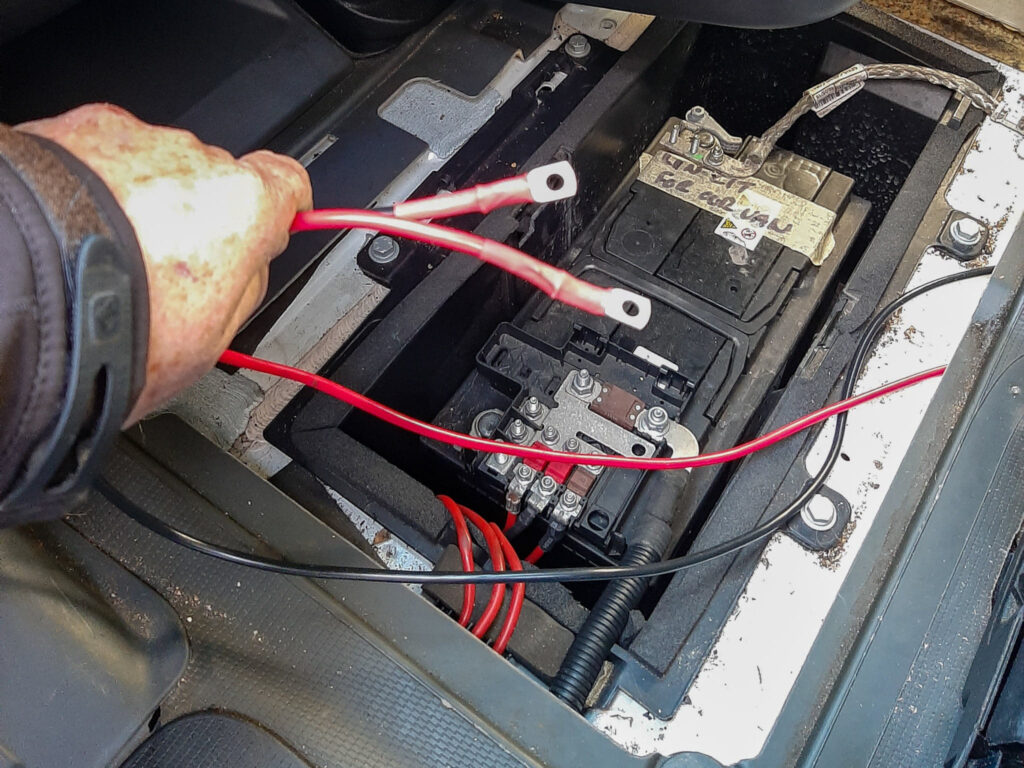
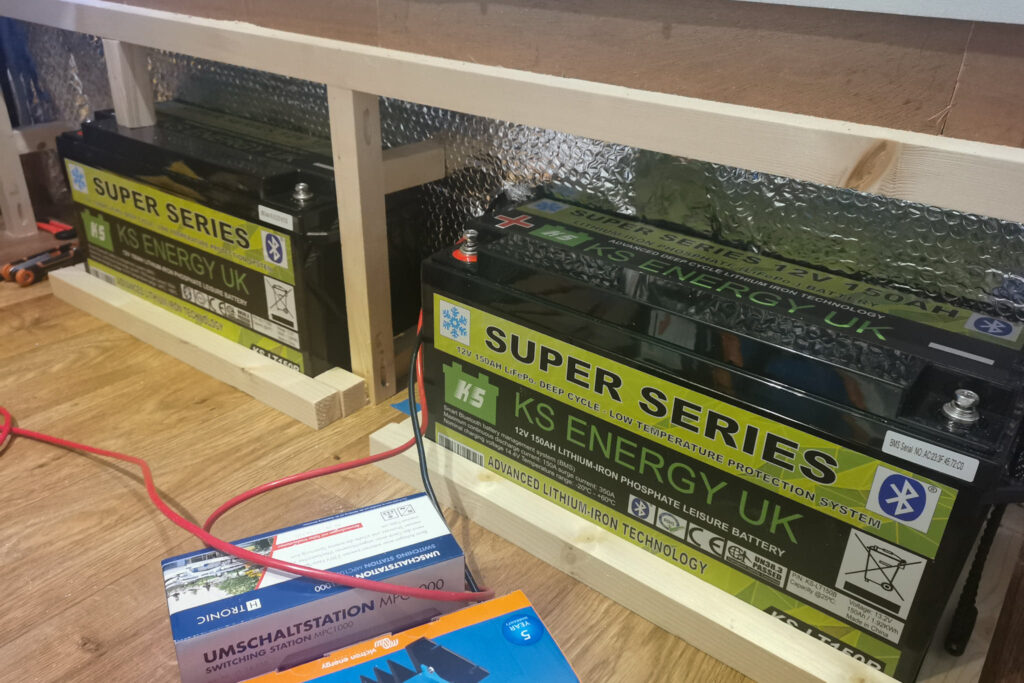
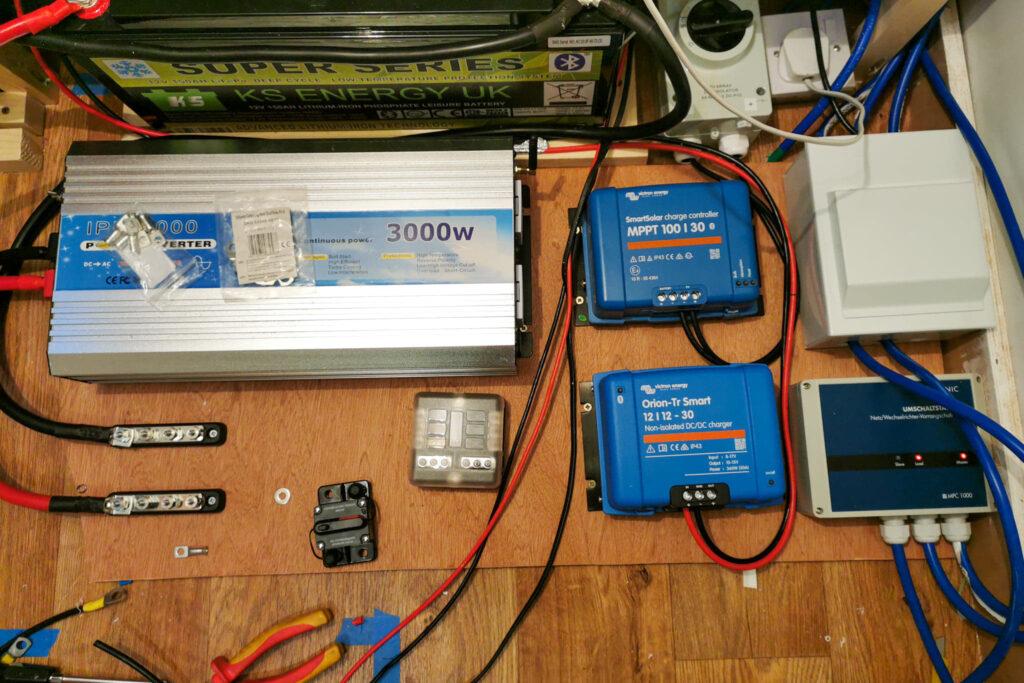
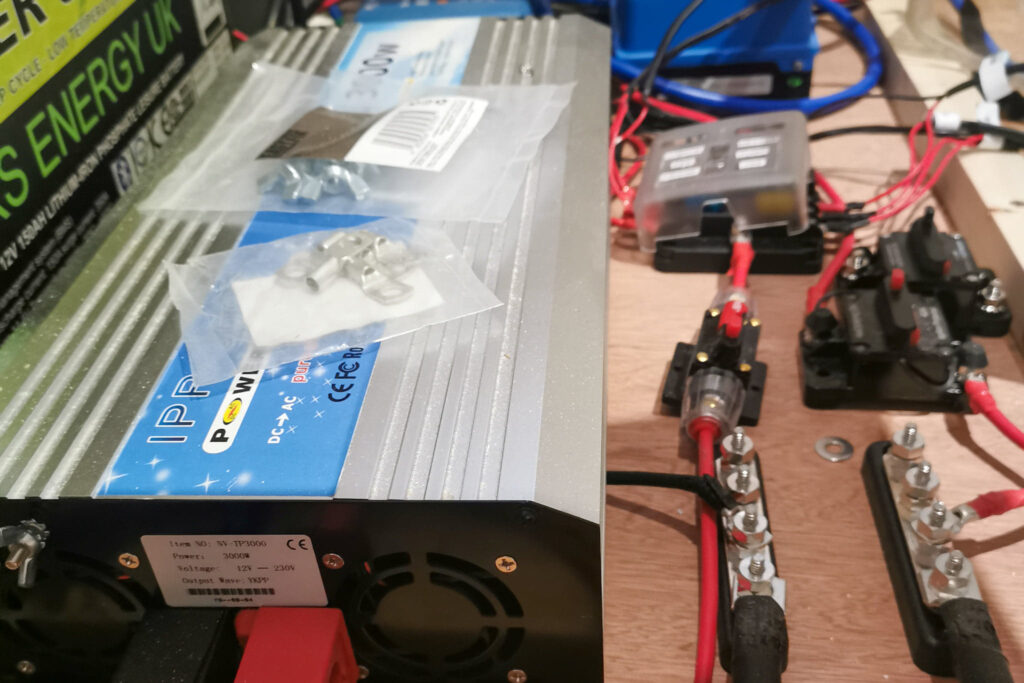
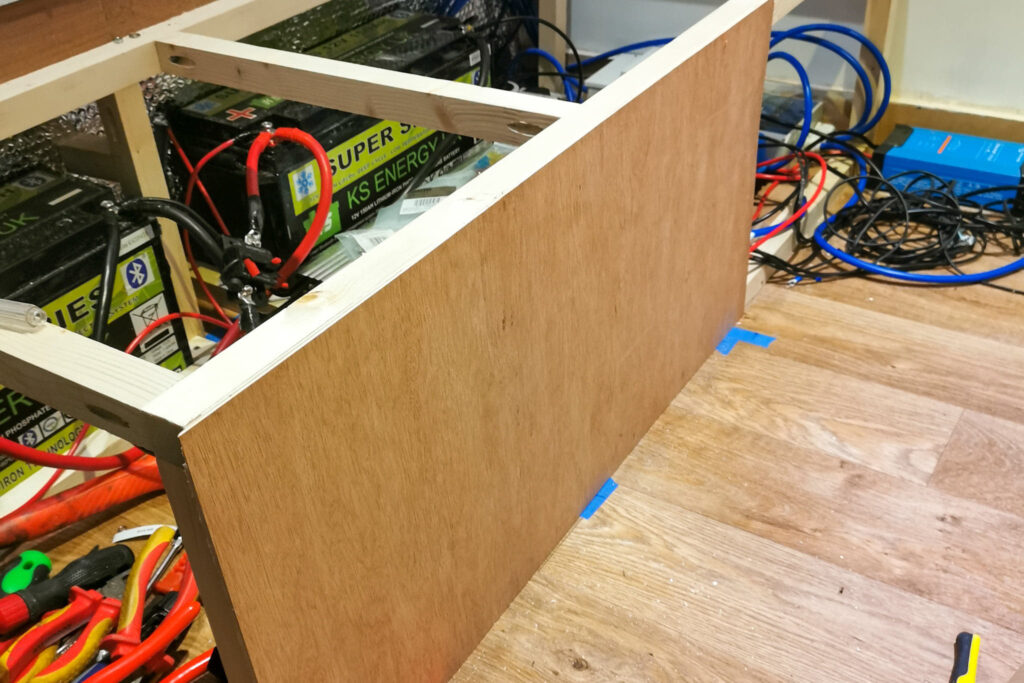
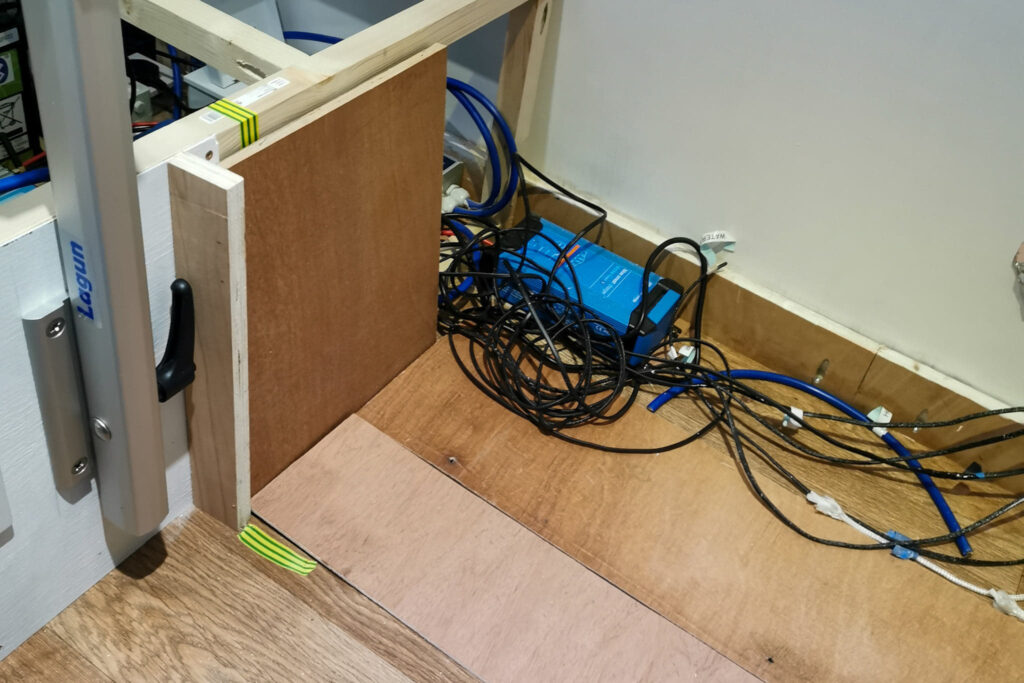
We finally opened up our most expensive part of the build – the batteries! We opted for 300aH of lithium batteries from KS Energy.
We spent the majority of the day picking a layout for all of the electrical components. Our entire electrical system will be housed under our “sofa” area.
We tested the batteries out, and all seems to be well. It still blows our mind that you can tell the charge and so much more from an app. Since when did batteries get so smart?
Once we roughly agreed on a layout we secured the batteries in place with a few battens and called it a night!
It’s crazy how messy your van can get after opening a few boxes. We are working in a dump.
Week 15
This week was a slightly slower pace as we were dealing with the scary important things… including the dreaded electrics!
Relevant posts include:
Day 81
19th November 2020
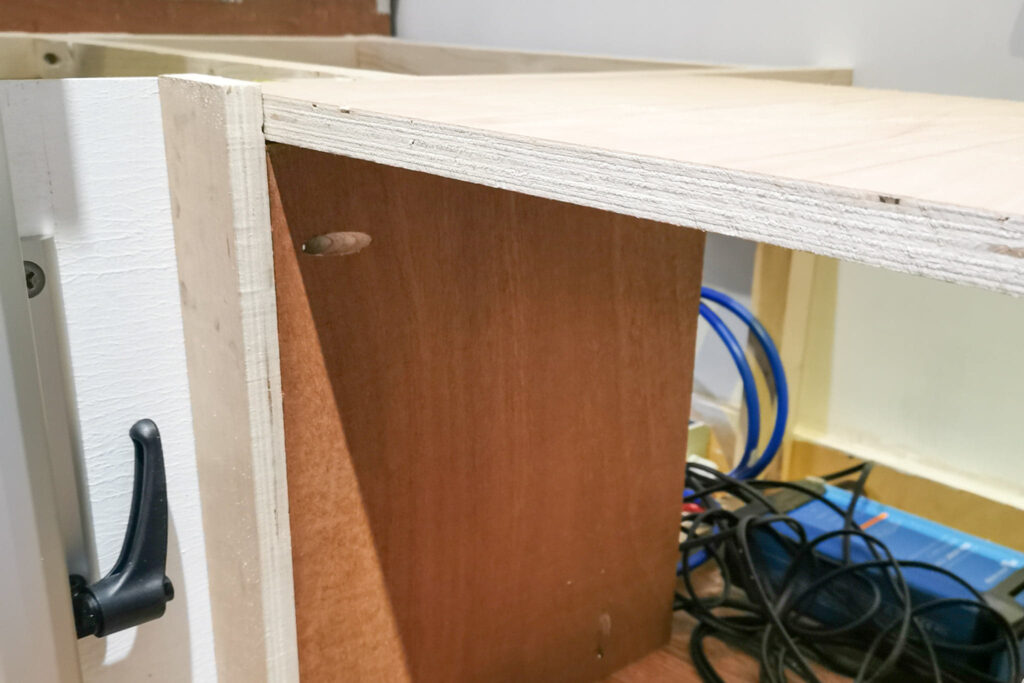
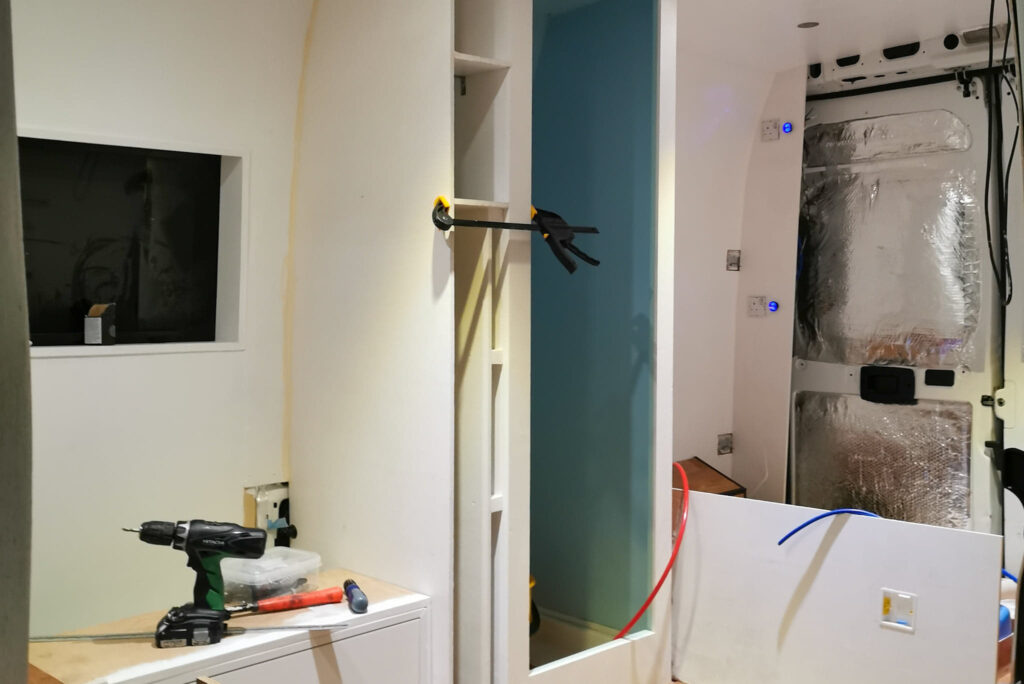
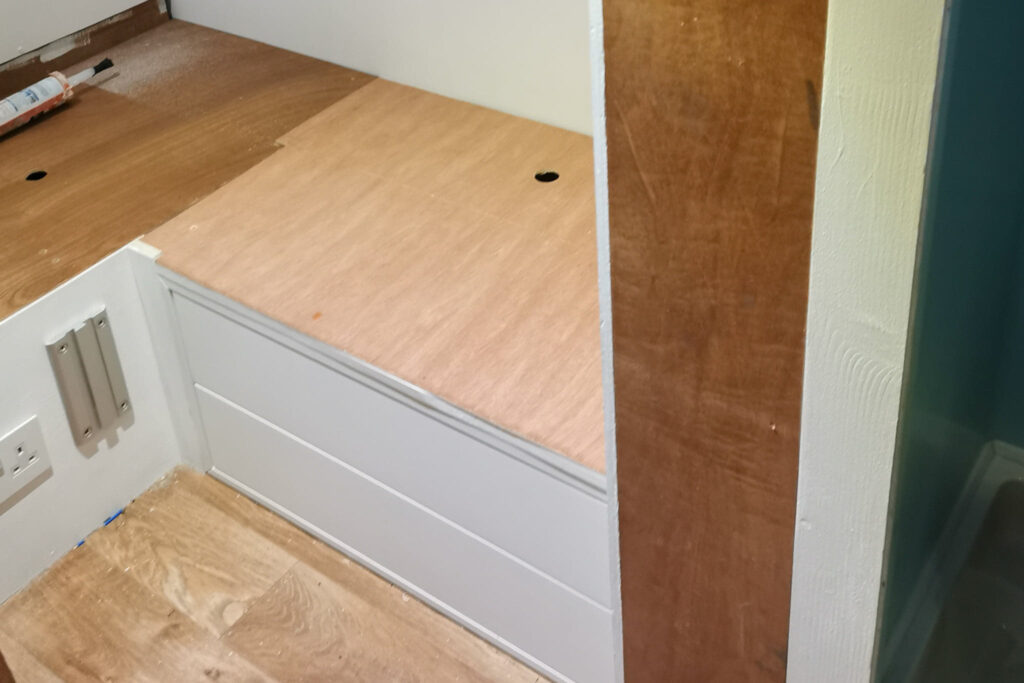
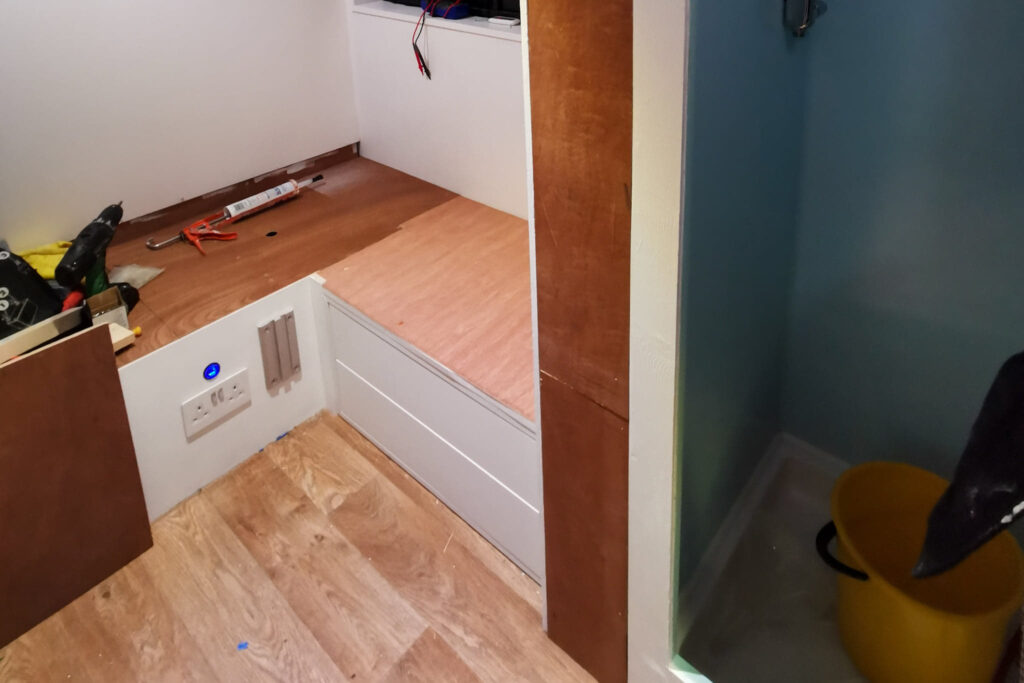
Despite the temperature plummeting to a chilly 2•C, we rallied onwards. We cut a bit of ply to be a small dividing wall that will not only house our switches but also create a small area for shelves to store the essentials – e.g. toilet paper.
We cut the ply to fit the curve of the wall beautifully – if we do say so ourselves!!
We also pootled around with the electrics. Unfortunately, most of the day the batteries were charging so we couldn’t progress as much as we would have liked.

Day 82
20th November 2020
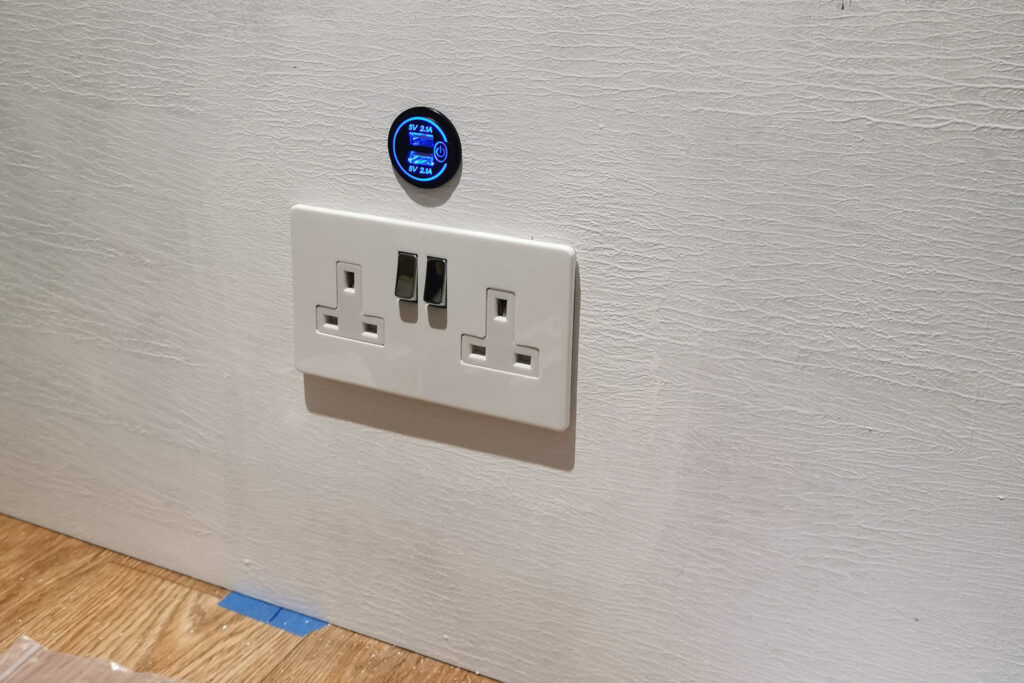
We continued cracking on with the electrics. We started by wiring up a socket for the hook up charger to plug into and we also wired up a plug to connect the inverted the the “umshaltstation” (not sure what this thing is called… that just what it said on the box)
We also sanded down the wall we made yesterday and trial fitted it one more time.
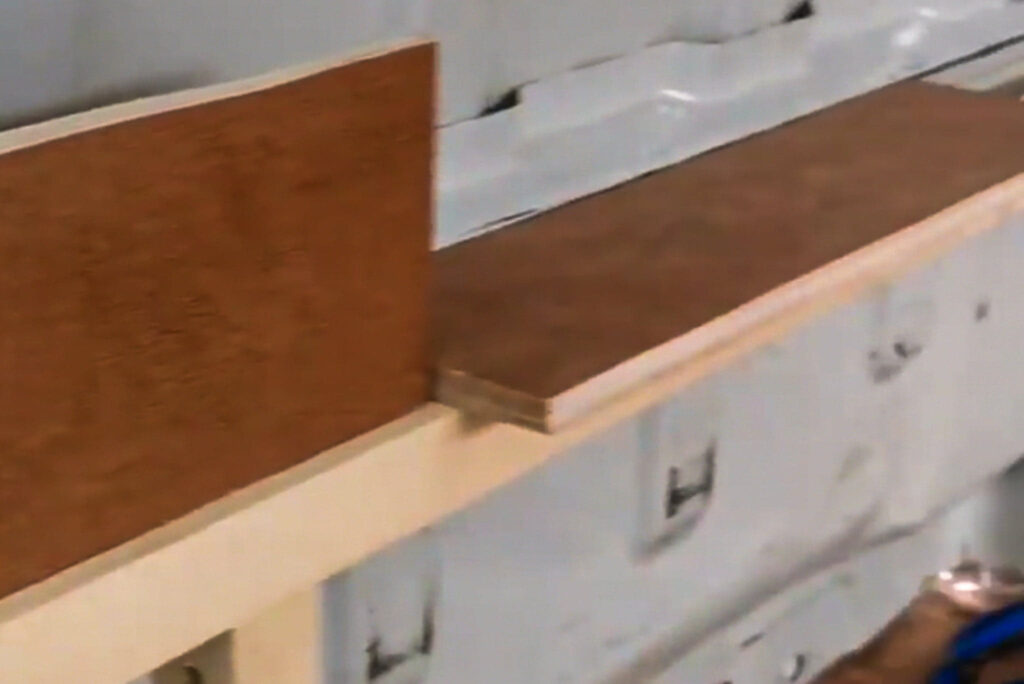
Finally we a straight edge in a bit of 12mm ply so we could create the two small walls that will be positioned behind the bed.
Day 83
21st November 2020
Another day of working on the electrics.
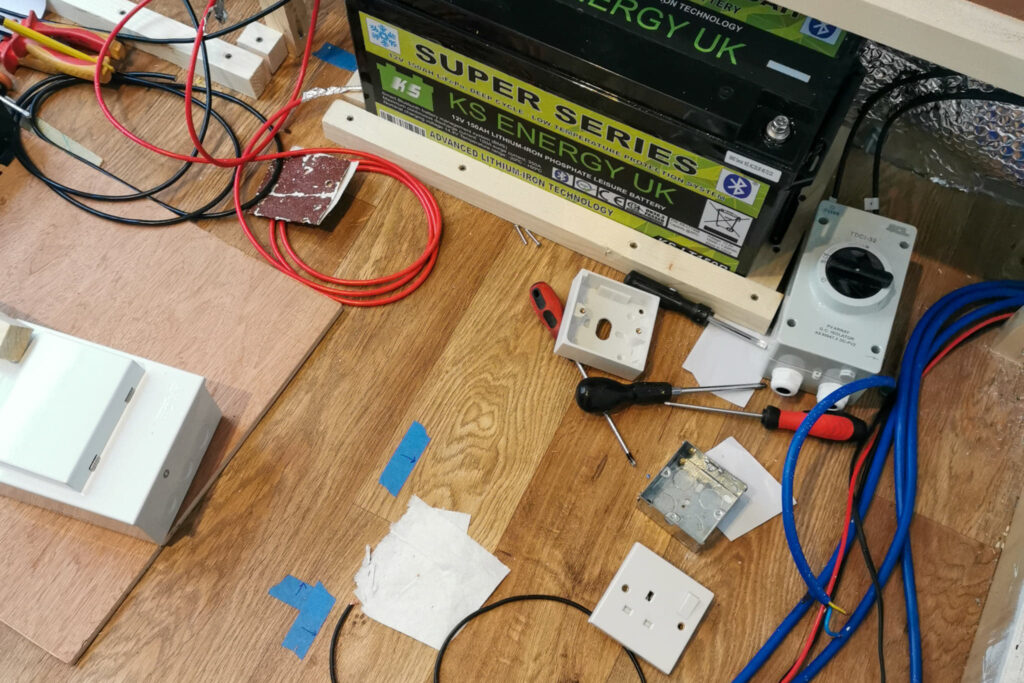
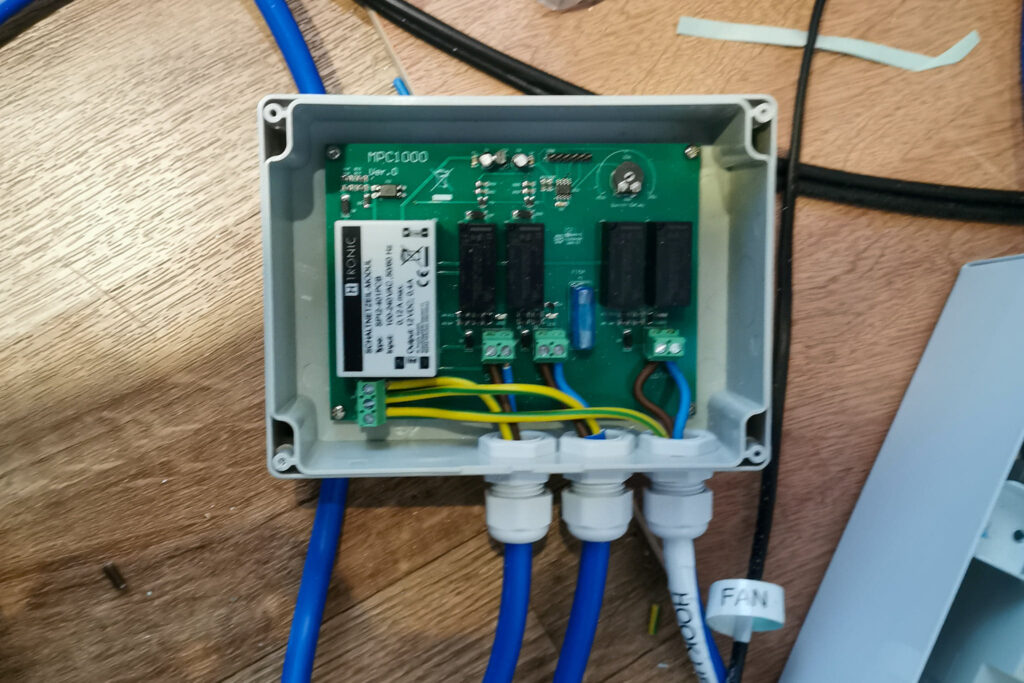
We wired up the “umschaltstation” (a switching station – between the battery and shore power) and the garage consumer unit. These jobs were a bit fiddly, so we are glad they are out of the way.
We started painting the wall we cut out yesterday too.
Not very exciting, but progress is progress.
Day 84
22th November 2020
We cut plywood to be small walls at the back of the van – behind the beds. After carefully cutting them, we were initially unhappy with how they looked. Although they followed the curve of the wall perfectly, they were a bit slanty. However, this is such a minor issue compared to all the work we have still got to do on the van. By the end of the day, the slant of the walls had grown on us.
We also continued wiring up the electrics. We wired the batteries together and attached the inverter. We also earthed both the batteries and the garage consumer unit. We also started wiring up the DC to DC charger.
Finally, we continued painting the wall from yesterday.
Day 85
23rd November 2020
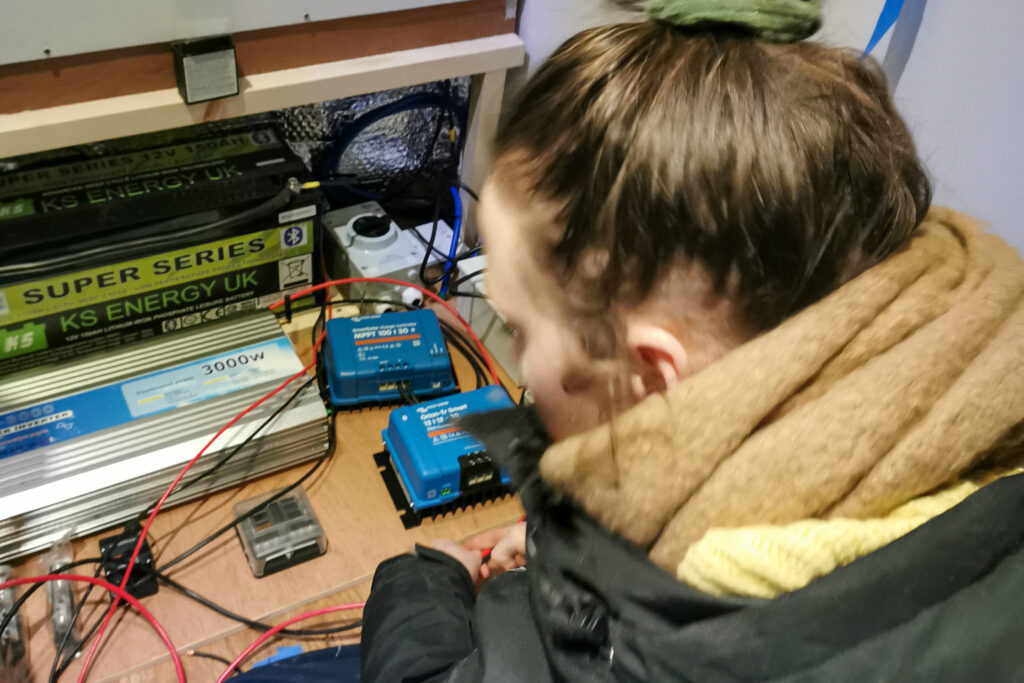
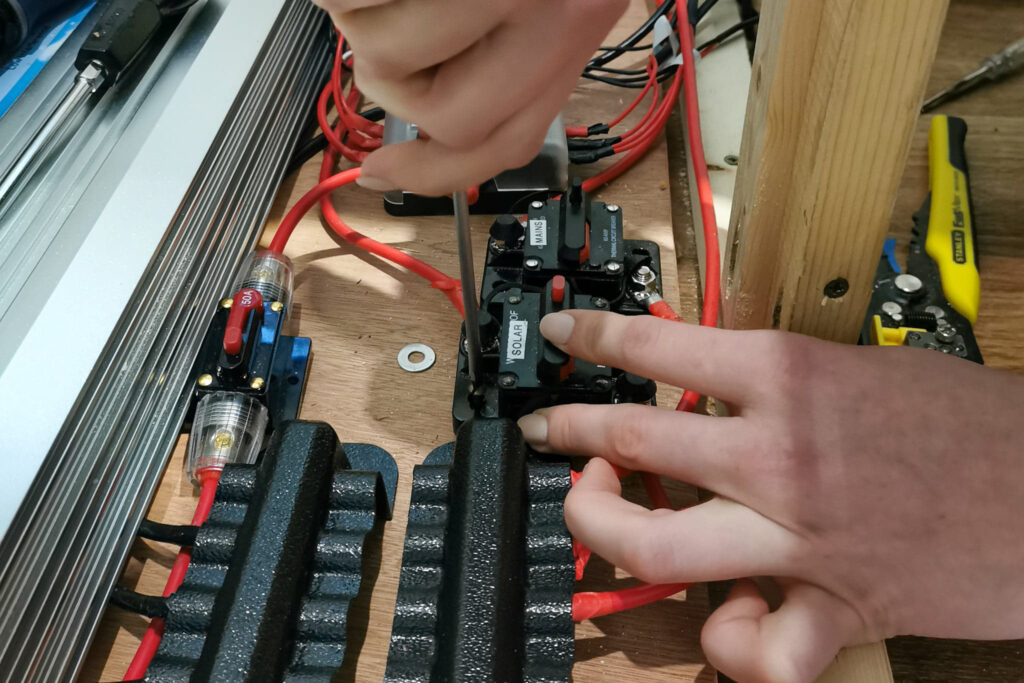
We primarily continued on with the electrics. We wired the batteries to the busbars, wired up the solar controller, and finished wiring the DC to DC charger. We also secured the majority of the electrics to the ground.
We also painted the small walls that are going to be at the back of the van.
We finally fixed one of the drawer fronts from the garage (false floor) area drawers. It kept falling off no matter how we chose to attach it. Today we used a combination of screws and no more nails. Fingers crossed this is the last time we have to fix it!
Finally, we drilled pocket holes into our internal wall we painted yesterday so it is completely ready to be put into position when we clear some space in the van.
Week 16
Perhaps not the most productive week, but an important one none-the-less. We finally installed our diesel heater – which will make working through the Scottish winter a little more tolerable!
We also spent a fair amount of time trying to wrap our heads around the electrics.
Relevant posts include:
Day 86
26th November 2020
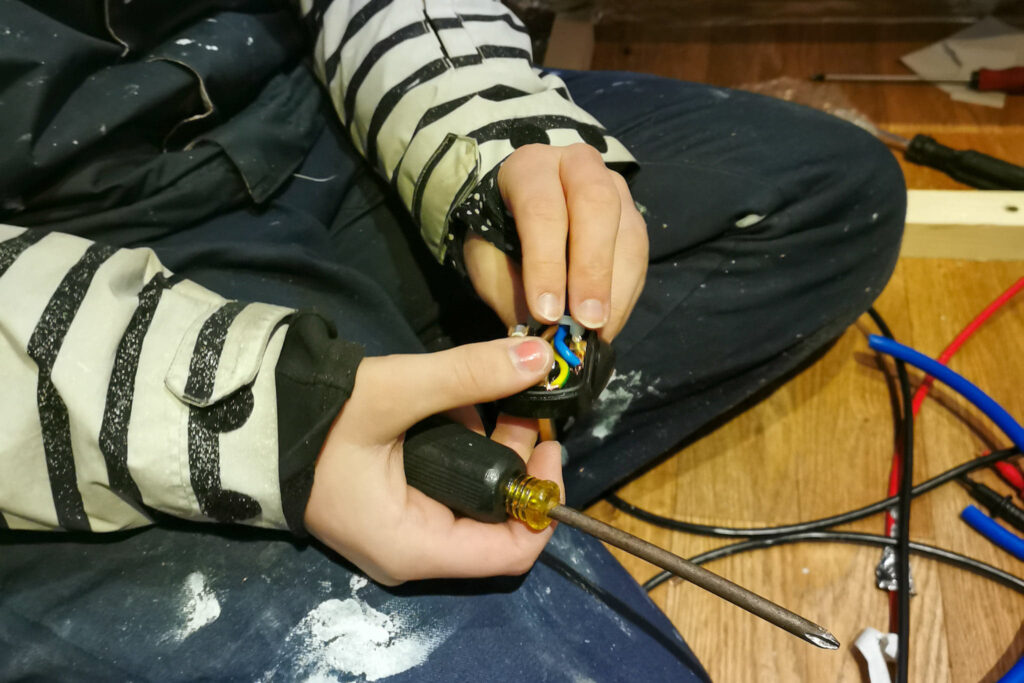
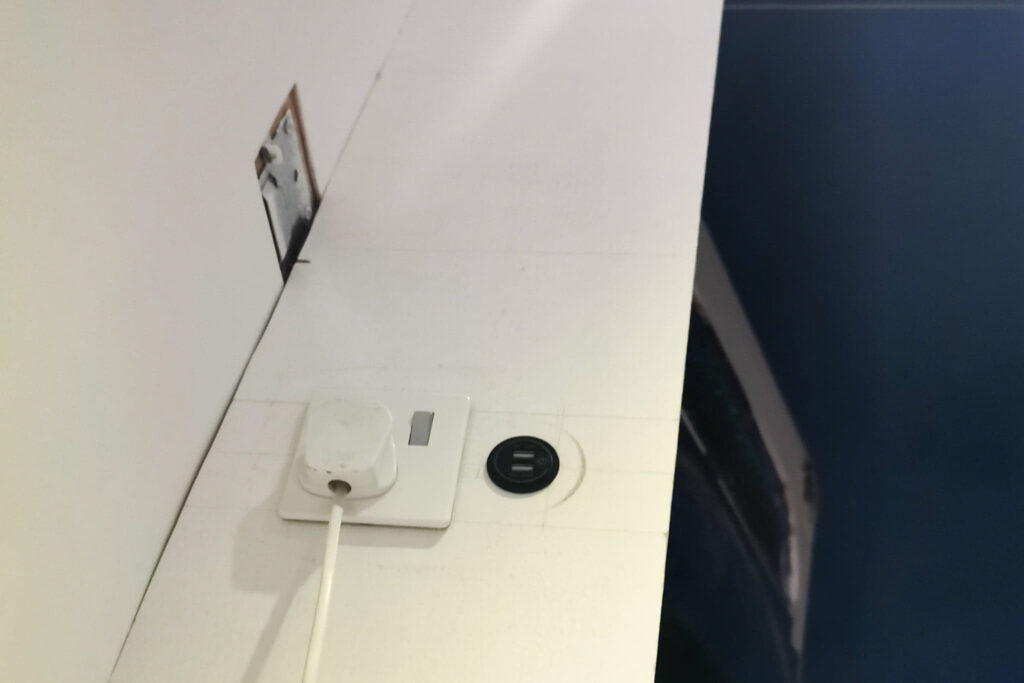
We finally got round to installing the back walls. Firstly, we prepped them by cutting some socket shaped holes and USB shaped holes into them to make things a little easier when it came to wiring.
Once installed, we cracked on with wiring up the sockets and USB ports.
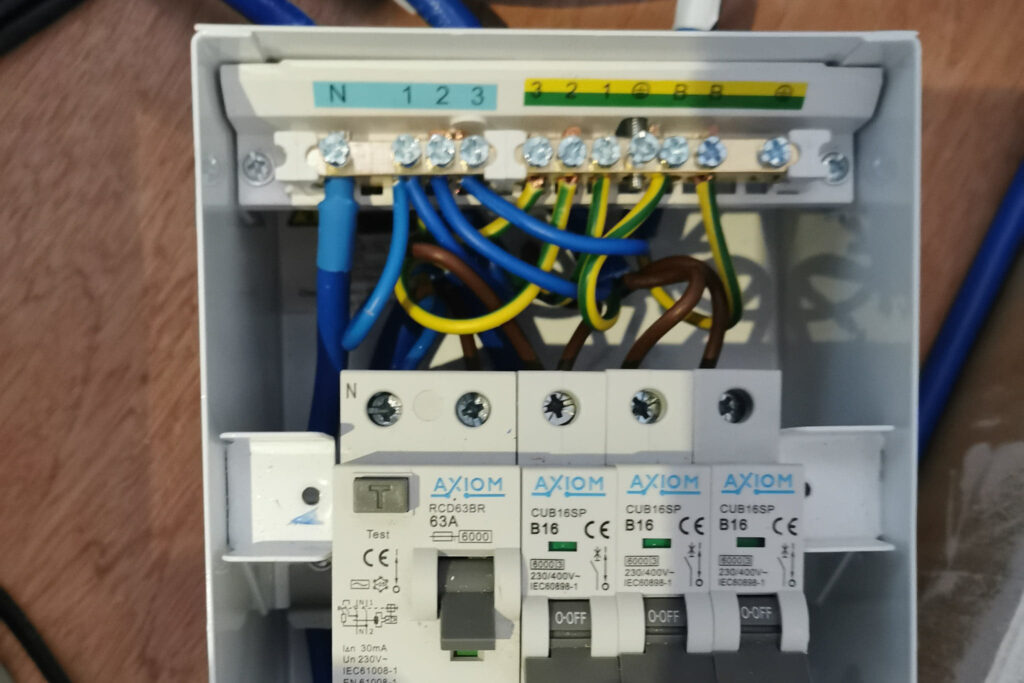
We also finished a few other electrical jobs. We installed the busbars and circuit breakers and also completely finished wiring up the solar controller. Unfortunately, we haven’t really been able to test the solar because A) we live in Scotland B) the van is parked in a shady spot.

Day 87
27th November 2020
We are starting to see the light at the end of the tunnel when it comes to the electrics in our van. With almost all of the big important electrical jobs done, we feel like we have left the danger zone.
We were wrong.
WE ALMOST SET OUR VAN ON FIRE
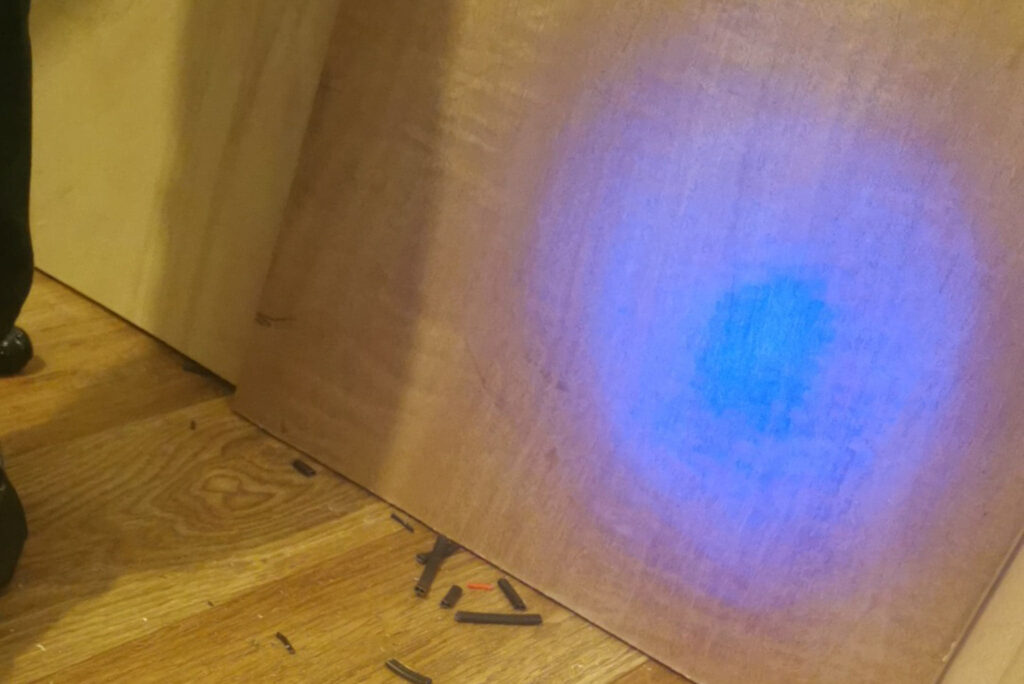
Having taken a quick lunch break we returned bright-eyed and bushy-tailed. However, we were shocked to find a dodgy smell on our return. One of our wires had short-circuited and had almost set our vinyl flooring on fire. The floor has been through so much considering its relatively short life!
The problem was immediately fixed and no harm was done. We also finished wiring the USB’s and the fuse box today, so it wasn’t all bad!

Day 88
28th November 2020
It finally feels like we are entering a new chapter of the build.
Today we started building the structure for our sofa. We are eventually going to have an “L” shaped sofa, but for today, we are just working on one leg of the “L”. Once the structure was constructed, we swiftly moved on.
We sanded the wooden bulkhead wall in preparation for painting. We put 2 thick coats on the wall and the roof before calling it a night.
Simultaneously, we also are working on creating a wall for the water fill-up point to be attached to.
Finally, we did some fiddly jobs that included trying to figure out the perfect dimensions to create a perfect curve around the door using plywood.
Day 89
29th November 2020
A considerably slower day at the van today.
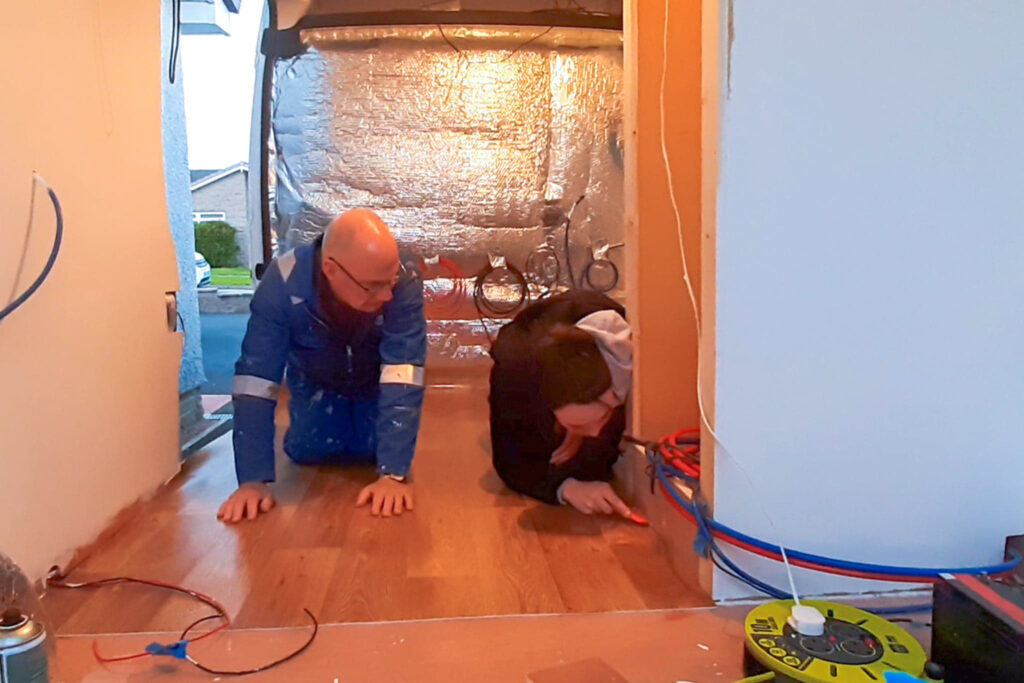
We started fitting a diesel heater. That really was all we did… and it’s not even fully installed yet. Hopefully, tomorrow will be more productive.
It’s so difficult to find motivation now that the temperatures are plummeting.
Day 90
30th November 2020
The chilly winter days are becoming increasingly miserable and slowing down our progress considerably.
We only spent a half day at the van as the rain scared us away!
When we arrived we had one goal in mind – finish installing the diesel heater.
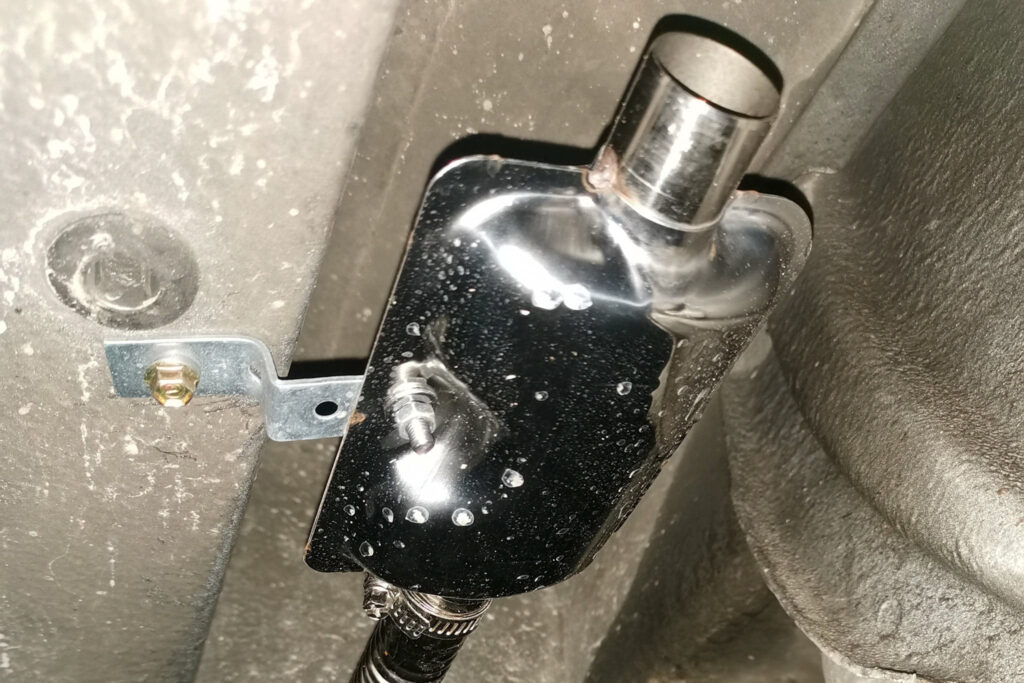
Once again, we didn’t achieve our goal (a recurring theme of this diary!). Although the installing is one of the easier jobs we have done, we were delayed and deterred by the rain battering down on us as we lay outside partially under the van trying to fit the exhaust and filter.
It was a bloody nightmare.
TOP TIP: Don’t fit anything on the exterior of your van when its raining!

Day 91
1st December 2020
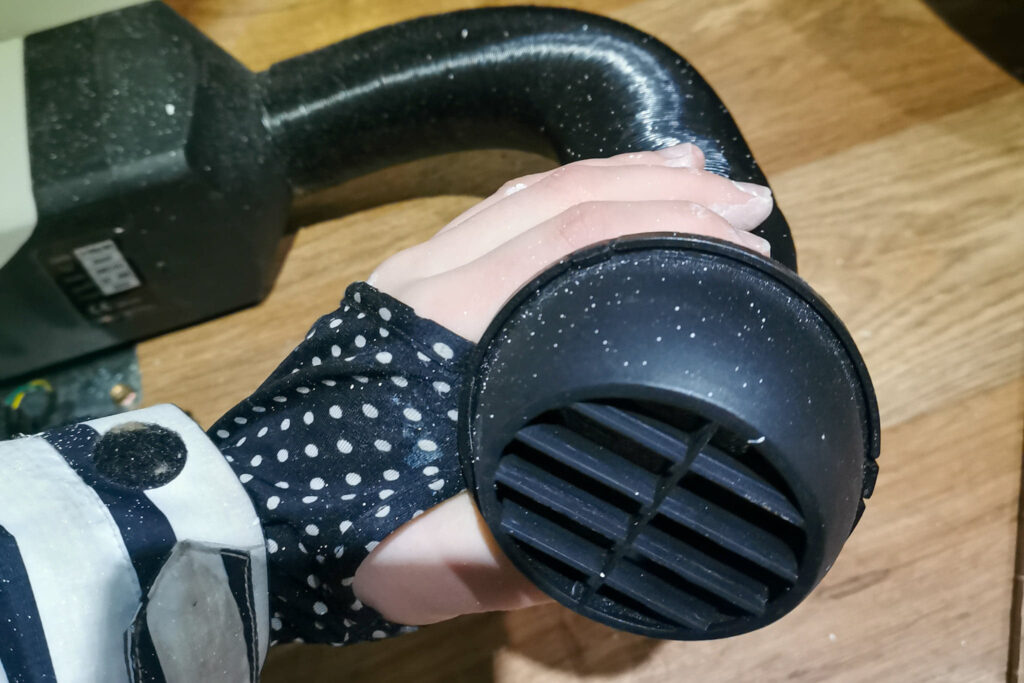
We got the diesel heater up and running and we couldn’t be more THANKFUL for the heat!
We also pootled around with the electrics.
Nothing too exciting to report.
Day 92
2nd December 2020
WORST DAY YET
Somehow we managed to lock the keys inside the van! We genuinely have no idea how this happened.
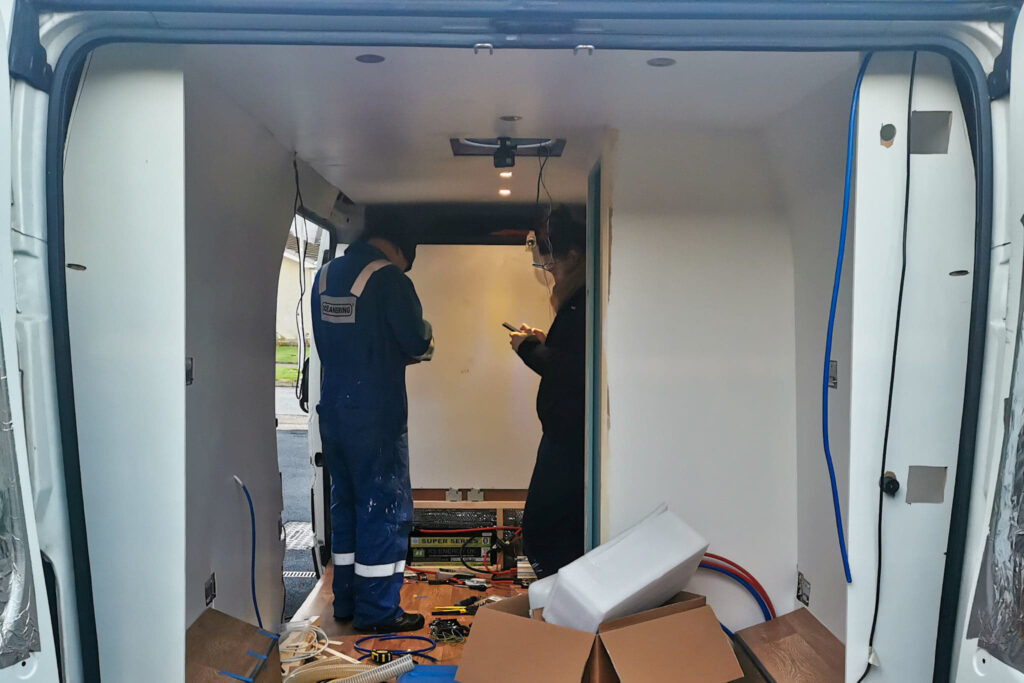
We spent the majority of the day watching a locksmith break his way into our van. It made us wish that we had removed the bulkhead as this wouldn’t have been an issue as we could still access the back of the van!
We did a few final finishing touches to the electrics. But overall another extremely unproductive, cold day!
Week 17
This week we were extremely thankful that we installed a heater as the temperatures really started to plummet! Never-the-less we persevered with the electrics, and even found time to install out Lagun table mount amongst other small jobs.
Day 93
3rd December 2020
Another bump in the road for us today… Our jigsaw broke. When will we catch a break?
Also, it was the first day at the van that the temperature was below freezing! WE DO NOT RECOMMEND!
Despite this, we managed to make a start on boxing in our electric/ making our sofa. We intended on inserting a socket and fitting our Lagun table mount… but it was not to be!
Day 94
5th December 2020
Today we realised that we used silicone sealant instead of caulk! After wandering why there was a sheen to the roof we figured out we made a stupid error.
We literally spent several hours picking off all of the sealant… and there was a lot.
Once we finally finished that, we apply ACTUAL caulk in preparation for more painting!
Day 95
6th December 2020
Today we painted all the areas that we sanded and caulked yesterday. Our van really is starting to look like on gigantic white box… from the inside and outside!
We also did a few final touches to our electrics and started to try and wrap our heads around the plumbing.
We thought the plumbing would be self explanatory… alas, it is not!
Day 96
7th December 2020
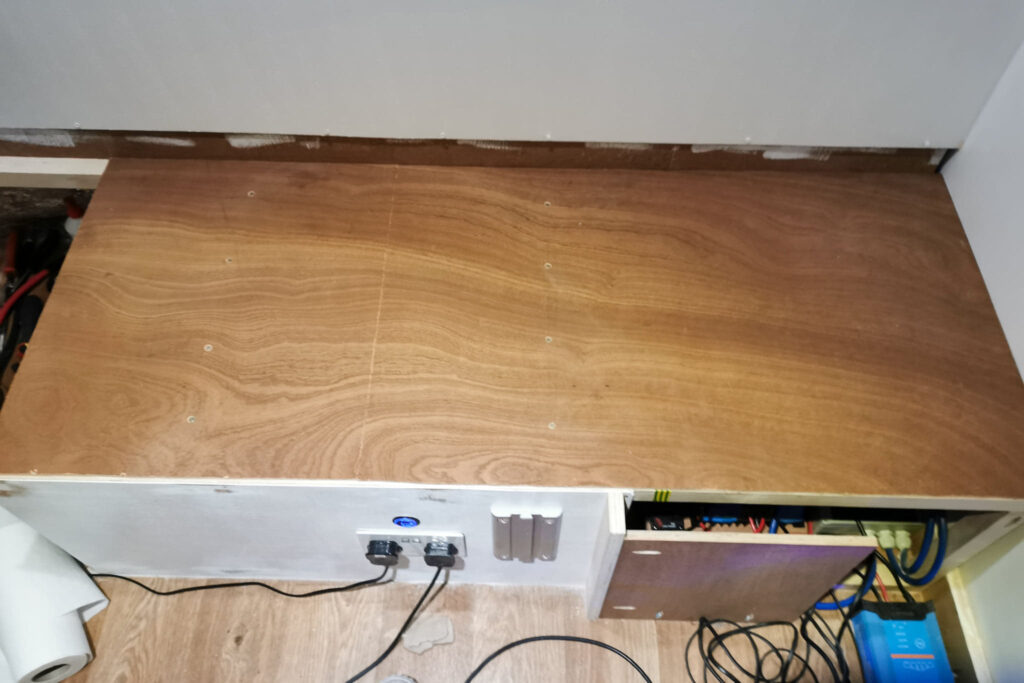
We primarily worked on boxing in the electrics. We fitted a piece of ply to the front of the sofa and also connected up a socket and USB ports.
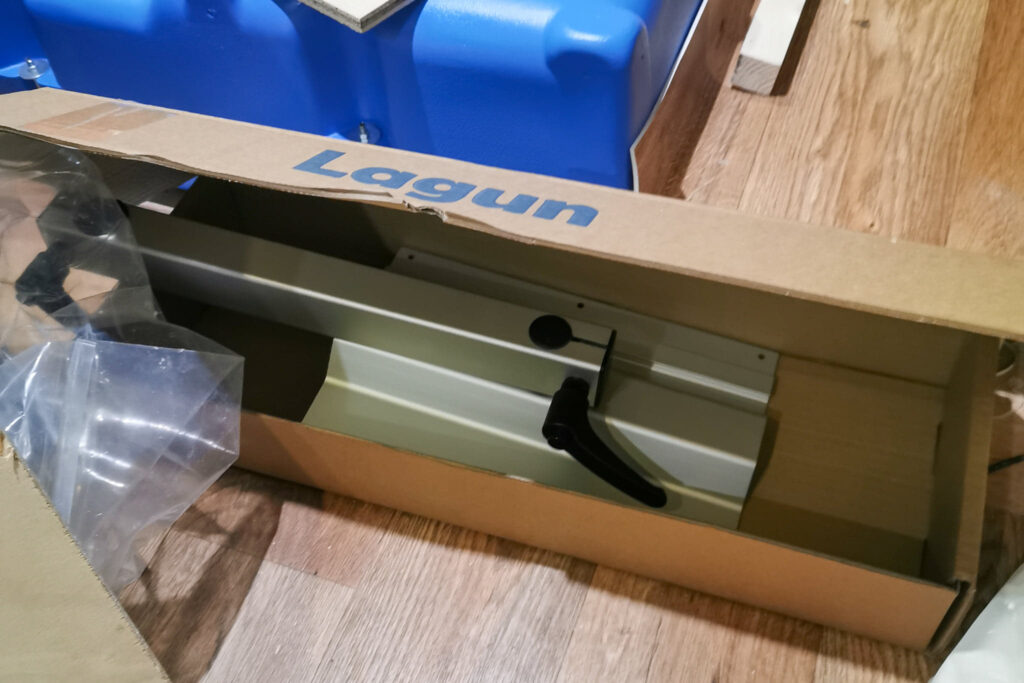
We even fitted our Lagun table mount plate. It feels weird fitting a “finishing” touch so early, however, it is nice to make the van a little bit more “homey”… even if the table has no table top!
Day 97
9th December 2020
We continued working on the “sofa” area.
We are housing a small set of IKEA drawers under this section of the sofa so today we spent the majority of our time just carefully calculating and cutting a frame to house them in so we wouldn’t be sitting directly on top of them. We attached a couple of the pieces we cut using pocket hole screws, so far we are happy with the results.
Week 18
A slow week with a lot of rain. We only managed to wire up a couple of switches and create the sofa top / lid! It feels good to have a solid place to sit down between jobs though!
Day 98
14th December 2020
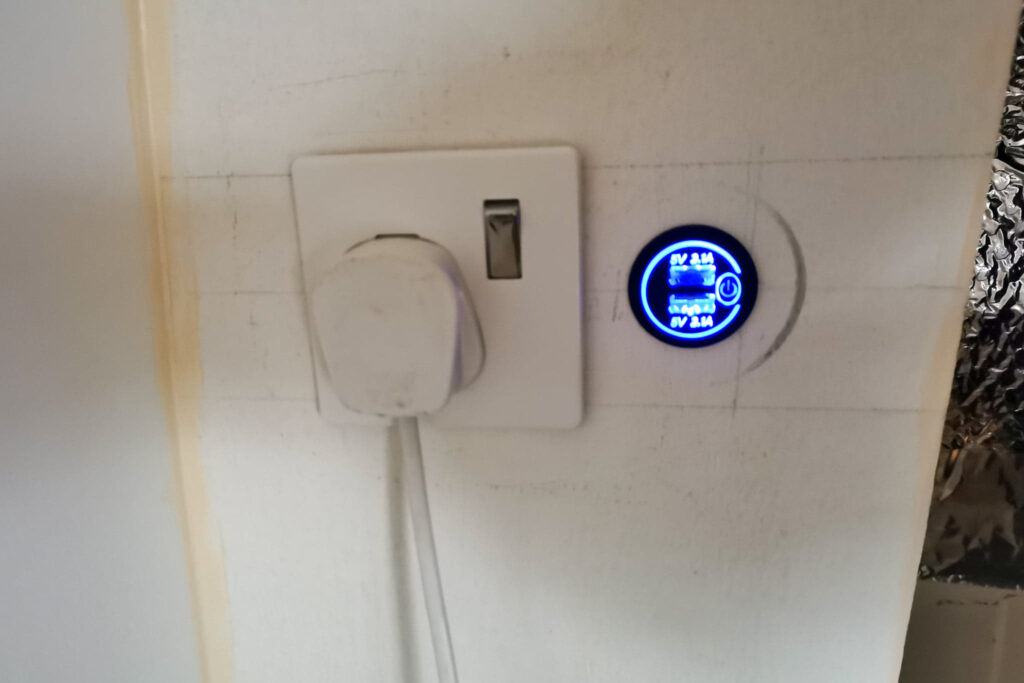
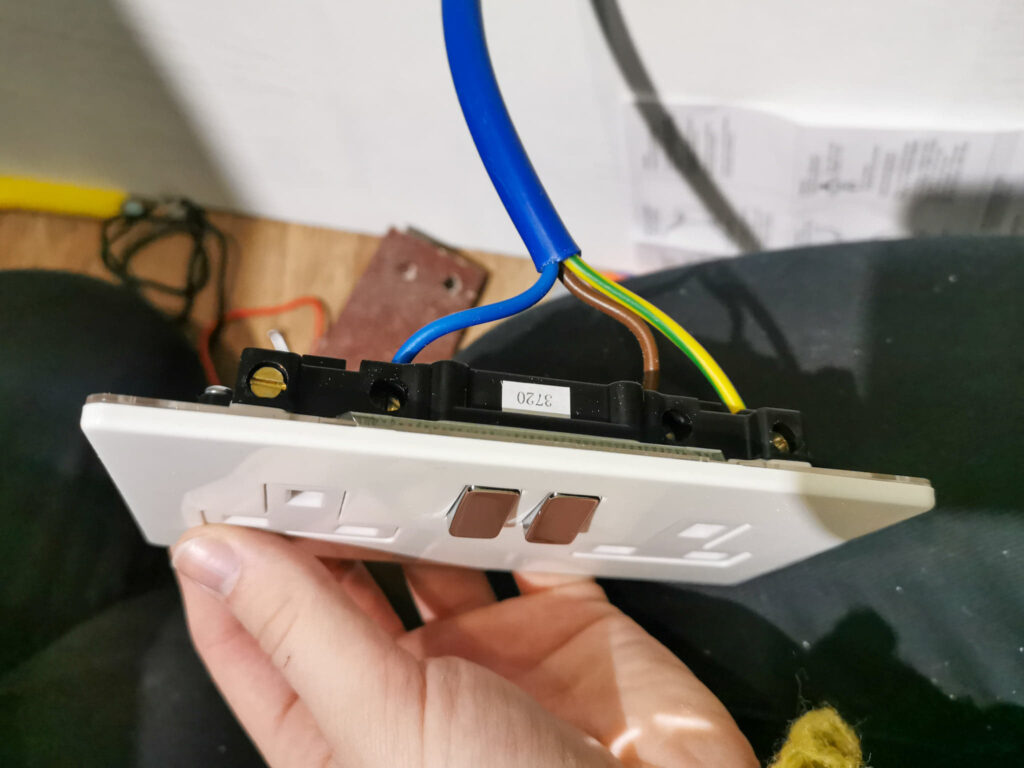
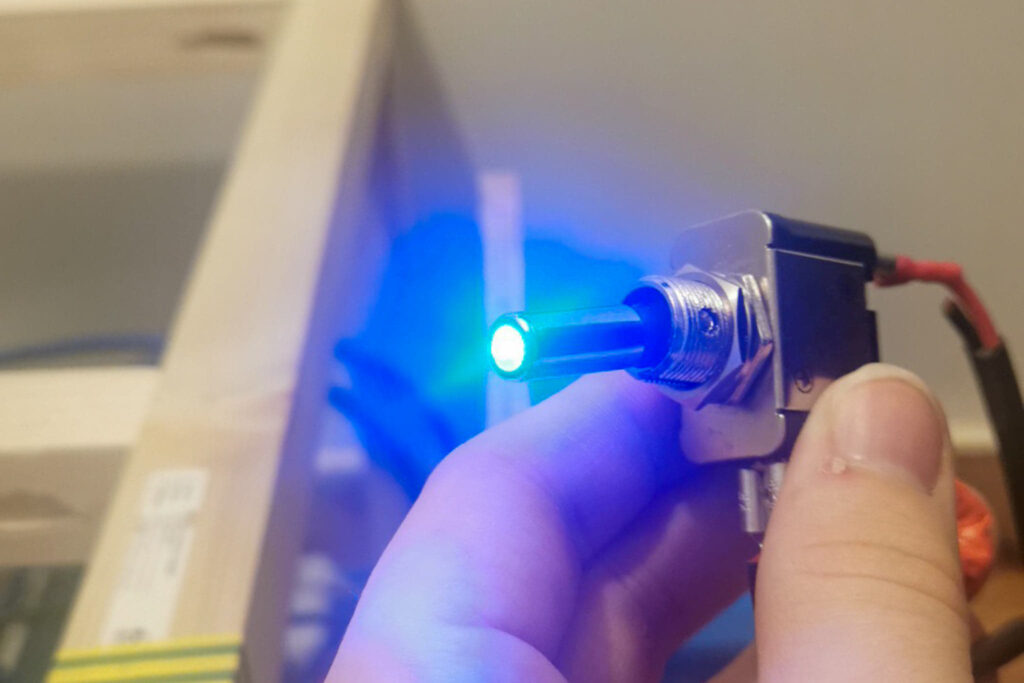
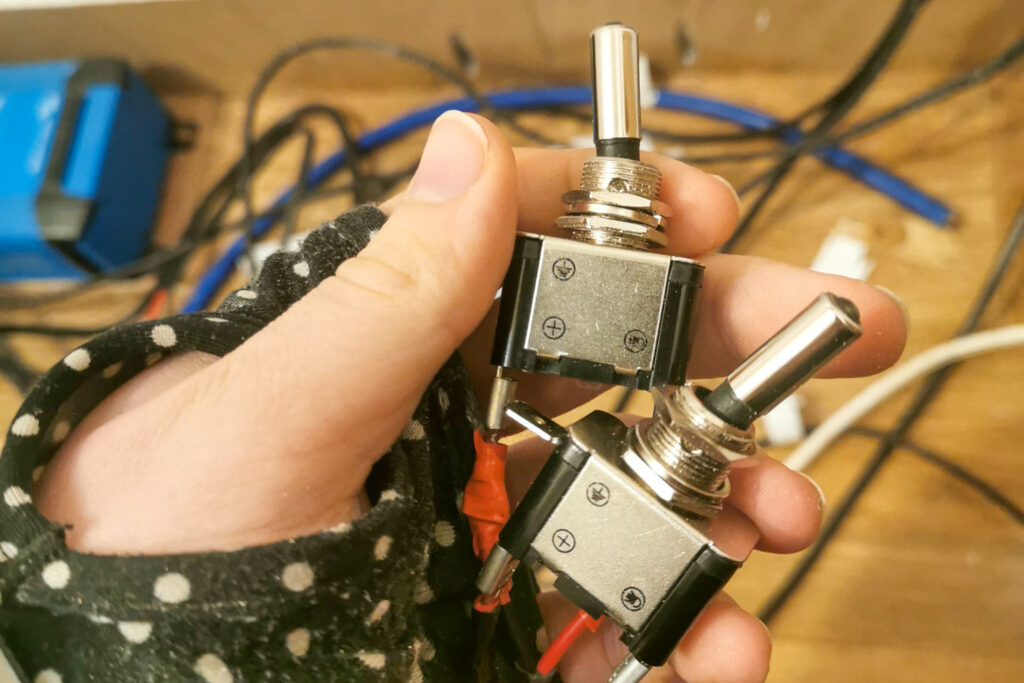
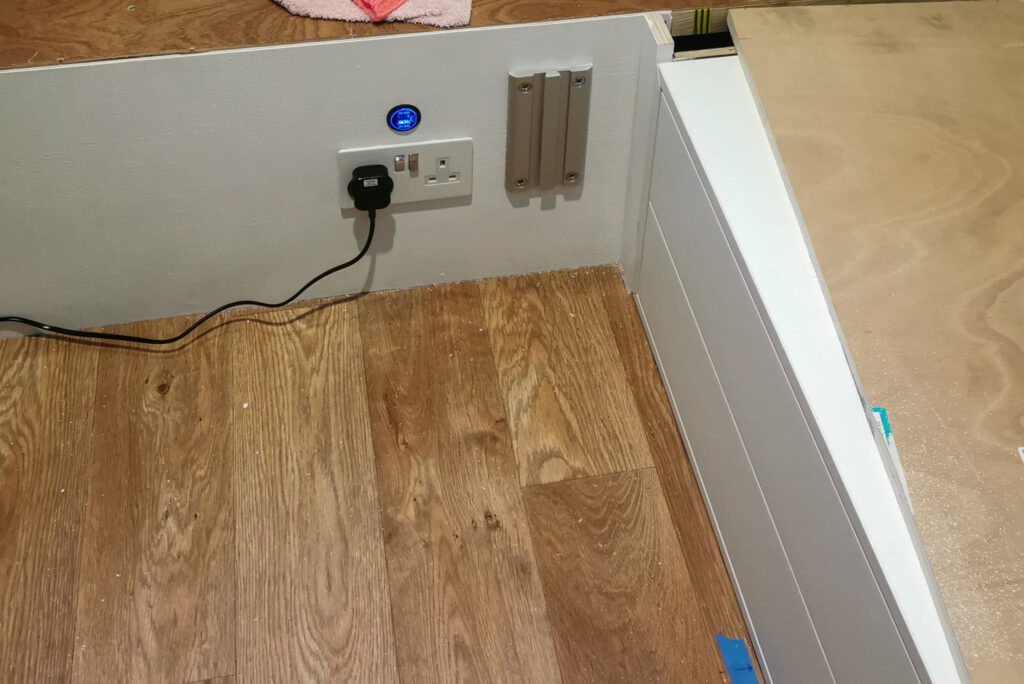
Today we wired up a switch. We opted for a toggle switch with (what we thought would) a cute white. This is not what arrived in the post. Instead, we were provided with an obnoxiously bright blue switch. It was horrendous. It was more like a laser than an LED.
These will probably not be a permanent fixture as the light is just a bit too bright in such a confined space!
Day 99
15th December 2020
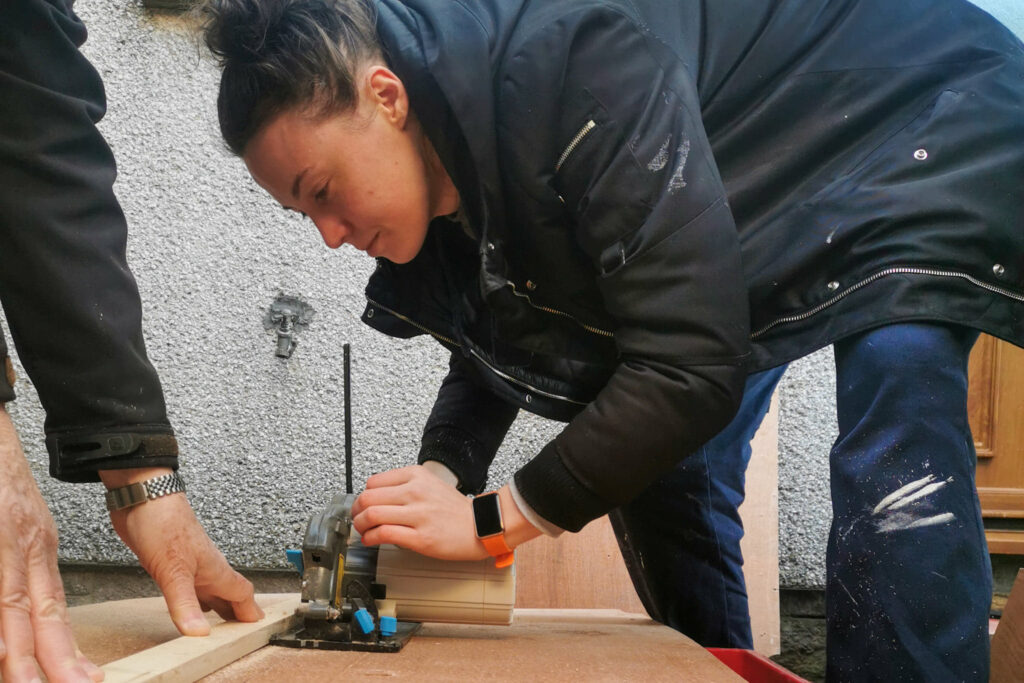
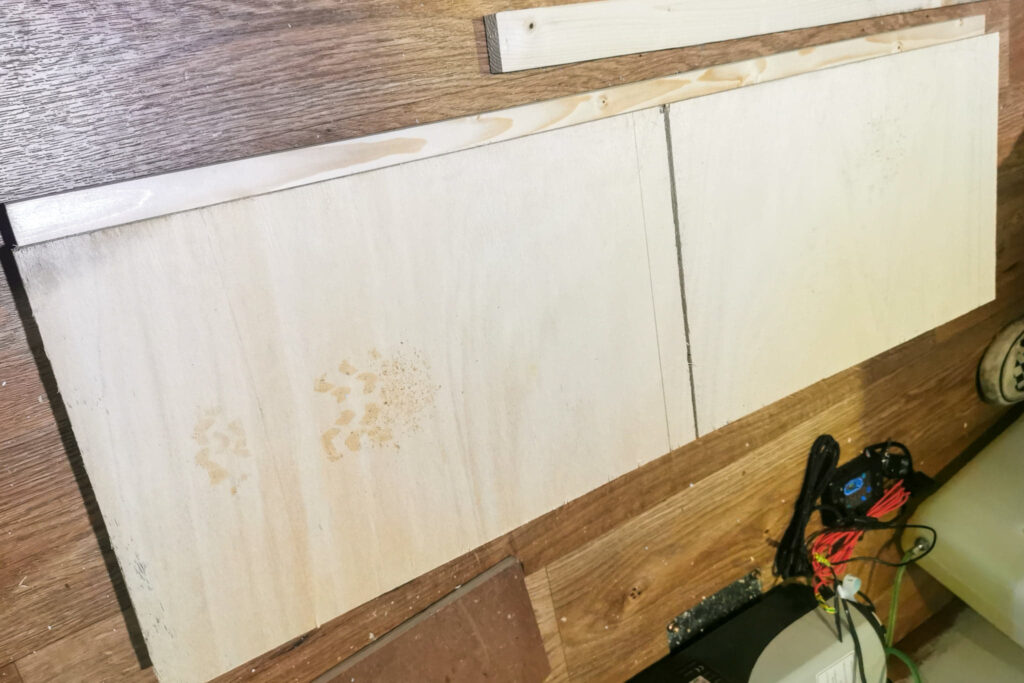
We cut some plywood to act as the bench seat top/lid. We chose 5mm ply and strengthened it with a batten along the back; this also helps to hold it in place and not slide around. We chose to go for such a thin plywood as the load will be spread out on the sofa. It also keeps the weight down which is a priority when converting a van
Week 19
Unfortunately, we had our first major disaster since starting this van build – we flooded our van when trying our hand at plumbing – although it wasn’t really our fault (more on that later though)! We did manage to fix the problem and even finished fitting our shower, and give the entire van a few more coats of paint!
Day 100
17th December 2020
We started to play around with the plumbing again. We were looking to find a suitable layout for all the components and also ordering up any plumbing fixtures and fittings that we needed.
As we are using bunk beds, there is very limited space beneath them, therefore optimising this space was key.
After a lot of thinking and not much progress, we feel slightly more confident in moving forward.
Day 101
18th December 2020
FIRST PLUMBING DISASTER!
We failed at the first hurdle. Having followed the water tank setup instructions PERFECTLY we were pretty happy to test it for leaks. After filling the tank up with about 10L of water it began gushing out at the outlet. We scrambled for towels and microfibre cloths to mop it up – it was a disaster.
After cleaning up the mess we went back and consulted the instructions… and we DEFINITELY didn’t make an error. The bloody instructions we wrong. We moved one of the components around and there was no leak.
We left it overnight to see if there was perhaps a slow leak. Only time will tell.

Day 102
19th December 2020
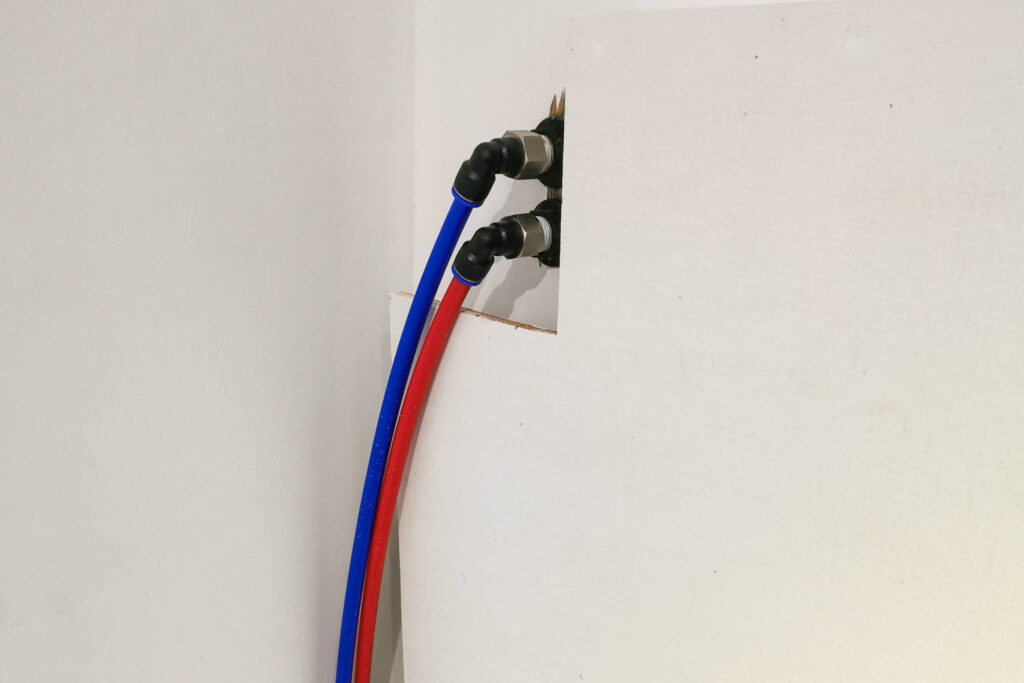
When we arrived at the van we were eager to see if the outlet had remained dry overnight. Unfortunately, there was a TINY bit of moisture around the outlet. Thankfully it was an easy fix. We upgraded one of the nuts on the outlet fixture and apply PFTE tape.
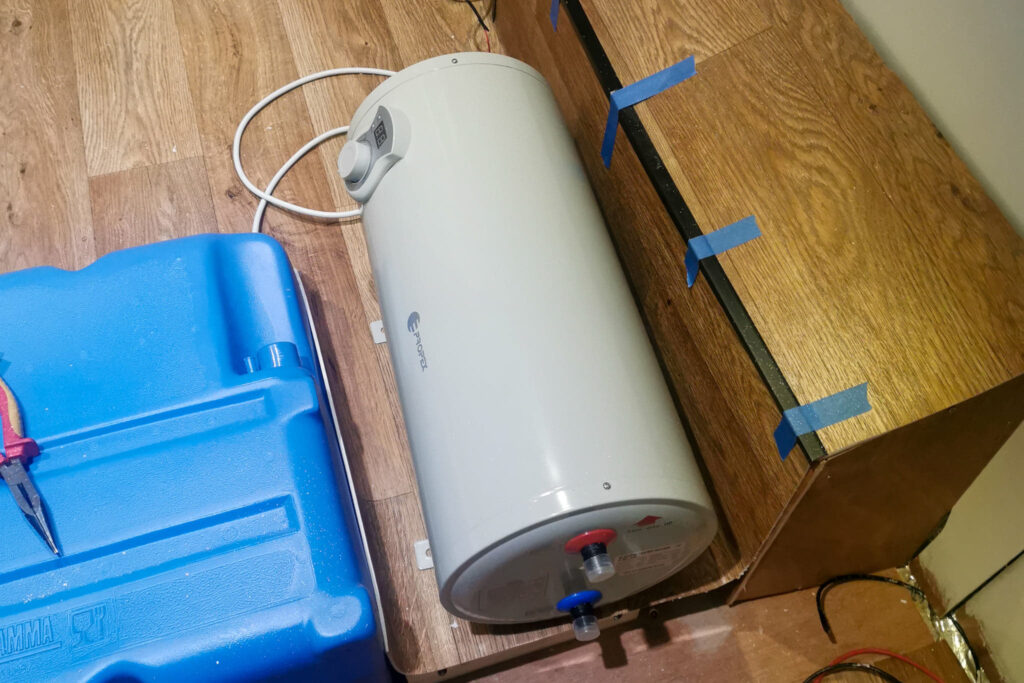
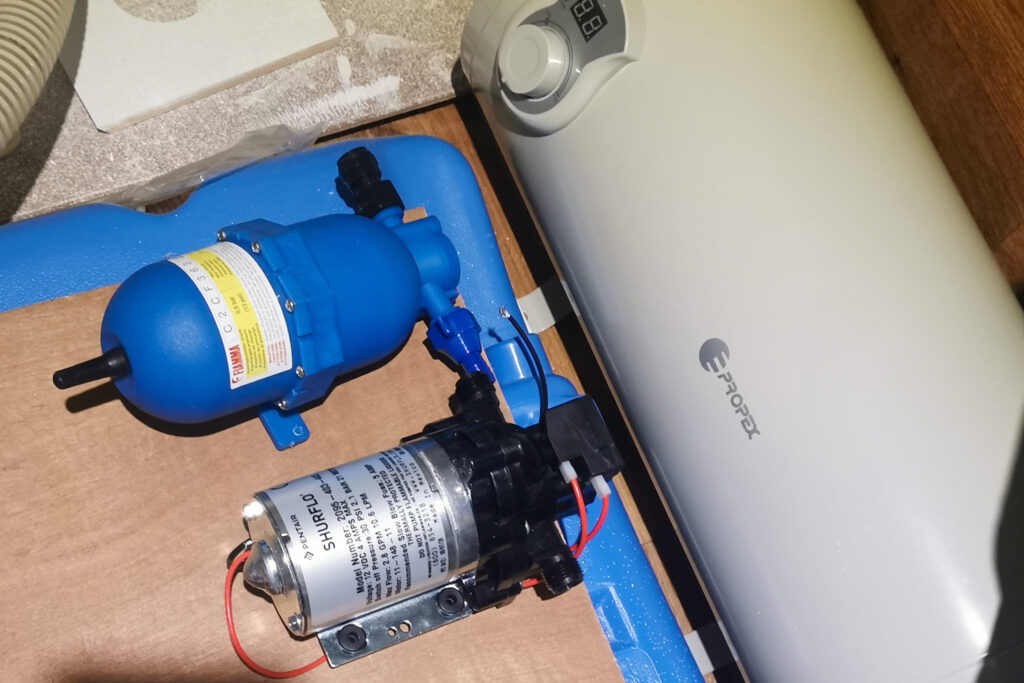
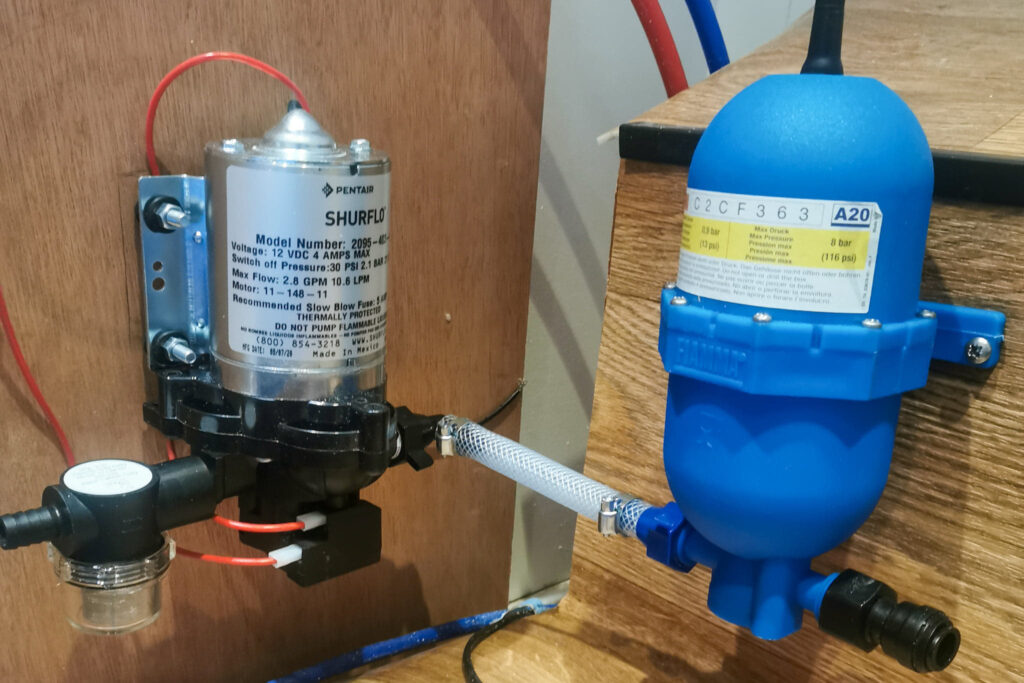
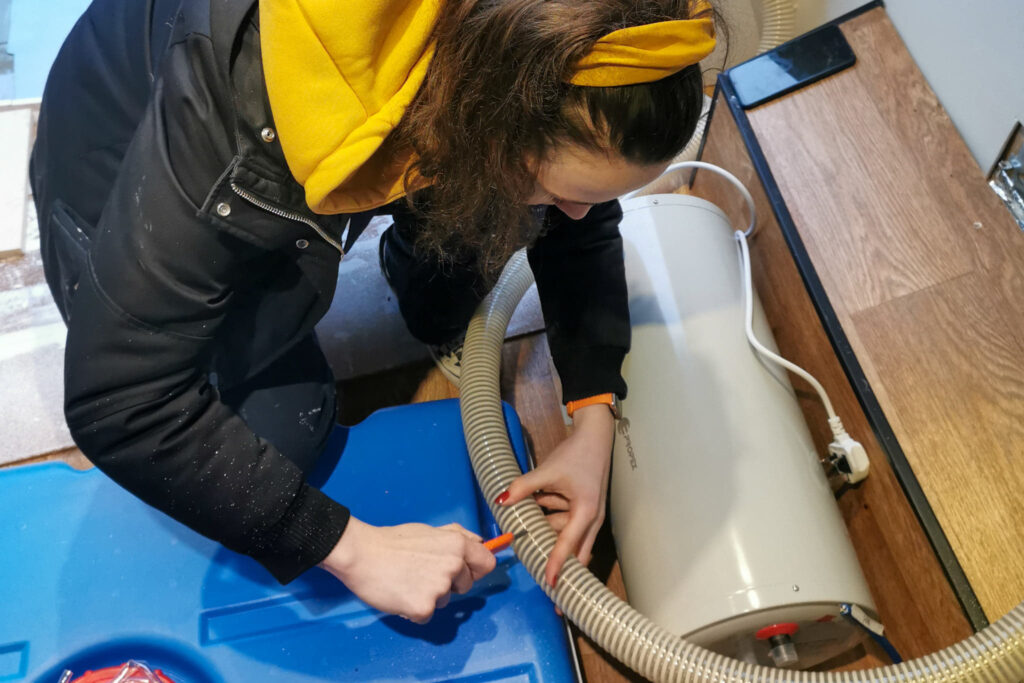
We also fixed out water filter, pump, and accumulator together and securely fastened them to the wall.
Finally, we ran a pipe to the water heater in preparation for more plumbing tomorrow.
Day 103
20th December 2020
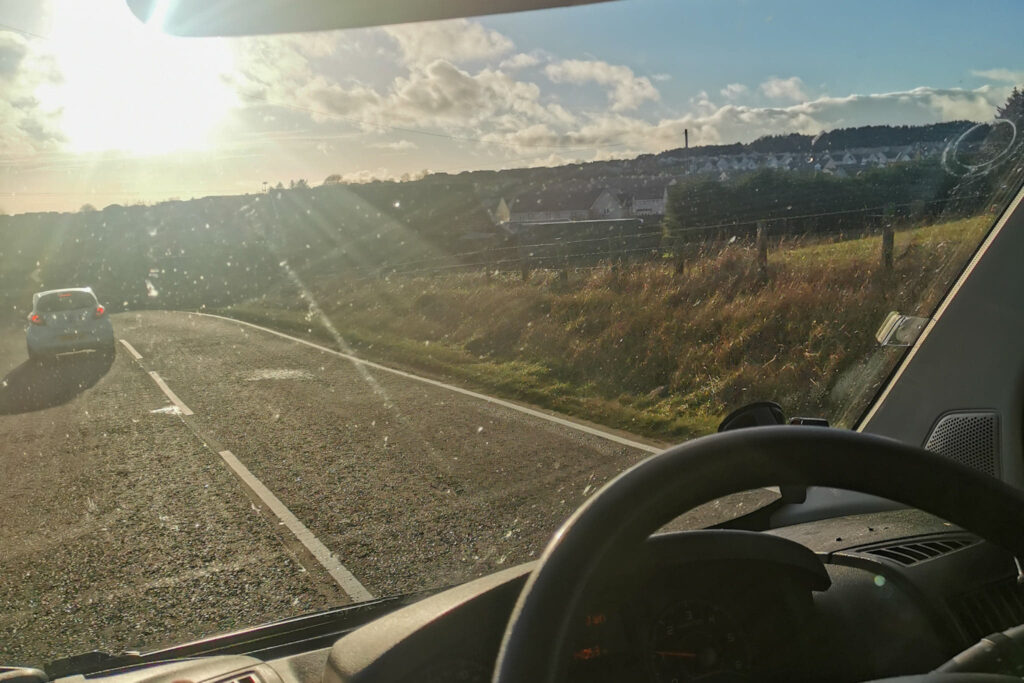
Since owning our van, we have been bothered by our van’s battery. It loses its charge VERY quickly – so much so that sometimes the central locking doesn’t even work! We are finding ourselves charging the battery daily, and today we even took it for a long run to really kick start the battery!
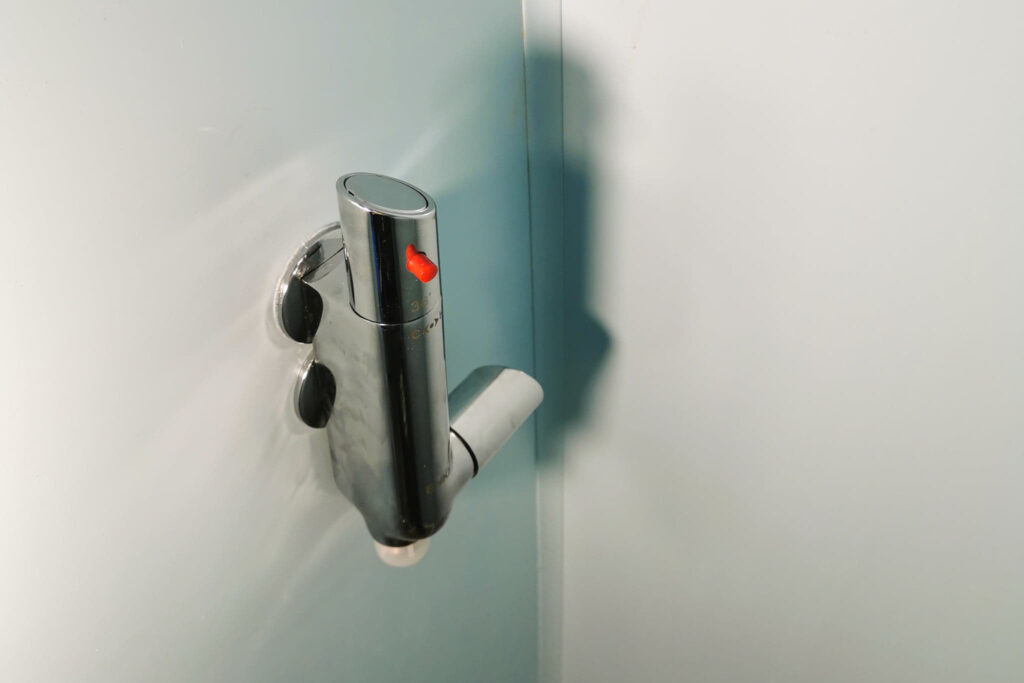
We also fitted the shower thermostat – a surprisingly easy job! It won’t be long before all the plumbing is done and we can actually test it out!
Day 104
22nd December 2020
A very unsuccessful day at the van. We arrived with the ambition of finishing plumbing our shower and fitting a wall. That was not the case. One of our fittings snapped almost immediately after installing it. Yet another delay.
Instead, we wired up a couple of switches… this time without the horrendous blue LED.
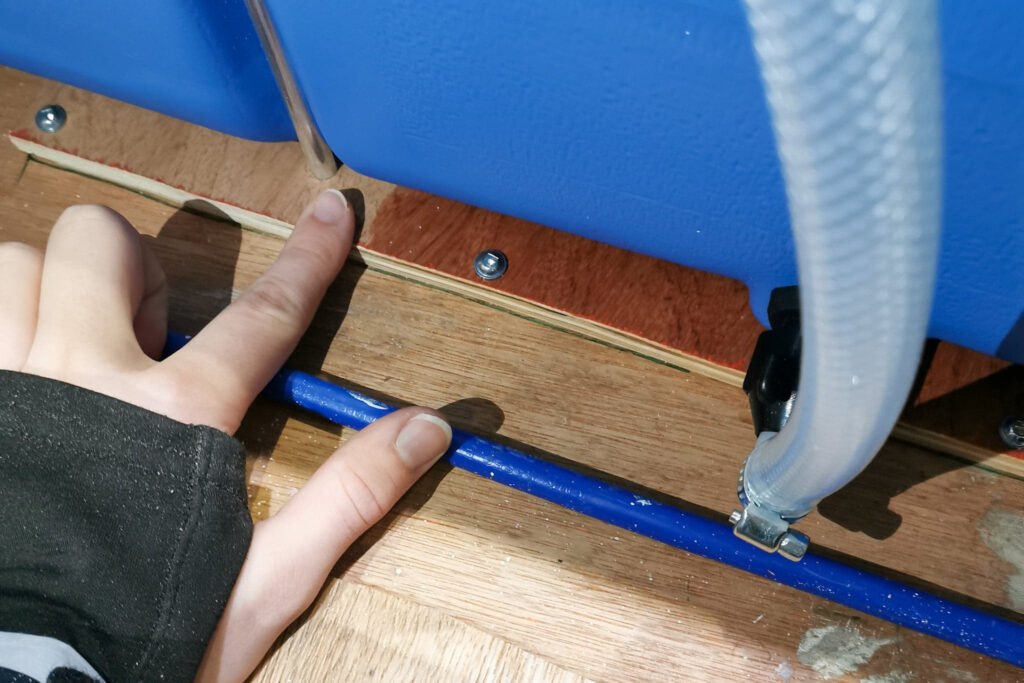
We also attached a couple of jubilee clips to our inlet pipe to the water pipe in preparation for finishing the installation of it.
Finally, we made a couple of design changes today that we think will make the interior of the van look even better. We will (eventually) be installing pull out units instead of shelves next to the shower.
Day 105
23rd December 2020
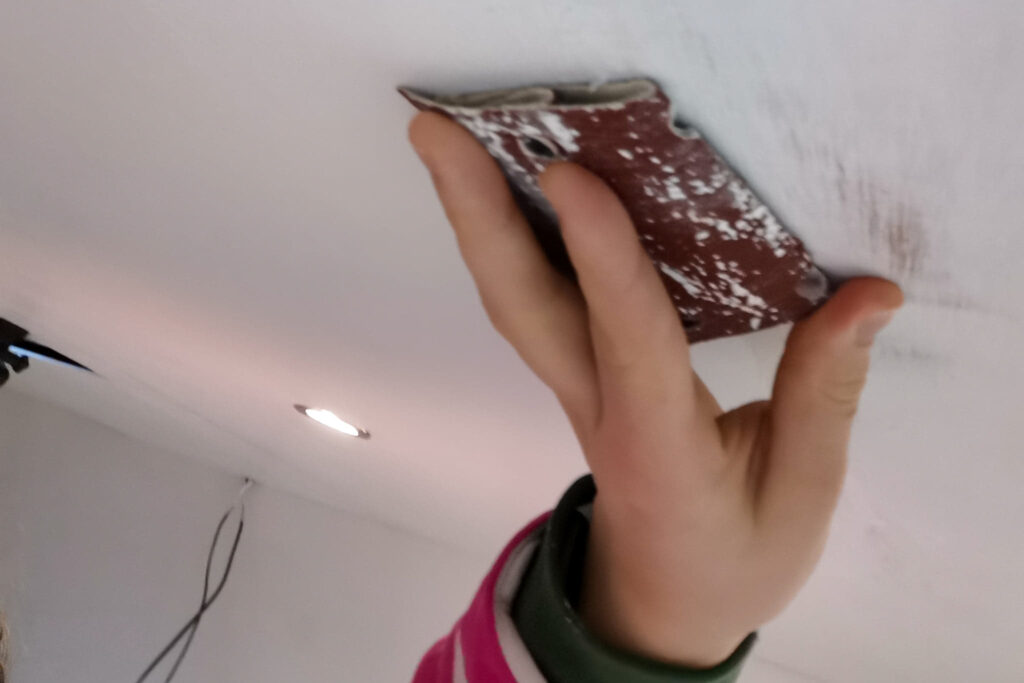
Paint, paint, and more paint.
The van was long overdue for a massive clean and a lick of paint. We genuinely don’t know how people manage to progress so quickly with their vans. We have spent at least 3 days painting this bad boy – and it still isn’t perfect! Although it is starting to look like a lovely little white box, and we couldn’t be happier.
Week 20
We started work on what will eventually become our storage area next to the shower. It will boast several shelves and a couple of slide out units. We also started working on our curved coffee table! Generally, just a lot of planning and thinking!
Day 106
24th December 2020
SNOW DAY!
A very quick visit to the van between purchasing some last-minute Christmas gifts!
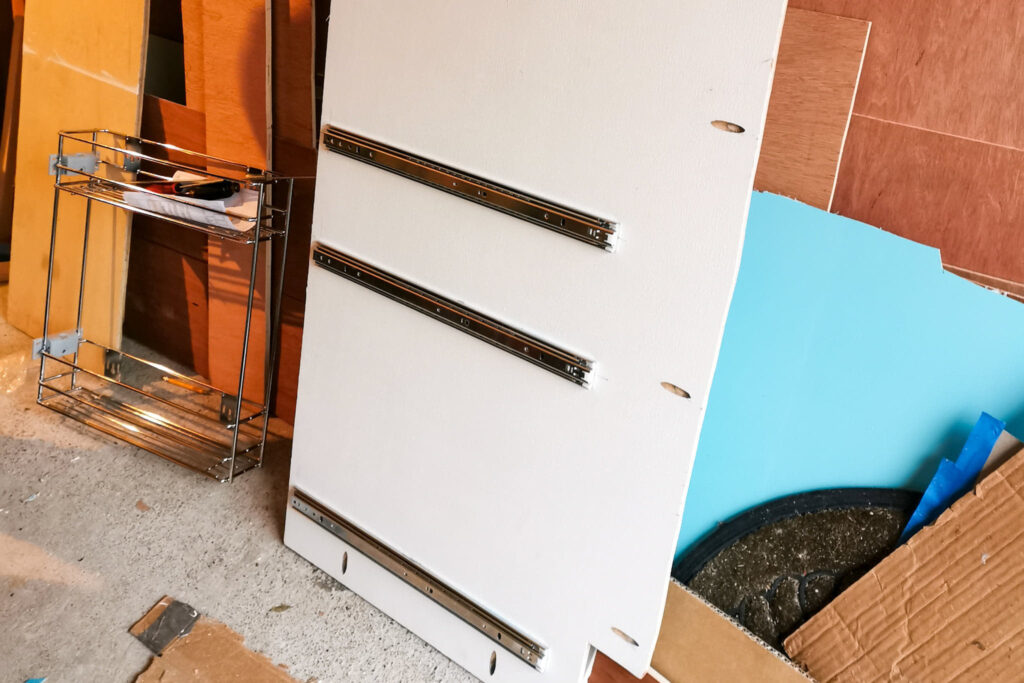
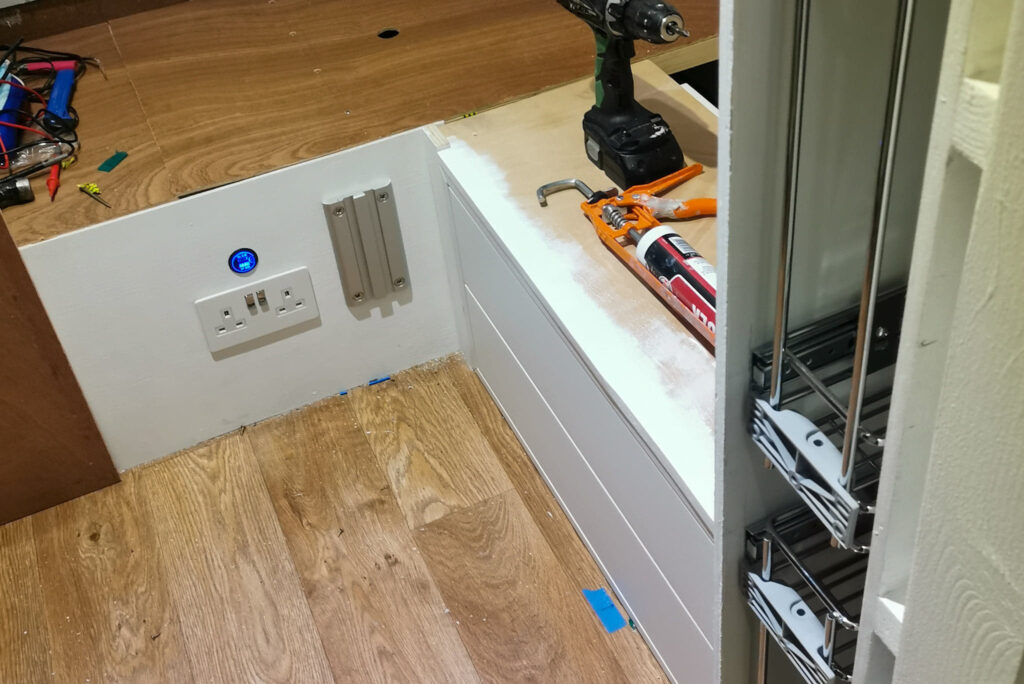
We also picked up some pull out cabinet mechanisms so we could make our storage area look a bit more professional.
To our surprise, they were a breeze to fit – a rare occurrence when converting a van! We secured the drawer slides to a wall that we are yet to fit as we need to finish a tiny bit of plumbing before we can crack on.
Everything is starting to come together… our garage is filling up with van components and furniture just waiting to the screwed in!
Day 107
28th December 2020
Finally back to work on the van after our wee Christmas break.
Once again, when we arrived at the van the battery was completely drained. We jump stated it and left the engine running for a few hours. Fingers crossed we don’t have the same problem tomorrow.
Once we got the van up and running we got stuck into trial fitting the remaining section of our corner sofa base (including our IKEA drawers). It fit like a dream.
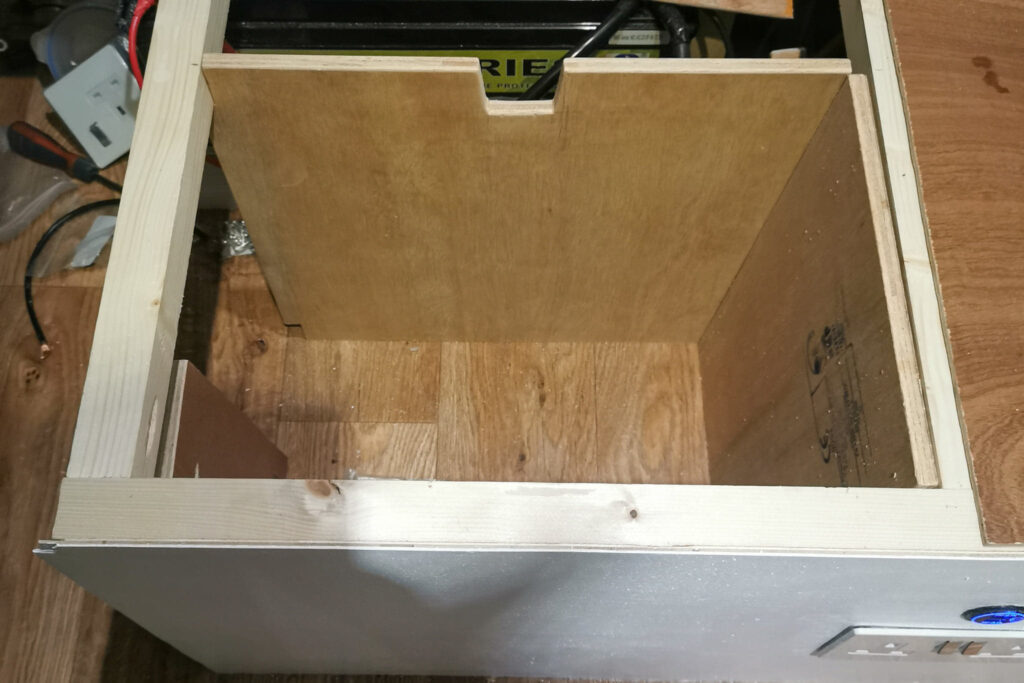
We also started to create an extremely narrow shelving unit that will be hidden behind our pull out cabinet doors. These shelves will be perfect for storing skinny items like laptops and documents.
Day 108
29th December 2020
One thing we absolutely HATE about converting a van is that everything you do is so reliant on so many other factors.
We have hit a stage in our build where we are waiting patiently for some plumbing bits and pieces to be able to keep making progress elsewhere in the van. These two small adapters are the reason we haven’t installed our dividing wall with heaps of nifty storage solutions, and also the reason our sofa is still incomplete.
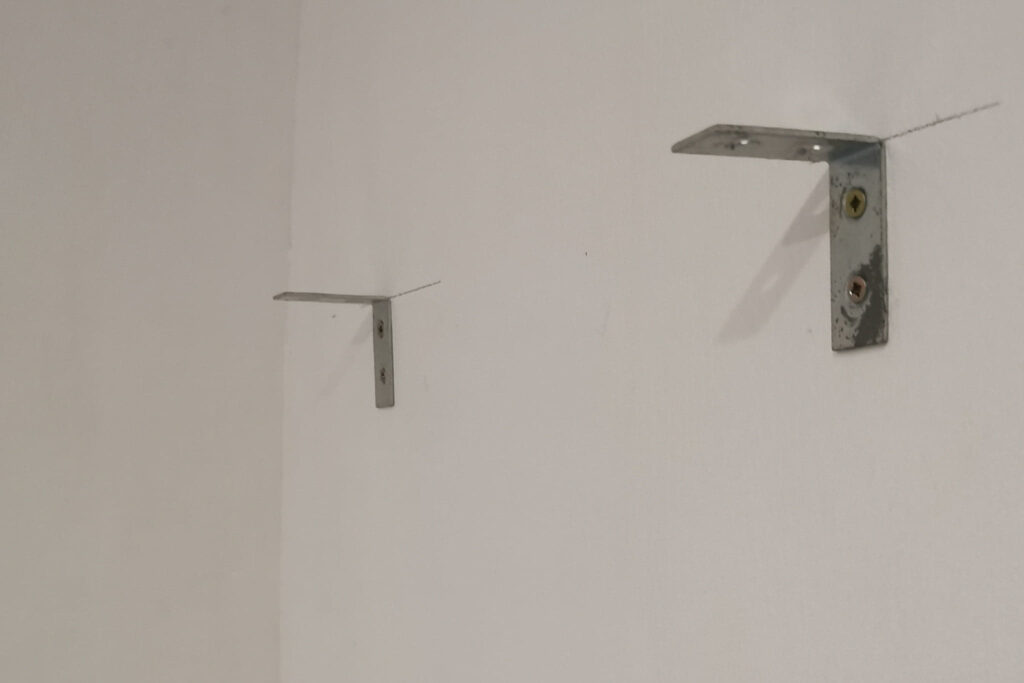
Today we just caulked the front edges of several bits of ply that will eventually be installed! We also screwed up a couple of brackets to hold a shelf… eventually!
Day 109
30th December 2020
A productive day of painting, sanding, and problem-solving.
Much like a lot of our build, we’ve gone overboard when it comes to small details – especially when it won’t even be visible. We spend a fair amount of time painting the inside of our shelves that will be hidden behind a drawer. We never cut corners, even when it would make life 100x easier.
We also got to work making a curve for our coffee table. Eventually, we will be cladding the curve using a leftover aqua panel – it sounds dodgy, but trust the process!
Finally, we crafted a small box to act as a barrier from the electrics under the sofa to make a smarter storage solution.
Week 21
A bit of a random week of trying to tie up loose ends of jobs we started weeks ago! We worked on the plumbing, did a minuscule bit of wiring, and finally (and most importantly) we constructed our storage unit – and we are obsessed!!
Day 110
31st December 2020
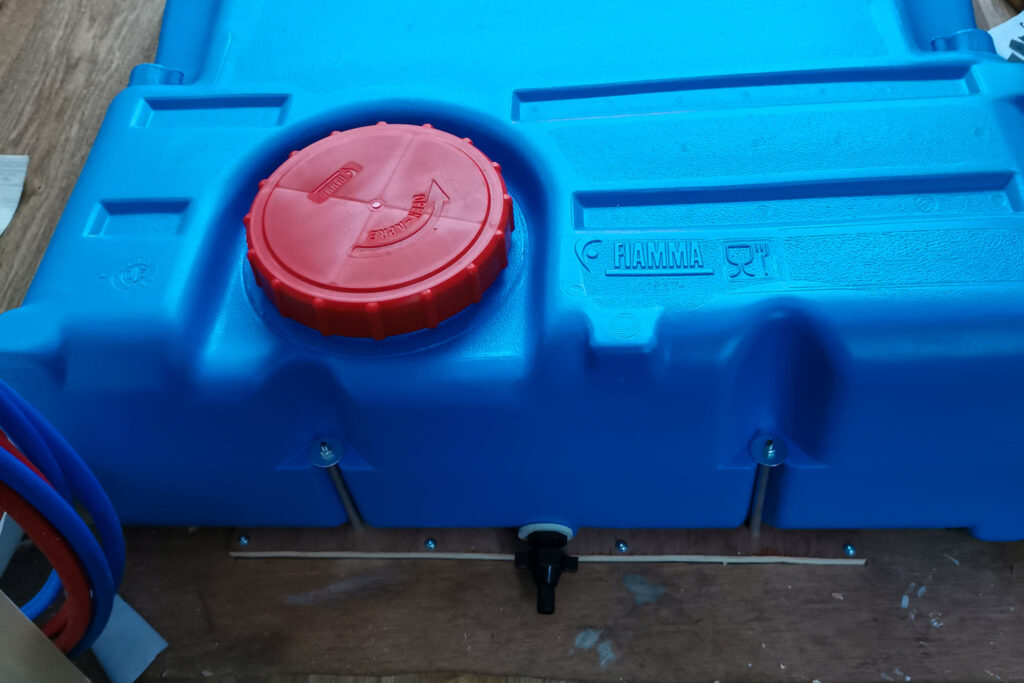
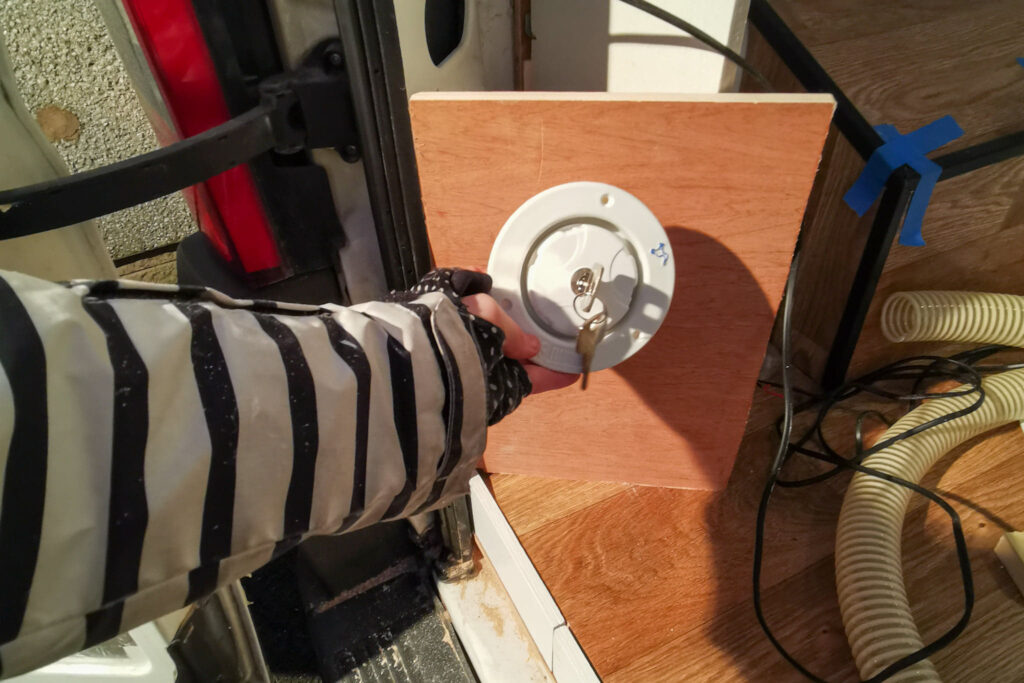
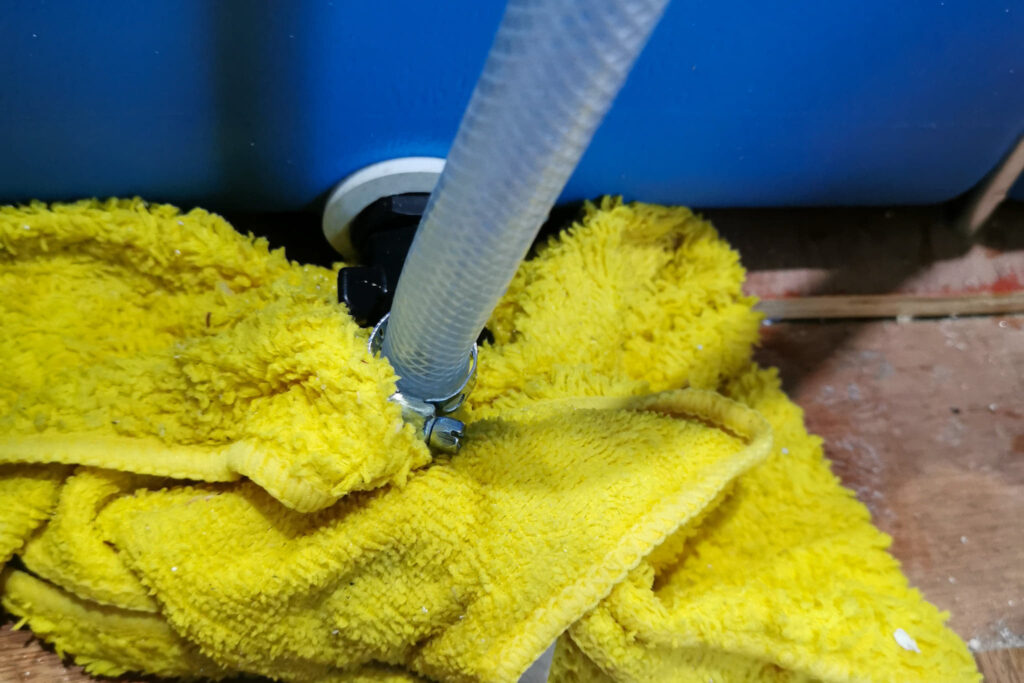
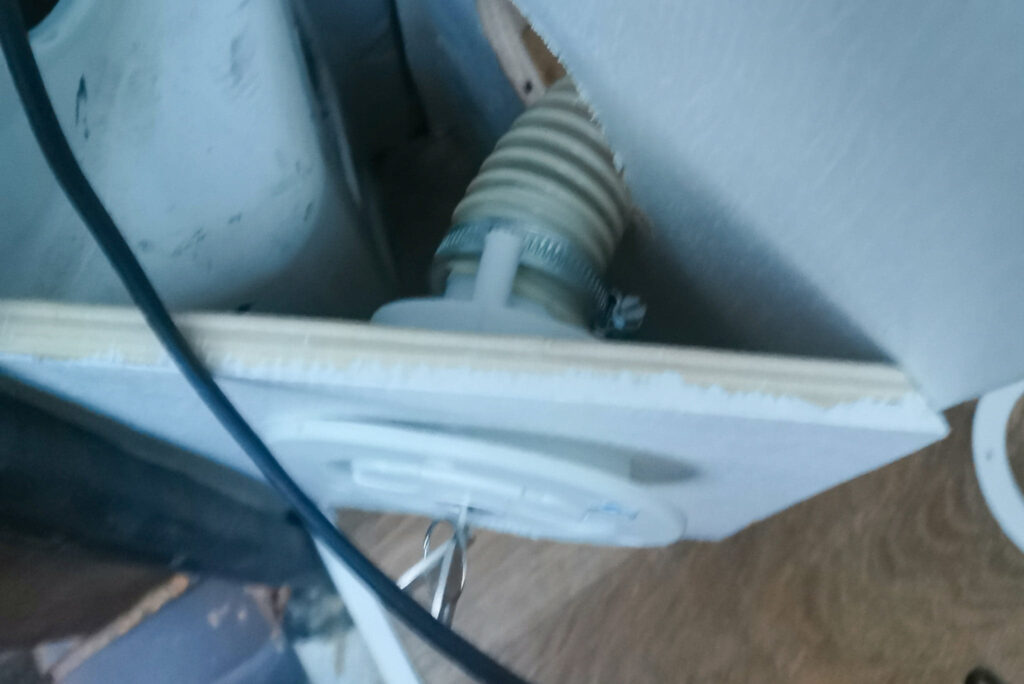
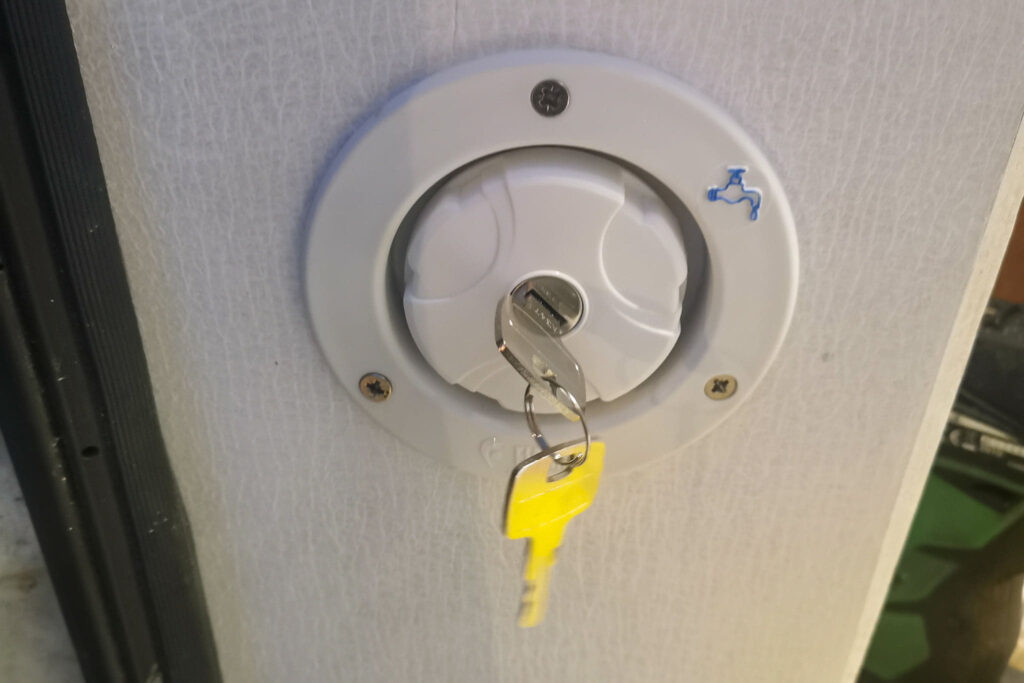
A productive end to an incredible year. We finally finished fitting the water tank locking cap to the filler hose pipe. This wasn’t without difficulty as the pipe was so rigid making it almost impossible to manipulate it in the direction we wanted. Once we forced it into position we secured it to the tank and cap with jubilee clips. To our horror, the jubilee clip securing the pipe to the tank was not strong enough and it began leaking everywhere.
One step forward, 2 steps back.
We decided to leave the tank and order up some zip ties to hopefully solve our leakage problem.
We also spent some time adding another layer of paint to a few things that are yet to be fitted into the van, including a wall, shelves, and supporting structure around our IKEA chest of drawers.
Day 111
3rd January 2021
A slightly unproductive day just doing a few odd jobs before the rain and chilly temperatures scared us away.
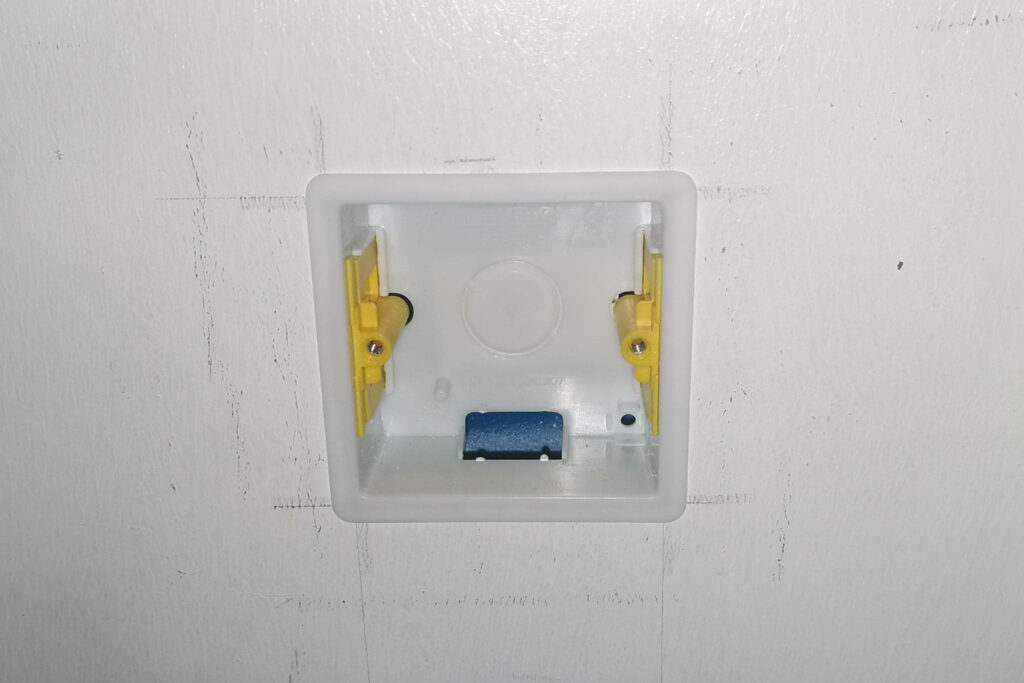
We screwed a dividing box into the area under the sofa so we could separate the storage space from the electrics. We also spent a little bit of time cutting a hole into our bulkhead separating our garage area from the living space and fitted a socket box which will eventually become the water heater switch.
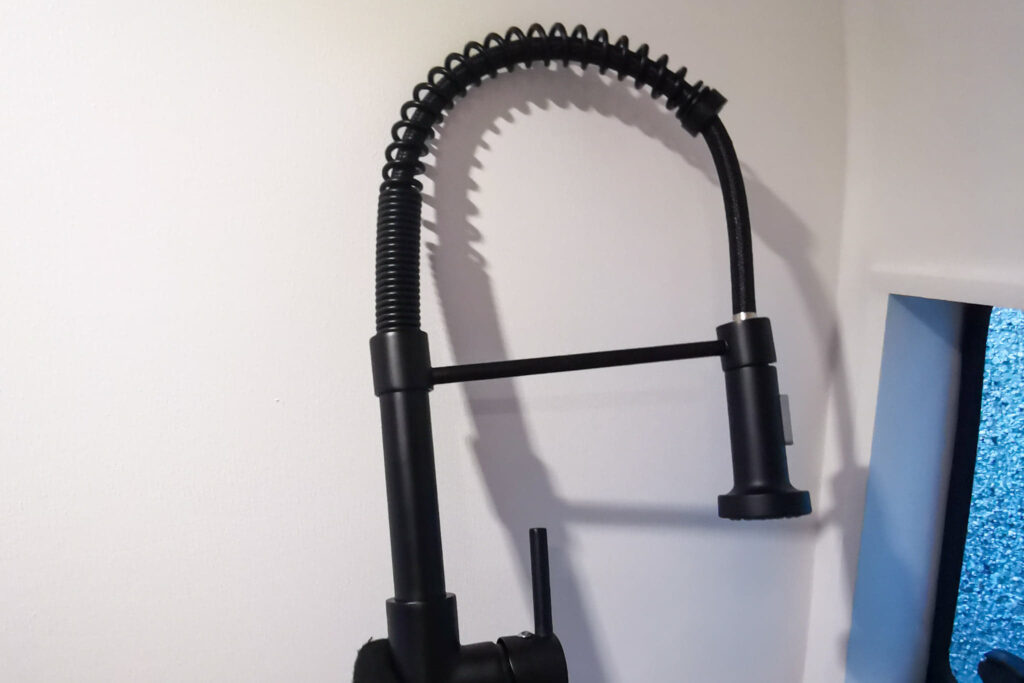
Oh, and our beautiful tap arrived in the post!
Day 112
4th January 2021
An extremely productive day!!
Firstly, we finished plumbing the shower! It wasn’t without difficulty though as there were several leaks! Turns out you need to push the push-fit connectors much harder than you may think. Thankfully, it was a nice easy fix!
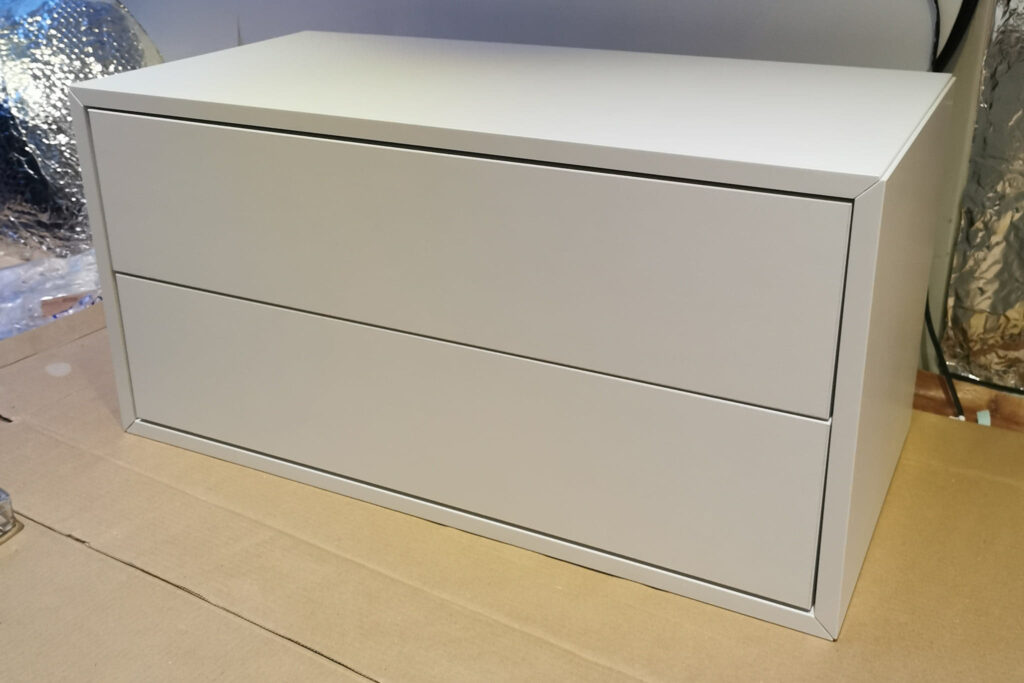
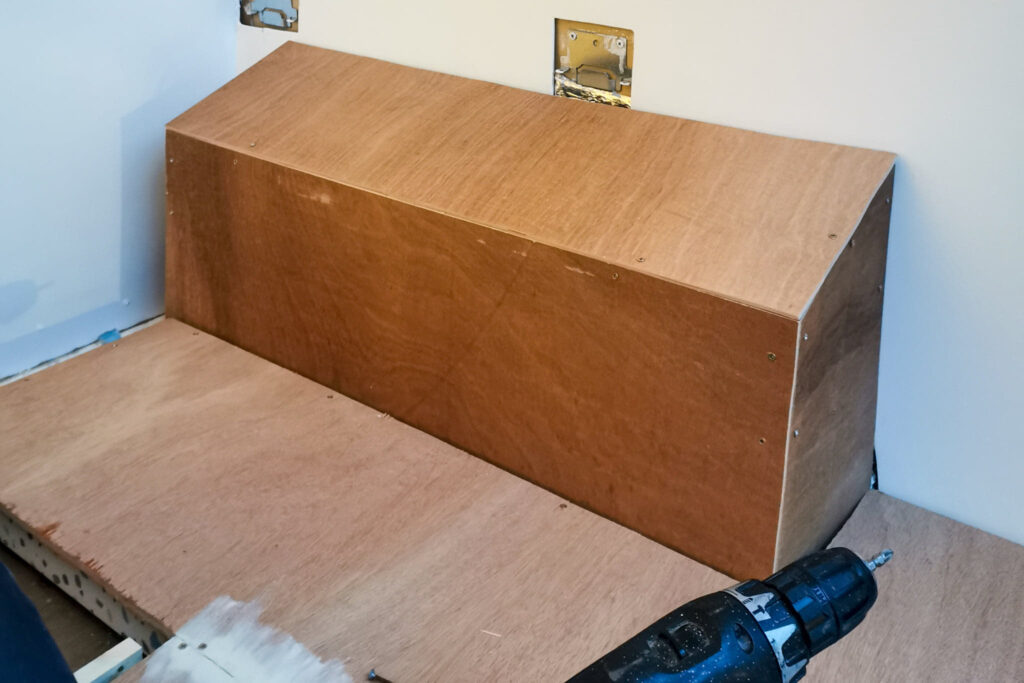
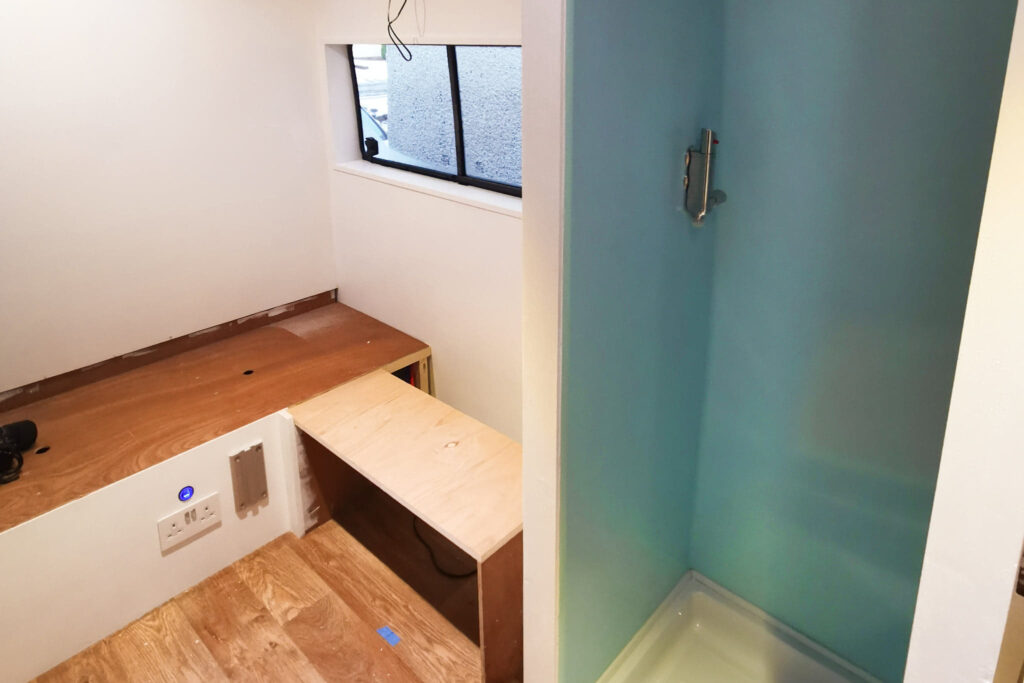
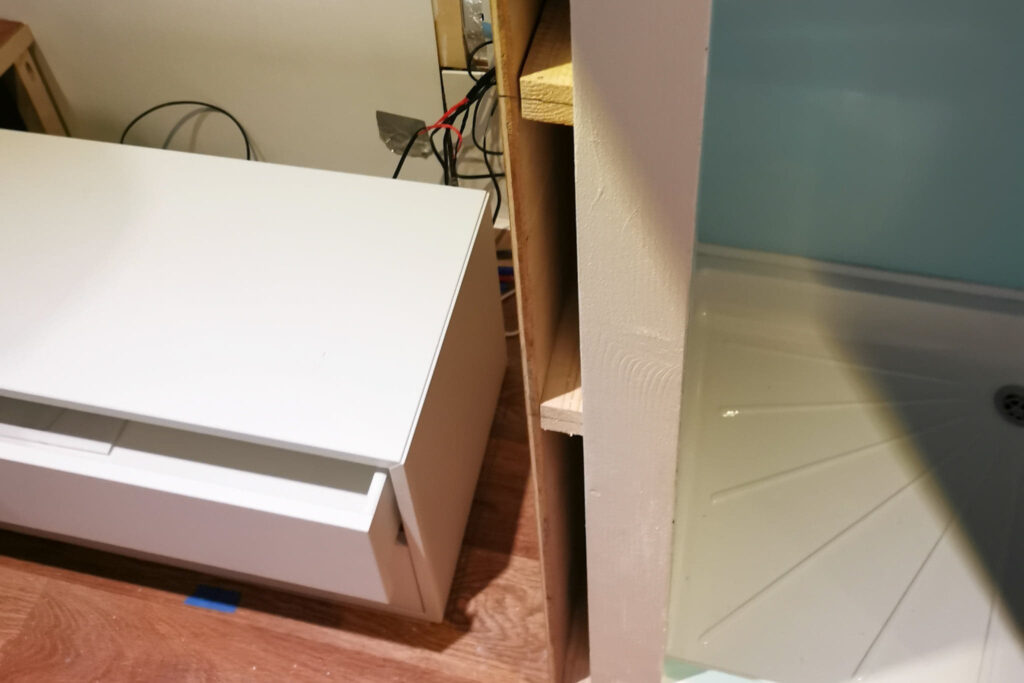
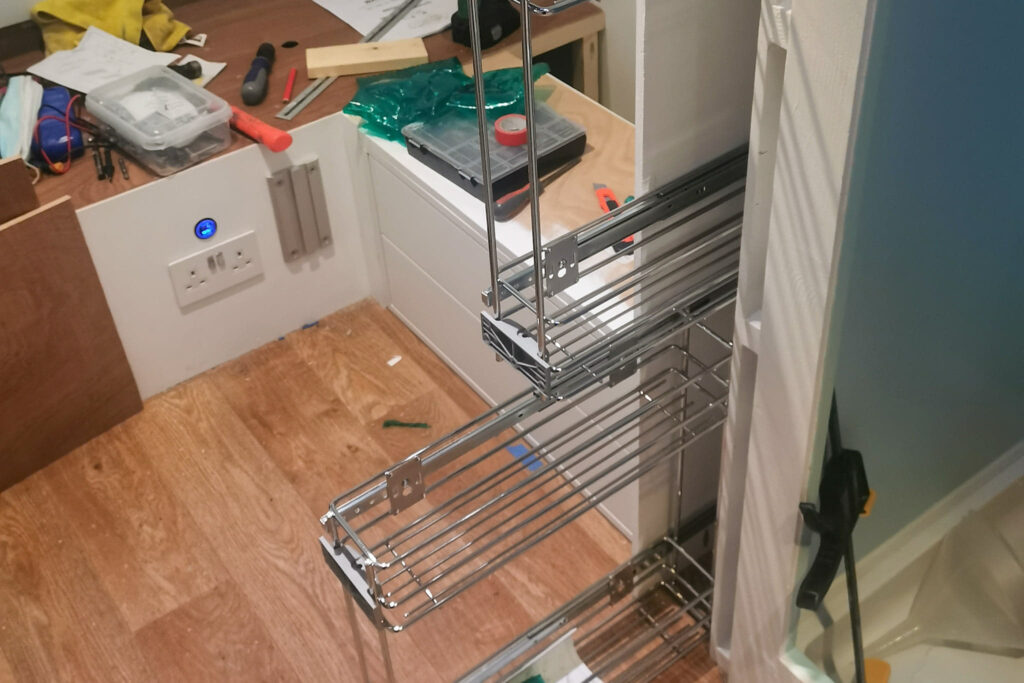
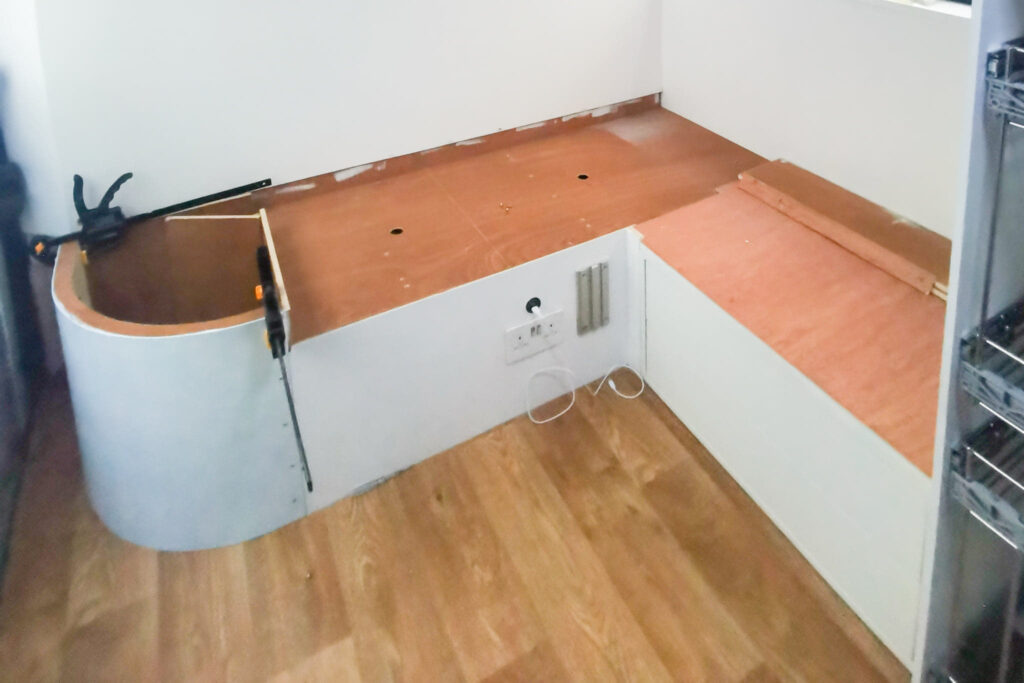
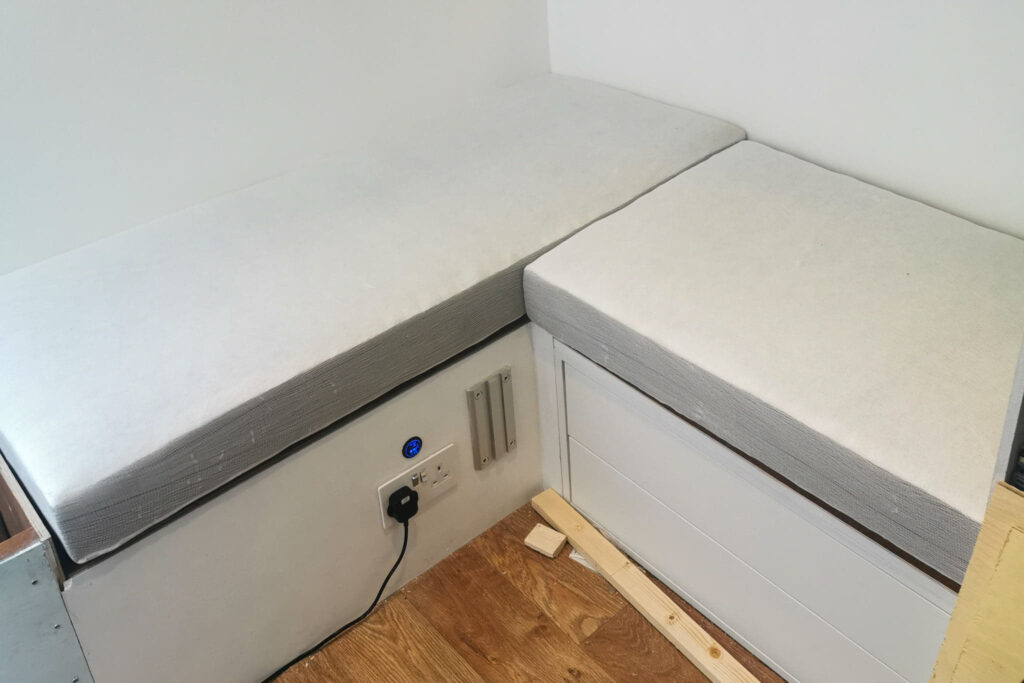
More importantly, we finally manage to fit our storage unit. There are 2 normal shelves, 3 skinny shelves, and 2 pull out cabinets (to be fully fitted soon). We can’t get over how good it looks… and how much storage it will provide us with!
Week 22
Day 112
8th January 2021
Today we installed the pull out cabinets onto their respective drawer runners. We are absolutely delighted with the results. Personally, we think it looks extremely professional – but of course, we are biased!
We also spent some time securing the Ikea drawers in position and fixing a frame around them in order to take the weight of anyone who sits on the sofa above them! Finally, we mounted a plank of wood on the wall behind the drawers in order for a sheet of 5mm ply to rest on.
A short but reasonably productive day at the van.
Day 112
9th January 2021
Today we felt like extremely proud van parents. It’s crazy how a few bits of wood can really spruce up a van.
Firstly, we created a lid for our small storage area down the back of our drawers… all we need to do now is upholster the sofa and that area is complete!!
We then cut out some drawer fronts. We were pretty apprehensive to do this as we anticipated that they would be extremely skewed. Particularly because trying to get things to be vertical (or even just aligned) is a nightmare in a van! Never-the-less it was surprisingly easy. We had absolutely nailed the construction (no literally) of our storage unit… Everything was so precise that cutting the drawer fronts was a breeze… AMEN!
Finally, we even attached our filler hose pipe to our water tank using a combination of jubilee clips, cable ties, and silicon sealant! Fingers crossed it is leak-proof when we try it out tomorrow.
Day 112
10th January 2021
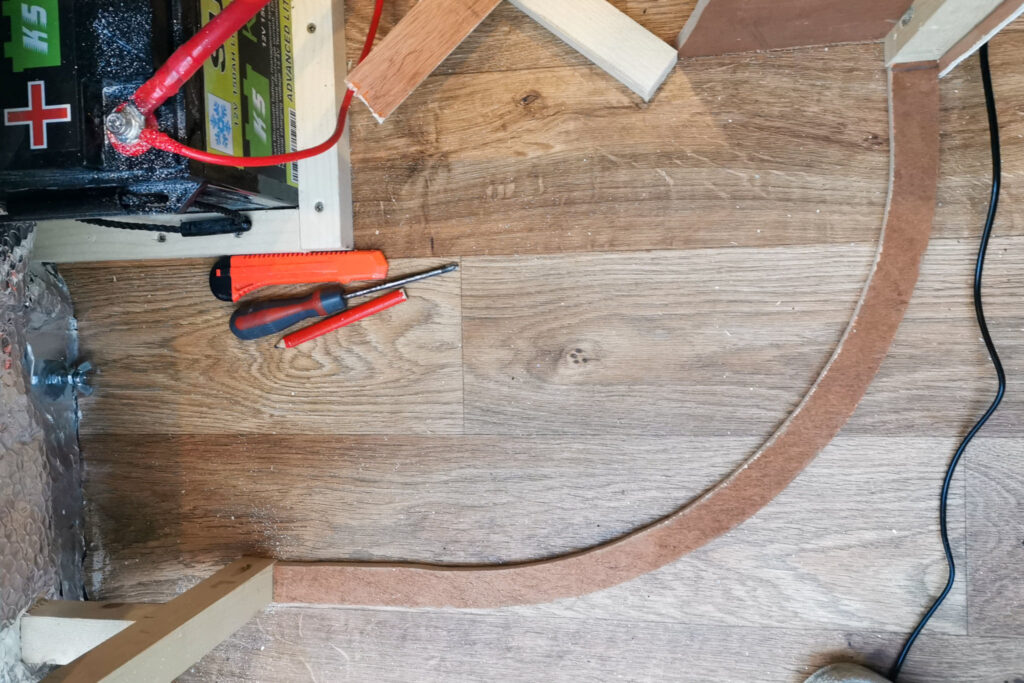
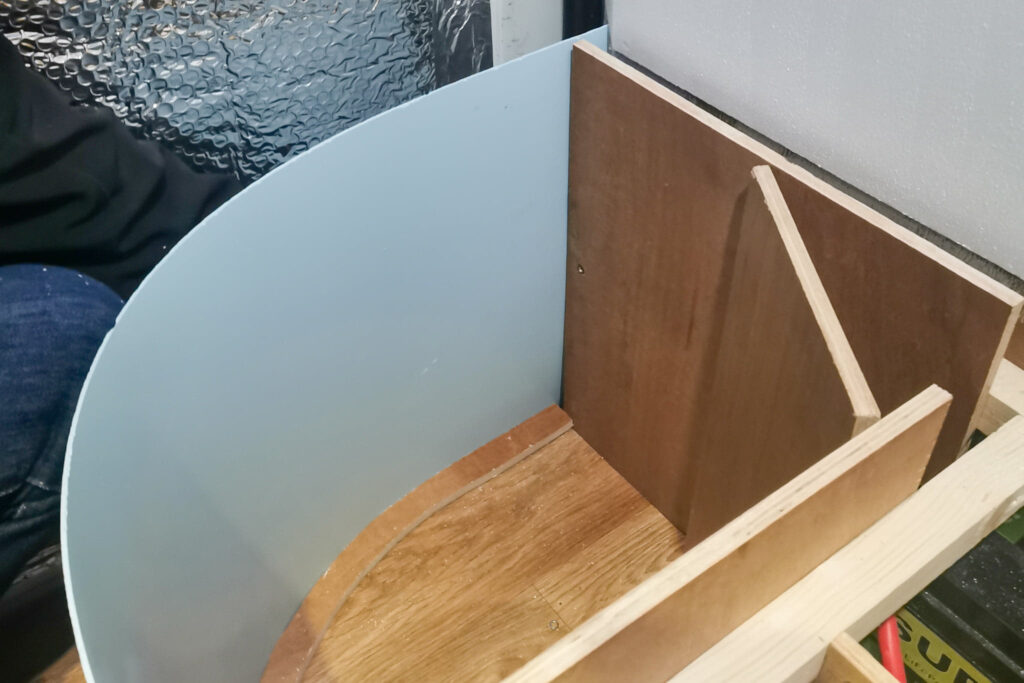
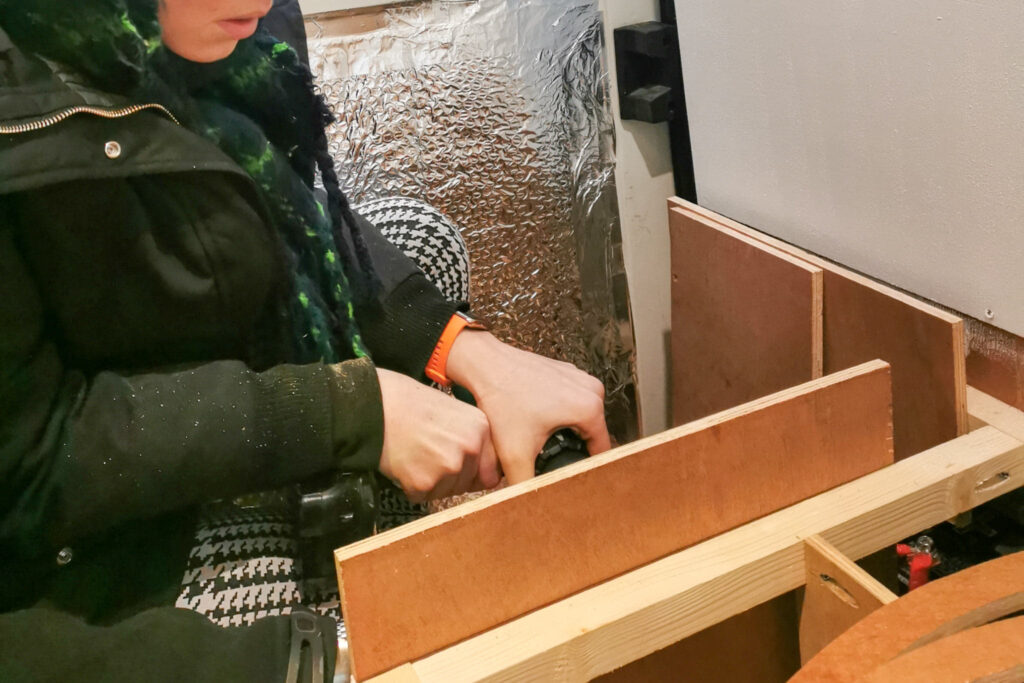
Today will keep up the momentum generated yesterday. We continued creating our curved coffee table. We had previously decided on the radius of the arc and we excited to see it turn into a reality.
We started by boxing in the area (which will eventually be storage) and secured it in place. We then placed our curved piece on the floor and screwed it in.
It is now all prepped for eventually wrapping the aqua panel around!
Finally, we also caulked the drawer fronts we cut yesterday!
Another good day!
Day 113
12th January 2021
Just a quick visit to the van today as we couldn’t bare the freezing cold.
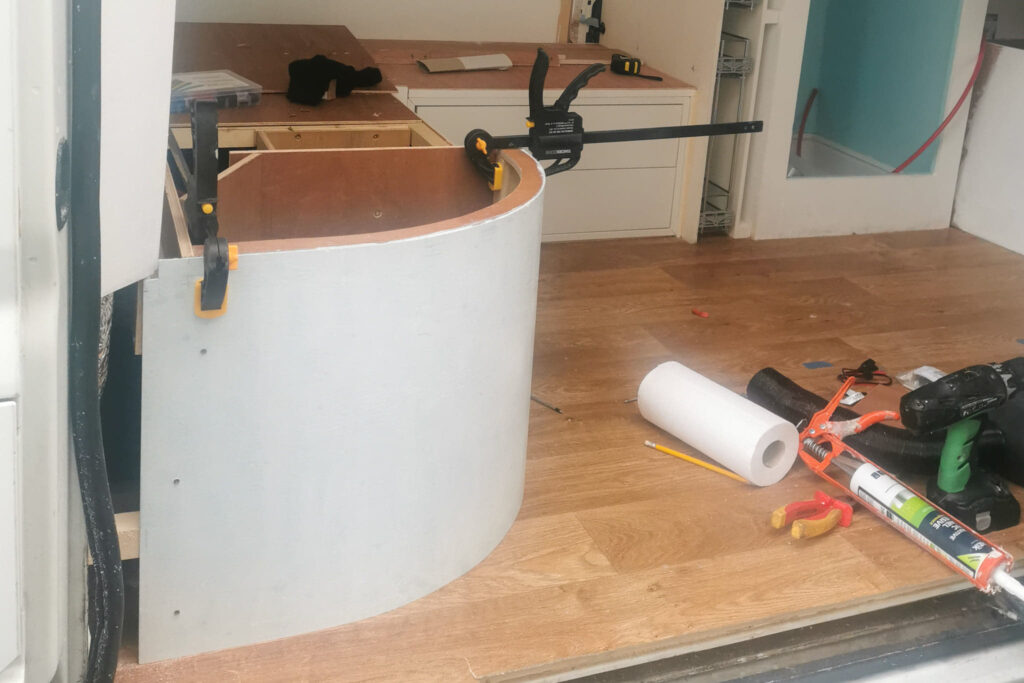
We attached the aqua panel to the curve we secured in place yesterday. We then inserted another curved piece and batten to help the aqua panel hold its shape – although I don’t think it will need it as it is super rigid!
Day 114
13th January 2021
Today we started to build our overhead cabinetry. We will eventually have 4 cabinets. (2 above the sofa, and 2 above the kitchen)
We had a basic idea of how we would create them. However, when put into practice it was a nightmare. The wood was splitting and it lacked the structural integrity we had hoped for.
We eventually gave up on that idea and spent the evening researching how we would construct them!
Day 115
14th January 2021
After yesterday’s disaster, we are pleased to report that we were a LOT more successful today.
We didn’t necessarily follow anyone else’s method, we just focused on creating strong bonds between the wood and putting pocket hole screws in the correct way.
This helped us tremendously and before long we had a beautiful front of the cabinet. It is so strong and so rigid.
Now it just needs a couple of licks of paint and the bottom attached and installed.
2 down, 2 to go!
Day 113
15th January 2021
Today was plane sailing.
We just created the other cabinet front. It is as strong as an ox! We cant wait to see what it will look like when it’s installed!
We also cut a few bits of wood to size for when we finally decide the depth of the cabinets and fit them!
Day 114
16th January 2021
Another day spent trying to figure out the overhead cabinets.
Unfortunately, we are perfectionist so things end up taking much longer than they should for a minimal improvement
We cut some 12mm plywood to size to make the cabinet fronts. To our surprise, it went very smoothly. We just can’t wait to be finished with the cabinets so we can move on to more exciting things… like the kitchen!
Day 115
17th January 2021
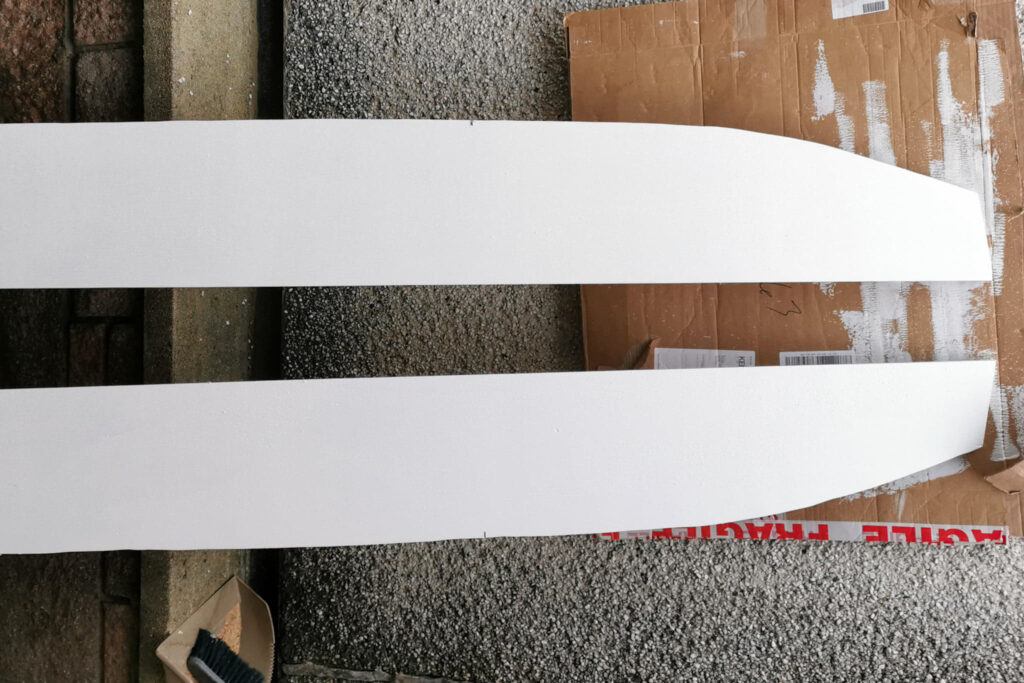
The foam for our sofa arrived and we are OBSESSED!
It is so comfy and soft and in desperate need of upholstering!
Once we were finished admiring our foam we got to work trial fitting cabinet fronts for the pull-out unit we created earlier this month. It was extremely frustrating as we are unwilling to settle for anything less than perfection.
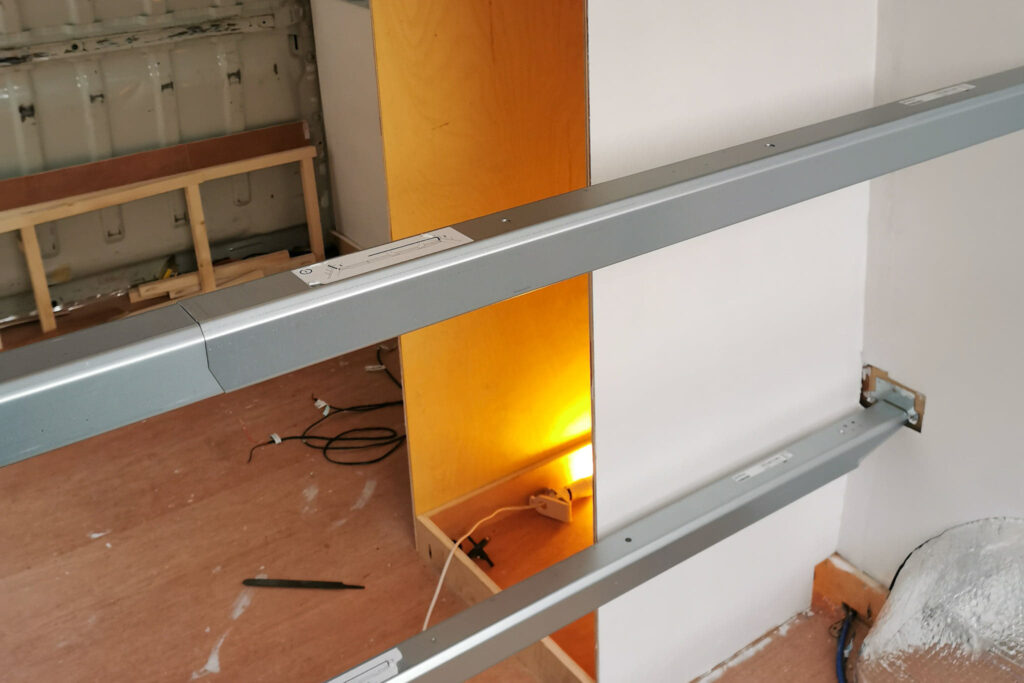
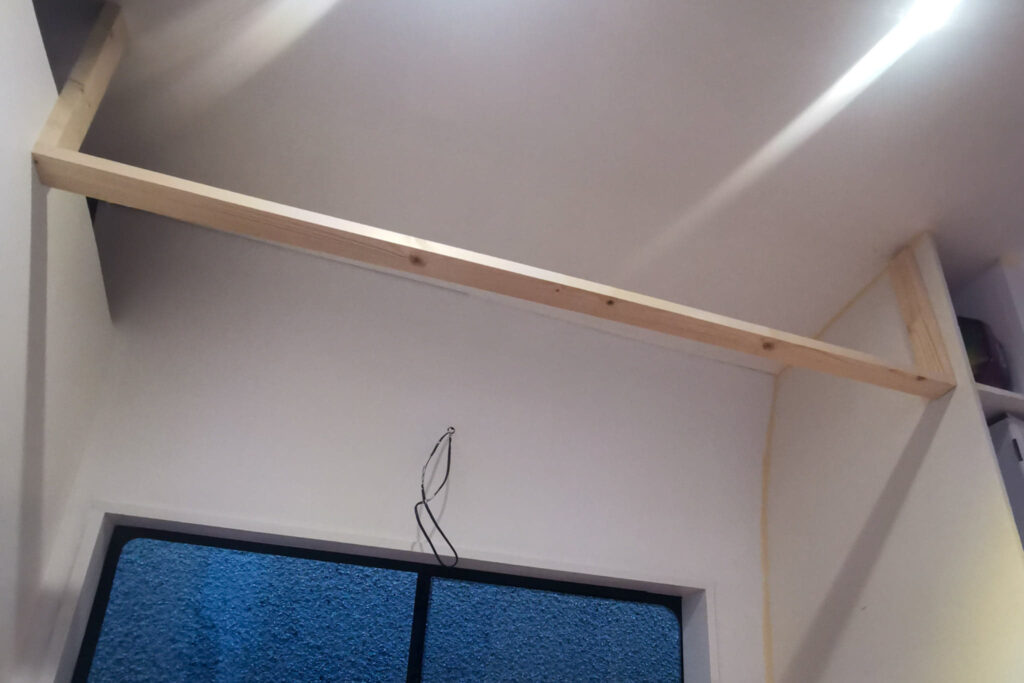
Finally, we continued on with the overhead cabinets. After a lot of thinking and brainstorming, we decided how we would mount them. We took the first step by screwing a batten to the roof.
Day 115
17th January 2021
The foam for our sofa arrived and we are OBSESSED!
It is so comfy and soft and in desperate need of upholstering!
Once we were finished admiring our foam we got to work trial fitting cabinet fronts for the pull-out unit we created earlier this month. It was extremely frustrating as we are unwilling to settle for anything less than perfection.
Finally, we continued on with the overhead cabinets. After a lot of thinking and brainstorming, we decided how we would mount them. We took the first step by screwing a batten to the roof.