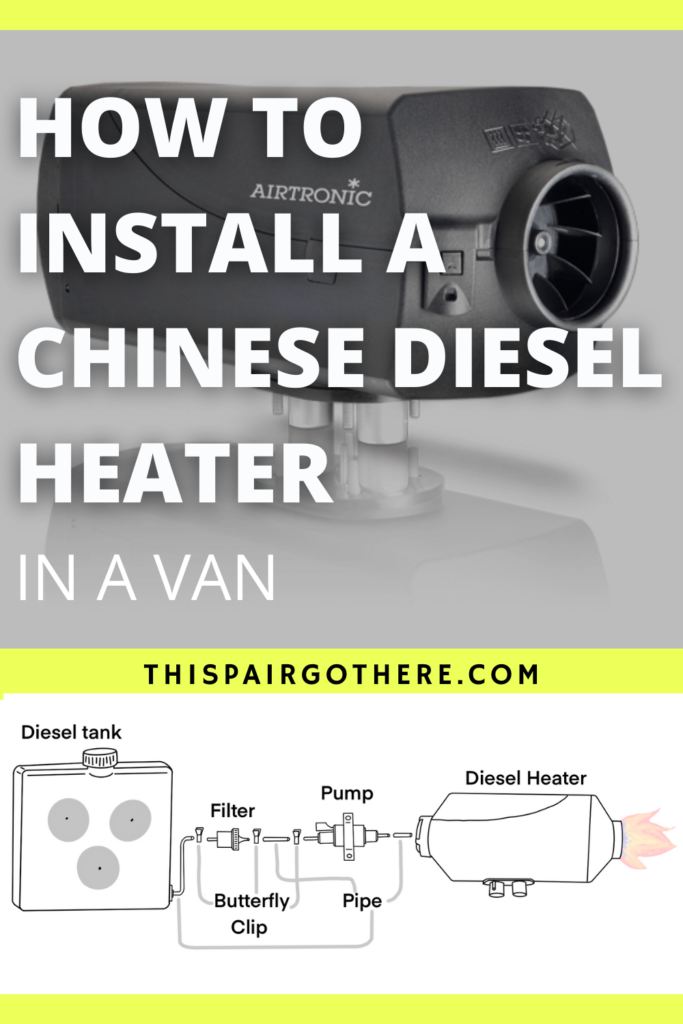
What Chinese Diesel Heater is right for your van?
With so many Chinese diesel heaters to choose from, it can be overwhelming to decide which one will be the most suitable for your van. There a couple of things to consider prior to purchasing.
- Available space (inside and underneath the van!).
- Location of the heater
- Size of your van
- Budget
The available space and location of your van may dictate what size and style of heater you will buy. The size of your van will affect what power output you will require in order to heat your van appropriately. And finally, budget. Chinese diesel heaters are extremely reasonably priced, however, if you opt for the 5KW one, it will be slightly more expensive. If you have an unlimited budget you may wish to look into investing in a branded aternative.
2KW or 5KW?
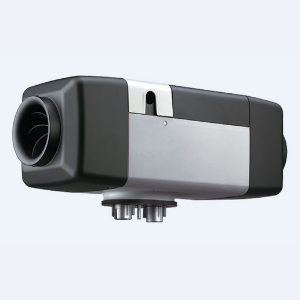
The 2KW heater is a fair bit smaller than its 5KW equivalent, We recommend this heater if you have limited space.
The 5KW heater is more powerful and will heat up your van a little bit quicker. We would recommend this heater if you have an XLWB van or bus.
We firmly believe that the 2KW heater is the better option as it is smaller, cheaper, and still performs the task exceptionally well.
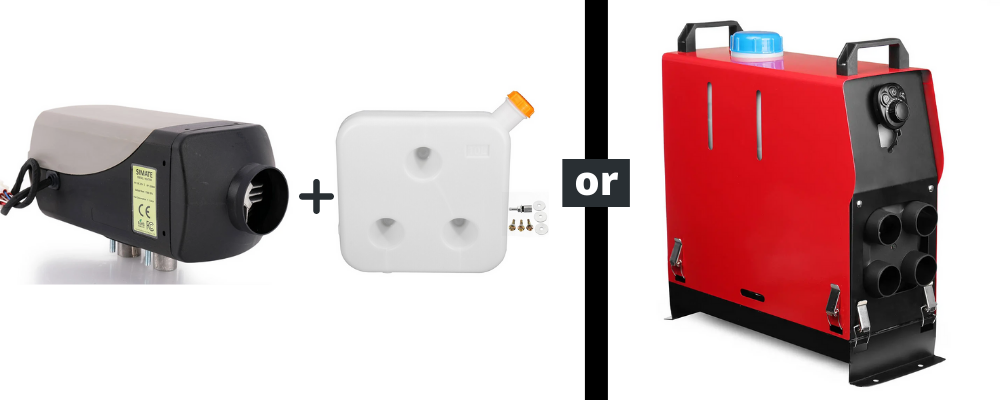
All-in-one unit or remote fuel tank?
An all-in-one unit is bulkier and requires more space. However, it does have the benefit of everything being in one place. If you opt for an all-in-one unit it is important to place it somewhere that is easily accessible so you can refuel it when necessary.
If you opt for a heater with a remote tank, it means you can position your heater in a smaller space, and place your fuel tank somewhere more convenient to fill up. However, it does require a little bit more effort to install.
Chinese Diesel Heater Alternatives
If you are wanting a diesel heater but not necessarily a Chinese one, there are several reputable brands providing high-quality diesel heaters, these include Webasto and Eberspacher.
If you choose to go down this route we recommend looking into the heaters listed below.
Step 1 – Choose the Location of your Diesel Heater.
Like all things involved in converting a van, picking a location for a diesel heater is not as simple as it may sound. There are several things you need to consider… and many things that could throw a spanner in the works. These include:
- Where the exhaust will go through the floor of the van. This WILL dictate where the heater will be located. There are structural cross beams, fuel tanks, and many other things under the van that must be avoided.
- Airflow. The heater requires airflow and therefore needs to be located in an area that is not too cramped.
- Where you want the heat to be directed. This isn’t the most important issue as there will be some leeway on where the air can be directed as you will be provided with a flexible hose. However, it is still worth considering.
Step 2 – Drill through the Floor.
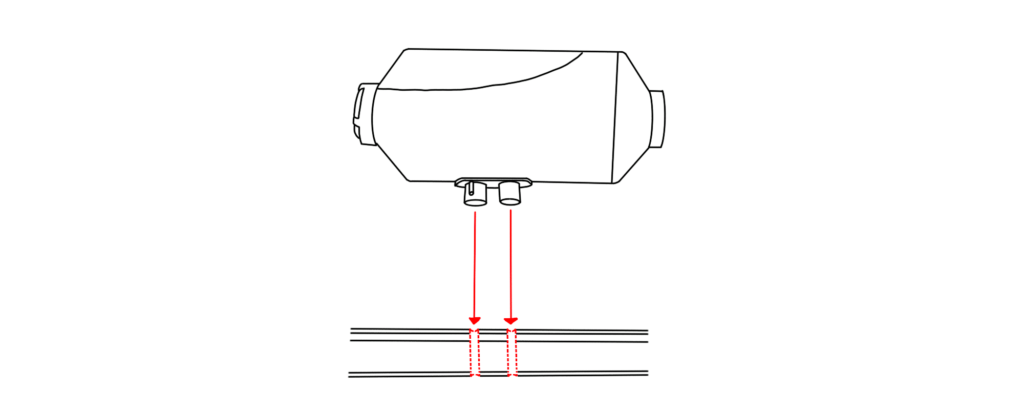
In order to make sure the location you have selected for your heater is suitable, you must drill through the floor where the center of the exhaust goes. This will determine if the heater will be able to fit as you will be able to identify if you are hitting any crossbeams etc. This is essentially an early trial fit scenario.
We drilled 2 pilot holes in order for both the air intake pipe and exhaust to eventually fit through.
These pilot holes should go through the internal flooring and insulation, AND the exterior skin of the van as seen the diagram below.
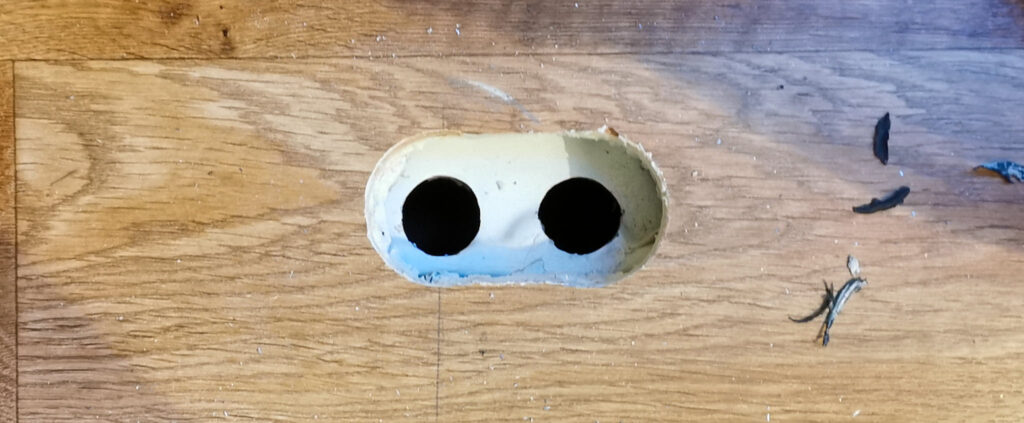
Step 3 – Expand the Holes.
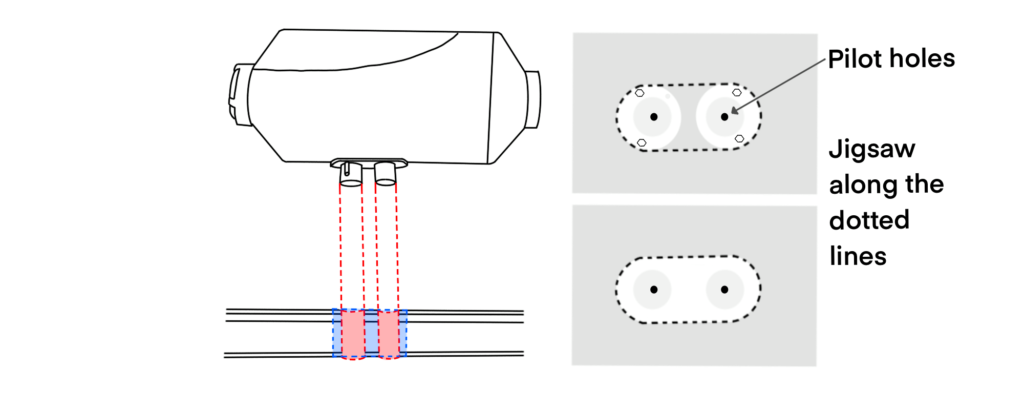
Expand the pilot holes to a suitable size to fit the heater into. Use a saw drill to achieve this.
Next, use a jigsaw to connect the 2 holes to create an oval-shaped hole.
When cutting the hole you must make sure that it is large enough for not only the pipes to fit in but also the bolts that attach the metal plate to the heater.
As an extra precaution you may wish to slightly undercut the insulation under your floor where you have just drilled.
Note: do not cut through the metal floor of the van.
Step 4 – Cut through the Van Floor.
Measure the diameter of the exhaust and air intake and cut a similar-sized hole in the floor. Make sure the hole in the floor is slightly bigger so it doesn’t heat up with the exhaust pipe. Use the pilot holes from step 2 as a guide to where to drill the holes.
Cut a small hole for the fuel tank pipe to fit through. It may even fit in the hole you have drilled (for the air intake).
Sand down all of the rough edges.
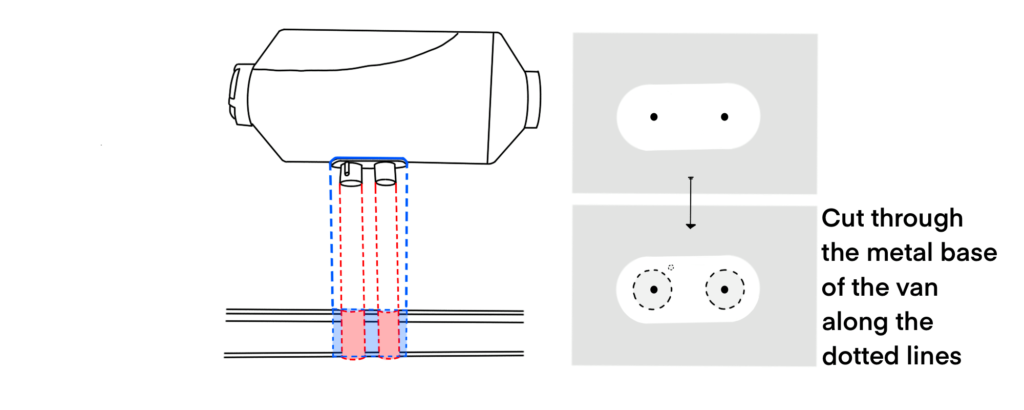
Note: If you have sheet vinyl flooring, cut out the section that will be under the metal plate of the diesel heater. This is just a precaution so it doesn’t melt as the heater can get hot when operating.
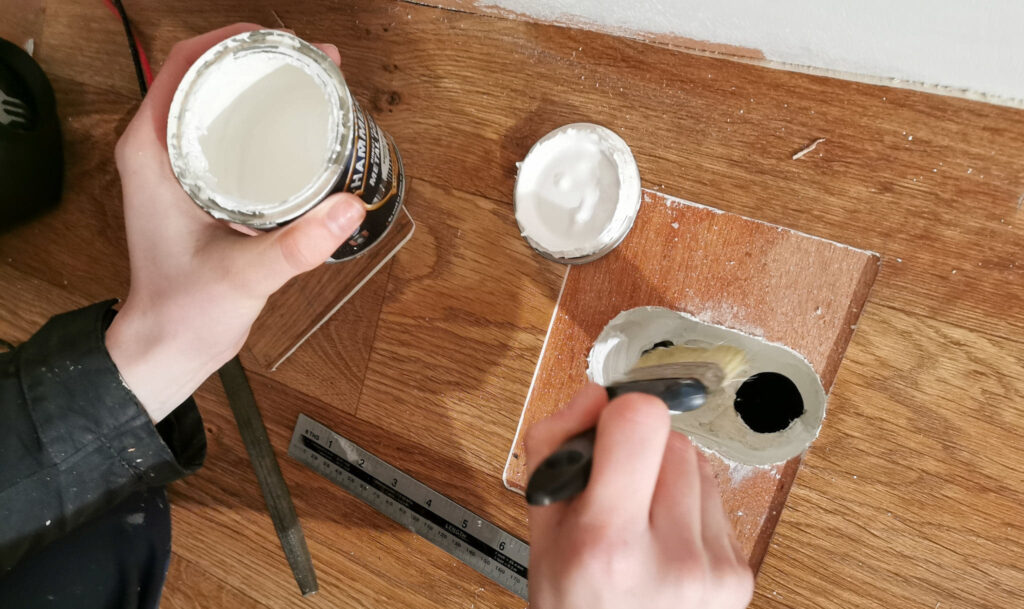
Step 5 – Treat the Area you have just Cut.
Firstly, apply Hammerite to the rough edge of the hole that you have just cut through the base of your van.
Next, on the inside of the hole, apply a generous coating of fireproof sealant. This step is just an extra precaution that we took and sn’t really necessary.
Leave over night for drying.
Step 6 – Drill a Hole for the Fuel Tube.
You need to drill a hole for the fuel tube to fit through so it can be connected to the Chinese diesel heater from the underside of the van. This hole must be positioned beside the heater, NOT UNDER IT.
Drill a 10mm hole through the floor and sand any rough edges. Make sure there is nothing under the van that could be an obstruction for the tube.
Once the hole is drilled, pass the tube through it to make sure it fits.
Step 7 – Prepare the Chinese Diesel Heater for Installation in your Van.
Before the heater can be fully installed, there are several things that need to be done.
- Put the rubber mounting plate onto the bottom of the heater.
- Put the metal mounting plate onto the bottom of the heater (after the rubber plate).
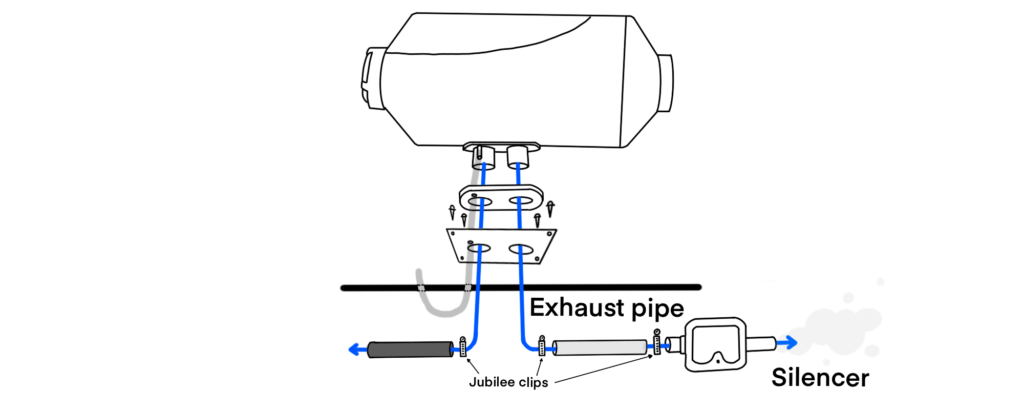
- Attach the air intake pipe to the pipe on the underside of the heater (the pipe positioned at the back of the heater) and secure it with a jubilee clip.
- Connect the exhaust pipe and secure it with a jubilee clip (the pipe at the front of the heater).
- Attach the fuel tube and secure it with the butterfly clip provided.
Once all pipes/tubes are attached, feed them through the floor of the van.
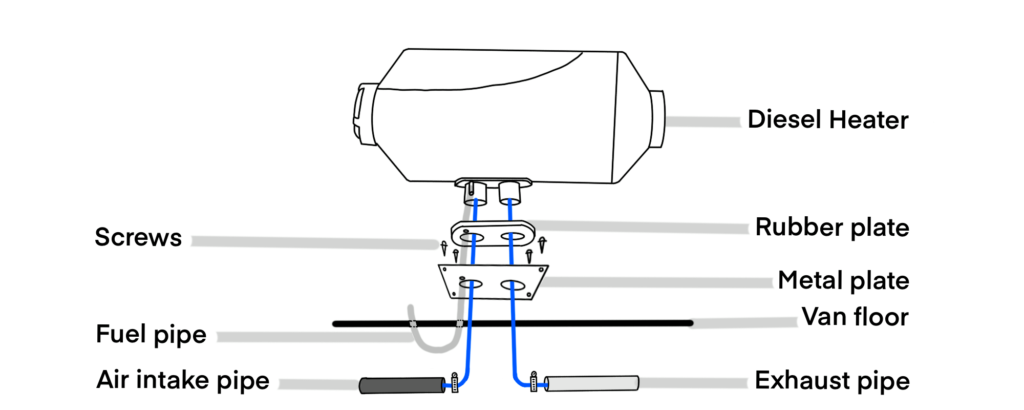
Step 8 – Secure the heater in Position.
Once the Chinese diesel heater is in position with all the relevant pipes/tubes escorted through the floor of the van, you can tightly secure the heater to the floor.
Simply drill the screws through the designated points on the metal plate.
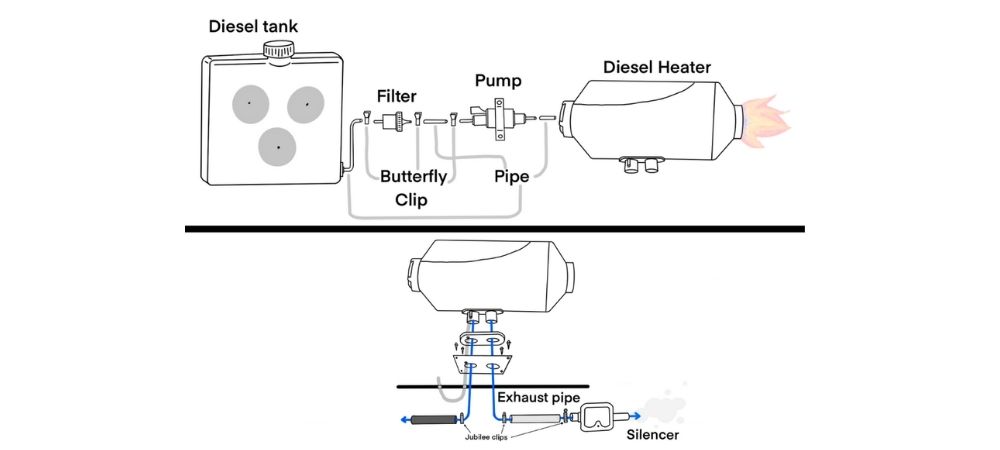
Step 9 – Attach the Silencer and Air Filter.
Simply attach the silencer and air filter as shown in the diagram below. Make sure to keep them a safe distance away from other things under your van (e.g. water tanks, and wheels).
Step 10 – Secure the Pipes Under the Van
Secure the pipes tightly to the body of the van. This will stop them from getting damaged and rattling.
Step 11 – Connect the Filter and Diesel Tank.
Attach the small tube to the fuel tank using the fixings provided.
Next, cut the tube to a reasonable length and connect the filter.
Simply slide the fuel tube onto the bulkier end of the filter and secure it in place with the clip provided, as shown in the diagram below.
Note: Consider if you will be maneuvering the fuel tank when filling it up as you may want to allow some slack in the tube in order to account for this.
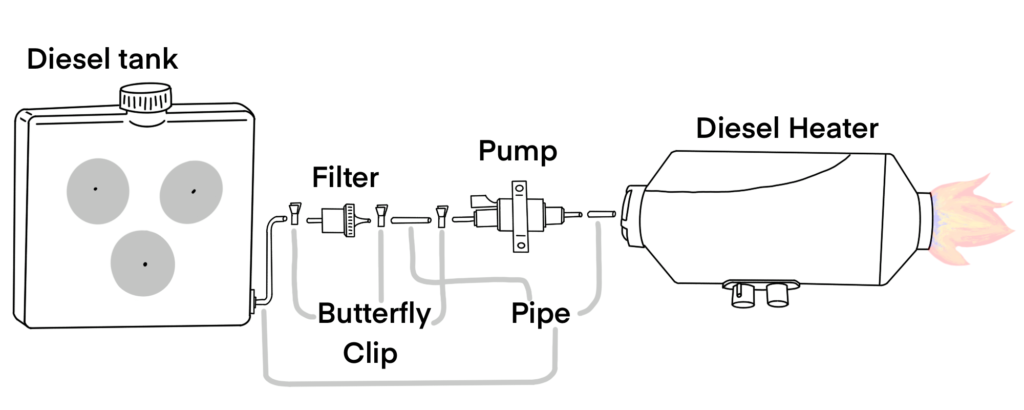
Step 12 – Attach the Filter to the Pump.
The pump is supplied fitted into a sleeve with pre-drilled holes, making it easy to fit onto a wall.
The connection end should be mounted pointing up at 45º. This is the end where the electrical connection is, it is also the outlet to the pump as seen in the diagram in Step 11
Attach a small piece of tube to the filter and connect it to the inlet of the pump. This can be secured in position using the clip that is provided with the diesel heater.
Step 13 – Connect the Pump to the Heater.
Simply attach another length of the tube to the output of the pump and secure it with a clip. This pipe should be longer as it will be passed through the hole in the floor of the van (created in step 6) and connected to the underside of the Chinese diesel heater using a butterfly clip.
Please reference the diagram in step 11.
Step 14 – Connect the Electrics.
There are several electrical connectors on your diesel heater; one is on the monitor, one is from the pump, and one is on the heater. These are reasonably self-explanatory as they are different shapes and fit together with ease.
Next, connect the diesel heater to your 12V supply.
Note: the diesel heater has a fuse, however, we chose to also run the wire through our fusebox.
For reference, we used 2 core 1.5mm cable.
Step 15 – Fill the Fuel Tank.
Exactly as it says – fill up the tank. This will allow you to see if all the hard work you’ve put in to get to this stage has been worth it and the heater works.
Step 16 – Trial Run.
Press the buttons at the bottom left and right hand corners of the control panel simultaneously – it will say H off on the screen. Next, press the up arrow at the top right corner and the screen will say H on.
This will start the pump and the diesel will slowly make its way from the fuel tank to the heater. This may take upwards of 15 minutes depending on how far the fuel tank is from the heater.

Control Panel Tips
If you want to control the temperature on the screen, press the two buttons at the top of the screen on either side to change the monitor to see what temperature it is currently set at. From there you can and easily increase or decrease using the up and down arrows.
To scroll through the panel’s functions press the “ok” button. This will allow you to check:
- Air Temperature (Currently).
- What the temperature is set to.
- Voltage.
- Fault Codes.
- Duration the heater has been on (time).
Conclusion
If you are planning to spend any time in your van in weather under 10℃ then you will not want to be without a Chinese Diesel Heater. It is cheap, compact, and performs extremely well.
We opted for a 2KW diesel heater and it heats our entire van very quickly, we have absolutely no regrets not purchasing a 5KW one.
Feel free to ask us questions regarding a Chinese diesel heater, whether it is about materials, price, time, or whatever else. You can always find us in the comments.