Why Insulate a Van?
Insulating a van is essential for numerous reasons.
Temperature Control
In the summer, insulation can help prevent excessive amounts of heat from building up in your van. In the winter, less heat will escape from a properly insulated van. No matter the weather, insulation can keep you more comfortable and reduce heating and air conditioning costs.
Minimises Condensation
Condensation builds up when warm moist air inside your van touches the cold body of the van (metal panels or windows). In such a small space, condensation can build quickly – whether it’s from cooking, showering, or even just breathing! Unfortunately, if condensation comes into contact with certain types of insulation it can create mould… and even worse, rust! Properly insulating your van and vapour sealing it with a vapour barrier and foil tape will minimise the risk of this.
Sound Barrier
Living in a van can be noisy, especially if you are parked up next to a busy road. Insulation will dampen the noises from the outside getting in… and inside getting out! For more information regarding soundproofing and deading check out the post below.
Rigid Board Insulation
Rigid board insulation is the most effective material to use when insulating your van.
The boards with a radiant heat barrier facing foil will significantly improve the insulating properties by reflecting infrared solar energy before penetrating the wall or ceiling.
Pro’s
- Installation requires no special equipment or extraordinary protection for workers
- very high R number compared to loose fill insulation
- excellent thermal properties
- lightweight
- resistant to water vapour
Con’s
- Joints between sheets and boards must be taped to prevent air flow and to create a vapour seal.
- Can be tricky to cut to the exact shape of your van
We used:
Recticel Instafit Polyurethane Insulation board (L)2.4m (W)1.2m (T)25mm from B&Q
Where to use Rigid Board Insulation
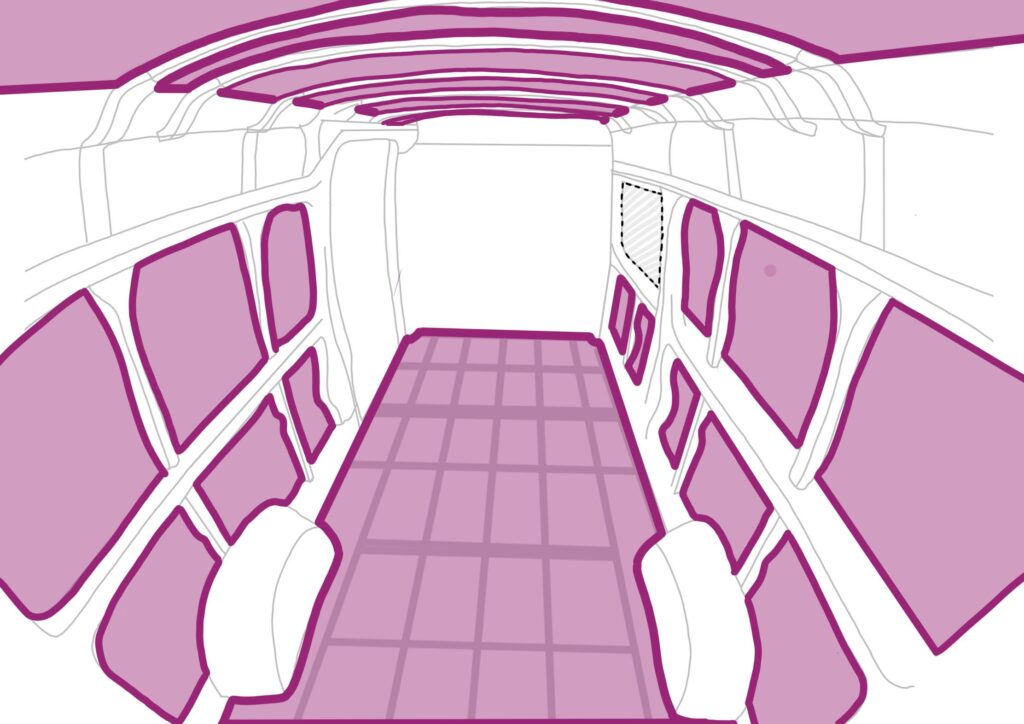
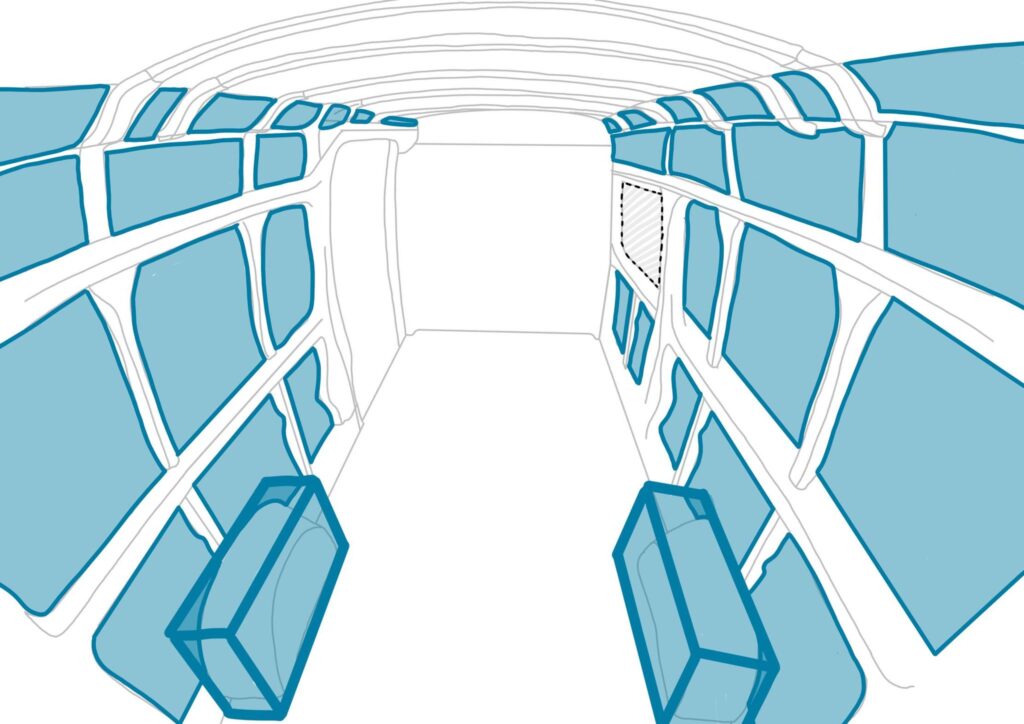
We used this type of Insulation for our floor, ceiling, and walls as seen in the diagram below.
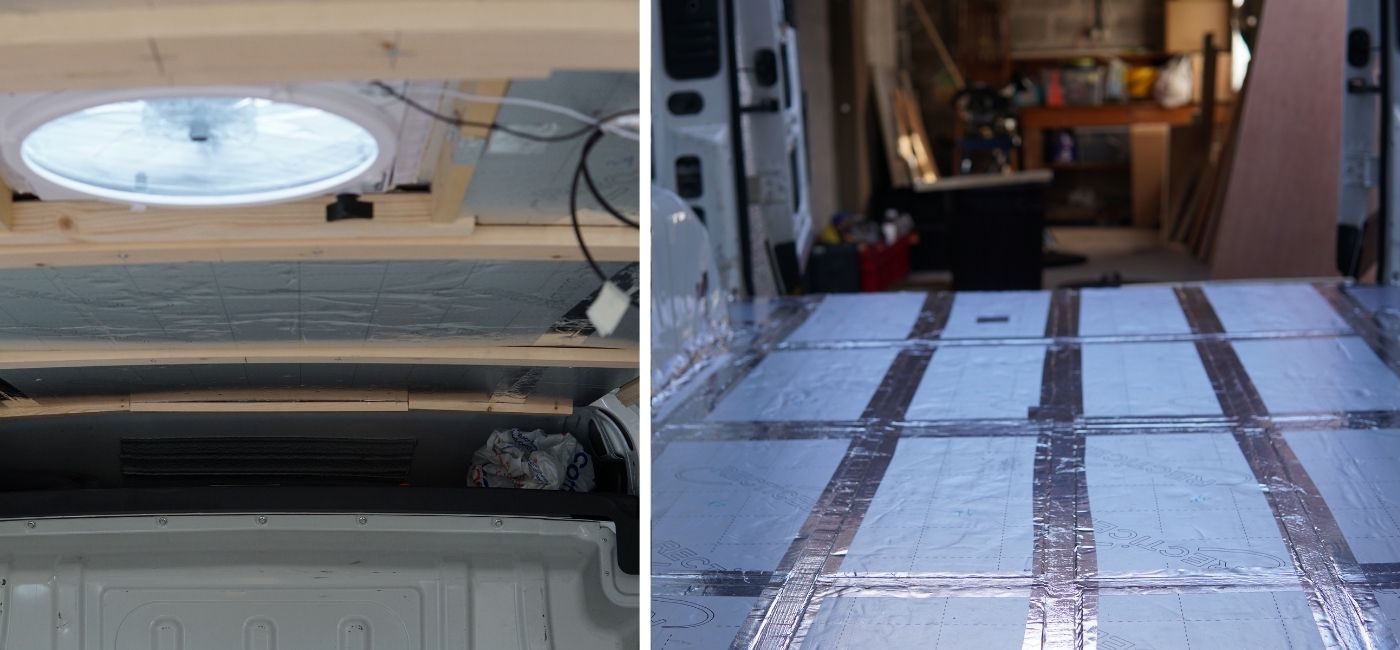
Floor: Cut the insulation up to fit within the framing on the floor. Each piece is individually measured and cut to fit snuggly. Foil tape over the edges of the insulation and the framing to create a vapour seal.
For more information regarding how we made our floor, check out the post below.
Ceiling: Cut the insulation to span the entire width of the roof and the distance between the ribs on the roof. Make sure the insulation is secured to the roof using a powerful adhesive (e.g. Sikaflex) and then foil tape over the edge of the insulation and over the battens that have framed the roof. This will create a vapour seal.
For an in-depth step-by-step guide to installing and insulating a ceiling in a van click below.
Walls: Cut rigid board insulation to fit between the horizontal and vertical ribs of the van. This insulation is primarily used to bulk out the area prior to filling it further with wool insulation. The measurements don’t need to be exact, however, the more area you can cover with rigid board insulation the better!
Note: Rigid board insulation is easy to cut to exact measurements using a Stanley knife or if you don’t have a scalpel a bread knife works exceptionally well. We have witnessed people using an angle grinder to cut this stuff which is extremely excessive and over the top.
Loft Roll Insulation
Rolled up loft insulation is an extremely popular choice amongst van converters. There are several different variations of the product, the most popular materials are:
- fibreglass
- sheep’s wool
- mineral wool
- specialist acoustic wool – great for blocking out noise from the outside!
Pro’s
- Can be cut to exact sizes
- Perfect for stuffing into all the awkward crevasses in the van
- Good R-rating.
- Easy to work with.
- Reasonably priced (fibreglass)
Con’s
- Fibreglass can irritate skin and eyes.
- Sheep’s wool insulation can be extremely expensive.
- fibrous insulation can negatively affect air quality.
- Can absorb water therefore the use of a vapour barrier is essential to prevent your van from corroding. Find out more about a vapour barrier here
We used:
Knauf Eko Roll Loft insulation roll, (L)7.28m (W)1.14m (T)100mm
– Purchased from Amazon
Note: despite being made from fibreglass, this product is fireproof, non-hygroscopic, and will not encourage the growth of fungi, mould or bacteria.
Where to use Wool Insulation:
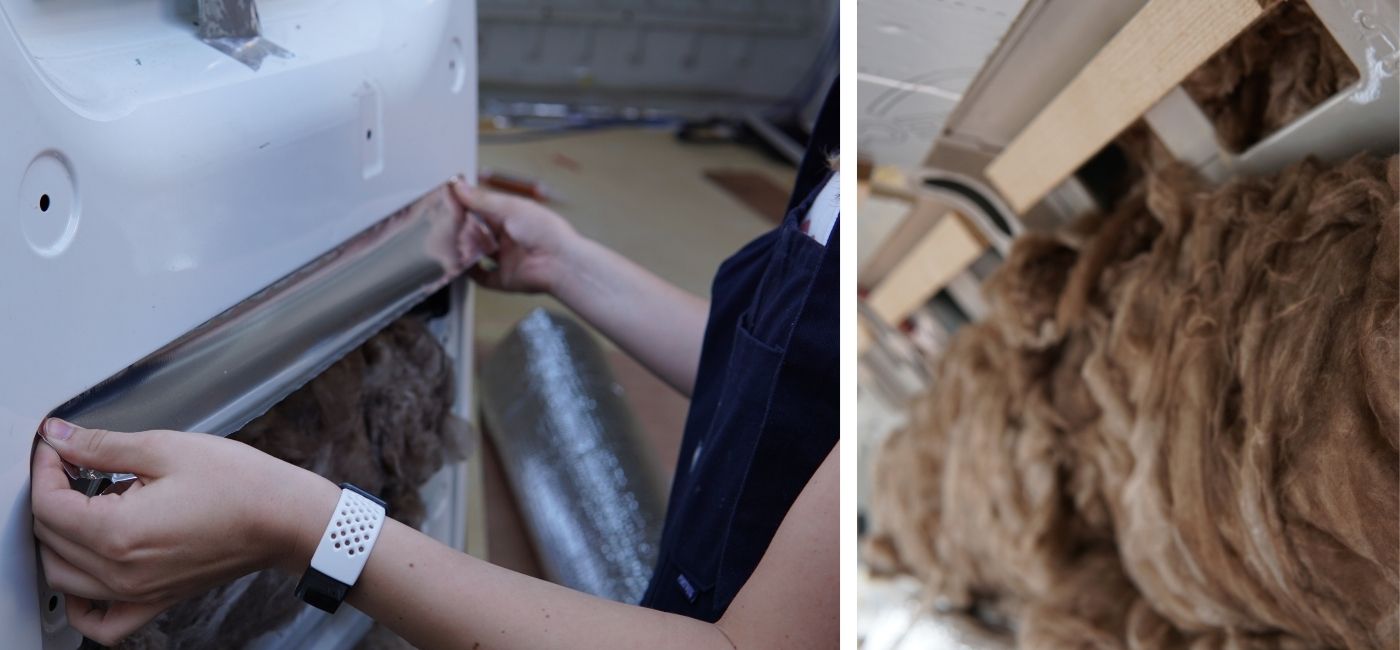
We used this type of insulation in the walls, doors, wheel arches, and other cavities as seen in the diagram below.
Walls: loose-fill insulation such as wool insulation is perfect for bulking out the insulation on the walls. Our method was to stuff the walls as much as possible then secure it in place with a vapour barrier.
Doors: the doors in a van are essentially a series of cavities that you can stuff the insulation into. There is no real method to this, just get stuck into it!
Wheel arches: You may wish to stuff your wheel arch boxes with it! Find out how to in the link below.
Other cavities: This includes the areas above the doors, between the walls and the floor, and between the roof and walls. Generally speaking, if you can squeeze in some insulation – do it!
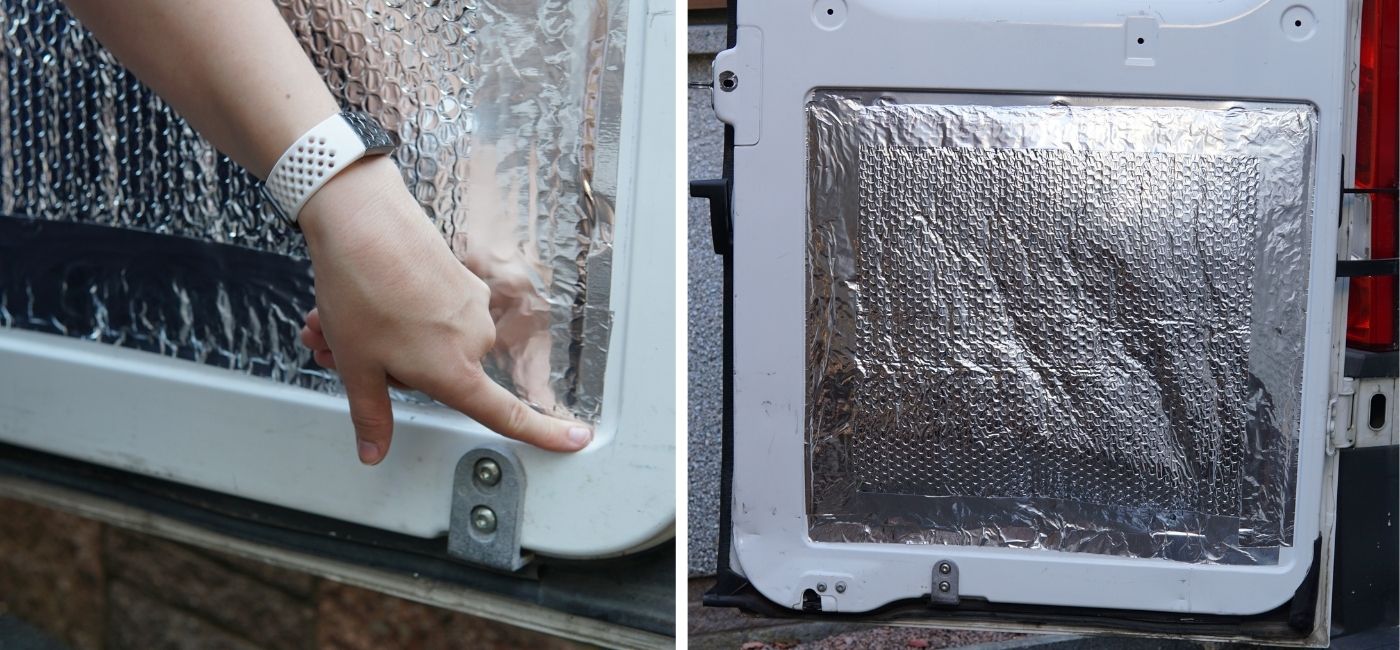
Vapour Barrier – Foil Thermal Insulation
A vapour barriers purpose is to help prevent water vapour from reaching the insulation and metal panels of the van – therefore preventing a climate in which rust can occur – the nightmare situation!
A vapour barrier is absolutely essential in a campervan as moisture can build up very quickly in such a small space – whether from cooking, showering, or even just breathing!
Pro’s
- Easy to work with
- Can wrap around pipes and other awkward shapes e.g. wheel arches.
- It is very effective in warm climates where it is useful in keeping buildings cool.
- It can also be used as a vapor barrier, as it is relatively waterproof and unaffected by moisture.
Con’s
- Though effective in warmer climates, it will require being combined with other forms of insulation in colder climates. This is in order to prevent heat loss in cold weather from convection.
- There is the potential of reflective insulation becoming an electrical hazard should a wiring fault occur. After all, it is metal and conducts electricity.
We used:
Insulation roll
– Purchased from Amazom
Where we used it:
We used it throughout the van. Particularly anywhere where we used the loose-fill loft insulation. We also covered our bulkhead and wrapped our wheel arches.
As this insulation doesn’t provide the same level of insulating properties we used it primarily as a vapour barrier, rather than a method of insulating!
We used foil tape to completely vapour seal our van – as seen in our step-by-step guides to installing the:
… and others!
Conclusion
Insulating a van can be time consuming and expensive, however, it is arguably one of the most important elements of your van build. You will thank yourself when you are reaping the rewards of the insulation whether it’s freezing cold or boiling hot!
Feel free to ask us any questions about insulating the van, whether it is about materials, price, time, or whatever else. You can always find us in the comments.tanley